Written by Calvin on May 30, 2012/Calvin's Corner
Repairing On-The-Ride
This article will review repairs we can do while we are out and about on a bike. There are, of course, many possible issues and problems that can and do occasionally occur when we are riding. Here, we will consider the what to bring, the pre-ride inspection and six broad categories: Flat Tires, Wheel Issues, Drive Train, Braking Systems, Stems/Posts/Bars, and Frames/Forks.
Do You Hear That?
Correctly diagnosing a repair in the shop/garage/basement is the first step to a successful outcome. The same is true when we are stuck on the trailside or roadside. Learn first to listen to your bike as you ride, and develop a sense of its feel. If and when something odd shows up, it probably isn’t you, it is likely there is something up with your bike. A new click, a new squeak, a new rattle, all these are telling you something has changed.
The time to deal with most technical problems we see and experience while on the trail or road is best answered with this bit of advice: DO YOUR WORK BEFORE YOU LEAVE FOR THE RIDE. There are, of course, situations that cannot easily be foreseen, but without debate, it can be said the lion’s share of problems during the ride are things that could have been prevented with some preventative maintenance and inspection.
WHAT TO BRING WITH YOU
The most important thing to carry with you is your knowledge and your understanding of your equipment. With this knowledge, you will know what is needed to fix the problem, and, importantly, you will understand the limits to what should and should not be fixed on the ride.
It will be a huge help to have some tools, spares parts and supplies with you. There are some basic items every ride should have, but your bike might have some unique concerns. Bring at least enough to get a flat tire on your bike fixed. Even if you cannot do the work, someone might be there or happen by who can give a hand. For flat tires, the minimal would be: spare tube, patch kit, pump or air cartridges, tire levers, and a wheel wrench if you do not have quick-release hubs. Here’s an important tip: Remember to double check your saddle bag for spare parts and the correct tools once in a while. You may find yourself looking for the inner tube you loaned to a friend on the last ride.
 Figure 1. Sample saddle bag from a roadie: TL-4 tire levers, AWS-10 Hex Set, Air cartridge and head with 5 air cartridges. Only two of five have air, but he gets bonus points for not littering the road. Note the screwdriver with sharp tip. The spare inner tube has a hole, potentially from the aforesaid screwdriver. To round out the kit, a $1 bill and a quarter.
You may have some special things unique to your bike; be sure to bring these as well. For example, if your rims demand long valve extenders, but you only carry the short spare inner tubes, did you remember to bring the Park Tool VC-1 tool to swap over the extender? A multi-tool is a good idea as it combines tools with different functions such as hex wrenches and spoke wrenches.
- A bag of some sort to carry the tools. This is commonly a saddlebag, but it might be something to slip into your backpack.
- Spoke wrench- to fit at least your own wheels
- Hex wrench set, at least 3, 4, 5 and 6mm.
- Tire levers (2 min.)
- Spare inner tubes
- Pump or air-cartridges with head
- Patch Kit, such as the VP-1 Vulcanizing Patch Kit or GP-2 Super Patch Kit
- Zip ties
- Piece of rag- such as an old cotton sock. Put tools and parts inside it, and use it wipe your hands after the repair.
Shake Me Up, Judy—the pre-ride inspection
To avoid a bleak ride, do a quick pre-ride inspection while at home. Better yet, do this the night before and give yourself a chance to get things fixed properly. It is really not necessary to check every nut and bolt on the bike. However, during even a quick look over before leaping in the saddle you are likely to catch some potential problems:
- Grab both tires and squeeze, testing for pressure. This does not replace the need for a pressure gauge for accuracy, but if you have a slow leak, it will show up.
- Pull top of wheel left to right, testing for bearing play.
- Spin each wheel. For rim brake people, inspect that you are clearing the brake pads. For disc brake people, check for any rotor rubbing.
- Grab both brakes and squeeze hard. If something now feels mushy or soft, something is amiss.
- Get in front of the bike and grab the bars. Drop bar people, try to rotate the bars. They shouldn’t move. Grab the ends of the bars and put some left and right pressure on them. The stem should not easily move.
- Front shock people, press down hard on the bars and note the rebound of the fork. If it stays compressed, make other ride plans.
- Bounce it around and shake it up. Pick up the front end and bounce it around. Listen for rattles indicating loose parts and loose adjustments. A headset will rattle, so will a loose bottle cage.
- Grab the saddle and pull the front end up and down. Twist it as well. It should not easily move.
- Check out the saddle bag and inspect you have a spare tube, tires and supplies you may need.
- Throw the bike up in a stand to give it a quick shift. Have no stand handy? Well, then your friend becomes your repair stand by holding the bike up for you.
- Inspect the chain. Is it dry, squeaky like a mouse? Now’s the time for some Park Tool CL-1 Chain Lube.
- Give all the gears a quick shift.
- Get on the ride and know that you’ve at least given your machine a fighting chance.
A basic pre-ride inspection procedure is reviewed in this video:
When you have the opportunity to encounter and savor these situations, consider them not so much problems, but learning opportunities. Each situation will have unique challenges. Here is a basic review of some you may experience:
FLAT TIRES
Our pneumatic tire gives us much pleasure and add much to the quality of the ride, but the obvious downside is the flat tires that can occur. However, there are some things we can do to minimize these cutting attacks to our riding sensibilities. In terms of preventative maintenance, inspect your tires and replace them as they get thin or if the sidewalls become brittle with age and begin to crack. A fresh tire is better able to stand against the slashing of glass, thorns, claws, canine teeth, etc. An additional bit of advise would be...WATCH WHERE YOU ARE GOING. Keep your eyes forward looking for broken bottles, and pieces of steel in your way helps a lot. For MTB riding, watch your line and be thoughtful of sharp rocks likely to cut your sidewalls.
So now assume we did get a flat. Like all problems we are trying to fix, spend some time to fully diagnosis the issue. Saying, “Gee, it has a hole in it” is not a full diagnosis. Where is the hole? What caused the hole? Is the hole-maker still present? Before ripping the tire off the rim in frustration, inspect the entire outside perimeter for nails, thorns, glass, or rips.
After taking the tire, give it another look and feel, inside and out. You may find something sharp inside the tire body, but nothing may appear on the outside. Remove this offending thorn/wire/piece of glass.
Now, pump up the inner tube to locate the hole. If it will not pump up at all, there is a big hole, so find it. It is always worth knowing the cause of our misery.
Install the spare inner tube you brought along. But what about patching during the ride? That is a practice best done in the warmth and safety of home, with good light, proper solvents, a cup of tea, not to mention patience and time a plenty.
A flat tire repair also means it needs to be pumped back up with air. There are two basic choices for this, the carry along pump, or the air cartridge. The air cartridges can be fast, sometimes too fast. If the bead was not properly seated, will be announced as a blow out. The hand pump allows you to inflate, then spin the wheel, and then add more air. The hand pump also allows you to check the inner tube. Some air cartridges are good for the one shot, and cannot be used to partially inflate an inner tube for inspection.
The basic trail side procedure for a flat is reviewed in this video:
Tires can become ripped at the casing. If this is not plugged, it will allow the tube to herniate and blow out. On a high-pressure tire, a small slit of a few millimeters is enough to allow a tube to fail. With the tire off, use some material on the inside to cover the hole. If a pinch, many things can work here, but no matter what you use, it should be considered a “tourniquet” repair, good only to get you back from the ride. No patch is going to duplicate the strength of the original tire casing. The Park Tool TB-2 Tire Boot is strong with adhesive to hold to the tire for installation. This is not a repair for tubeless tire holes, because the boot requires pressure from the inner tube to stay in place. You will hear talk of using a dollar bill, or perhaps a Euro note, or possibly even the Pound, but these are simply paper.
The temporary repair for tire booting is reviewed in this video:
TUBELESS TIRES
Tubeless tires have their own charms, and charming ways to fail. A relatively common issue is the “burp.” The tire is impacted laterally, and the bead momentarily pops away from the bead, even slightly, and this allows air pressure to escape. If you notice this, FIX IT NOW!!! If you wait it, it will only get worse, because now there is less pressure holding the tire bead sealed against the rim. If you allow the tire to drop to zero pressure, pumping it back up and realigning the bead can be very difficult.
If the tire has lost a lot of pressure, the bead may not seat well. Pick up the front wheel off the ground to give the bead a fighting chance of seating. Just the weight of the bike will deform the tire enough to move the bead from its seat. Another option is to flip the bike upside down. Use your air cartridge or pump and hope the bead catches.
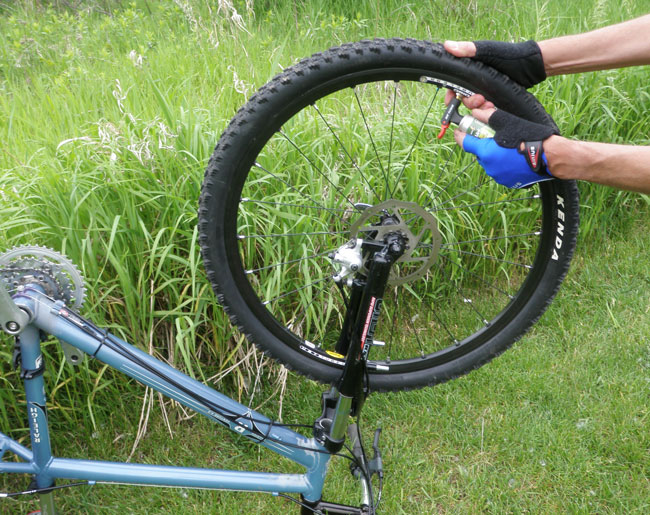 Get the pressure off the bead before attempting to inflate the tubeless systems
Tubeless tire systems are good at being resistant to the “rim pinch” as there is no inner tube to pinch. However, sharp objects can still cut these tires. There are tire sealants in use that can plug small holes, but a rip is too large a hole to be blocked. Install the spare inner tube you brought for just this contingency.
WHEEL PROBLEMS
We should expect that if a wheel is properly built and maintained, it will stay reasonably true and straight for the ride. If your wheel has “shook loose” during the ride, with all the spoke seeming to come loose, it means the wheel was very likely not properly tensioned to begin with. But, if the bike has had some extra tough service during the ride, it may come out of true. If you have hit something hard, real hard, it can bend the wheel rim. There is not much that can be done during the ride, except to know when you are defeated. If the tire is holding air and the tire bead is adequately seated, count yourself as lucky and ride on home.
Spokes can and do occasionally break. There are bigger issues of spoke life and spoke tension in play, but we are concerned with just the ride and getting back safely. A broken spoke is going to cause the wheel to come out of true. For rim brake bikes, the rim may now rub the pads.
Additionally, the broken spoke may flop around and scratch up the frame. It is likely the spoke broke at either the hub or at the rim. Remove the spoke fully from the wheel when possible. For the drive side of the rear wheel, or the rotor side of the front wheels, this may not be practical. Take the spoke and wrap it next to an adjacent spoke. It is also possible, if you brought the right spare materials, for rubber bands, or even pieces of the TB-2 Tire Boot to hold it in place. It will not help the rim trueness but it will stop the flop.
Dealing with a broken spoke is reviewed in this video:
With enough impact to the wheel, we can certainly cause damage to the rim, if not ourselves. Assuming we are all right after these types of crashes, we should check the bike for damage. If the impact was such that a lateral or sideways force was applied, the rim hoop can be bent. Adjusting spoke tension is unlikely to return the wheel to true or straightness. It is especially MTB lore to then successfully re-bend the rim on the trail. While some repair may be possible, it is difficult, takes experience, and has a limited ability to really fix the wheel.
The procedure to “re-bend” a wheel is reviewed in the following video:
DRIVE TRAIN
We will define our drive train here as everything from the under your foot to the rear cogs, and there’s a lot going on here: Shoes, pedals, crank, bottom bracket, chainrings, chain, and finally rear cogs.
Shoes:
Our foot wear, especially the clipless shoes, are part of the drive train. If the bolts holding the fasteners became loose, it will become difficult to release the pedal. This can be difficult to repair effectively during the ride. Normally the shoe and cleat rotate together to release from the pedal. A loose cleat allows the shoe to rotate but the cleat to stay fixed in the pedal. If you can reach into the cleat with a lever, such as a screwdriver or small hex wrench, you may be able to lever out the cleat.
Pedals:
These should be tight in the crank. If they have loosened, then they were not tight. You might be best off here to just walk home, because riding with a loose pedal in the crank will ruin the crank thread.
Cranks:
The cranks should have been properly secured as part of normal installation. If the arm is now loose, it is dangerous because the next step is that it will simply fall of. Riding a loose arm is also likely to damage the arm and its fittings. Get off the bike and get out your multi-tool and tighten the arm back up. The proper torque for these bolts can be quite high, and a multi-tool will not achieve the pressure you need for the best repair. Get a proper wrench, hopefully a torque wrench, on that bolt when you are back home.
The procedure for trial side repair of a loose crank and pedal are reviewed in this video:
Chainrings:
Here again, we find loose fasteners cause problems. If you find one loose or missing, remind yourself to read about Torque Concepts. It also possible the rings have become bent during the ride. First step here is to confirm the bolts are tight. There may be some re-bending possible. It is best to use a lever, but on the ride there may not be any such tool available.
A trailside repair procedure of bent chainrings is reviewed in this video:
Chain:
A common fear among cyclists is a broken chain. This can occur but it rarely occurs without any warning. Some cyclists will carry a chain tool with them, such as the CT-5 or CT-6.3.
Chains tend to follow their own adage, breaking at the weakest link. When performing a chain inspection, look at each plate and each rivet, one by one. Look for deformed side plates, off center rivets, and any that look odd.
But assume the chain has broken on our ride, what next? Begin with an inspection of the broken chain to learn why it broken. What this failure at the masterlink? Was this a failure of the special connection rivet?
To effect a temporary repair on the failed chain, it means, typically, you must shorten it at least by one inch. Assume after shortening the chain that now you must avoid the large-to-large sprocket combinations. Do not attempt to reuse the old damaged outer plates. Cut off the damaged links. This shortens the chain at least one inch. No matter how skilled you are, assume that a trailside chain repair is a temporary repair. Replace this failed chain before the next ride. There are three repair options to patch the broken chain back together, depending upon the spare parts your brought with you:
- Master Link: You brought a spare master link, yes? Well, add that to the list for next time. Master links need to join to inner plates, so shorten chain accordingly.
- Special Connection Rivet: Shimano is an example of a chain manufacturer that has a special connection rivet to join the chain. Reach in your bag and grab it. If you ride Shimano chains, add that to the list for next time.
- Existing Rivet Connection: If you use a chain tool with care, you can press a rivet out of one side plate but still have it engage in the opposite side plate. This is an older technique to join chains. It should be noted that no modern derailleur chain uses this method any more. To fix a chain this way is to weaken it.
A useful bit of skill and knowledge is to know how to make an emergency one speed conversion. Should our hanger break, or derailleur fall apart, or chain twist so much that we must cut out a large section, a last-ditch repair is to skip the shifting. It might mean walking up some steep climbs, and coasting down some hills.
A trailside conversion to a one-speed is reviewed in this video:
If during our ride the chain begins to squeak, it most likely needed lube before we started the ride. Chain lube can also wash out if you are caught in a heavy downpour of rain, or cross a lot of deep water. There is no fix other than getting more lubricant on the chain. If no lube is available, and you are just bothered by the noise, consider other options. Sunscreen would get between the plates for a bit, so would a cooking oil. After this, clean the chain and apply a good chain lube such as CL-1 Chain Lube.
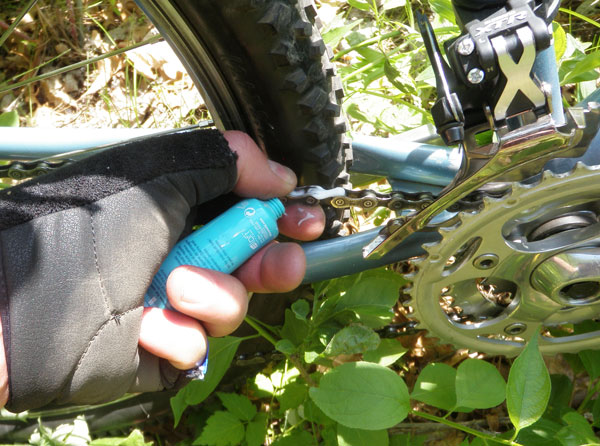 A desperate attempt to stop the squeaking, but it can work for a while. SPF ratings are not a concern in this use.
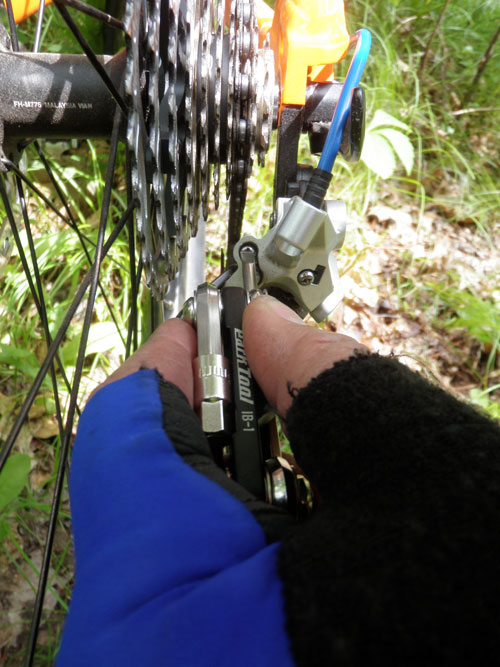 Use the limit screw to select a gear. Note that the cable is missing. Remember to tighten the pinch bolt so it does not rattle out and get lost.
Derailleur Systems
A lot that can go wrong here, but it should really only be a result of crashing. Normal preventive maintenance should get us through most all riding. Beginning at the shifter, we might experience a broken cable. Typically, it will fail at the head. There is not much we can do while on the ride except to coil up the cable so it does not become entangled with the rest of the bike. The derailleur will now shift to either the smallest rear cog, or for “rapid rise” systems, to the largest rear cog. Use your multi-tool and tighten the limit screw to select a different cog, and then be happy with that until the cable is replaced.
If the derailleur is simply performing poorly, it could be it needs an adjustment. The same procedures apply out in the field and in the shop, except now you need a friend to act as a repair stand. Low tree branches can also hold a bike, and sometimes you can simply turn it upside down on the ground. For lighter road bikes, a race mechanic “trick” is to lean over and hook the saddle over your neck.
If attempting to adjust the shifting makes no improvement, it may be the derailleur hanger is bent. The best fix here is the DAG-2, but that will need to wait until you get the bike into the shop. If the hanger is bent as a result of a crash, it can, sometimes, be possible to re-bend it. Sight the hanger from behind. The plane of the cogs and rear wheel should be parallel to the hanger and pulleys. A crash tends to push the derailleur toward the spokes. Use a hex wrench as leverage to pull it back…as best you can. This can work well, or you can break the hanger, but that is the risk of re-bending anything. Insert a hex wrench into the mounting bolt. Use two hands to pry the hanger back just a bit, then inspect.
If the hanger or derailleur are simply broken, it tells us that it is now time to make a one speed. The chain can be re-routed and shortened to get you home. For two front chainrings, pick the smaller ring. For triple rings, pick the middle ring. Now find a proper gear in back. It is best to follow a fairly straight line between front and rear cogs for a stable chainline that won’t fall off. This may or may not give a decent gear selection. You may have a choice of three cogs in back, but maybe only one has acceptable chain tension.
A trailside repair of a bent derailleur hanger is reviewed in this video:
Rear cogs
Rear cogs are mounted to either a freehub (cassette systems) or a freewheel. Both are generally a reliable part of the bike. However, when there are problems, we have no good repair on the ride. If the cassette locking has loosened, well, it is that old story: It was not tight to begin with. If the cassette or freewheel falls apart, looks like we are walking. Internally, the click-click-clicking we hear comes from small pawls, and these can break and fail. It can also occur a freewheel simply falls apart. For all of these…use the cell phone, or start walking.
Brake Systems
In terms of brake system failures on the ride, the safety concern is primarily a broken cable. This can be the result of an undetected fray in the cable, or, more likely, simply an inexpensive or defective cable head that simply pulls off. The exciting part here is that the head will pop off only when squeezed hard, which is of course most likely the point in the ride when you really, really want some braking power. There is no good repair for this failure on the ride. Most people will not bother to bring a spare cable. Ride back using care with your remaining brake.
A more common brake system issue is pad rub. Rim brake people may find their pads rubbing on the rim. Disc brake people may find the rotor striking the pads. Knowledge how to adjust brakes will help here, and the tools are pretty simple. Typically it is a 4 or 5mm hex, but sometimes it’s a T25 Torx fitting.
Hydraulic brakes are can leak at the compression fittings. If you have an open-end wrench, you might try snugging it. However, if the brake is still firm, finish the ride and then get it repaired properly.
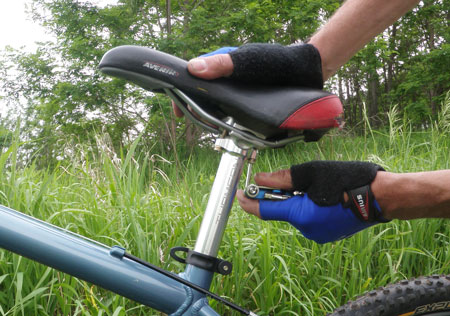 Stop and tighten the seat rail binders before things fall apart completely.
BARS, STEMS, SADDLES, POSTS
These are all important items on the bike, which is why we checked them all with a torque wrench, yes? A crash can move the stem or saddle. Use your hex wrenches to realign and then re-secure. Get the bolts tight. This is where having experience working with a torque wrench helps. You should practice getting the feel of the correct torques.
If the seatpost has simply broken, remove it from the bike. Repeat, remove broken posts. If just the saddle has fallen off and you lost the hardware to attach it, remove the seatpost, too. Leaving the post in place will only lead to tears.
FRAME and FORK
Simply put, there are no clever trail/roadside fixes here for broken or bent frames and forks. The bike should now be considered dangerous. Get off the bike and get out the cell phone. Start walking. Get your riding pal to pick you up later. The frame and fork are just too critical to our safety and well being to attempt a grape-vine-wrapped-with-pinesap adhesive, then overlaid with a clay-and-straw mixture, hoping it somehow all holds together.
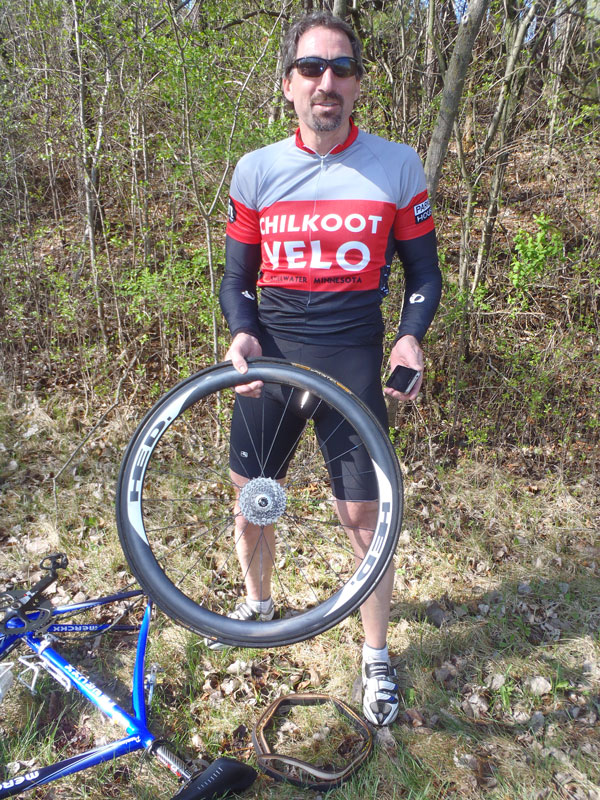 A road rider having a bad day. When the cell phone comes out, you know the ride is over.
Know when to fold ‘em
There will be some cases where you cannot win. Perhaps we don’t have the right equipment, perhaps the repair is beyond our skill, perhaps it simply cannot be done, or perhaps it would just be too dangerous to ride should we attempt a fix. The modern world has provided the answer for many of these situations, and that would be a cell phone. Call a friend to come get you.