Determining Dropper Post Size and Compability
How to determine what size and model of dropper post is compatible with your bike.
Terminology
- Pen and paper (or notes app)
- Calculator
- Tape Measure
- Measuring Calipers
A dropper seat post allows a rider to have multiple seat positions — typically, a full-height position giving proper leg extension for pedaling, and a fully-lowered position that allows the rider to lower their center of gravity in order to give more control in technical areas and steep descents.
Dropper posts are made up of an outer tube, the stanchion that actually does the “dropping”, a seal collar, an actuator, a saddle clamp, and often an air fill valve. If an air valve is present, it needs to be checked periodically and kept at the recommended pressure.
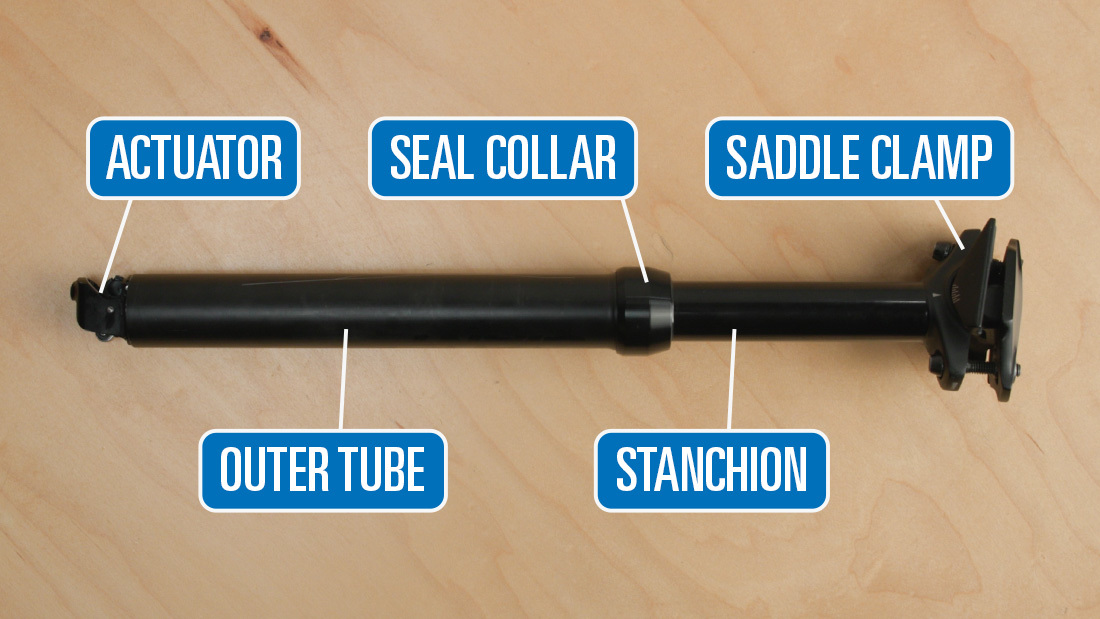
A dropper is actuated by a lever on the bar. Simply hold the lever, push down on the post, let go and the post will stay down. To raise the post push the lever again while standing up and the post will extend to full ride height. The remote lever is actuated using a cable, hydraulic hose or wireless connection.
Frame Measurement
For the purposes of this article, we are assuming you have 1. a bike, that has either equipped with 2a. a dropper post already installed, which you are looking to upgrade, or 2b. a non-dropper post. The process is the same for either option.
This process involves taking and recording measurements, and doing some light math with these numbers. Write down and label each measurement.
Ride Height
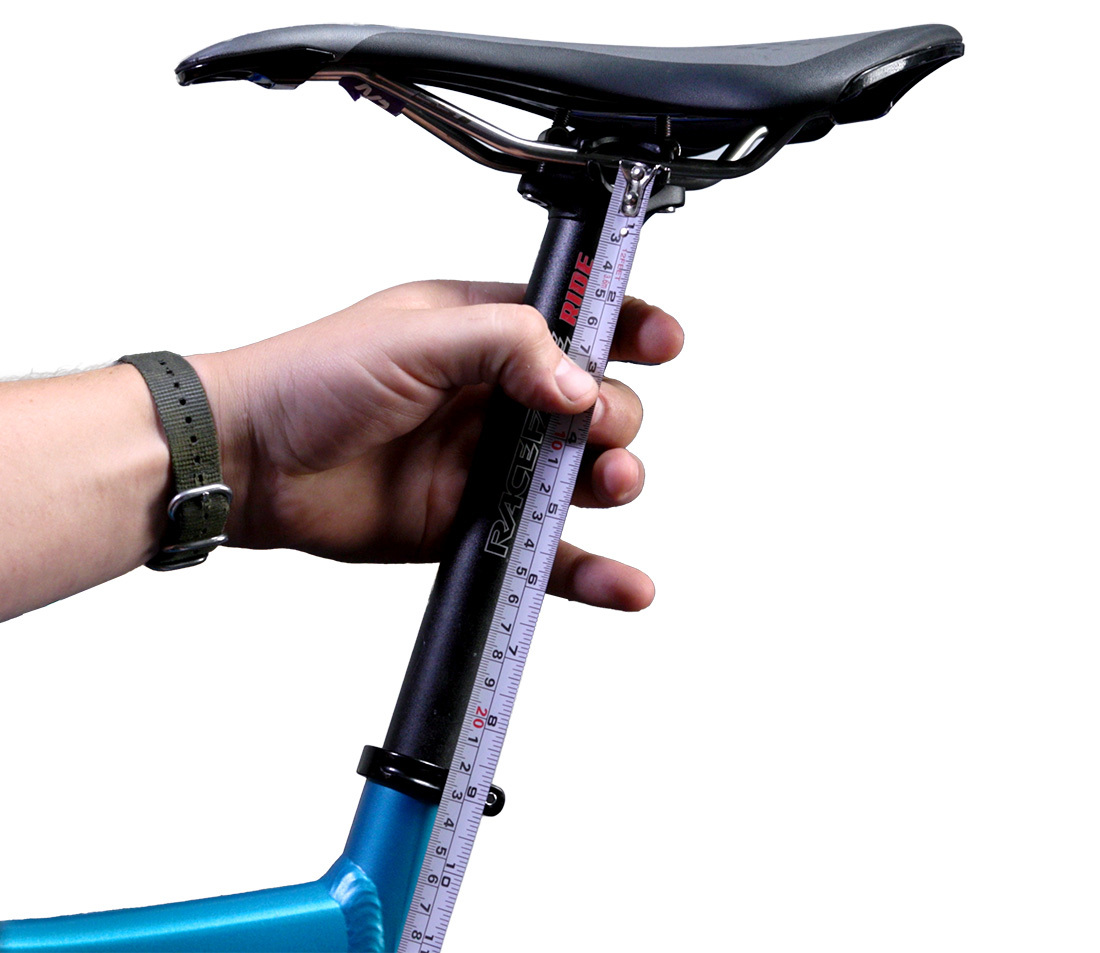
We’ll begin by measuring the ride height. This is the measurement from the top of your existing frame’s seat collar to the rails of your saddle. If you have a dropper installed, make sure it is fully extended. You want this measurement to reflect how you normally ride at speed.
Max Insertion
Next, loosen your seat post and measure your frame’s max insertion. This is the maximum amount a post can be inserted into the seat tube without being interrupted. Interruptions can include bottle cage bolts, bends in tubing and suspension linkages, to name a few.

A bottle cage boss is a common seat tube interruption
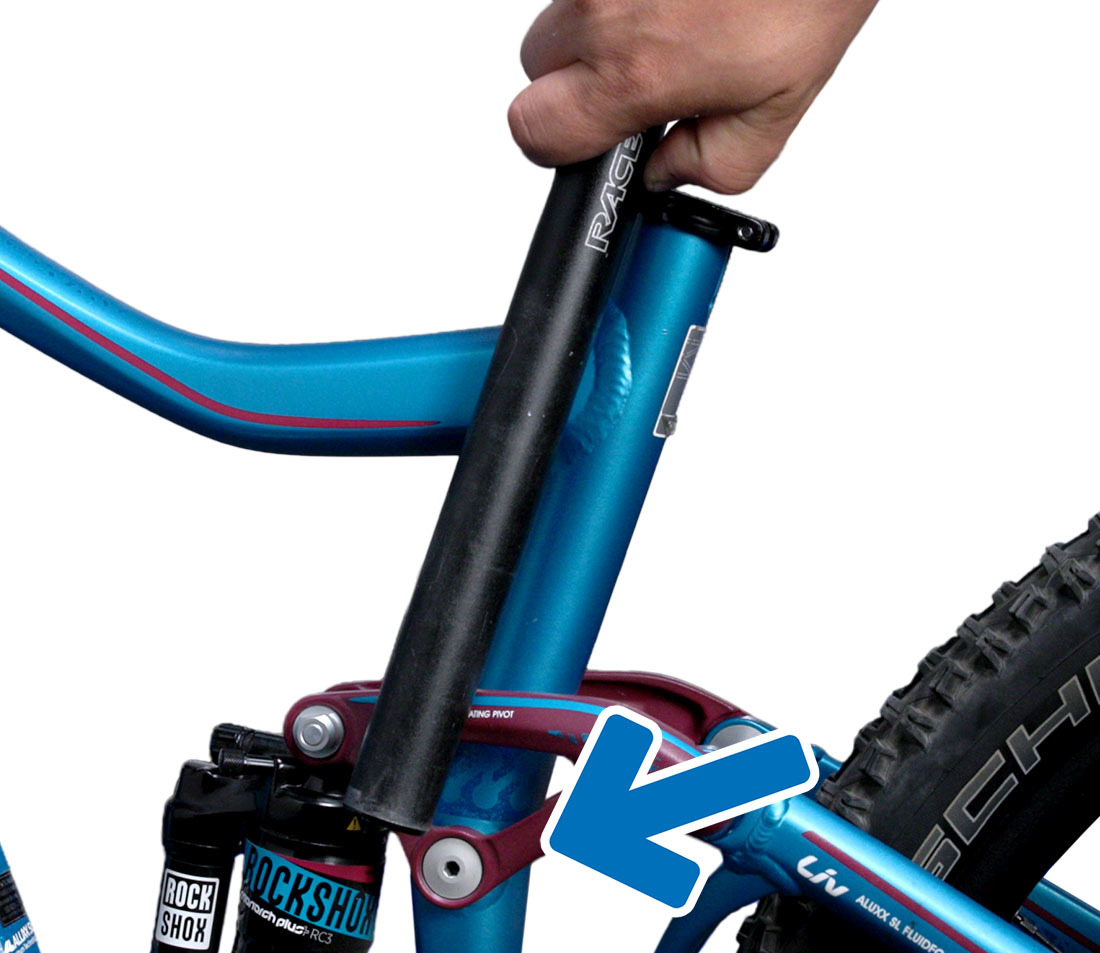
The appropriate seat tube length for this frame is limited by the suspension linkage
The most effective way to measure max insertion is to insert a rigid post into the seat tube until it is interrupted: make a mark, remove it and take a measurement. If you curently have a dropper you may need to remove it and install a rigid post.
Some bike frame manufacturers have started publishing this information. Checking your manufacturer’s website first can speed things along.
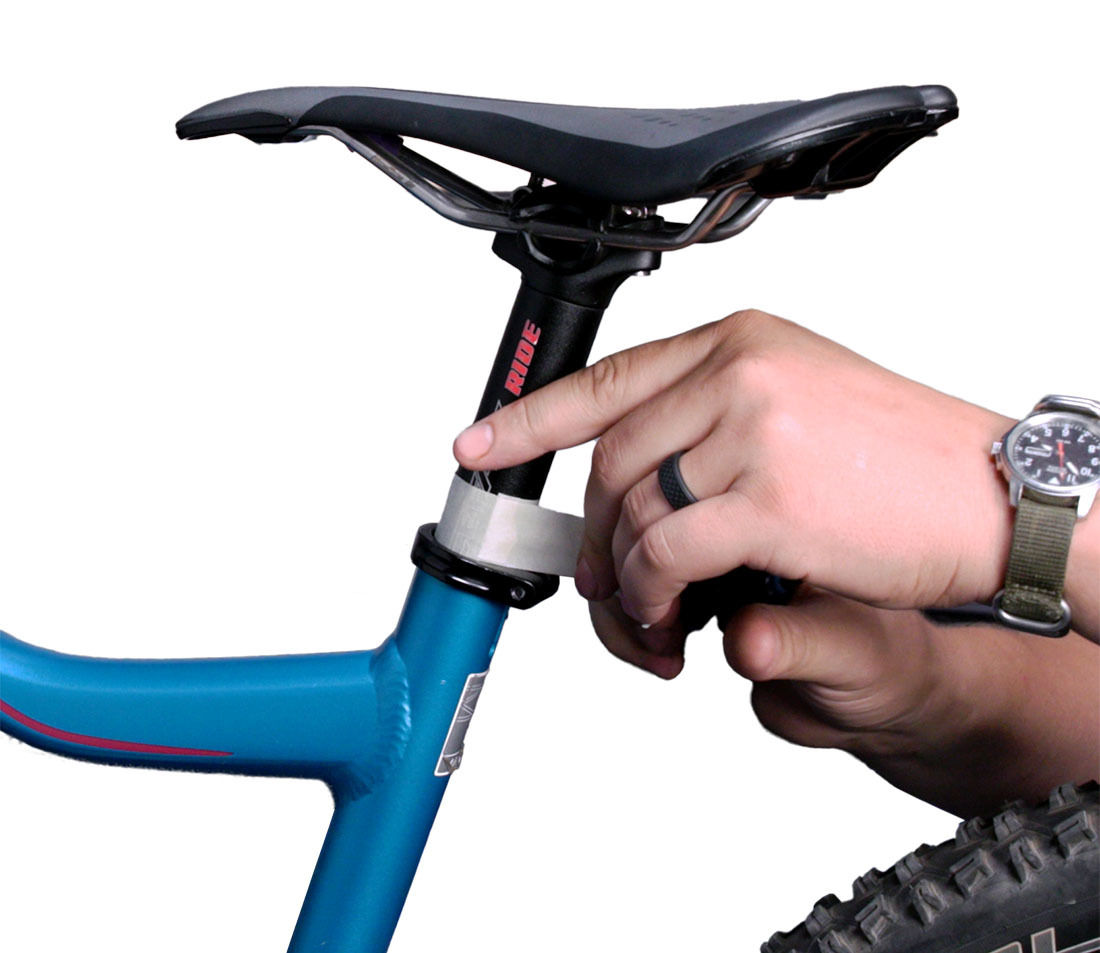
Masking tape is an effective way of marking the max insertion
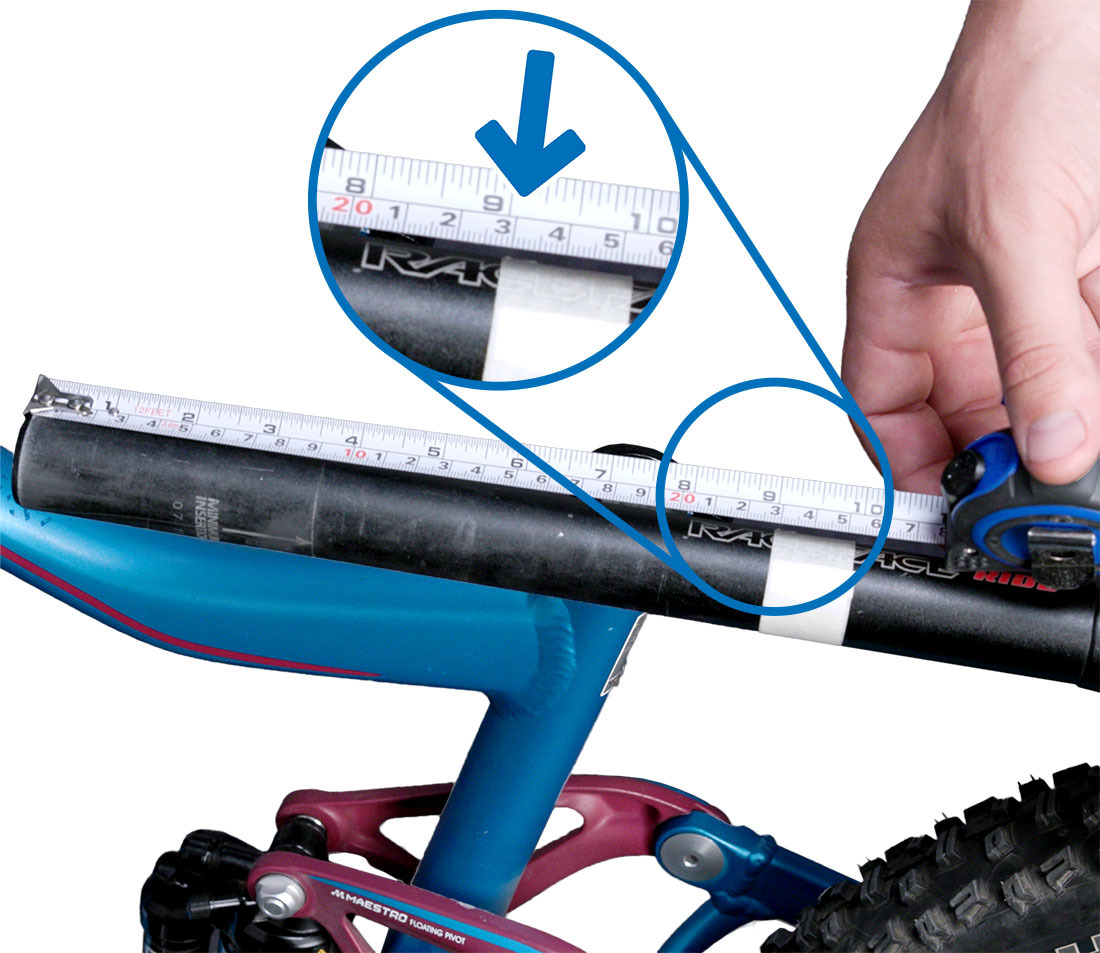
Our example setup has a max insertion of 230 mm
Seat Post Diameter
The seatpost diameter of your frame can be found a couple of ways:
- With the existing post removed, check to see if the measurement is listed on the side. The two most common sizes for dropper seatposts are 30.9 mm and 31.6 mm. If you have a different diameter, your choices of dropper posts may be limited.
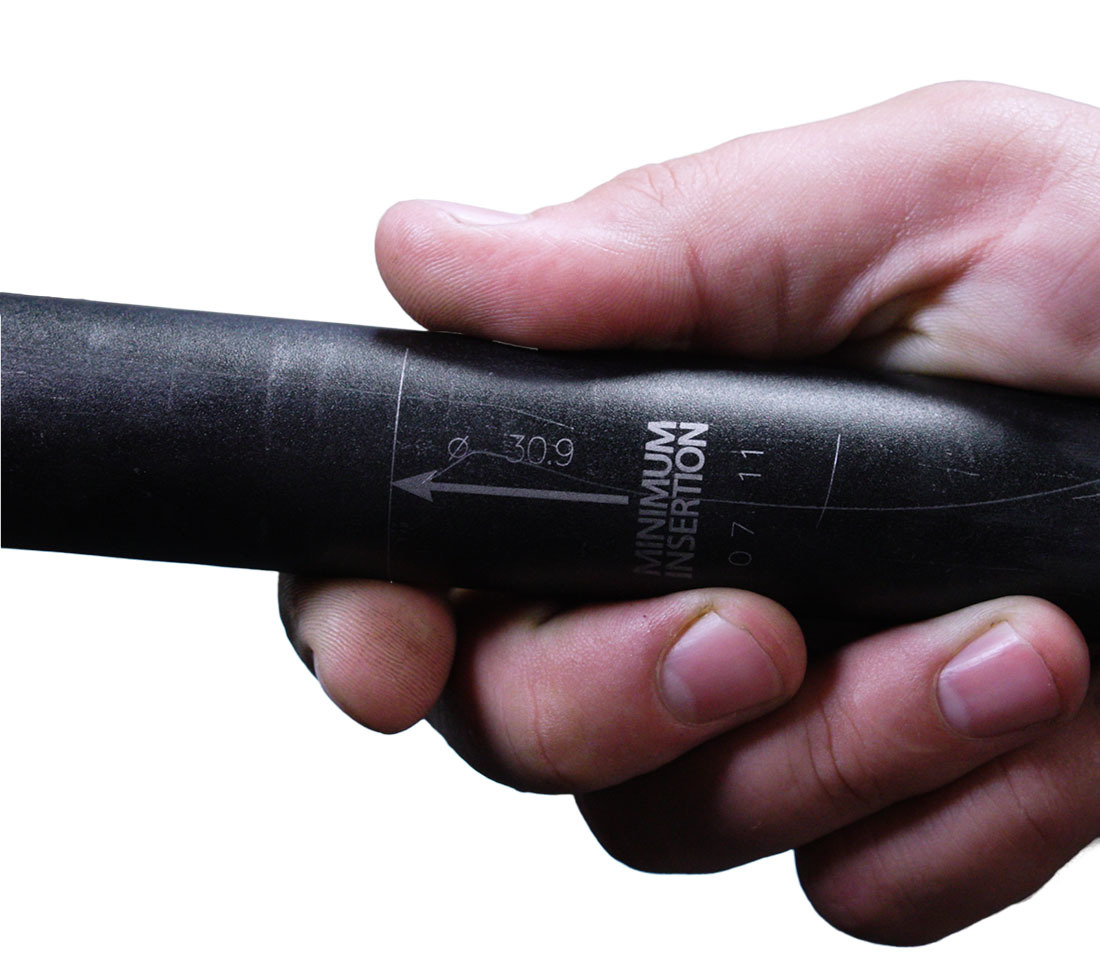
- If your current post doesn’t list its size, or you don’t have a seatpost yet, you can typically find this information on your frame manufacturer’s website.
NOTE: There are adaptor shims that can be used to adapt a smaller diameter seatpost to a larger diameter seat tube.
Housing/Hose Routing
Make note of how the dropper post’s hose or housing can be routed on your bike frame. This will help you narrow down what dropper posts are compatible with your bike and help you prepare for the installation process.
Some bikes have internal routing that may enter and exit different tubes of the frame, while other frames will only allow for external routing. Some will be routed completely internally with a guide tube. And others will need some help routing internally, like our example bike. And some need no routing at all, such as electronically-controlled dropper posts.
Seat Post Selection
With ride height, max insertion and seatpost diameter measurements in-hand, we can start the search for a new dropper post. This is a highly subjective process — we recommend reading reviews and soliciting opinions from sources you trust.
One factor to consider is how much travel, or drop, you’ll want with your new post. Keep in mind that a manufacturer may make a variety of travel options for different models and one may fit where another does not. A good way to narrow the field is to start by looking at posts that match your frame’s seatpost diameter and cable routing style.
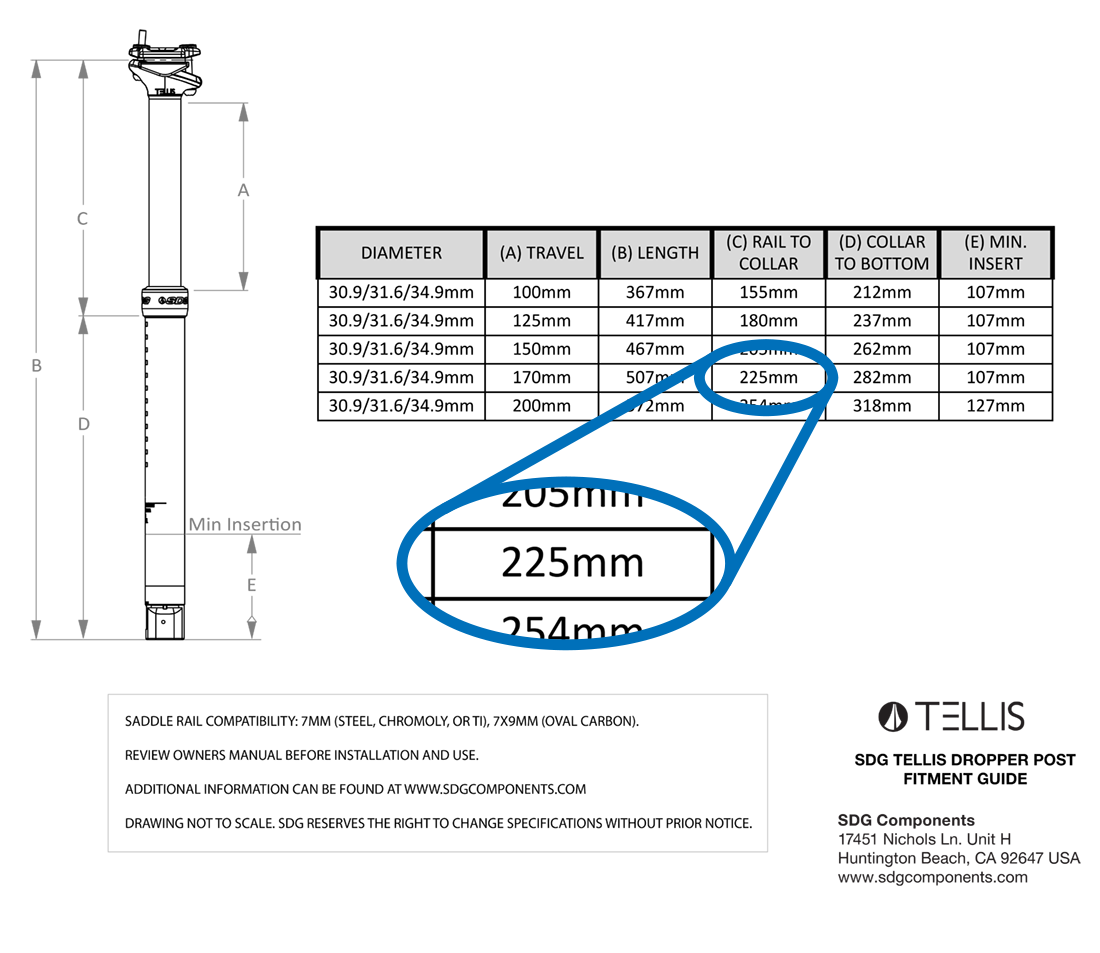
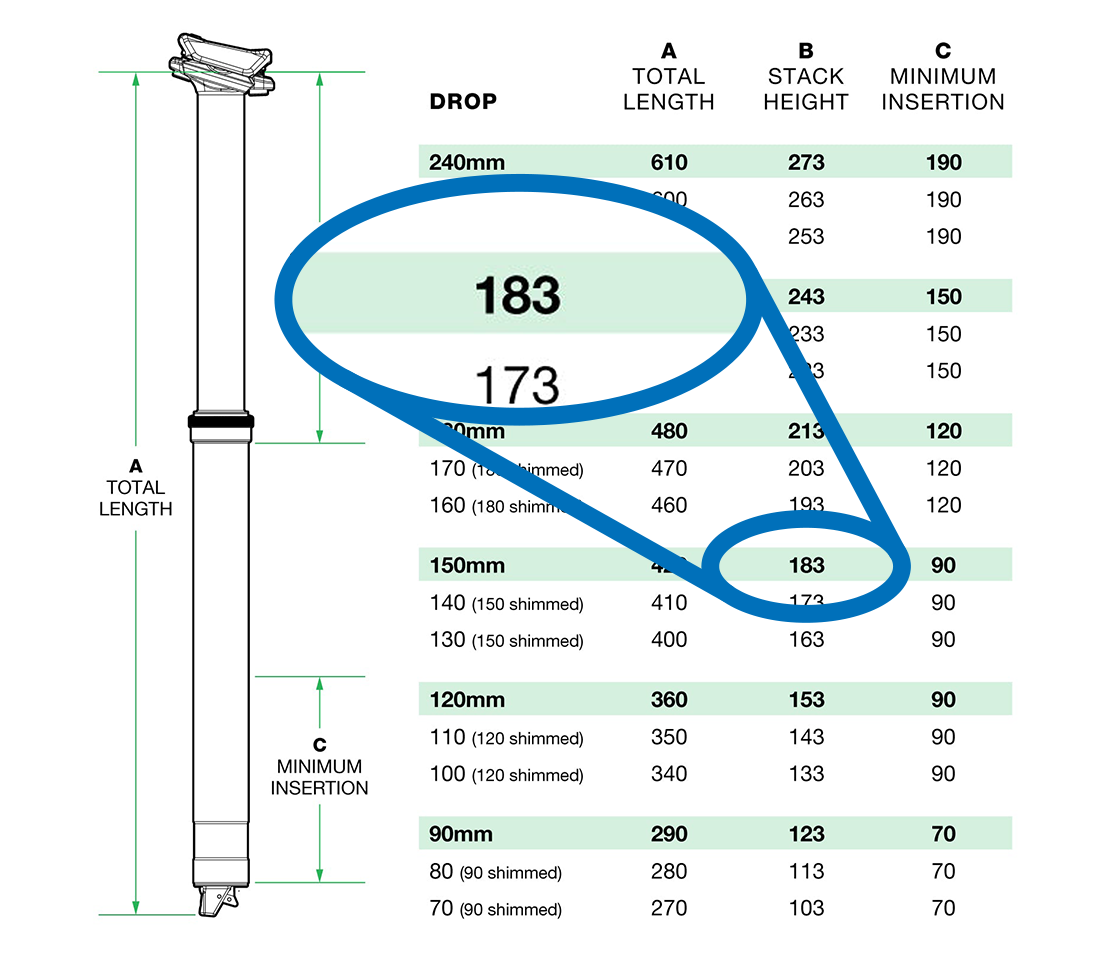
Once you have a few potential seatposts picked out, start looking for stack height and max insertion measurements. These measurements should be listed in the specifications of any potential post you’re interested in. You may need to dig around in the manufacturer’s technical documentation.
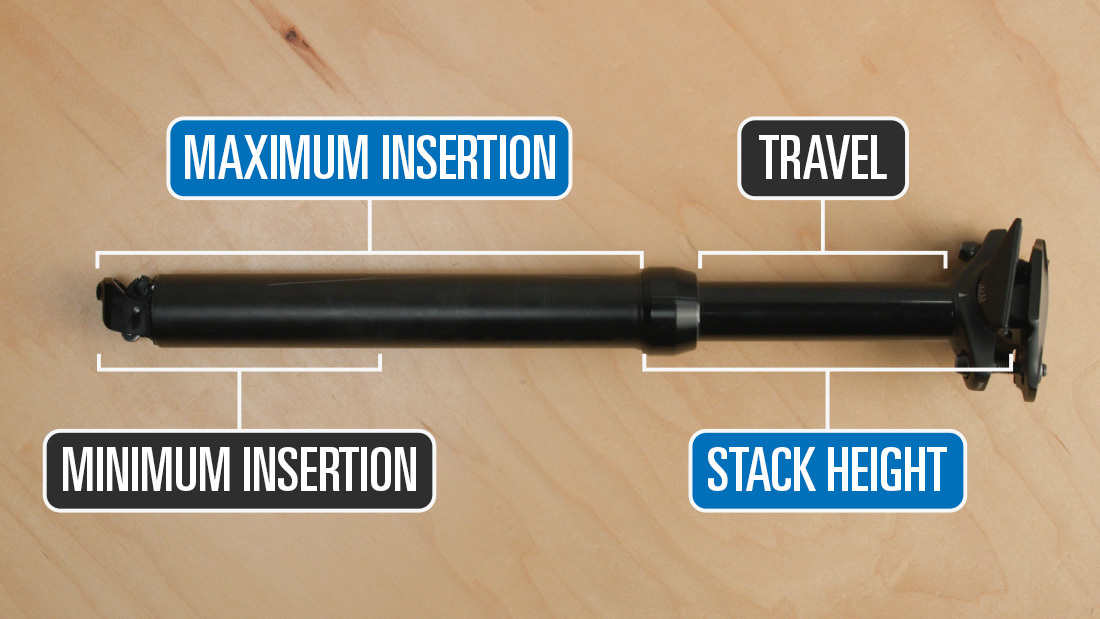
Stack Height
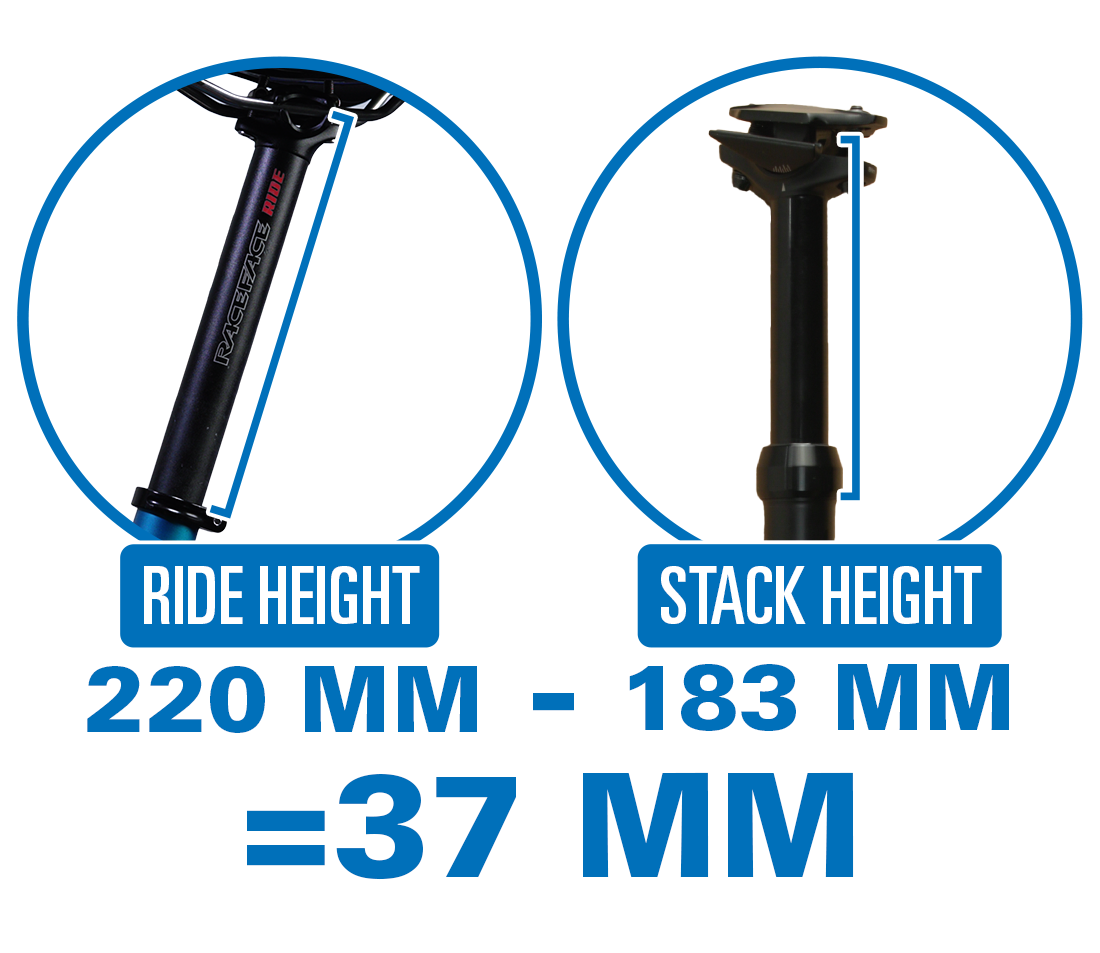
Stack height is a dropper’s measurement from the post’s saddle rails to the bottom of the dropper’s own seal collar. Your potential post’s stack height needs to be equal to or less than your bike’s ride height, which you measured earlier. If your potential post’s stack height is larger than your ride height, your saddle will be higher than desired when fully extended.
This post from PNW has a stack height of 200 mm, which fits within the window of our 220 mm ride height. This one can work!
Dropper Lower Difference
The dropper lower difference determines how much of our dropper post will insert into our bike without interference all while considering our ideal saddle height.
Subtract your potential post’s stack height from your previously-measured ride height. This number is your dropper lower difference. Record these numbers.
Max Insertion
Your potential post should have a max insertion number of its own listed. Record this number.
Next, take your dropper lower difference, and subtract it from your potential post’s max insertion. This will give you the amount of post that will be inserted into your bike frame. It must be less than or equal to your bike’s max insertion in order to work.