Rear Derailleur Removal and Installation
How to remove the rear derailleur from its hanger for service, replacement, or hanger alignment.
Preliminary Info
- Appropriate hex wrench for mounting bolt
- Threadlocker or other thread preparation
Derailleurs are often removed for service, or simply for replacement. Removal is also necessary in order to check and align the derailleur hanger.
This article mainly applies to the most common derailleur mounting systems, but less common non-integrated systems are also covered at the end.
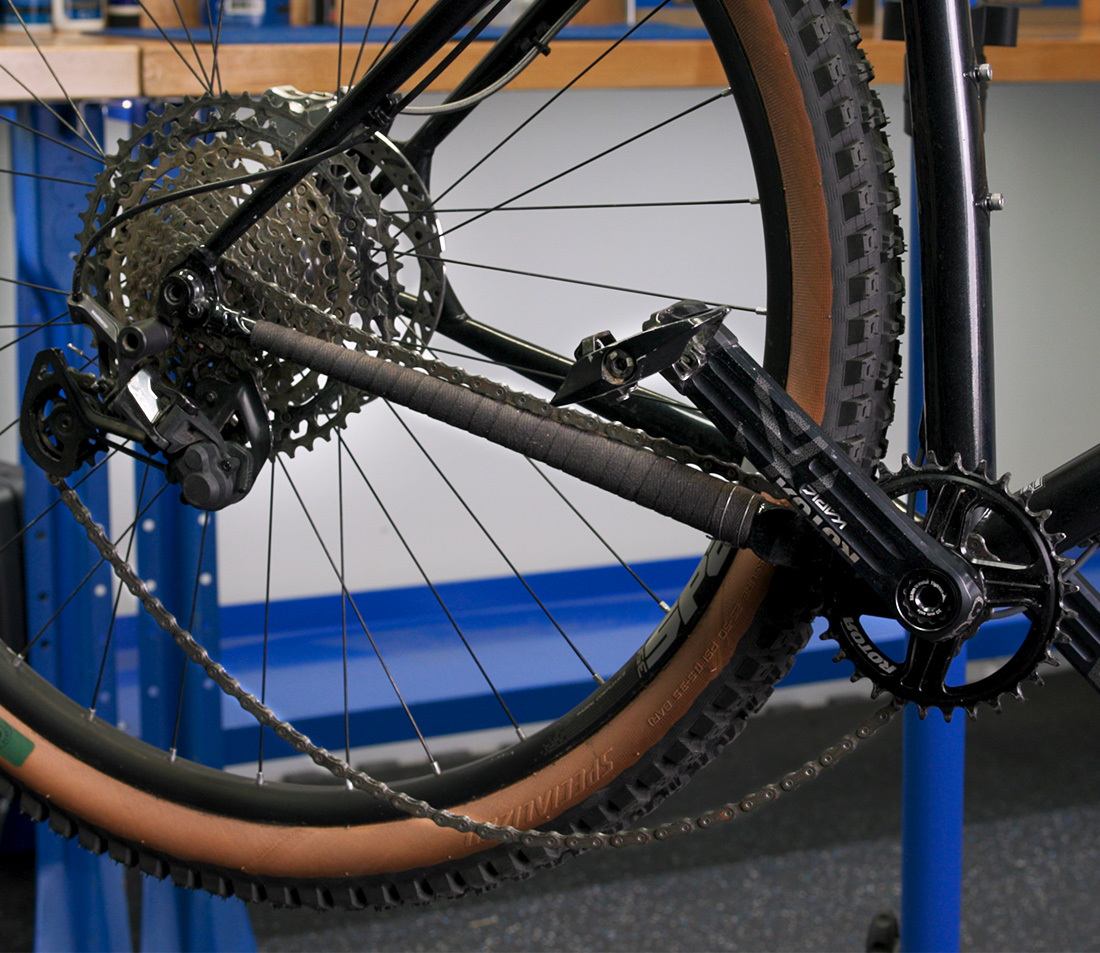
Derailleur Removal
Begin by shifting to the smallest sprocket in the front and rear. This slackens the chain and makes it easier to take off the derailleur. Some derailleur models also have a cage lock that will slacken the chain. If there is a clutch release lever, pull it to help free the cage. In fact, it can even help to drop the chain off the front ring entirely.
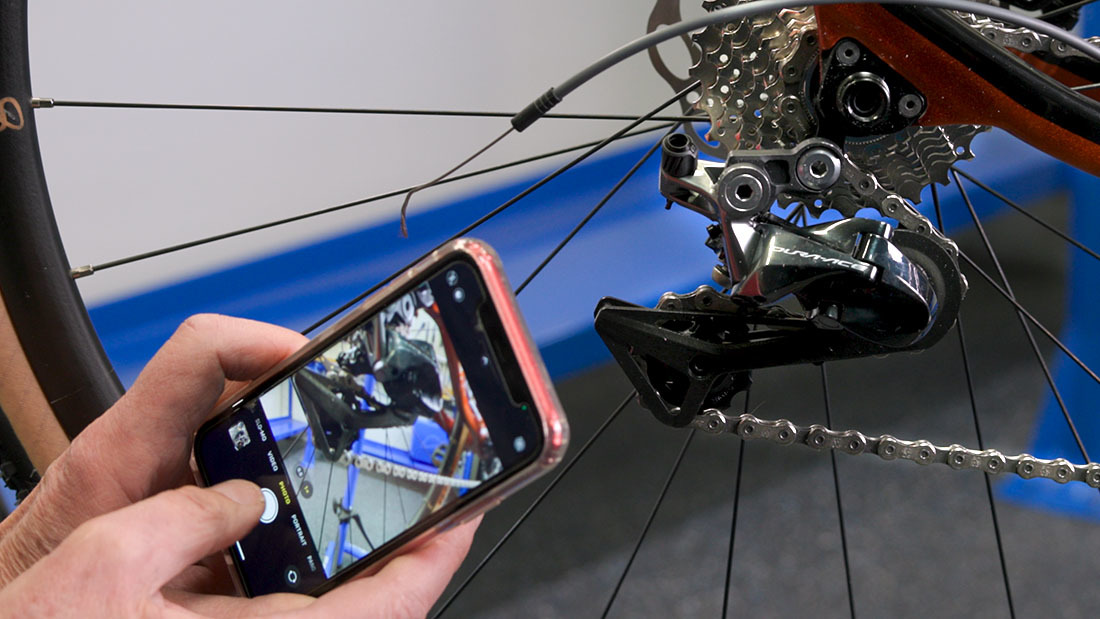
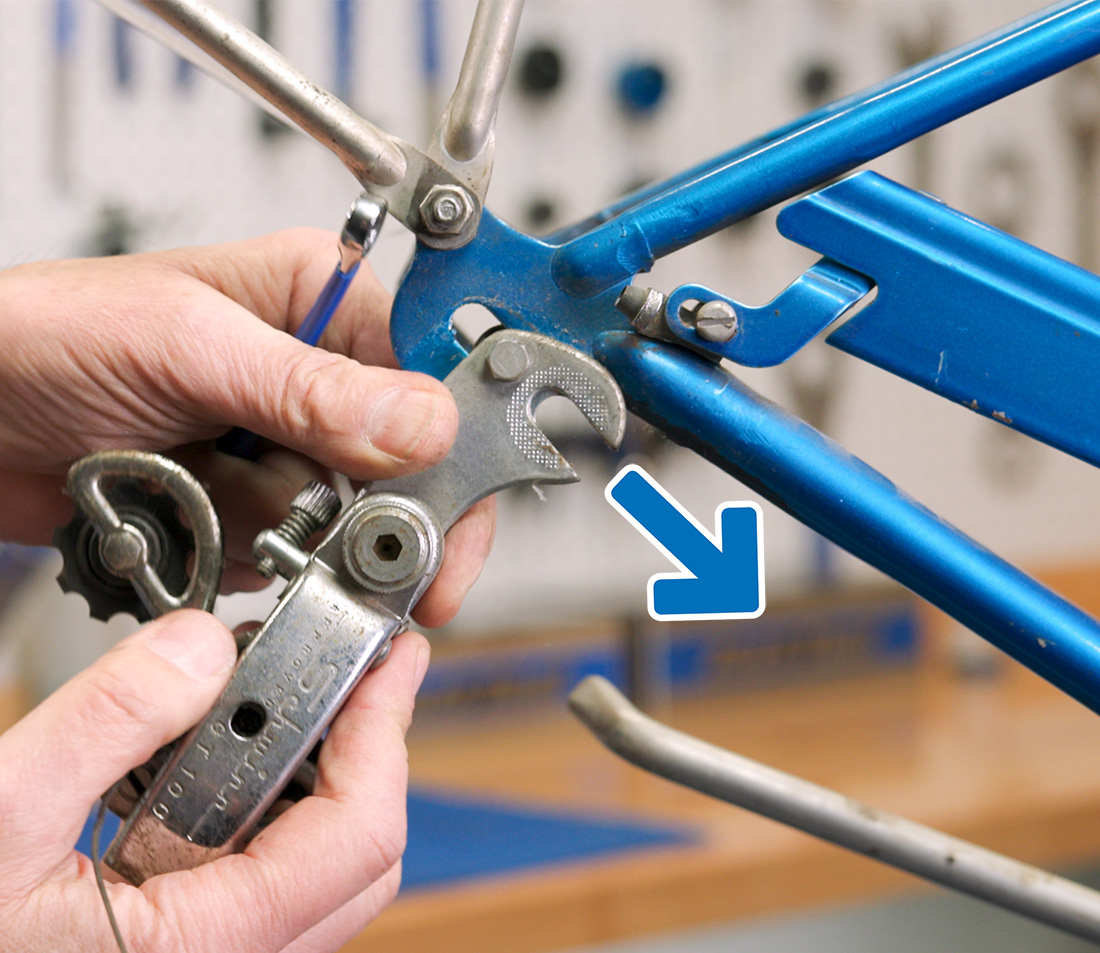
If you are removing the derailleur in order to check hanger alignment, the chain and shift cable can stay attached. However, if you are replacing the derailleur, remove the shift cable from the derailleur by loosening the pinch bolt. Then, remove the chain. But first: the chain routing through the pulley system of the derailleur and sprockets can get confusing. There are also numerous configurations of the B-screw and the tab on which it rests. So, take a few reference photos from a few angles.
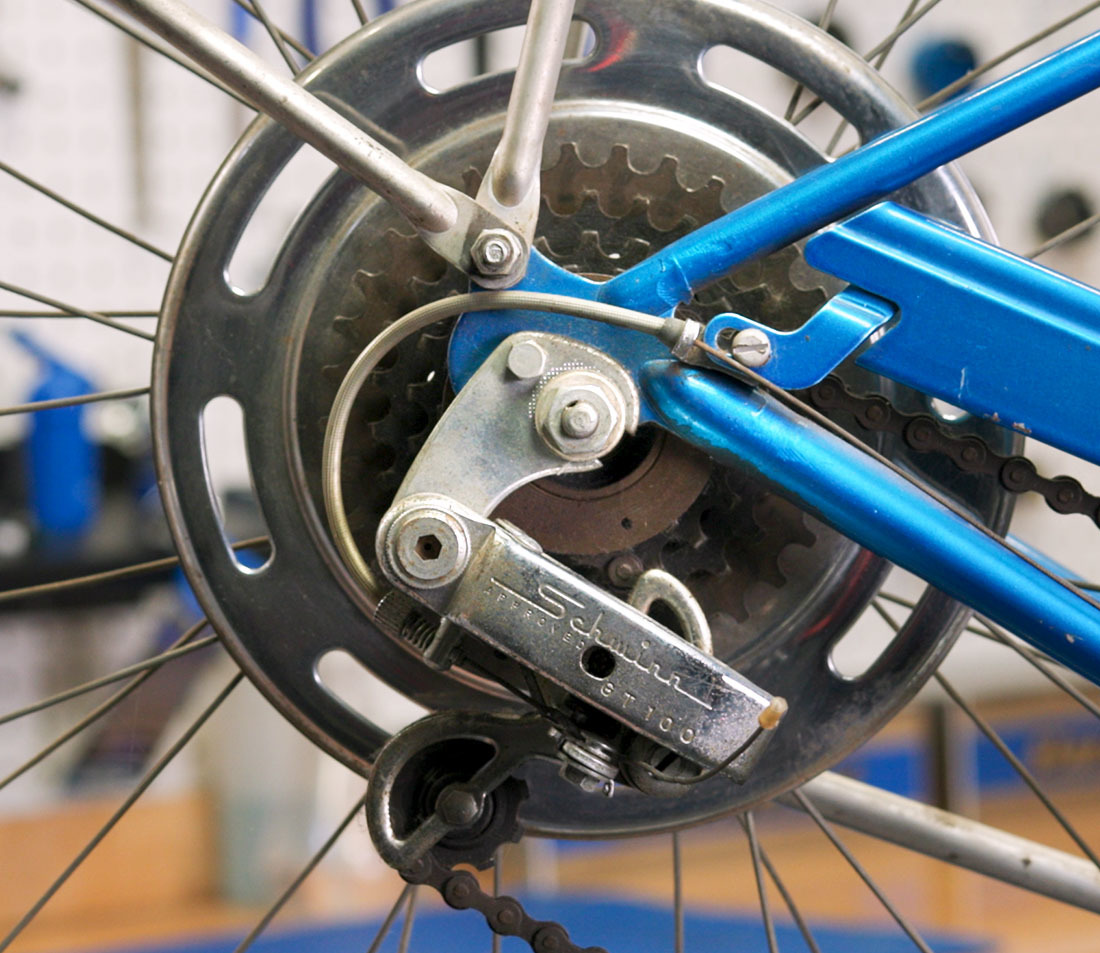
Every derailleur has a stop mechanism oriented against the part of the hanger called the tab. This is the B-screw and it controls the clearance of the pulleys to the sprockets.
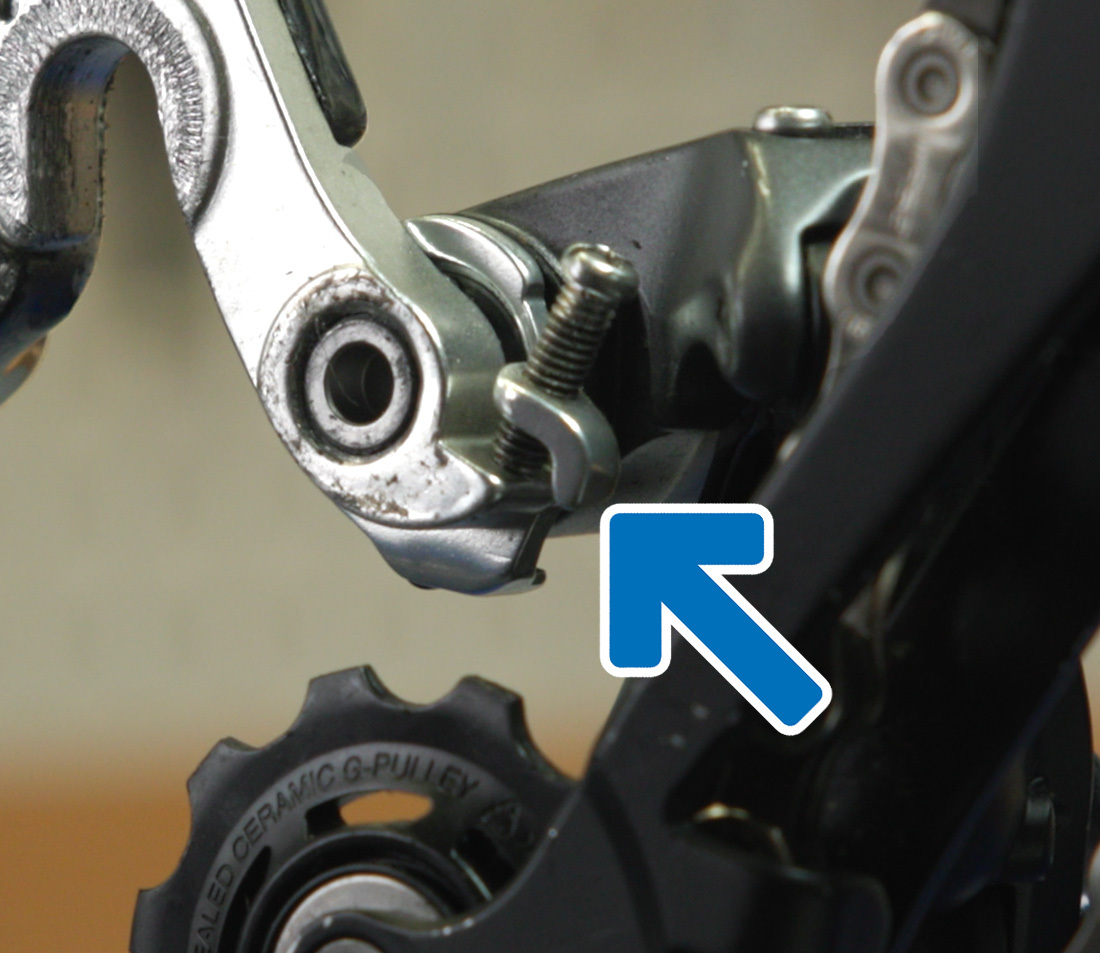
this model uses an extra linkage piece called an axle link that sits on the tab.

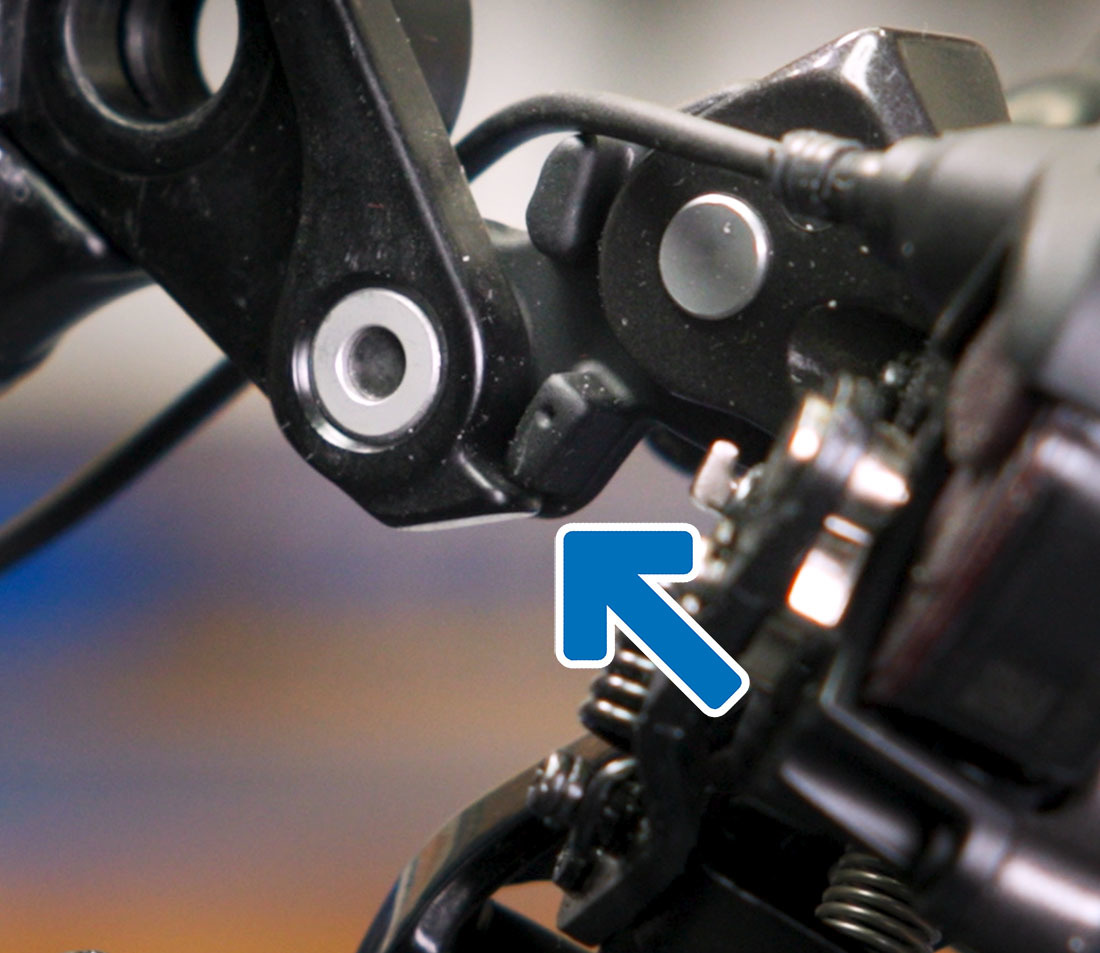
This design uses a special washer that presses against the dropout tab. The B-screw then presses on the washer.
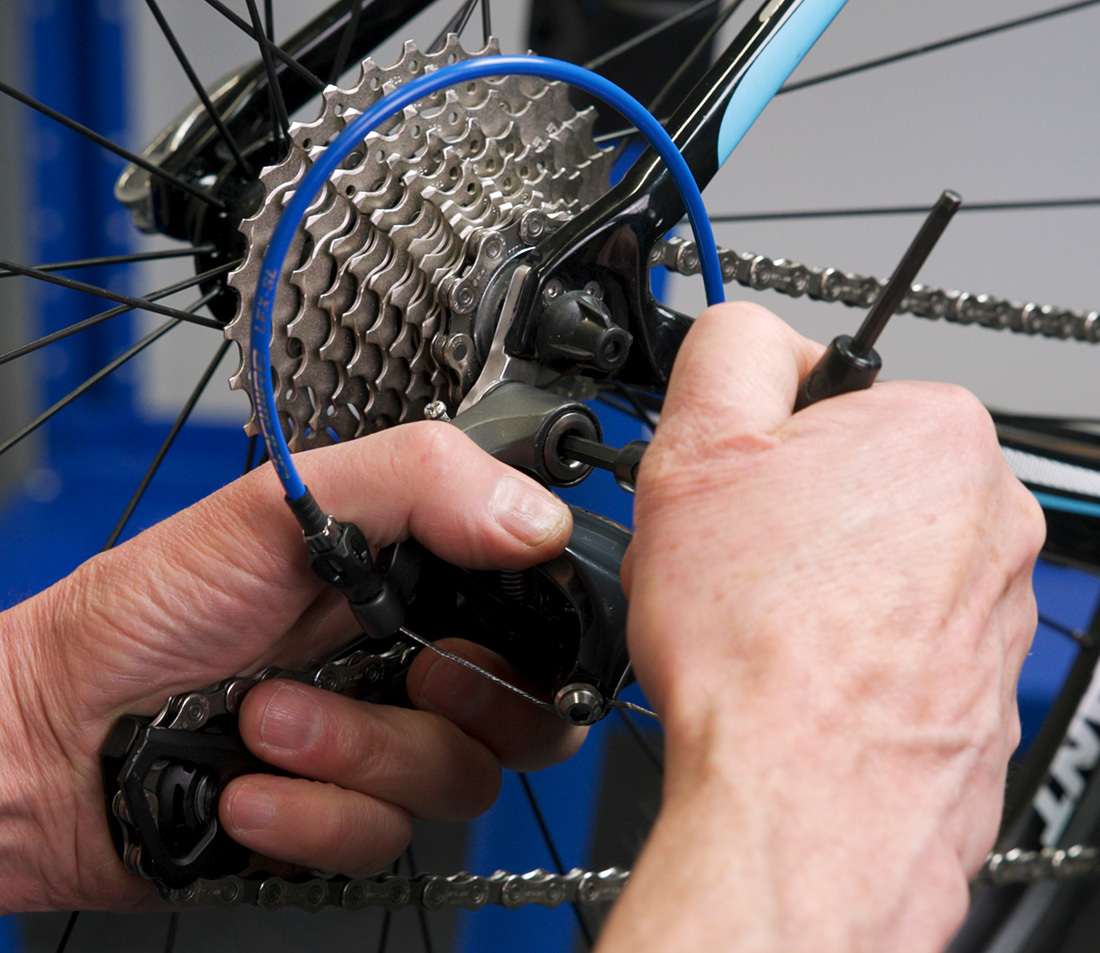
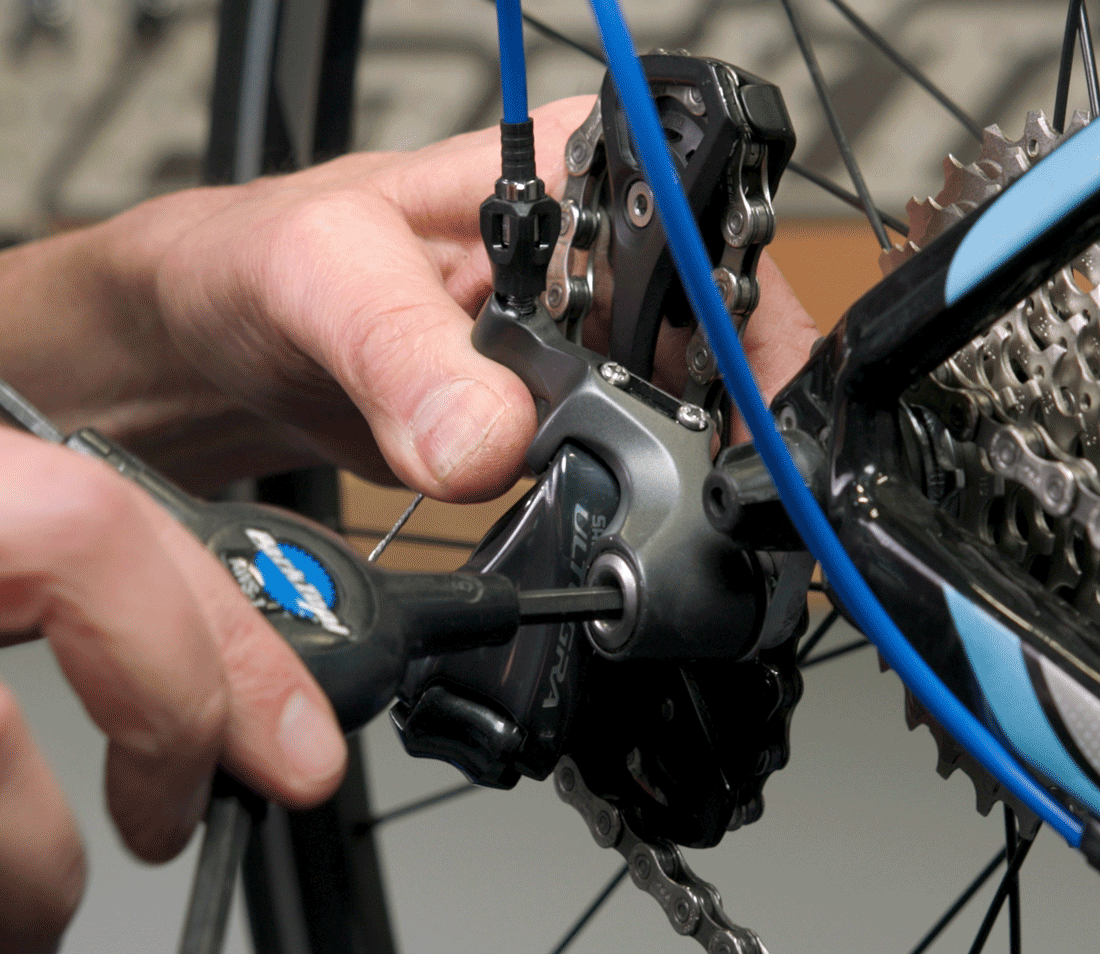
Using the appropriate wrench, loosen the mounting bolt at the hanger. To minimize any chance of thread damage, support the derailleur with your other hand, keeping the tool square to the hanger until it is fully disengaged.
The derailleur is now off the bike. If the chain and cable were left attached, simply allow it to hang.
Derailleur Installation
The first thing to consider is mounting bolt thread preparation. Some derailleurs come with a dry patch of threadlocker already in place. That is considered adequate thread preparation. Another option is to apply a mild liquid threadlocker, such as Park Tool TLR-1. If nothing else, at least apply some grease to the threads. This will allow the mounting bolt to securely tighten.
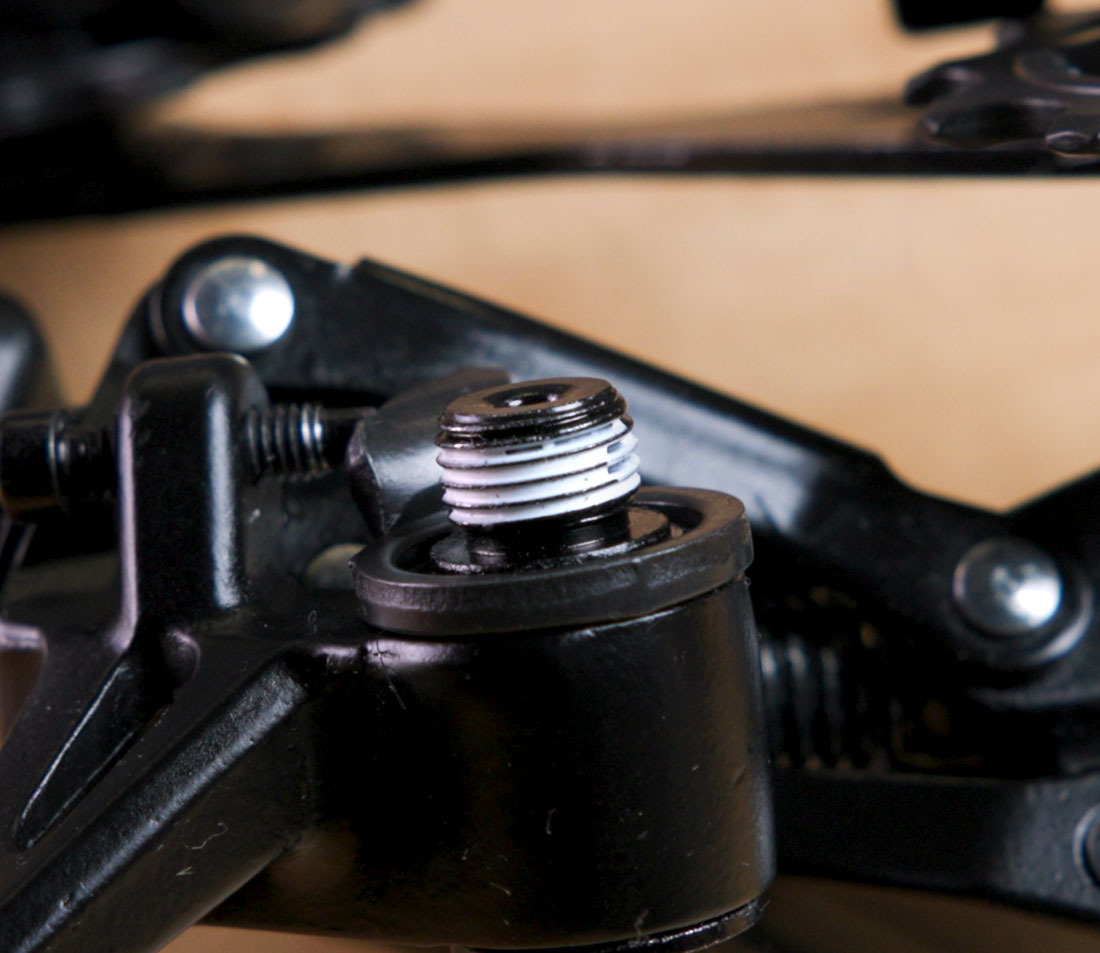
This mounting bolt has dry threadlocker pre-applied
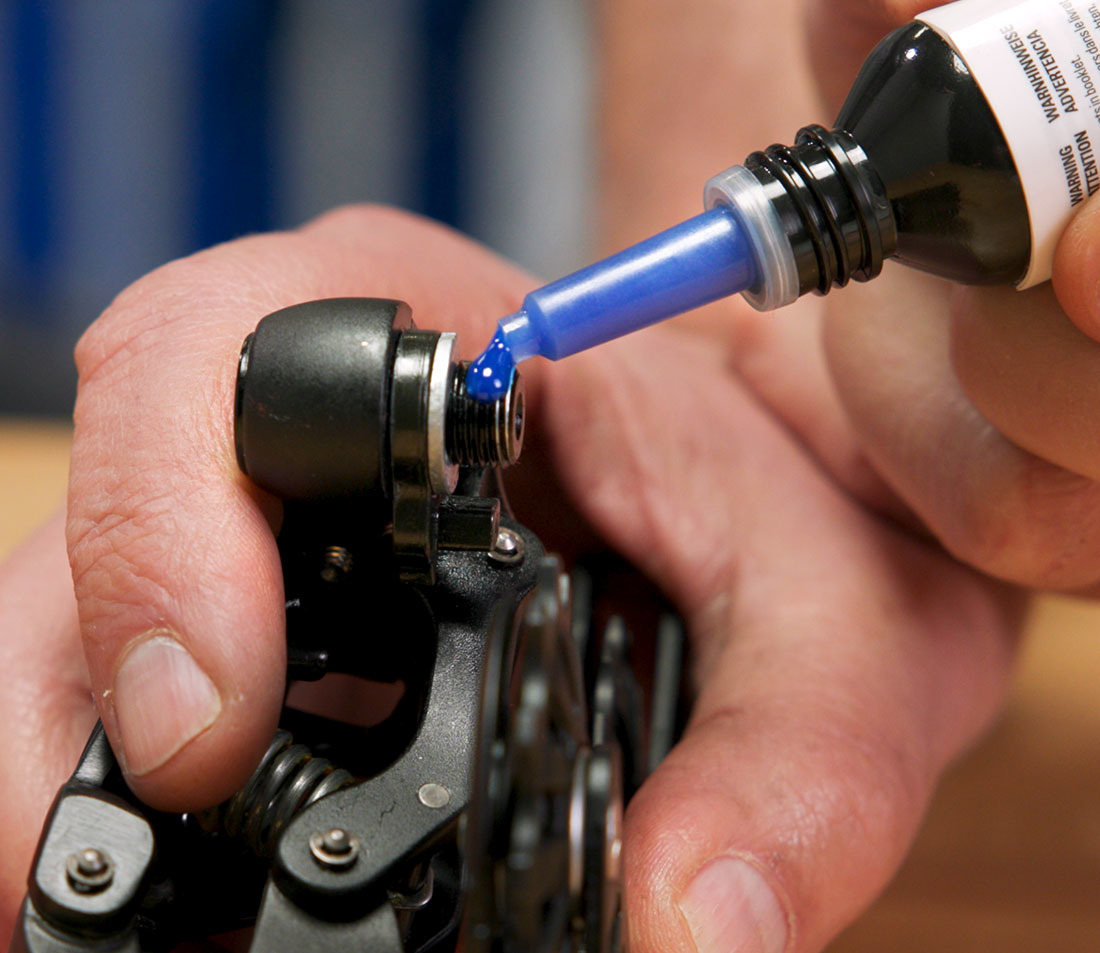
Apply a few drops of mild threadlocker to the threads
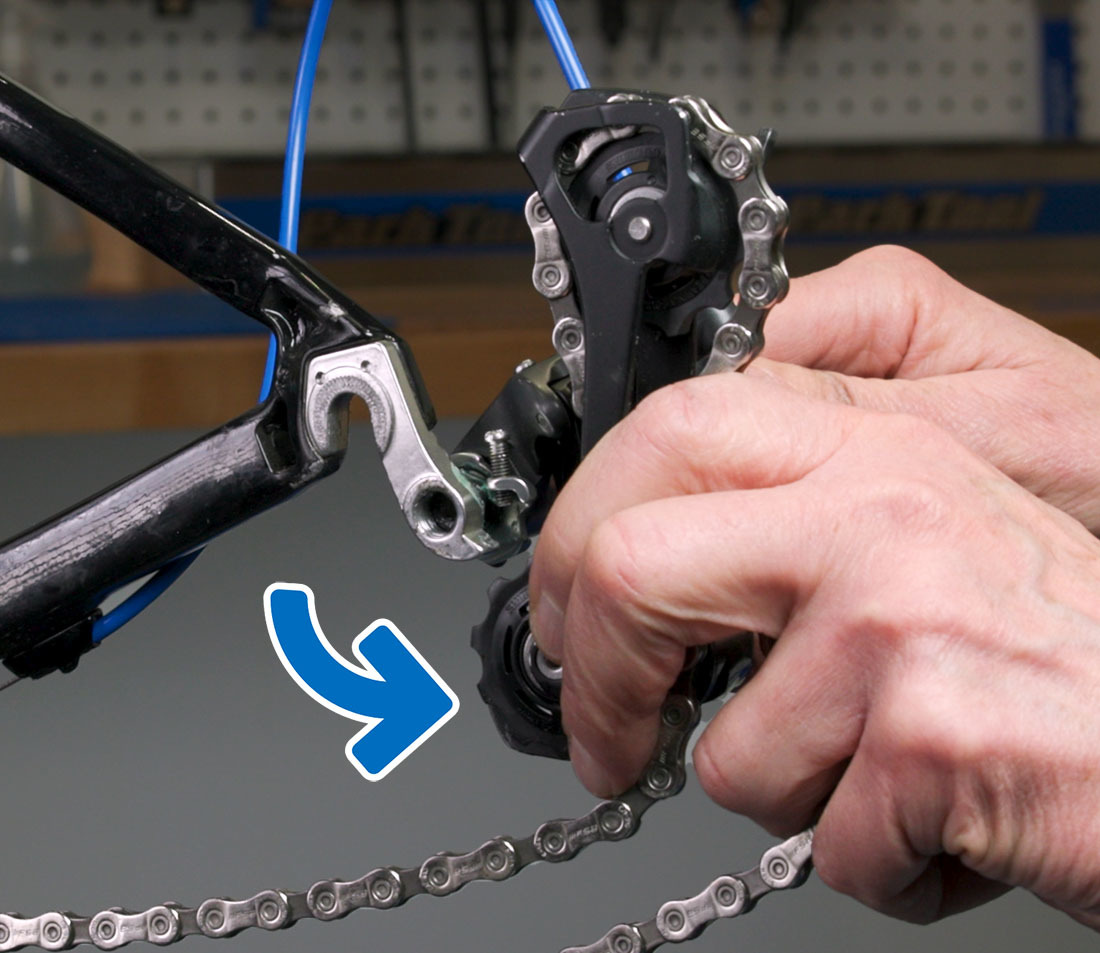
When installing, hold the body rotated back from its resting position to allow the B-stop mechanism to clear the hanger tab that you observed during disassembly. Use the shaft of the hex wrench to help visualize thread alignment as you align the mounting bolt square to the hanger.
If there is a lot of resistance as you thread it in and it feels like the threads are bad, stop and inspect. Double-check that you are threading in square to the hanger. It may be that the leading threads are damaged. Damaged threads can often be repaired — see Derailleur Hanger Thread Repair.
After the mounting bolt is fully threaded in, allow the derailleur to rotate forward. This ensures the stop mechanism is in the correct position to contact the hanger tab when it is fully tightened. Secure the derailleur bolt to full torque — typically 8-10 Nm. Reset any clutch or pulley cage lock engaged during the removal process. Reinstall the shift cable if it was removed.
If the chain was removed to install a new derailleur, it can now be reinstalled. Use your reference photos, which you definitely took, as a guide.
Finally, once all components have been reinstalled, double-check your derailleur adjustments. This is an especially necessary step if you have replaced your derailleur with a different model.
Non-Integrated Derailleur Brackets
Some bikes are designed without a derailleur hanger as part of the frame. These frames use a bracket that bolts outside the dropout. Securing the rear wheel axle provides more holding force for the bracket and derailleur.
To remove this style, first remove the wheel. As with traditional hanger designs, remove the shift cable and chain if you’re removing the derailleur entirely. Loosen the bolt holding the bracket to the drop out and slide the derailleur off.
Installation is the opposite of removal: slide the new hanger up to the end of the dropout. Hold the axle slot of the hanger aligned to the axle slot of the dropout and tighten the holding bolt. Reinstall the wheel.
Next article in this series
Rear Derailleur Adjustment View Article
Related articles
Rear Derailleur Hanger Alignment View Article
Derailleur Hanger Replacement View Article
Rear Derailleur Overhaul View Article