Written by Calvin on May 29, 2015/Calvin's Corner
Measuring Effective Rim Diameter
Wheel building begins with having the right components at hand. Basically, these are the hub, the rim, and of course spokes of the right length. Unfortunately, that last part, “spokes of the right length,” is not always so simple to come up with. A big part of determining the correct spoke length is using the correct “Effective Rim Diameter” (ERD), a concept that is reviewed in this article.
Spoke length that is either too long or too short will be problematic. Too long, and the spokes protrude past the end of the nipple. This in turn can poke a hole first in the rim strip and eventually the inner tube. Too long may also mean you run out of spoke threads as you attempt to tighten that spoke further.
Too short means that there will be inadequate thread engagement, and this can lead to thread failure and the spokes loosening. But what is our “Goldilocks” of spoke length? It is a larger window than you might expect. Ideally the spoke comes through all the threads of the nipple but no more. From here, it is typically 4mm shorter that is still acceptable to make a strong reliable wheel. Spokes falling within that range will be fine.
Figure 1 features an example of good length in a front disc brake wheel. The left side spokes, the rotor side, come up well into the nipple but do not go past the end of the nipple. The same spoke length was used for both sides of this front wheel, but notice the non-disc side spokes show less engagement. Disc front wheel are built with “dish,” or offset. The rim is pulled more to the hub flange with brake rotor. It might be argued this wheel should have different spokes for each side, with the non-rotor side just a bit longer. However, this spoke length is totally acceptable. Using the one length makes building the wheel faster, as well as less expensive.
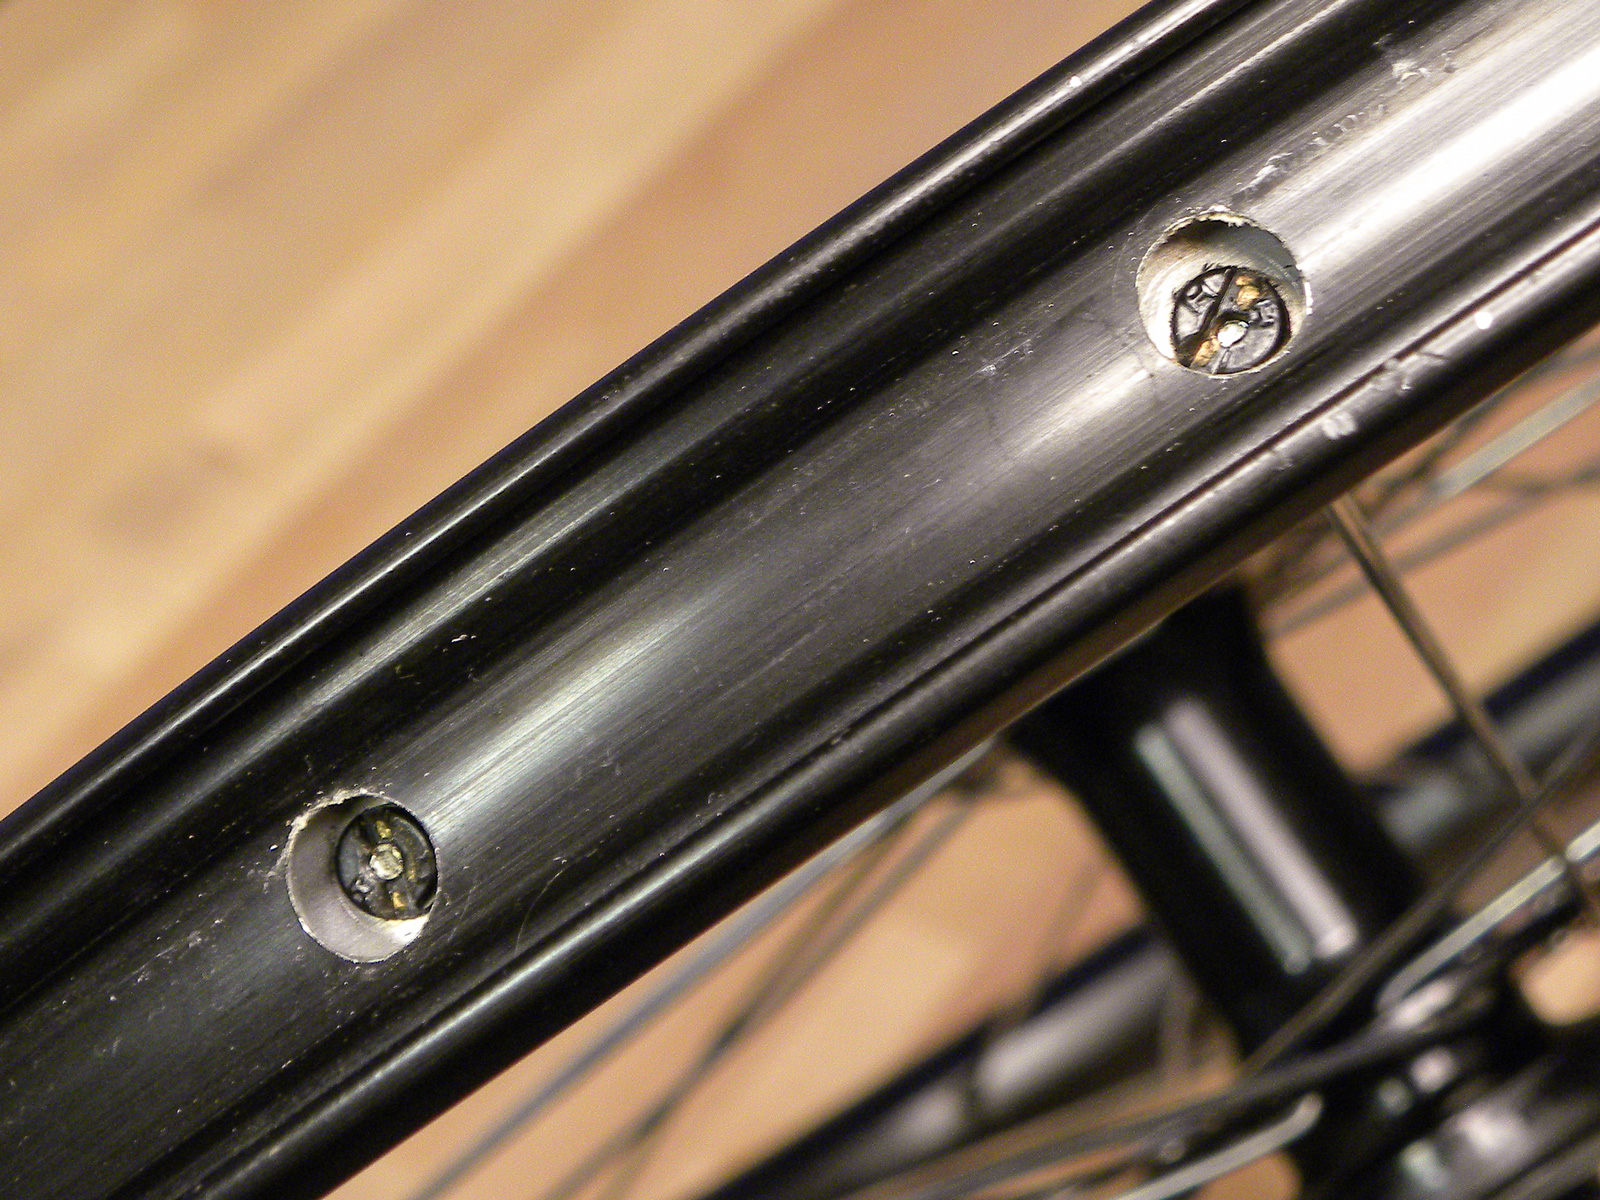
Figure 1. Nipple-to-spoke-end engagement differences on a front disc wheel (L: disc side; R: non-disc side)
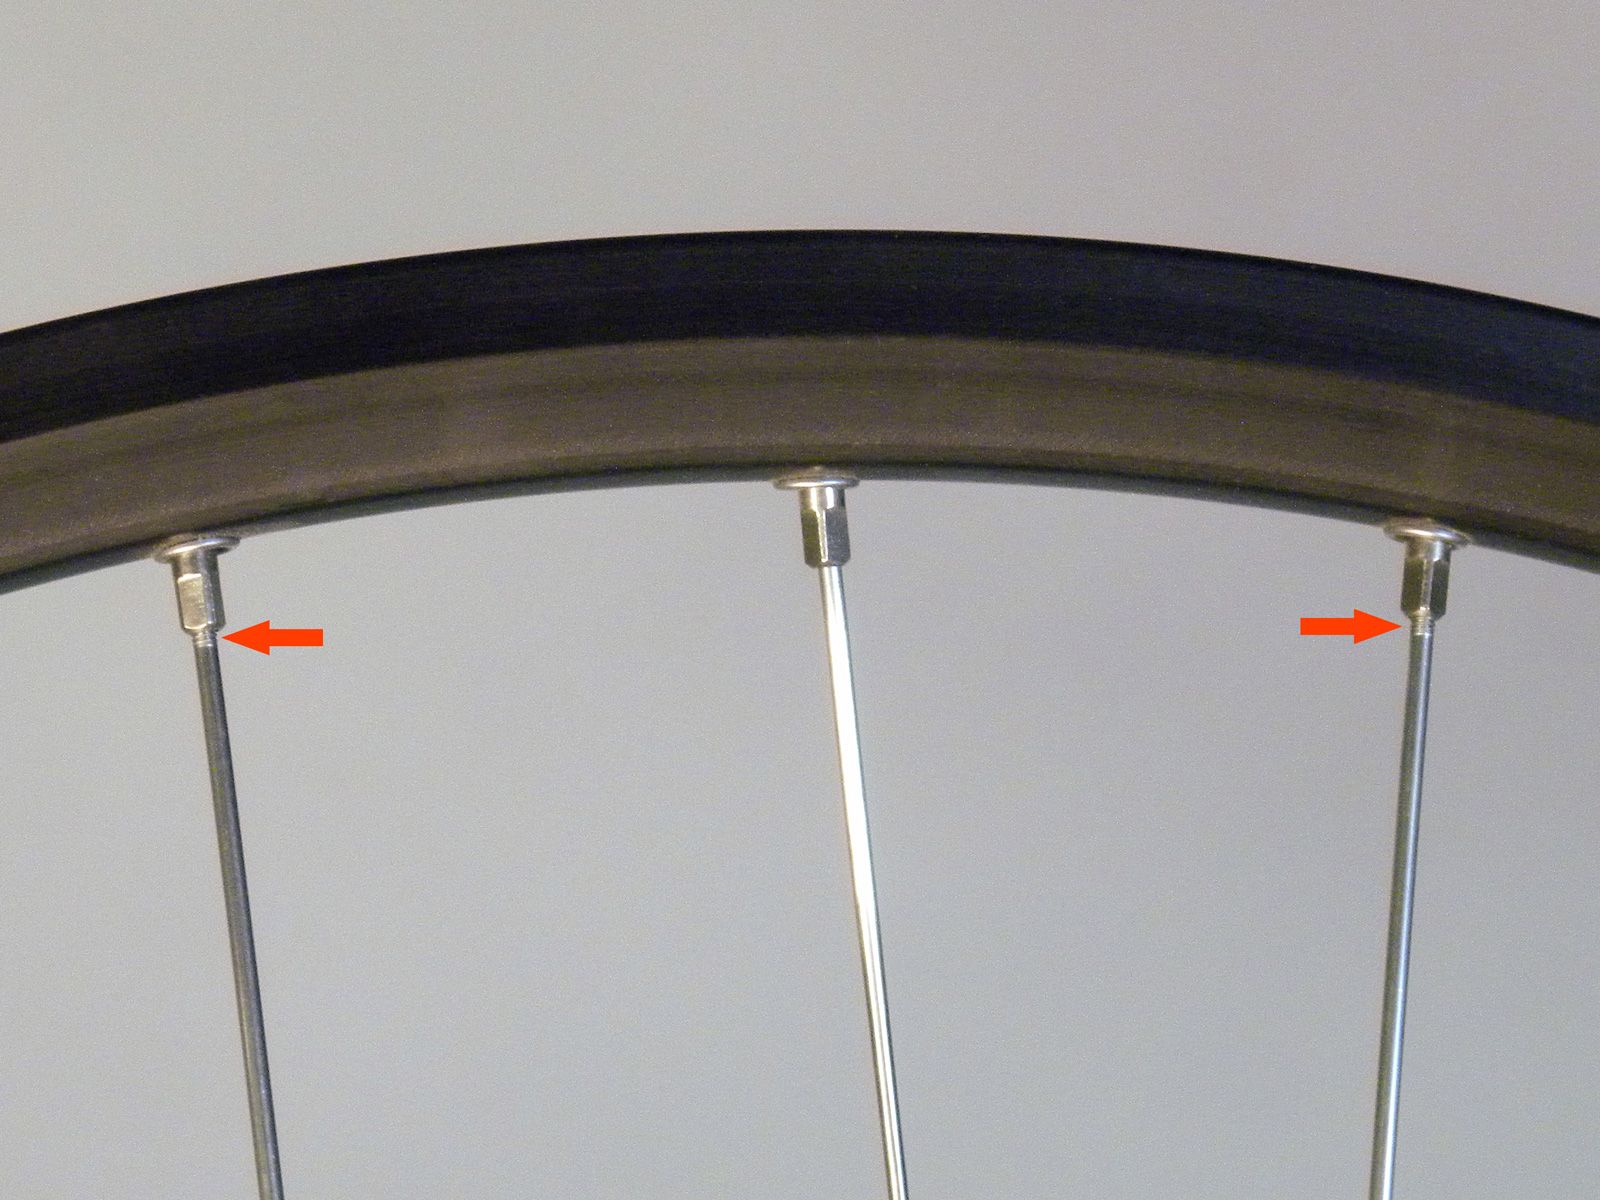
Figure 2. An example of a wheel with slightly too short spokes yet still completely functional
The sign of a short spoke is when there are lots of threads showing below the nipple. However, just a few threads don’t spoil the whole wheel. There are typically about 10mm worth of spoke length along a threaded spoke. If a few threads are visible, there is still plenty engagement inside the nipple to keep things together (figure 2). Bicycle spokes are typically a 56 TPI thread. This is basically a 0.45mm pitch, so each full turn advances the nipple almost half a millimeter. 3 or 4 threads showing at only 1.5mm less engagement in a nipple that has nearly 10mm of length.
Determining spoke length that fall with in this acceptable length target of not too long or not too short requires good accurate data, including for the rim to be built an ERD.
What is the ERD of a rim? First, it is not the diameter where the tire fits in the rim, nor is it the inner diameter of the rim hoop. The ERD is that point in the rim where the end of the spoke sits (given that we have spokes of an ideal length).
Think of two different rims intended to fit a 700C road tire. One rim has a flat shape with a low profile. The other rim is deeper with a pointed aero shape. The nipples and spoke ends will sit at different diameters between these two rims. These rims will differ in ERD, although the same size tire fits either rim (the tire bead fit is called the Bead Seat Diameter, but that’s a story for another day).
MEASURING RIM ERD
The bicycle industry is full of databases containing measurements on most everything, including rim ERDs. Sometimes these are accurate and sometimes not. However, it is always best to take your own measurements, at least the first time you work with a hub or rim you have not used before. As they say, look it up… but verify.
Begin by taking your Park Tool RR-12 Tape Measure and getting a rough inside diameter of the rim. This need not be very accurate, as this is only used to guess at a usable pair of “Measuring Sticks” (which are just two spokes and nipples). It is important to note that these are not at all the spoke lengths you are building with. These are just two spokes with nipples that are used to determine the rim’s ERD.
Assume you have a rim that is about 560mm from innermost edge to opposite innermost edge. Split that in two, for 280mm. However, to make it easier to measure using this technique, you don’t want these measuring spokes touching or overlapping. Grab any two spokes shy of the 280. Use two spokes of 270mm, 275mm, 260mm, or 266mm, anything like that laying around. Measure these two spokes using the Park Tool SBC-1 Spoke Bearing Cotter Pin Gauge and write down the number (figure 3).
You may note in Figure 3 that the spoke is not landing right on the 260 mark. It is a bit shy, but is also over the 259 mark. If it is over the mark, round up. This spoke would be considered a 260mm spoke.
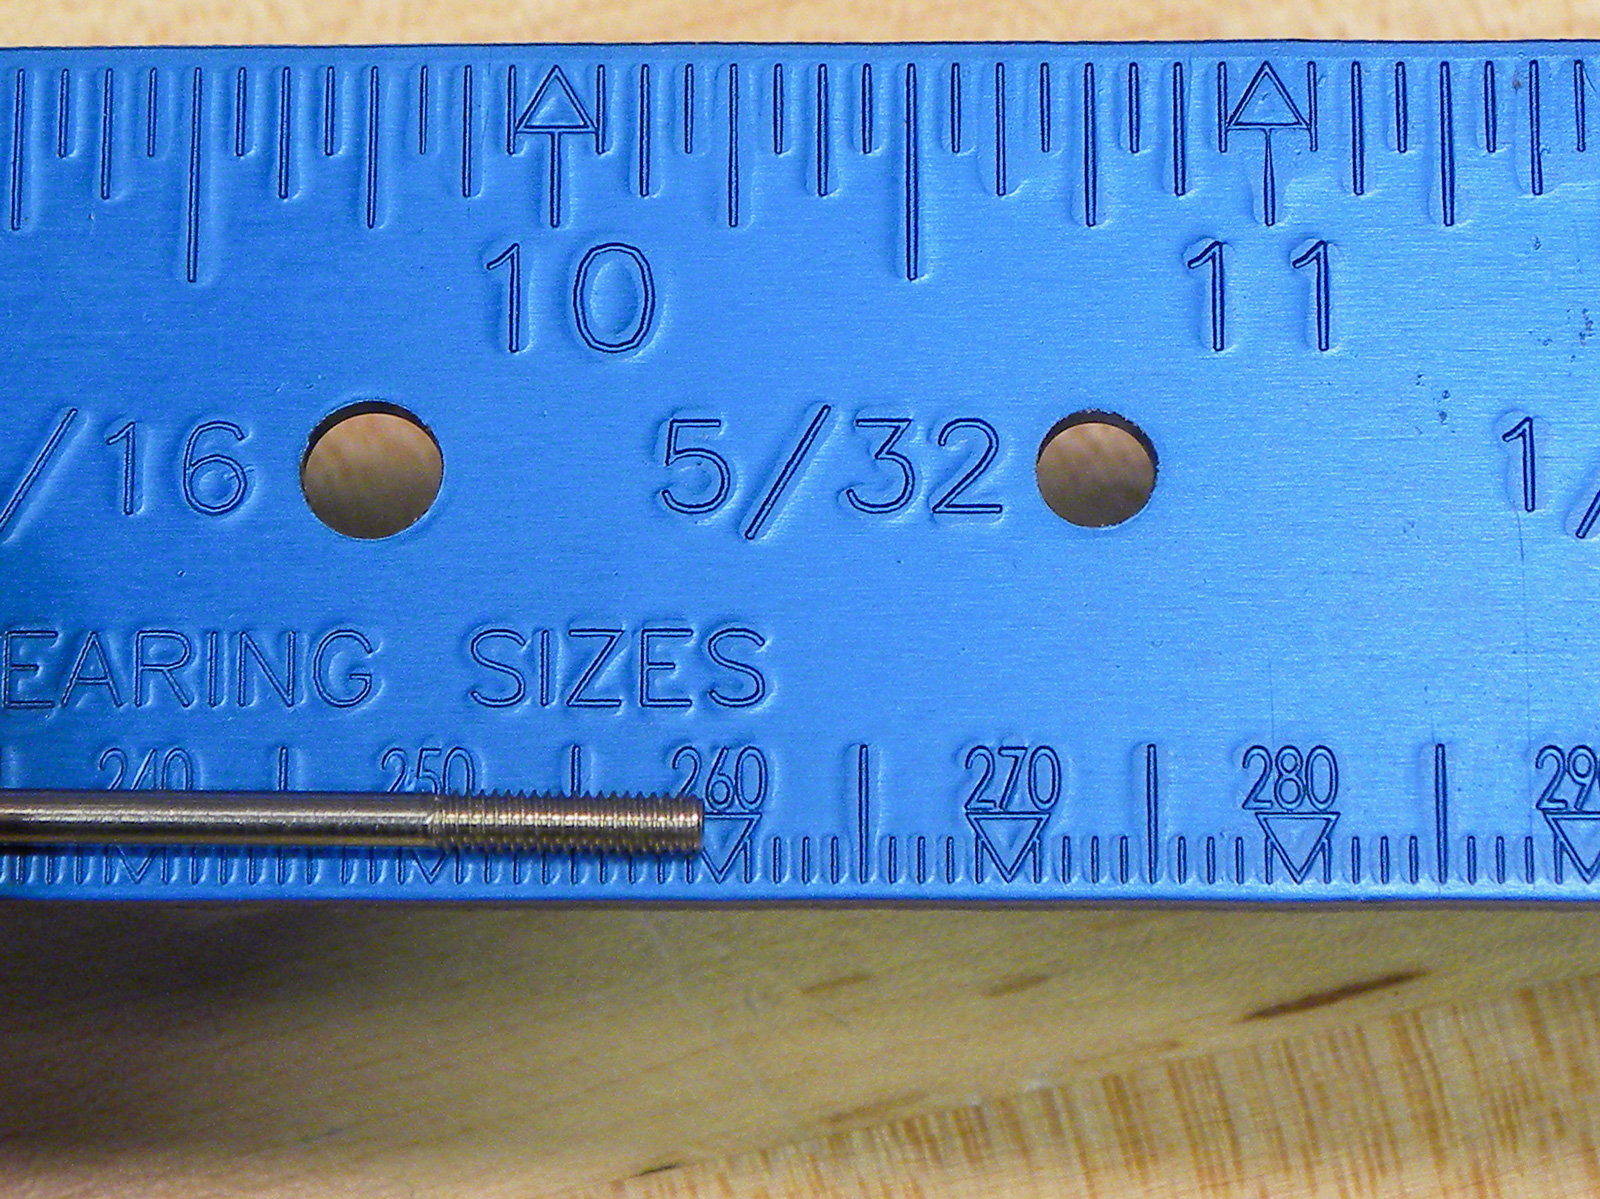
Figure 3. Use a spoke ruler and write down the spoke length of your "measuring sticks"
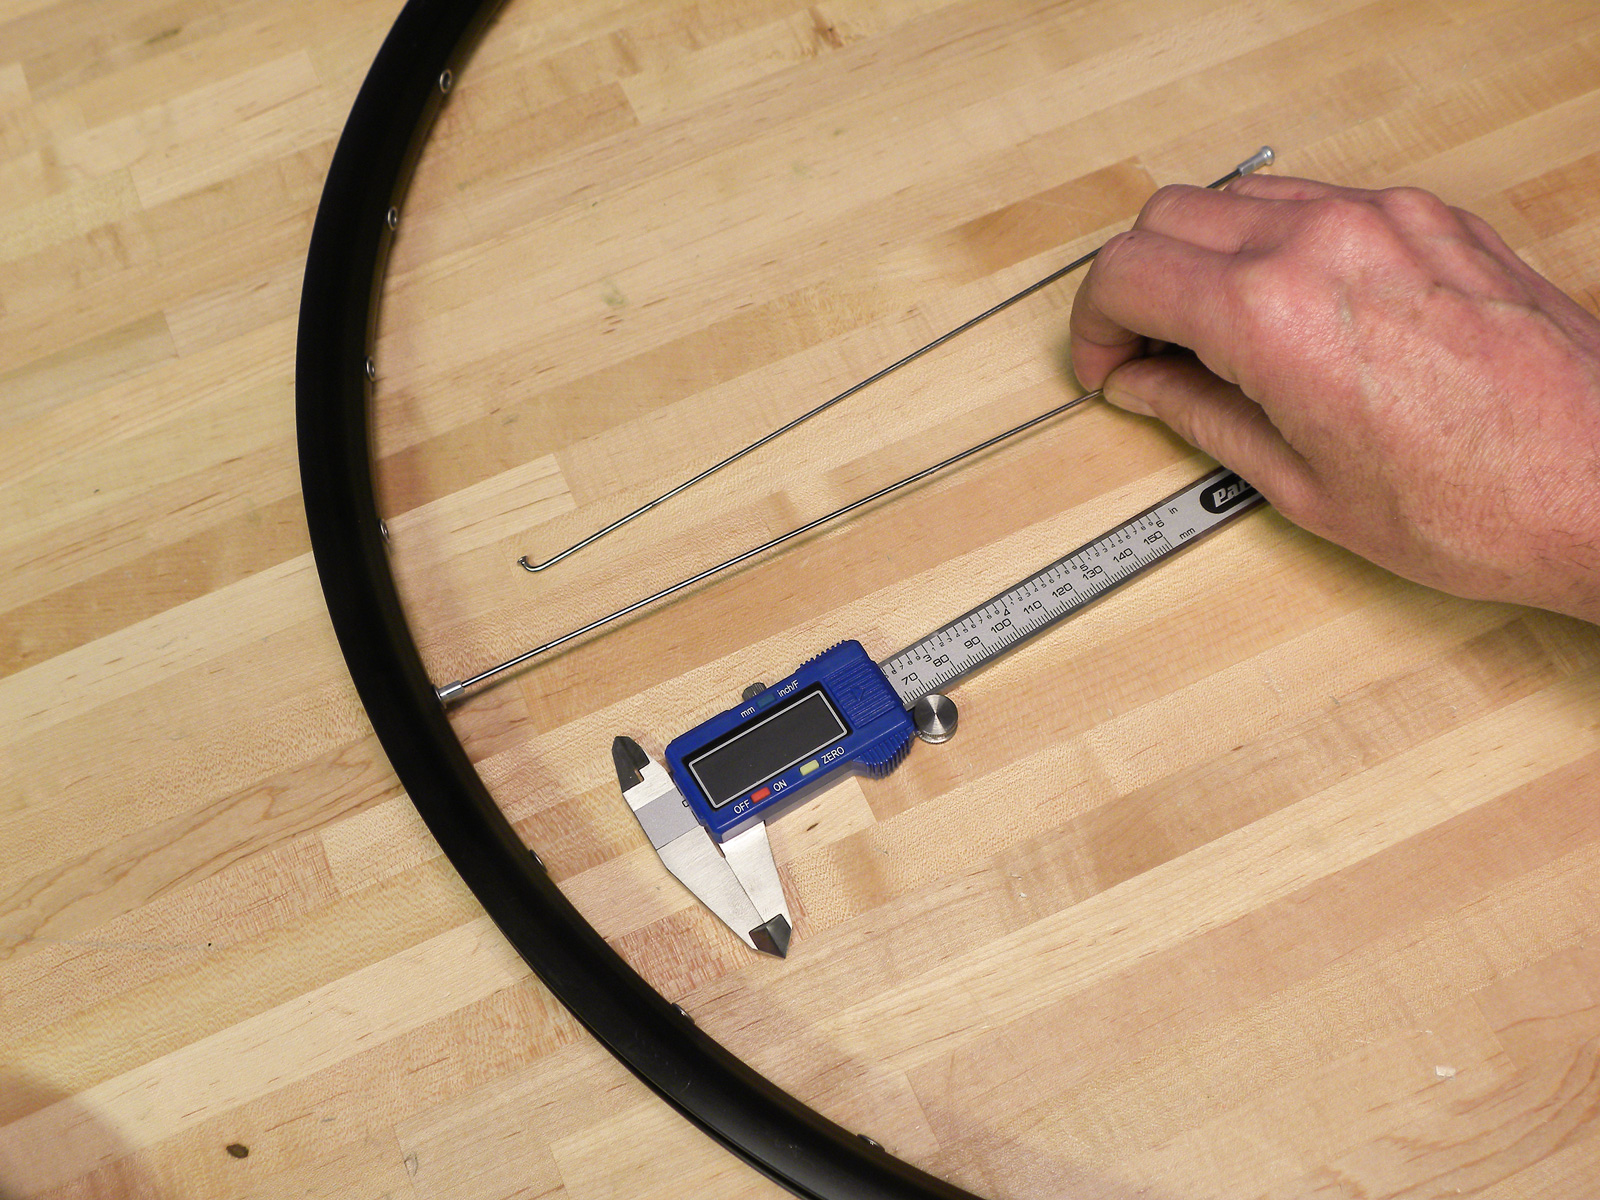
Figure 4. Insert threaded spoke end into rim hole and thread on nipple
Next, locate two holes in the rim, each directly across from one another. Install the threaded end of the spoke into the hole, and thread on a nipple (figure 4).
Now, pay attention to how far you thread the nipple on the spoke. If it is the common slotted nipple, a “perfect” spoke length would result in the spoke ending just at the bottom of the slot on a built wheel. Thread the spoke not all the way through the nipple, but just to the bottom of that slot (figure 5).
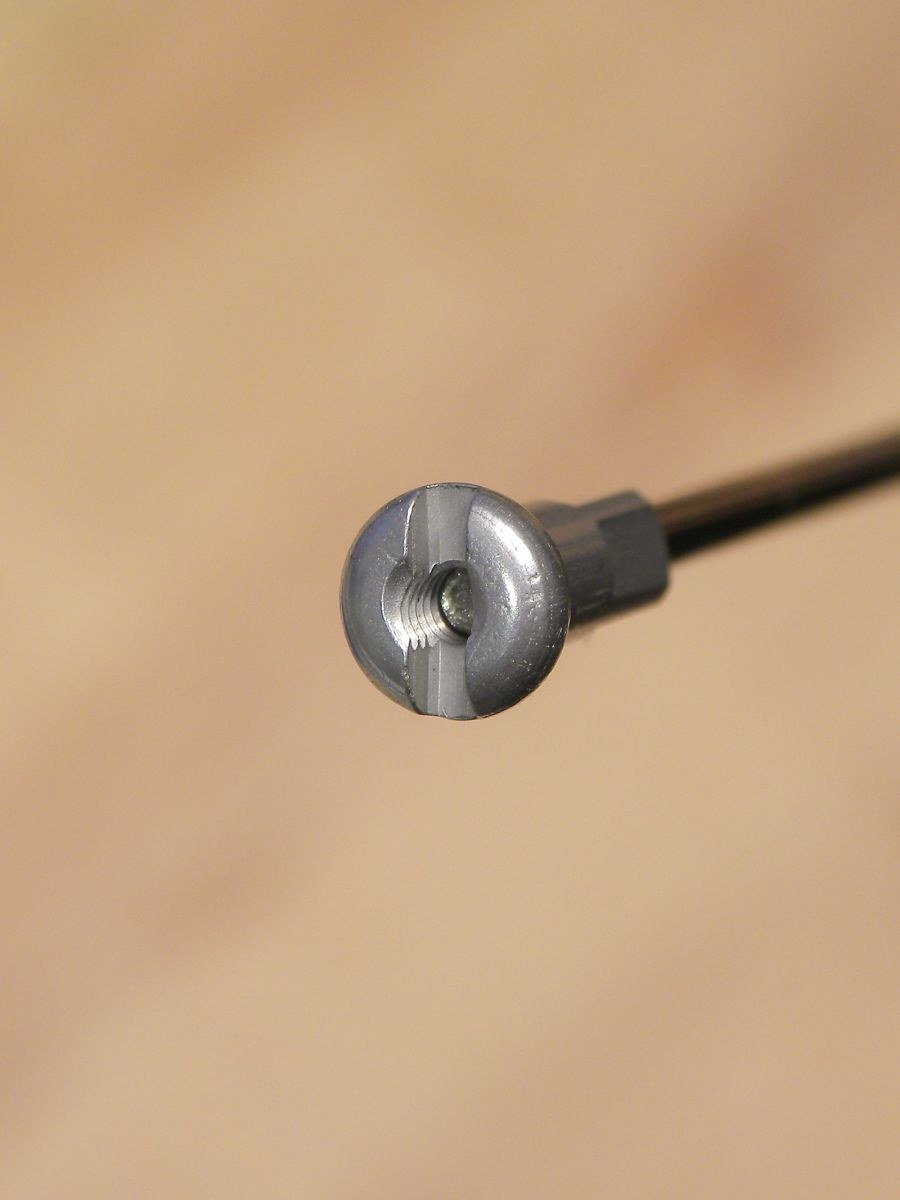
Figure 5a. Spoke is not threaded enough into the nipple.
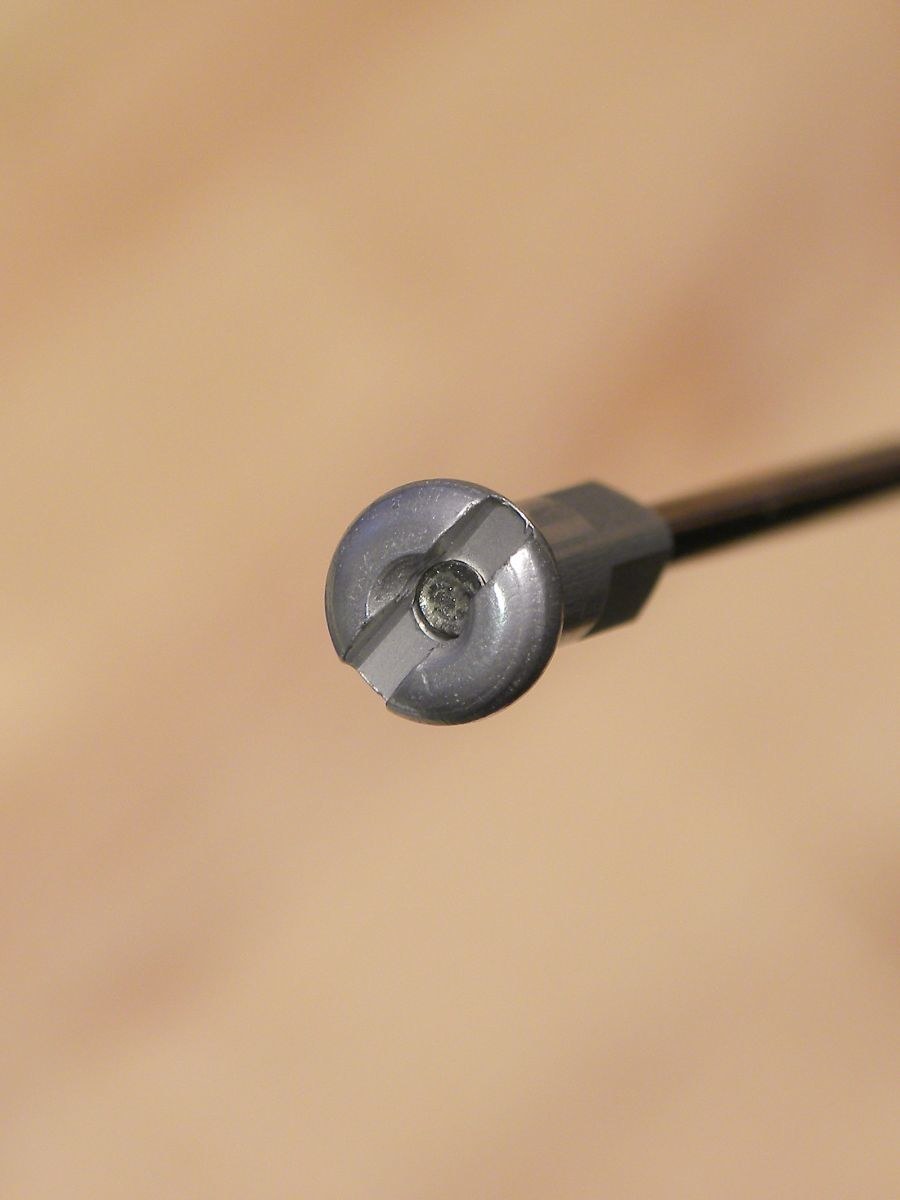
Figure 5b. Spoke is now threaded even with slot in nipple head, a "perfect spoke" length.
Find the second rim hole that is exactly 180 degrees away from the rim hole with the first spoke. Take the second spoke and insert the threaded end into this hole. Again thread on a nipple and repeat the same engagement (figure 5).
Pull both spoke ends toward one another. Use the Park Tool DC-1 Digital Caliper and measure from J-bend to J-bend. Use the narrow end of the caliper and hold the caliper body parallel to the spokes (figure 6).
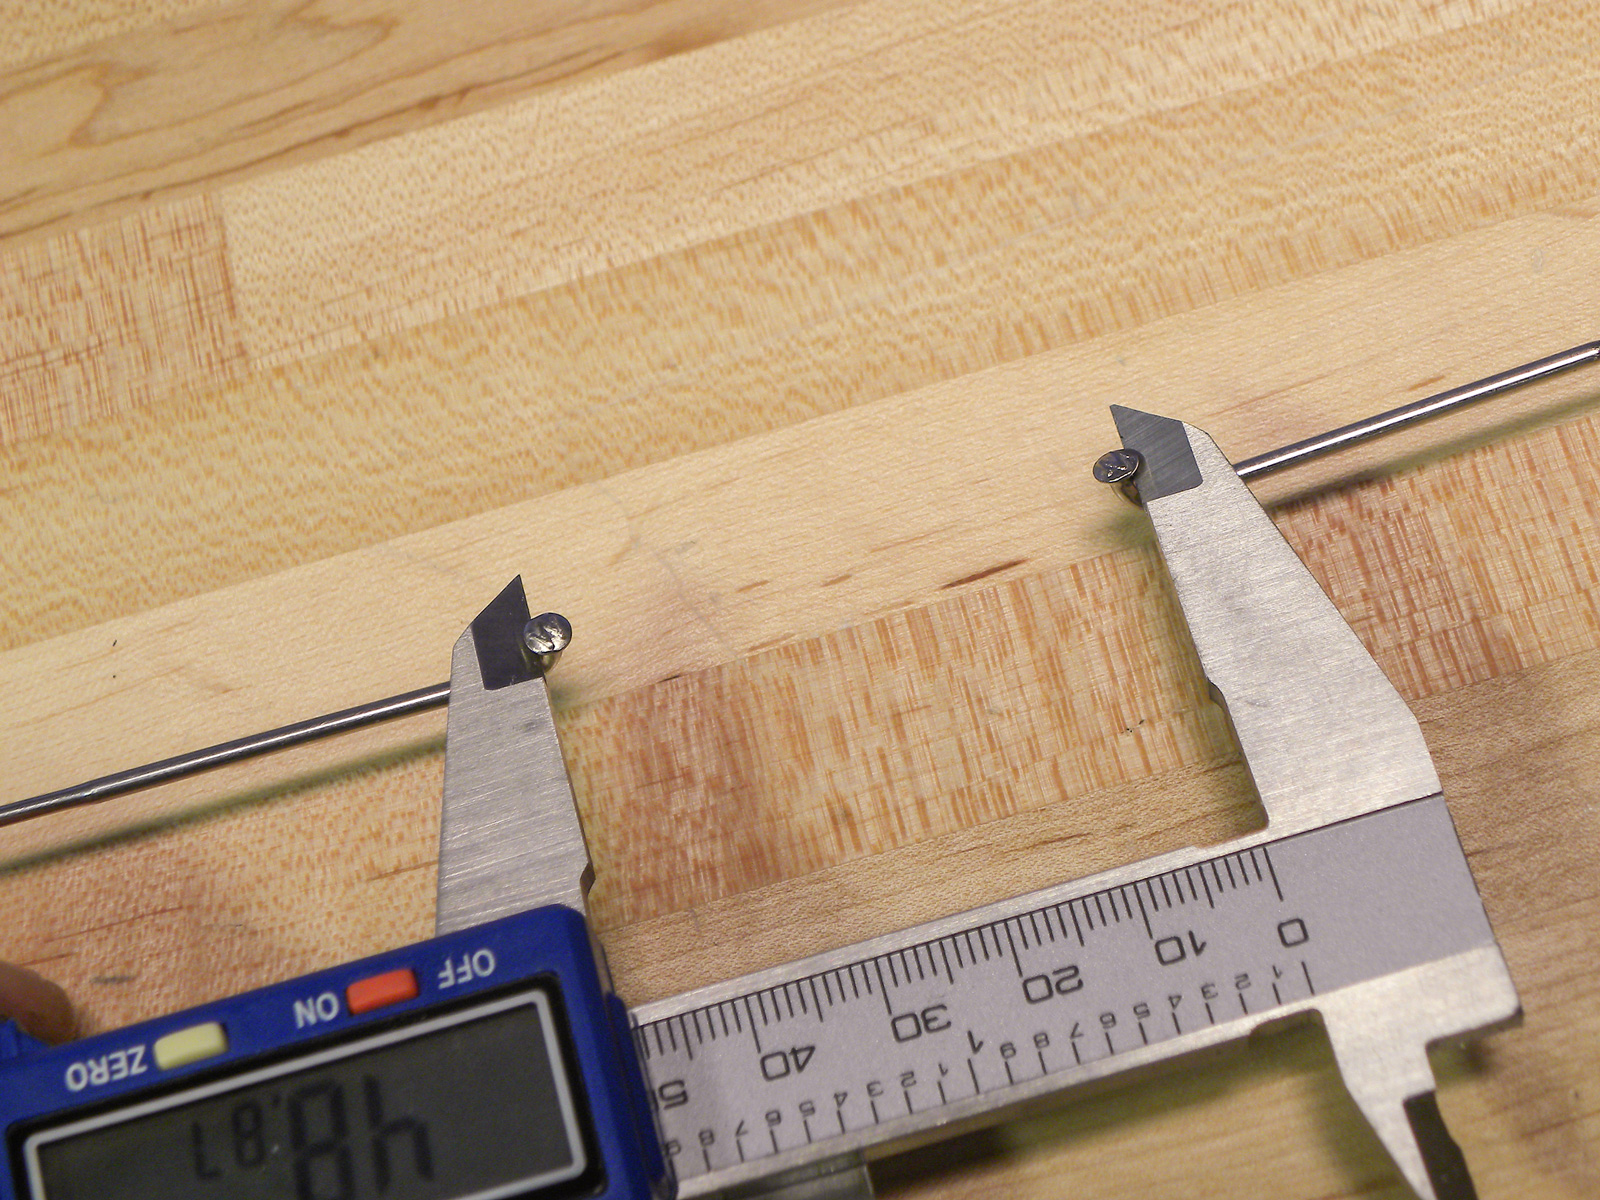
Figure 6. Measure from J-bend to J-bend using calipers, keeping caliper parallel to spokes
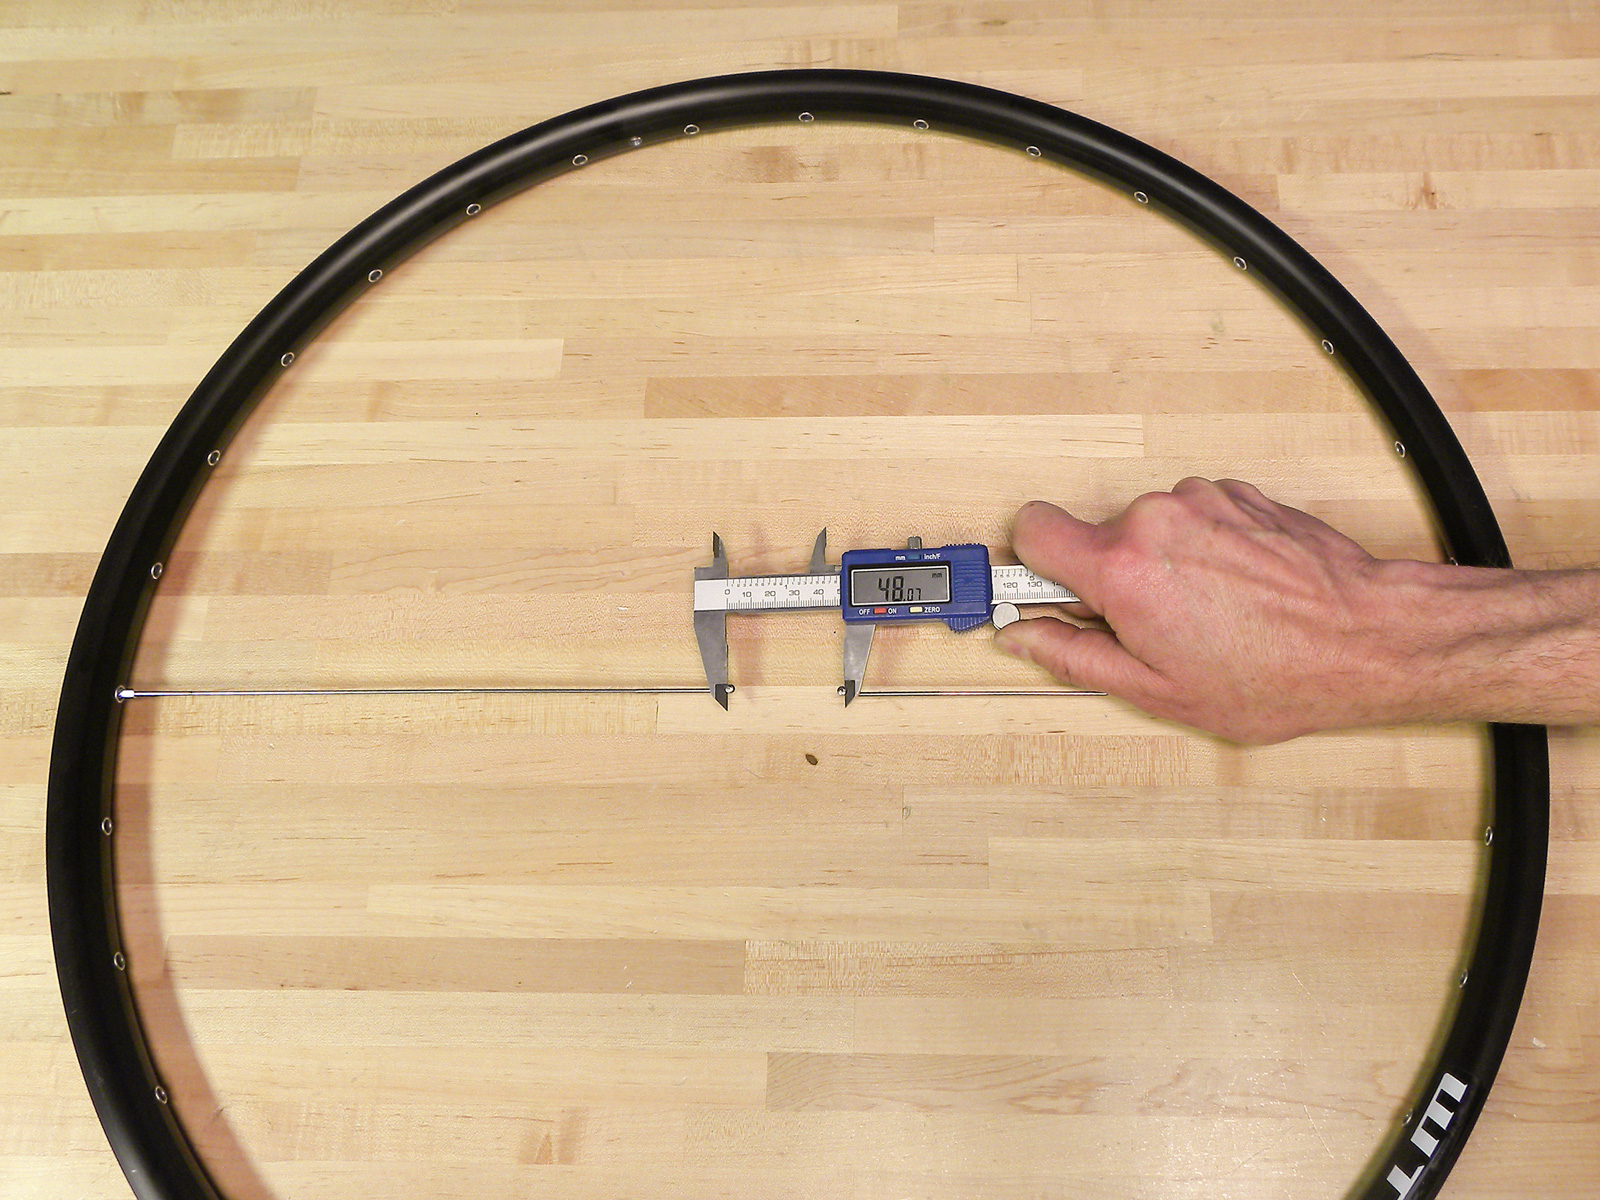
Figure 7. The caliper will measure the distance from spoke to spoke
Read the number off the DC-1 and write it down (figure 7).
Now, for the math. Take the length of spoke you just used and double it. Now add the bend-to-bend caliper measurement, and this will be the ERD of the rim.
For the example rim in Figure 7, we used 260mm spokes. So 260mm + 260mm + 48.4mm = 568.4mm. Drop the tenth millimeter, rounding down, so the ERD here is 568mm. This is the diameter where the spoke ends will sit in a well-built wheel.
Now what? Search the Internet for “spoke length calculator.” There are several good ones to pick from. These all will ask for the rim’s ERD. You will also need measurements off the hub and decision on the spoke lacing pattern, but that will be reviewed here at a future date.
ERD AND BUILDING A TRASHED RIM
Understand the ERD will help if you need to rebuild your wheel but want to reuse the spokes. Spokes will over time fatigue, so using older spokes in not such a good idea. But assume you just bashed your new wheel on a rock, or drove into the garage with the new bike on the roof rack. The rim is bent and trashed but the spokes are probably just fine. If you find a rim with the same drilling and same ERD, even a different brand, it will work.
BROKEN SPOKES
The concept of ERD is useful for quick and accurate estimates on length when fixing a wheel with broken spokes.
Measure another spoke on the same side as the broken one. Use the RR-12, and hold the tape end at the nipple end (figure 8).
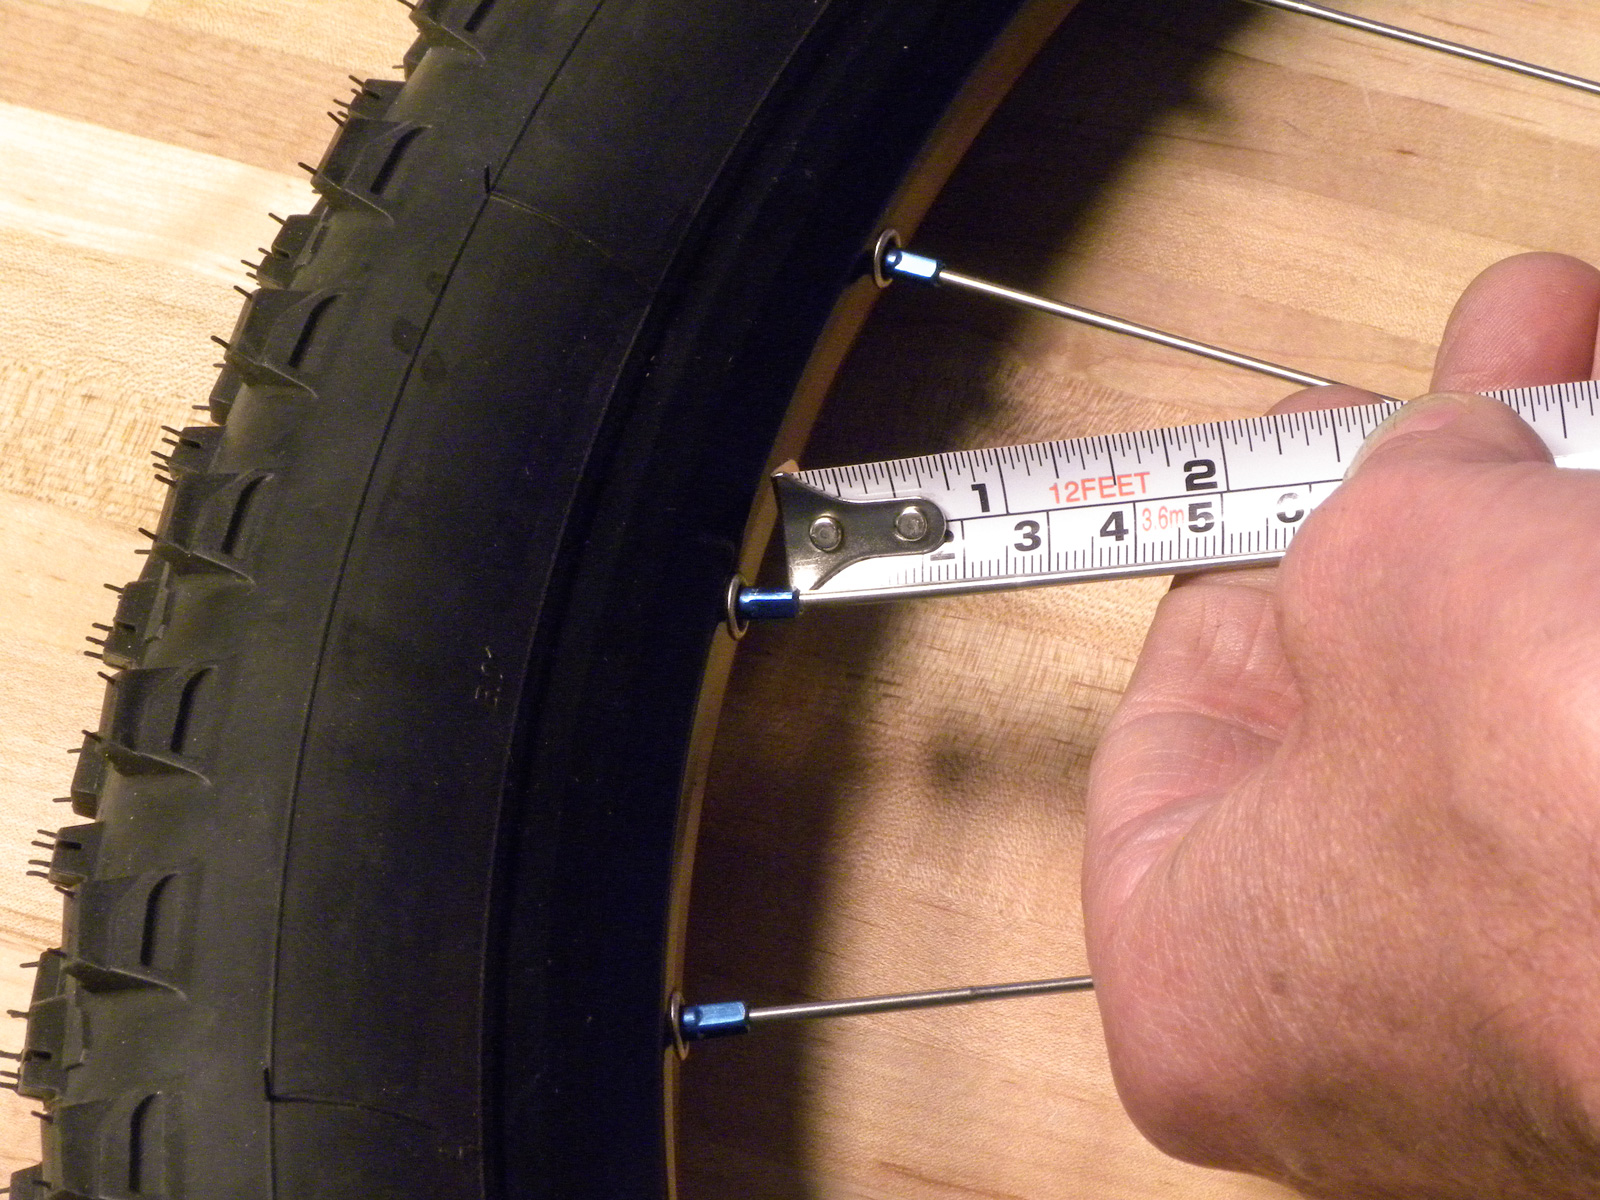
Figure 8. Measure beginning at inner edge of nipple
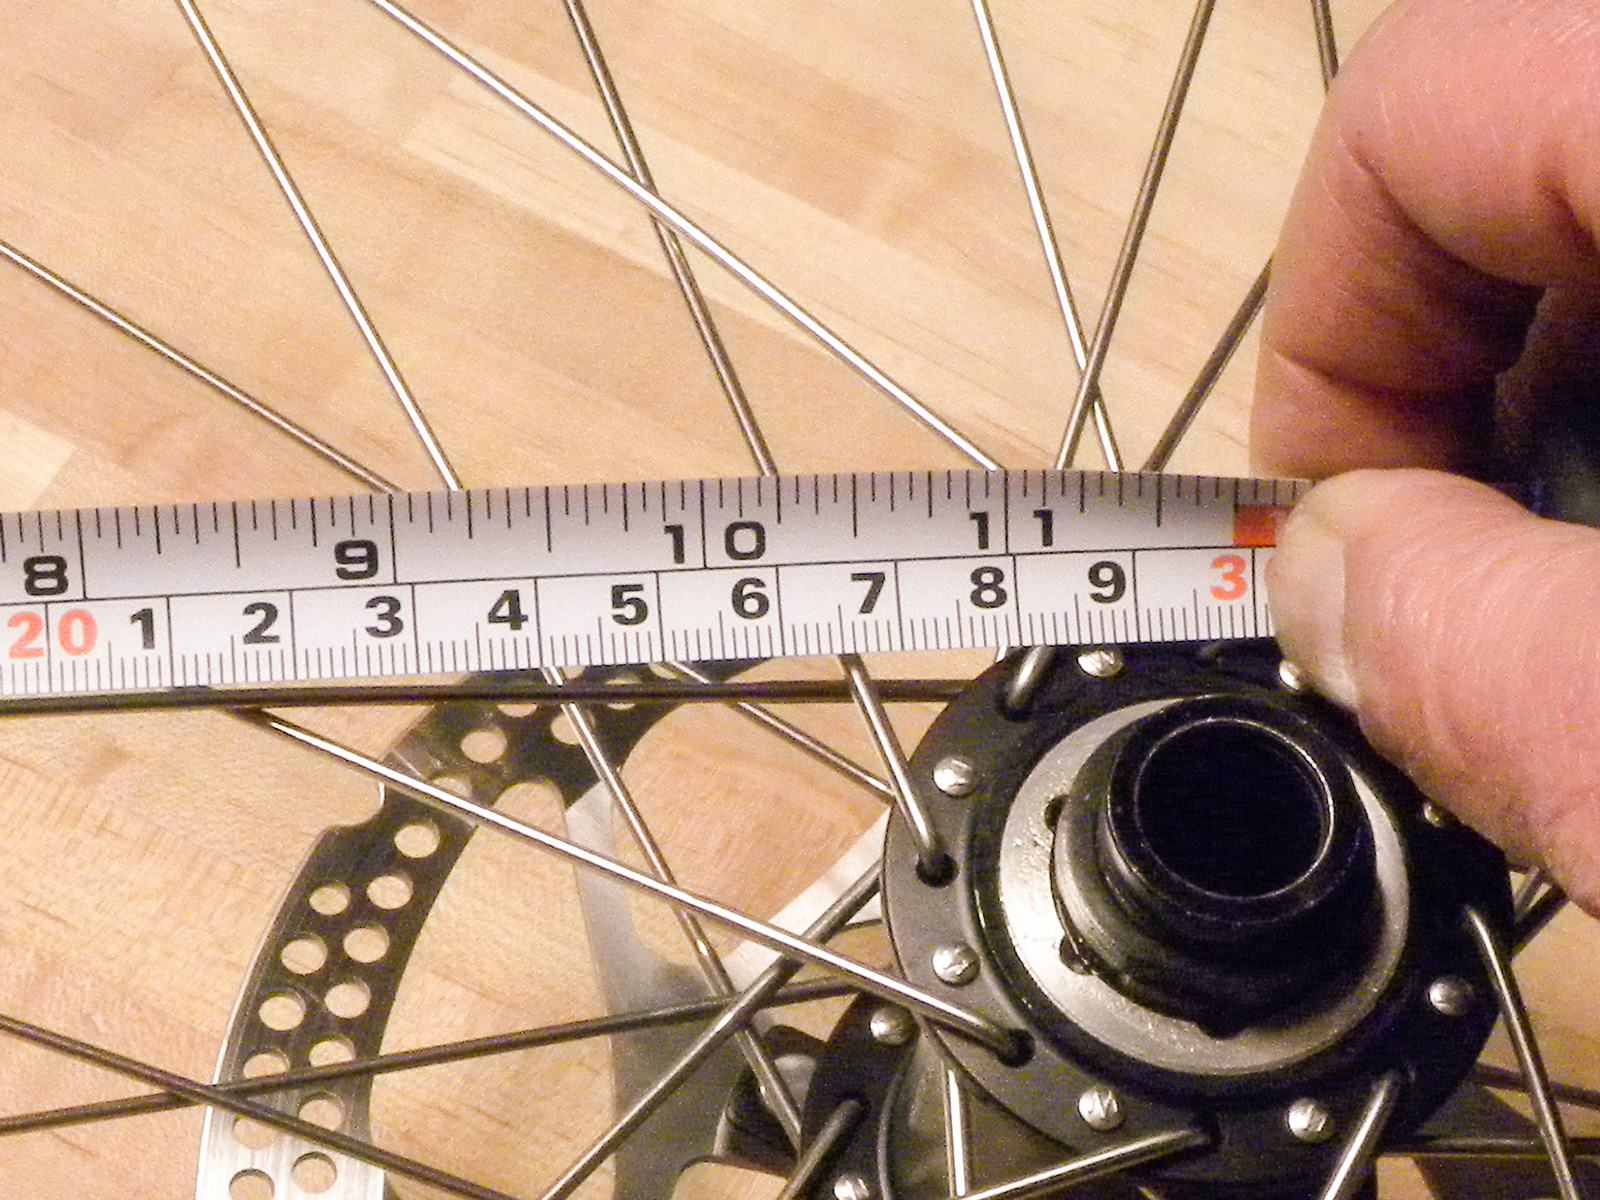
Figure 9. Reading of 285mm at edge of spoke head
Read the other end of the tape measure at the hub. Read to the edge of the spoke head, as this is close to the spoke J-bend inside the hub flange (figure 9).
Now inspect the nipple. There are two common type, 12mm and 16mm. For the shorter 12 nipples, add only 10mm to your tape measurement. In the example in Figure 9, add 10mm to the 285mm for a spoke length of 295mm. If the wheel uses the medium length nipples of 16mm, add 15mm to the reading at the hub.