Disc Brake Pad Removal & Installation
This article will discuss brake pad replacement on bicycle disc brake systems for both mechanical and hydraulic systems.
Preliminary Info
- Needle nose pliers for brakes with cotter pins or tight fitting pads
- Appropriate screwdriver, hex or Torx®-compatible wrench for retaining pins and adjusters
- Tool with a flat surface like the PP-1.2 for pressing in hydraulic pistons
When to replace brake pads
Pads should be replaced if they are worn out, contaminated, or to change pad material for performance reasons.
Wear
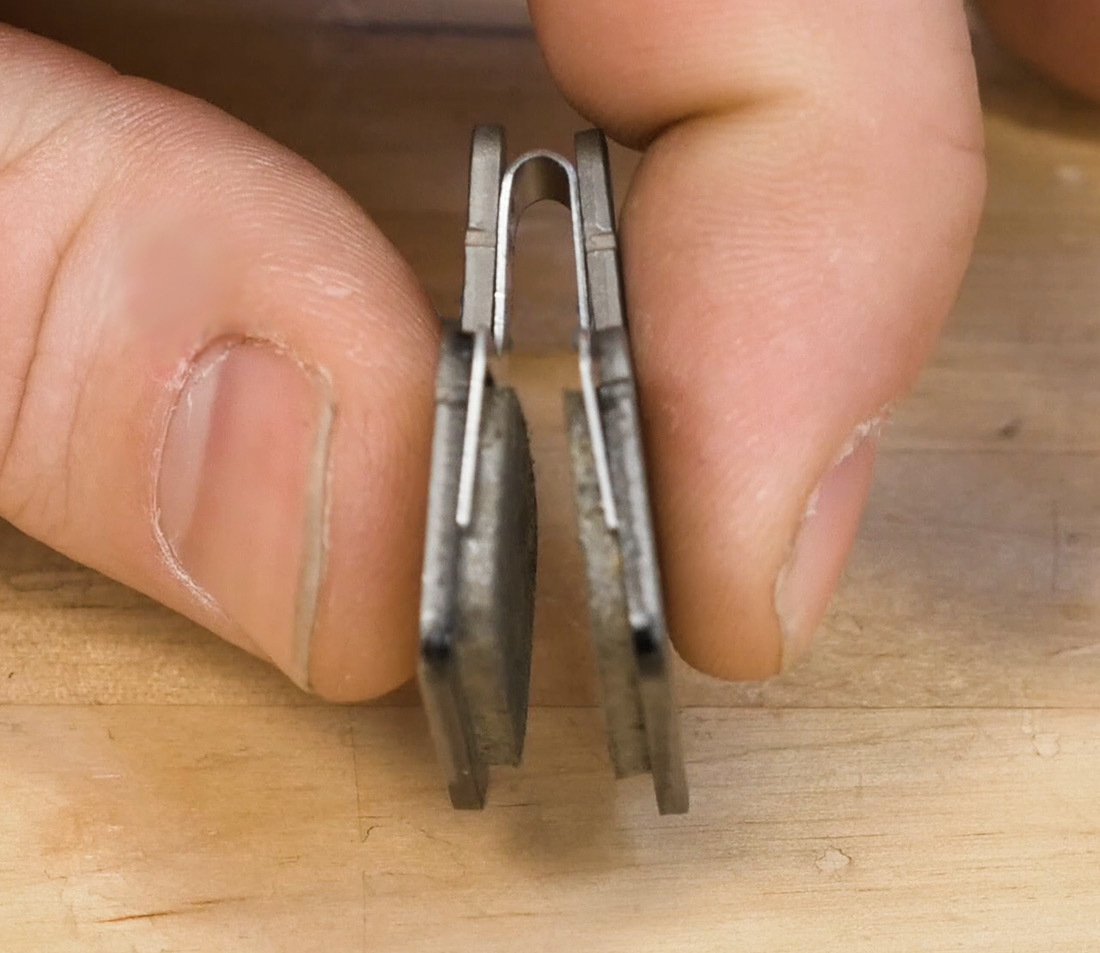
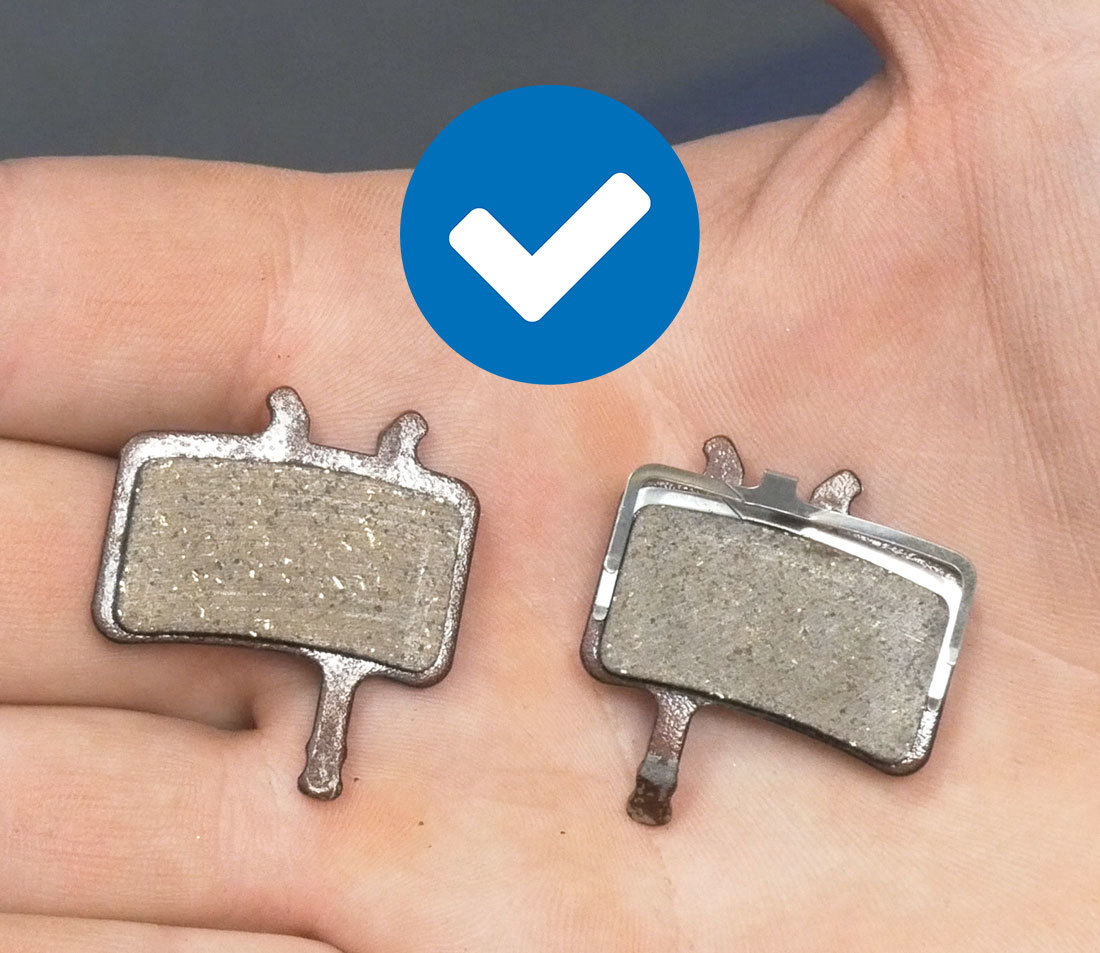
Generally, the pad material should measure at least 1mm thick. By stacking 3 business cards you can create a makeshift feeler gauge that is approximately 1mm.
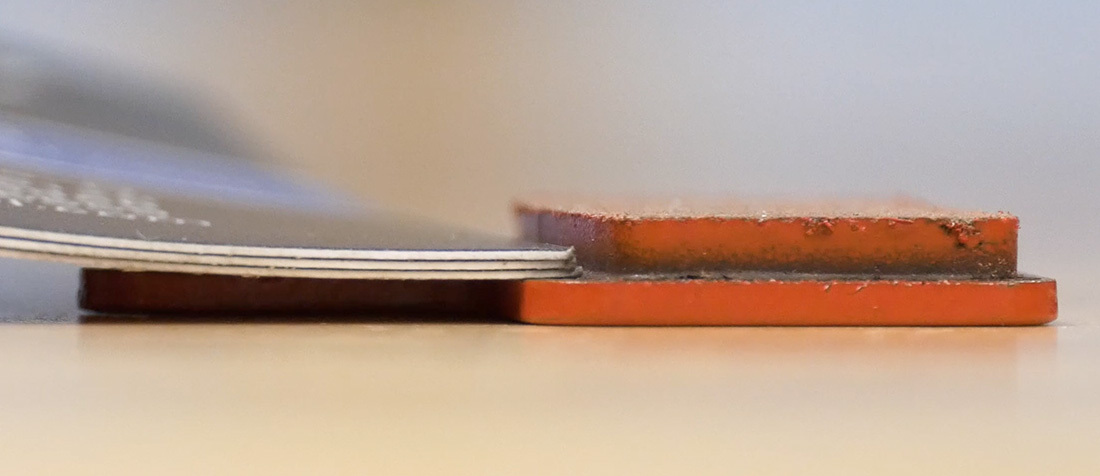
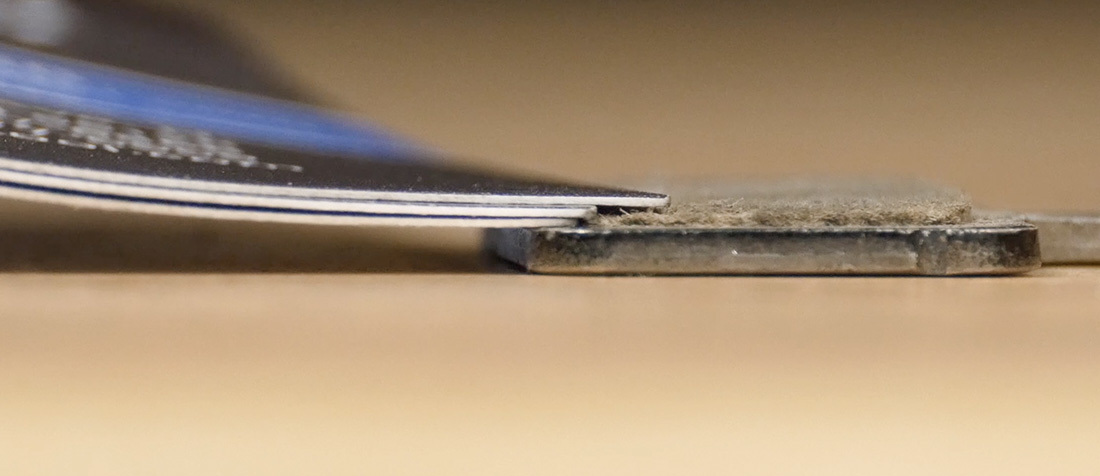
Check with the pad manufacturer for exact wear specifications, and use a caliper for accurate measurements.
Contamination
Contaminants such as brake fluids, oils or grease can ruin your pads, but they’re not always easy to see. Contaminated pads may cause problems such as a squeal, extra effort at the lever to slow down, or a darkness on the rotor and pads that smears when rubbed with a finger.
Always look for the source of the contamination. Some common sources are overspray from aerosol lubricants, or a leak in the hydraulic system.
Pad Material
Pads come in different materials — metallic, organic, and semi-metallic — each with their own advantages and disadvantages, as seen in the chart below:
| Organic | Semi-Metallic | Metallic | |
|---|---|---|---|
| Brake Noise | |||
| Initial Bite | ●●●●● | ●●●●○ | ●●●○○ |
| Rotor Longevity | ●●●●● | ●●●●○ | ●●●○○ |
| Pad Longevity (Dry Conditions) | ●●○○○ | ●●●○○ | ●●●●● |
| Pad Longevity (Wet Conditions) | ●○○○○ | ●●○○○ | ●●●●○ |
Keep in mind that there may be compatibility issues with certain rotor material and pad material combinations. Check for any such warnings on the components or packaging.
Finding the correct replacement pads for your system can be difficult. A good option is to bring the bike or pad into a good bike shop and ask for assistance. Otherwise look up your specific caliper model on the manufacturer’s website to find the correct pads. Alternatively, look for a replacement pad that looks identical in shape to your old pads. If it’s the same shape, it’ll likely work on your brake.
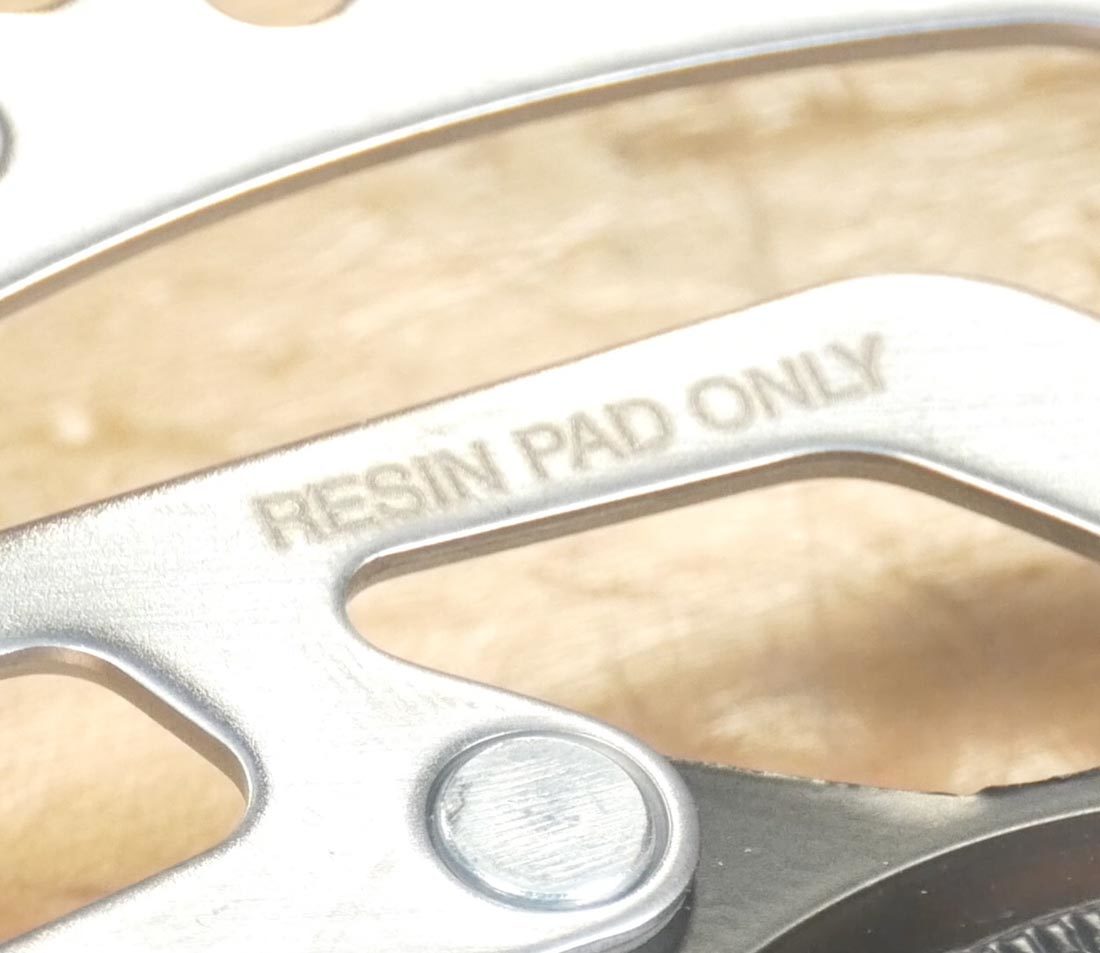
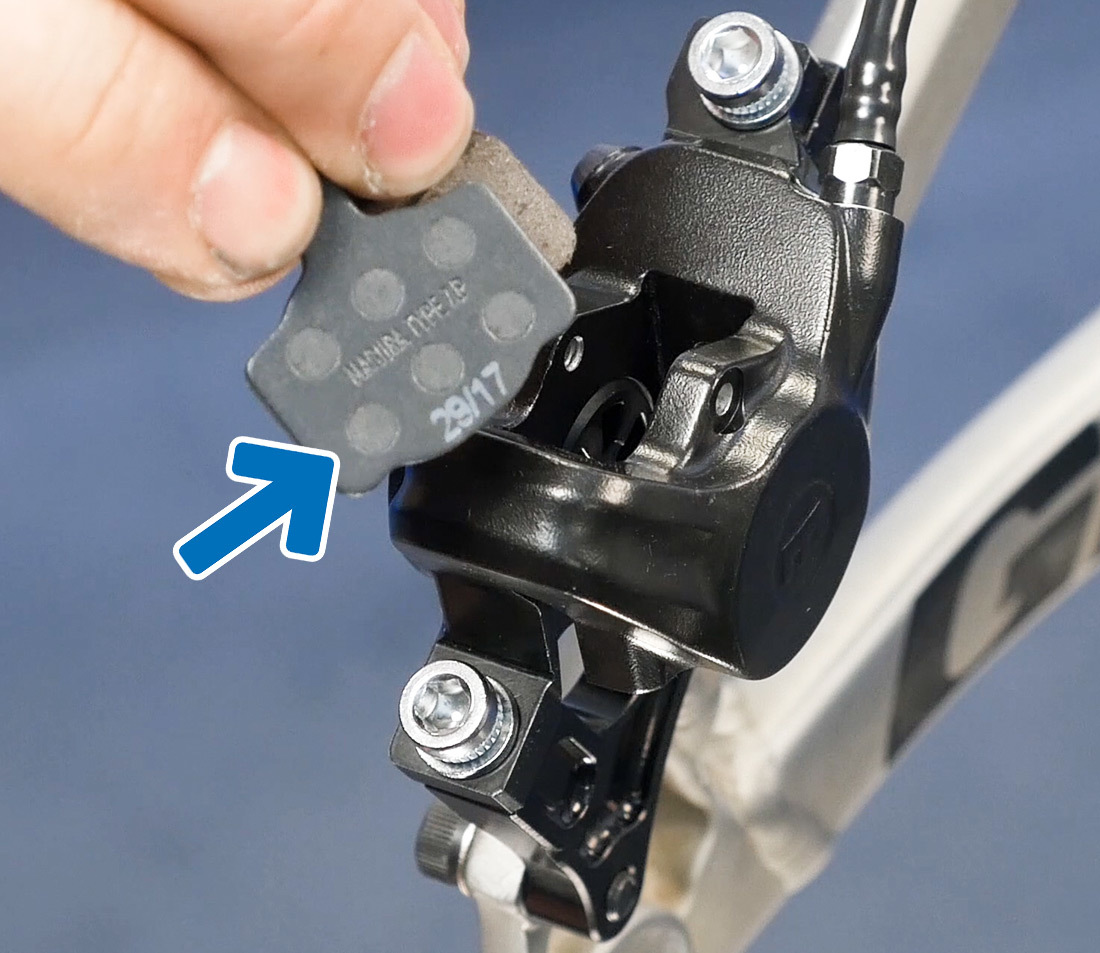
pad material specification printed on the rotor
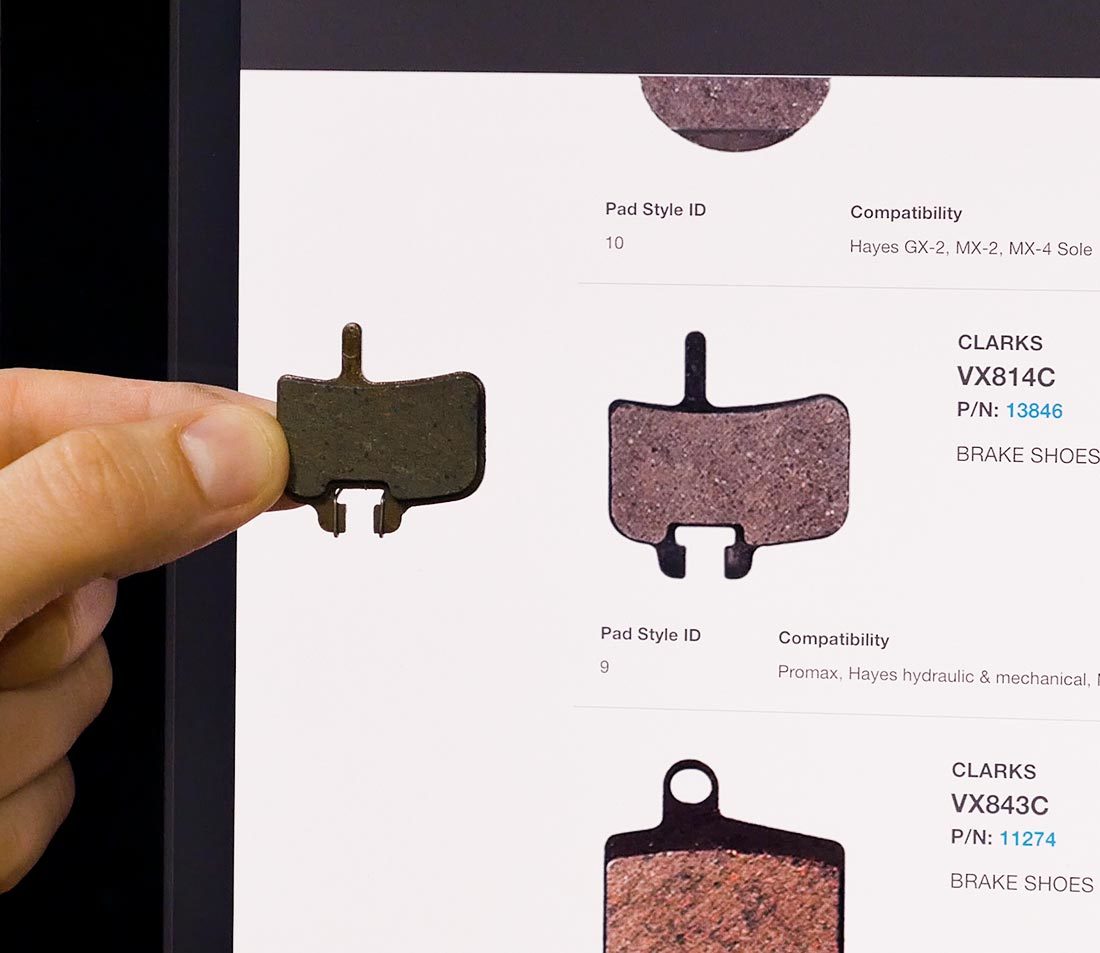
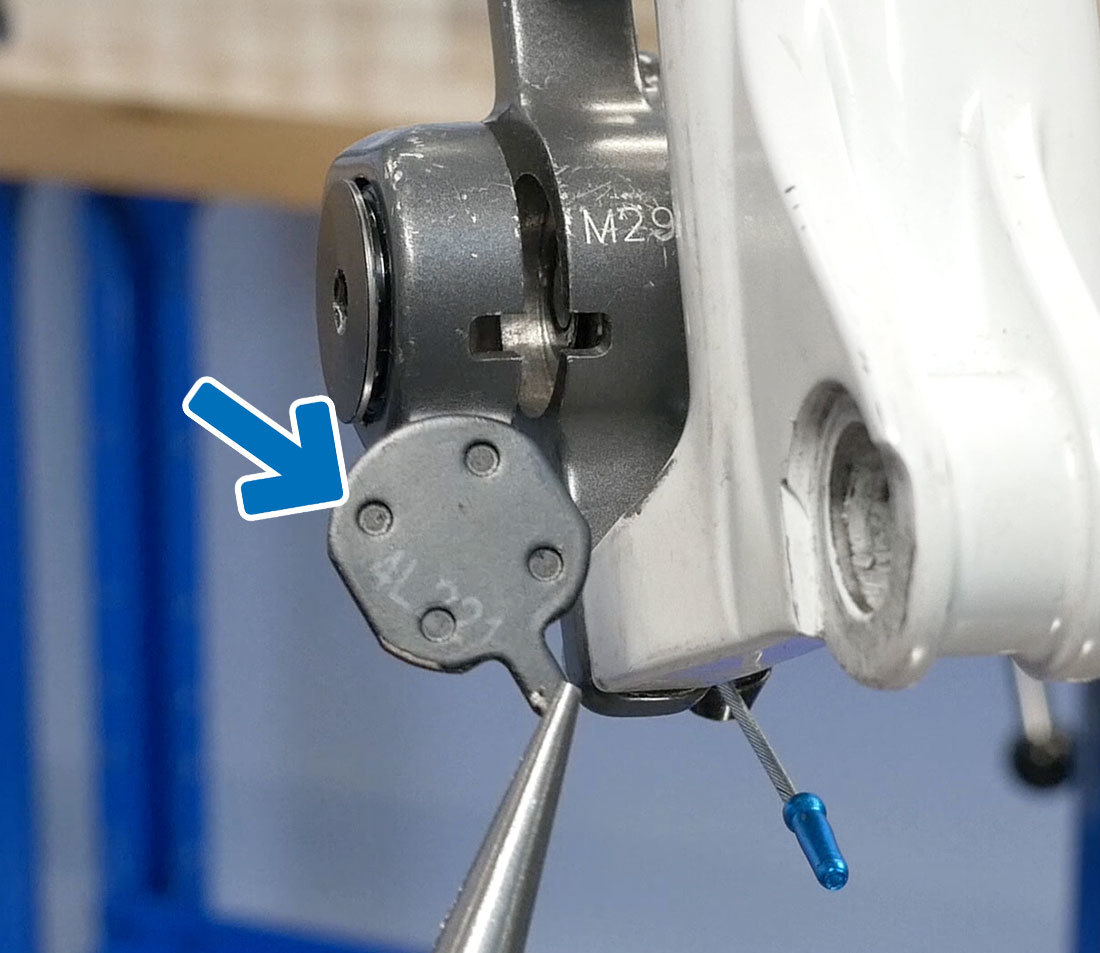
It can be useful to scroll through a retailer's website to find and purchase a compatible replacement pad
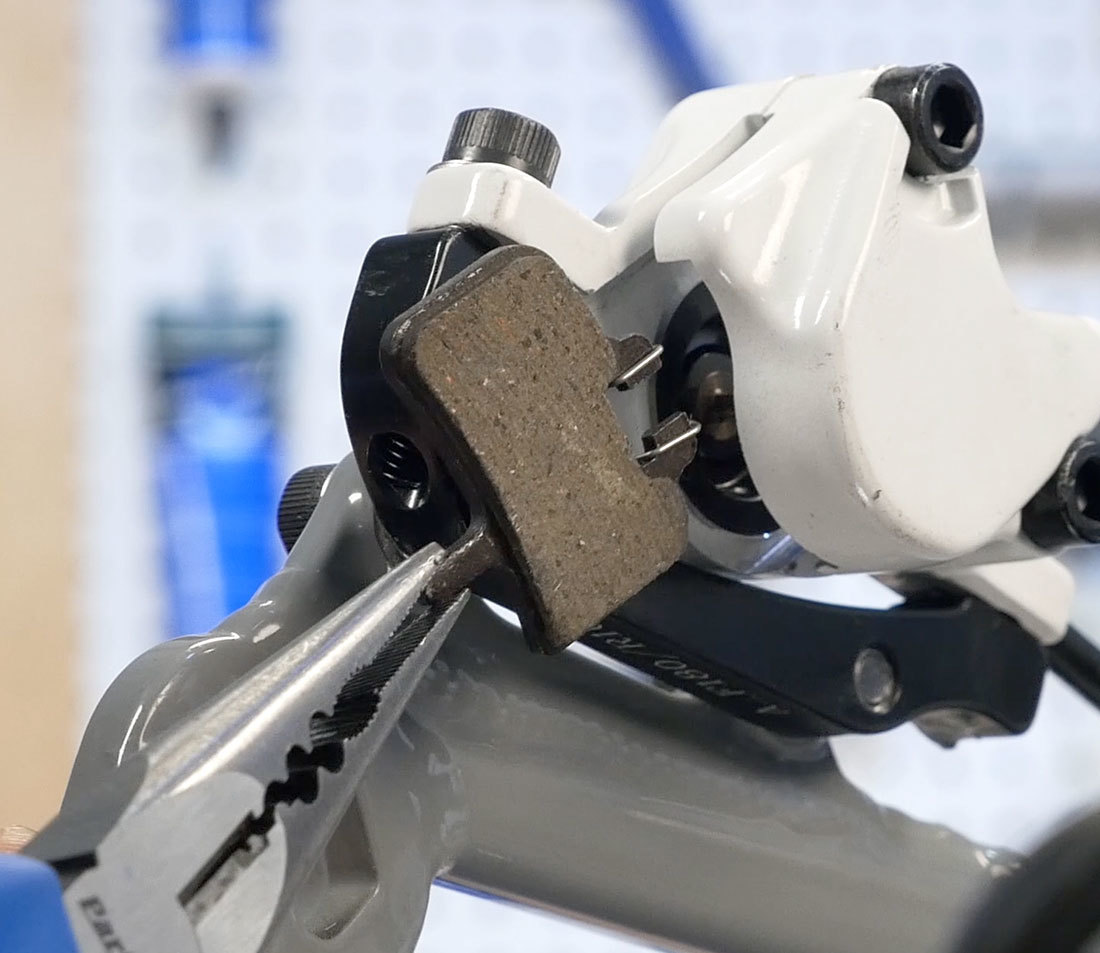
Pad Removal
Begin by mounting the bike in a repair stand and removing the wheel.
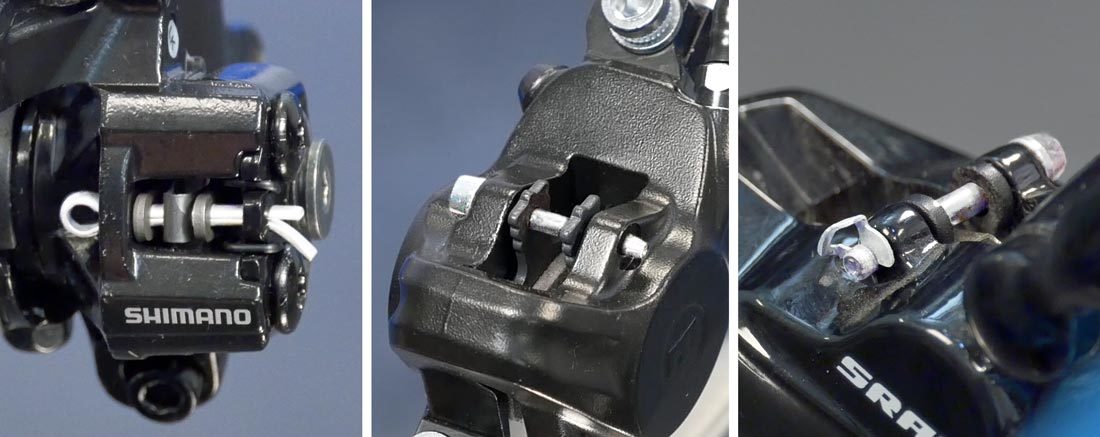
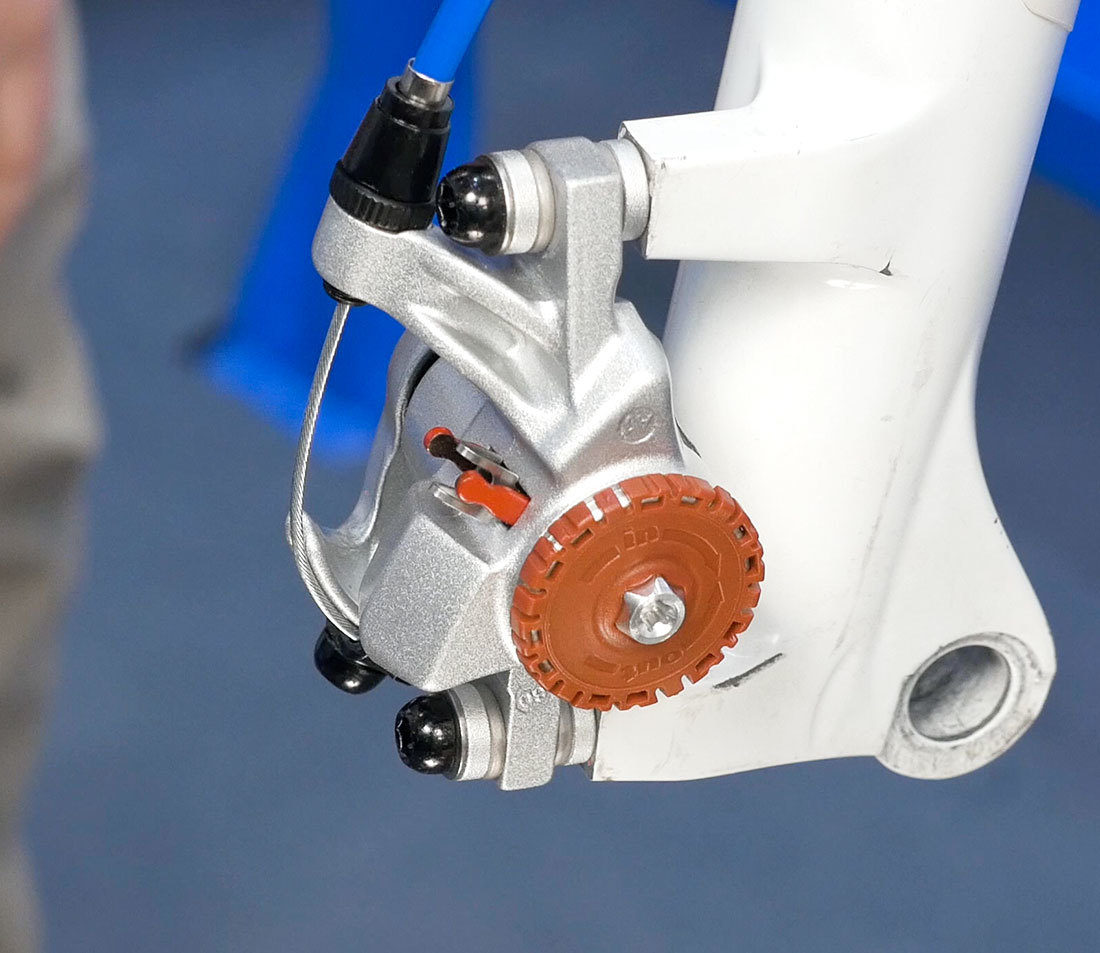
There are a multitude of common brake caliper designs. This article will highlight some of the key things that may be present on your system.
NOTE: Pay attention to the orientation of parts, because this process will be reversed for installation.
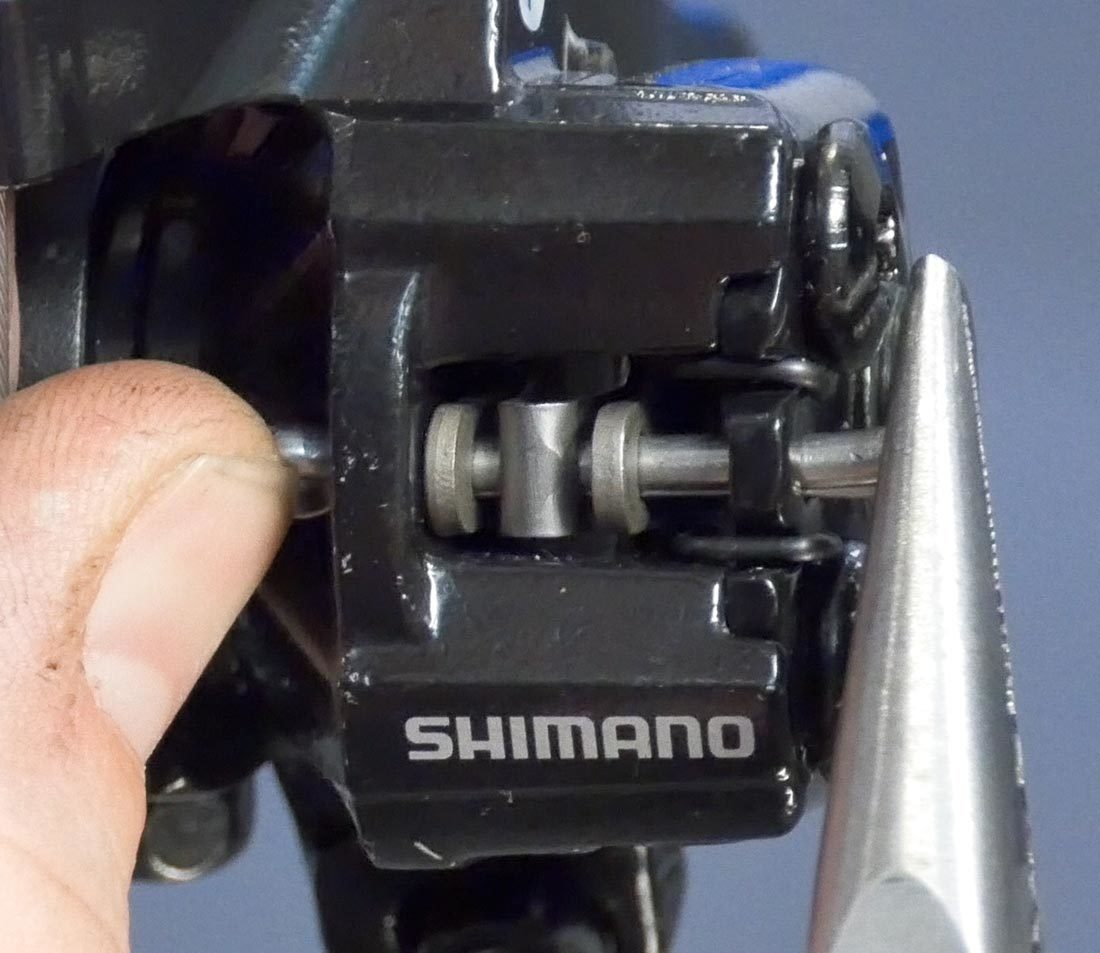
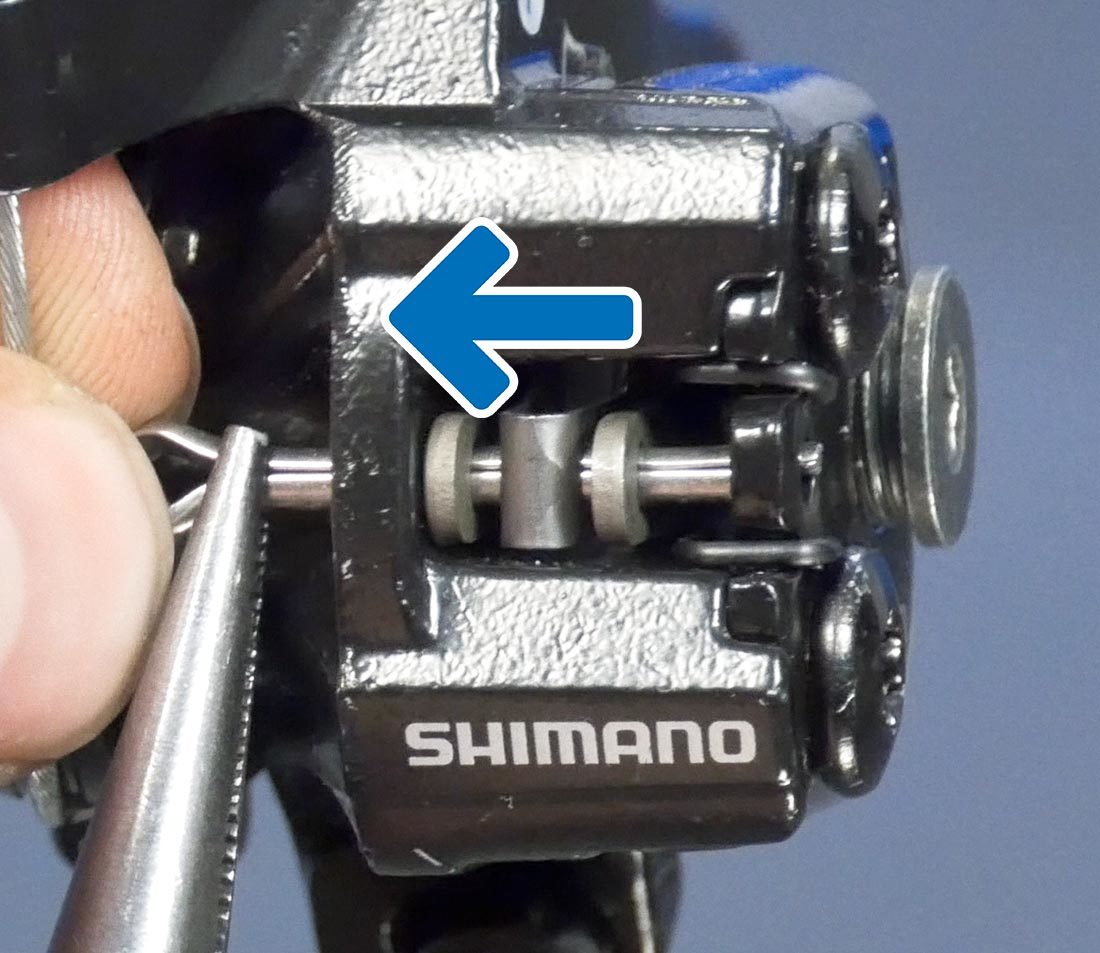
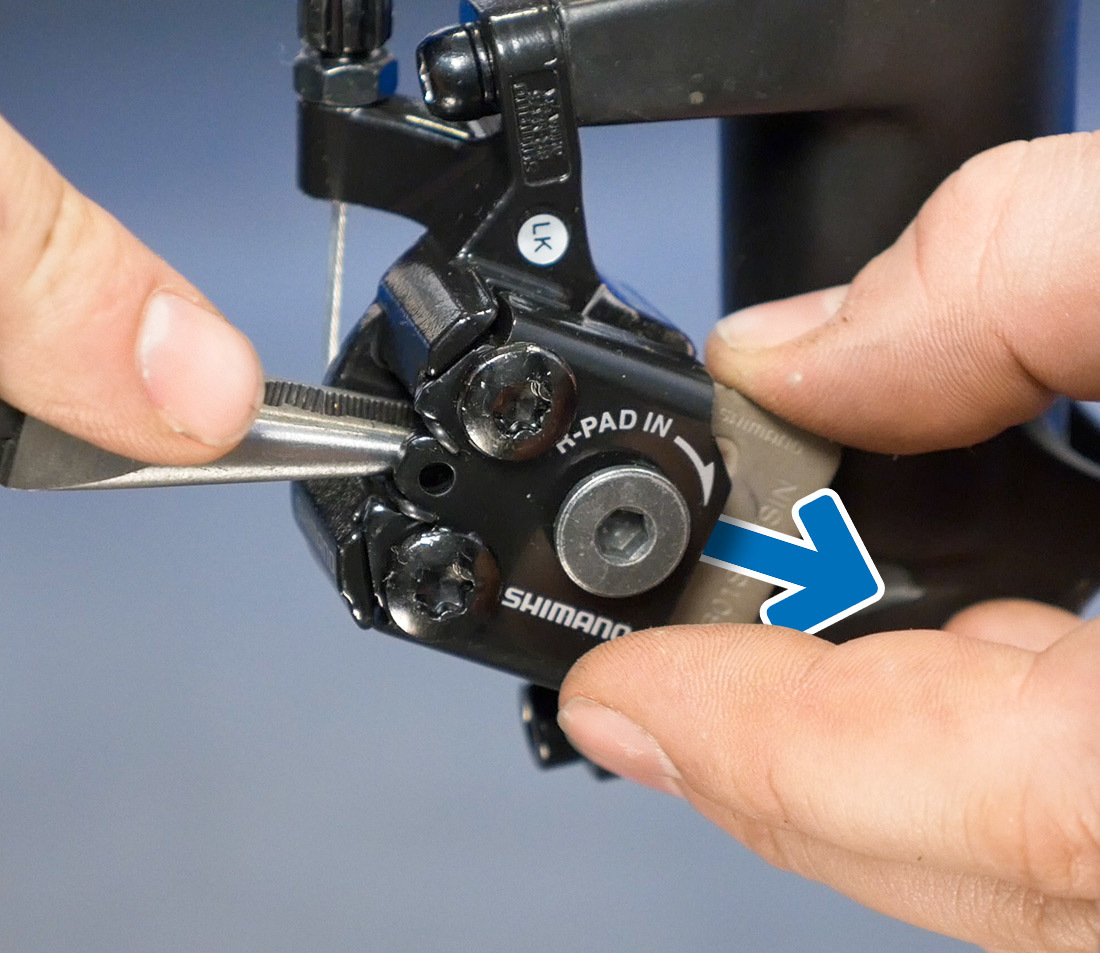
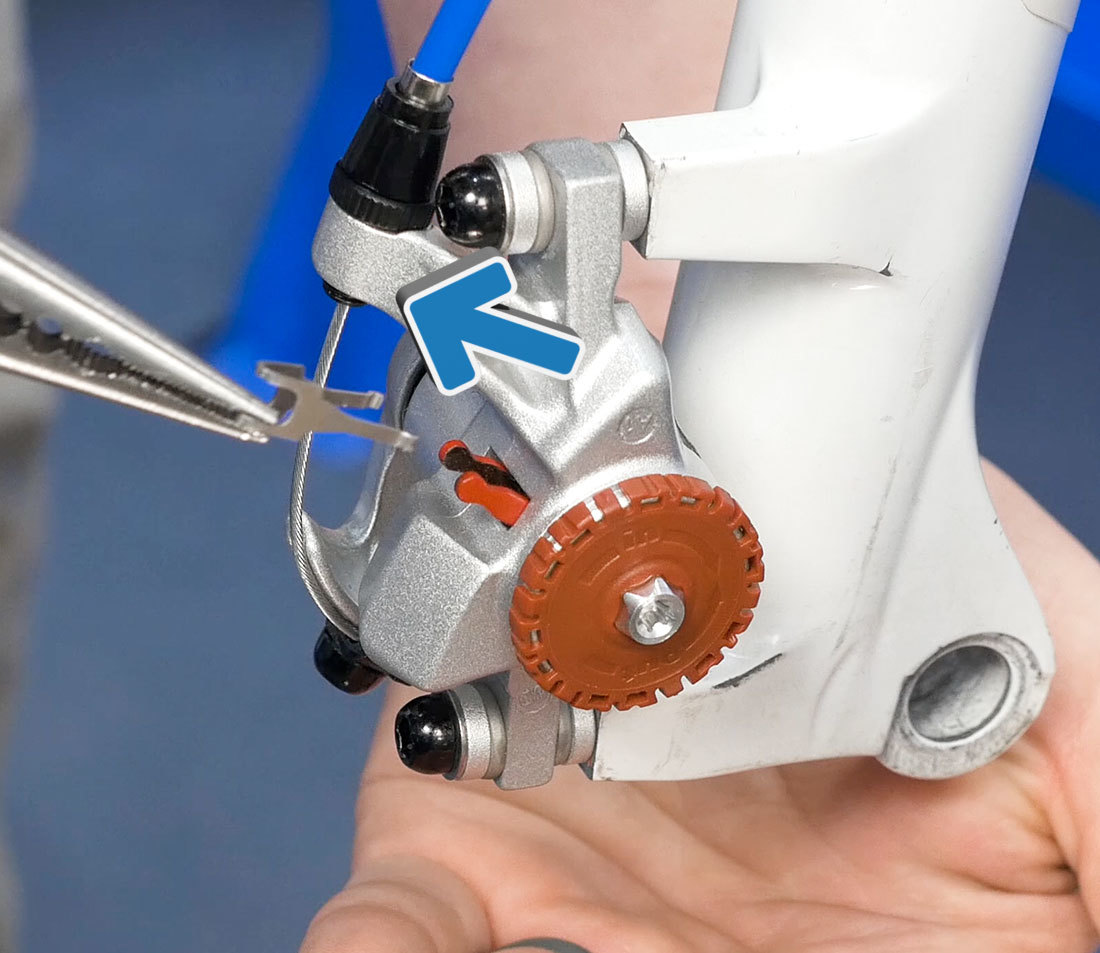
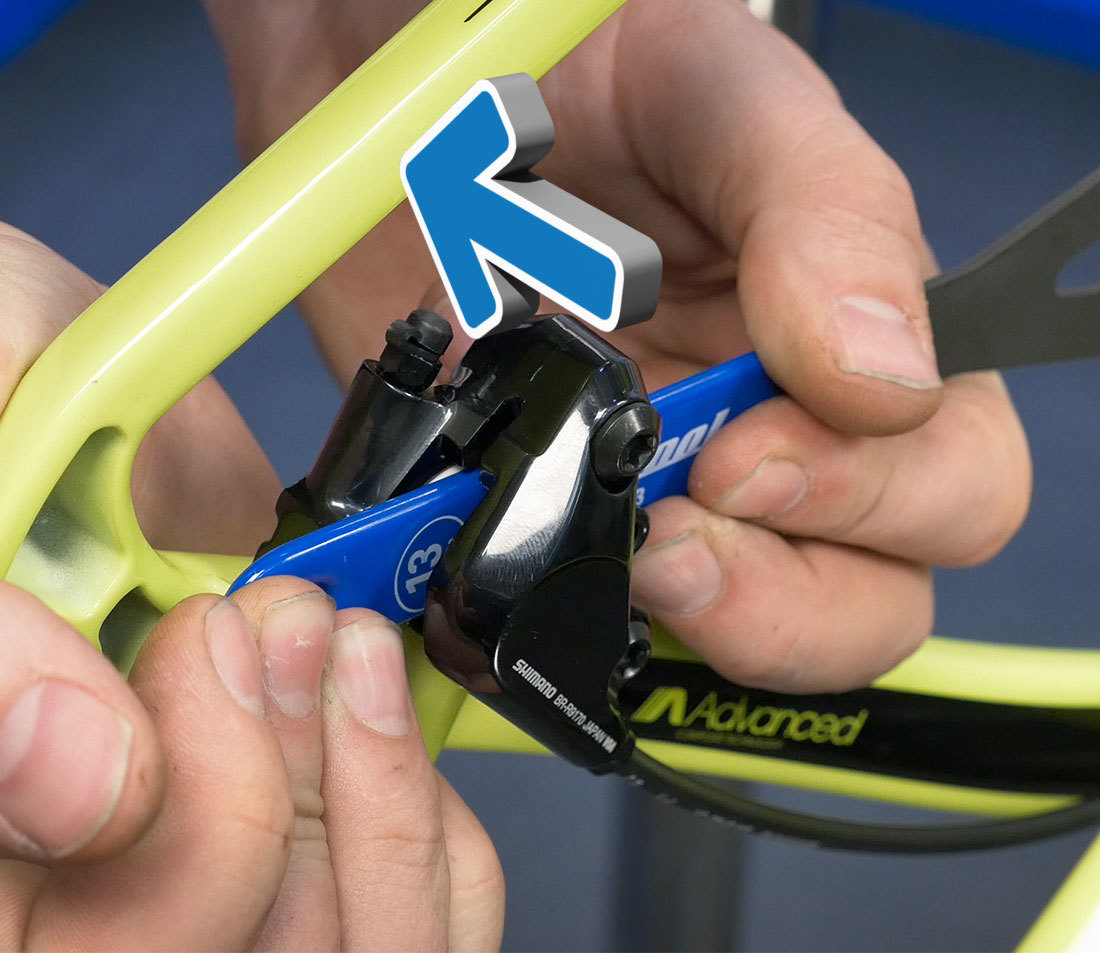
Retaining Pin
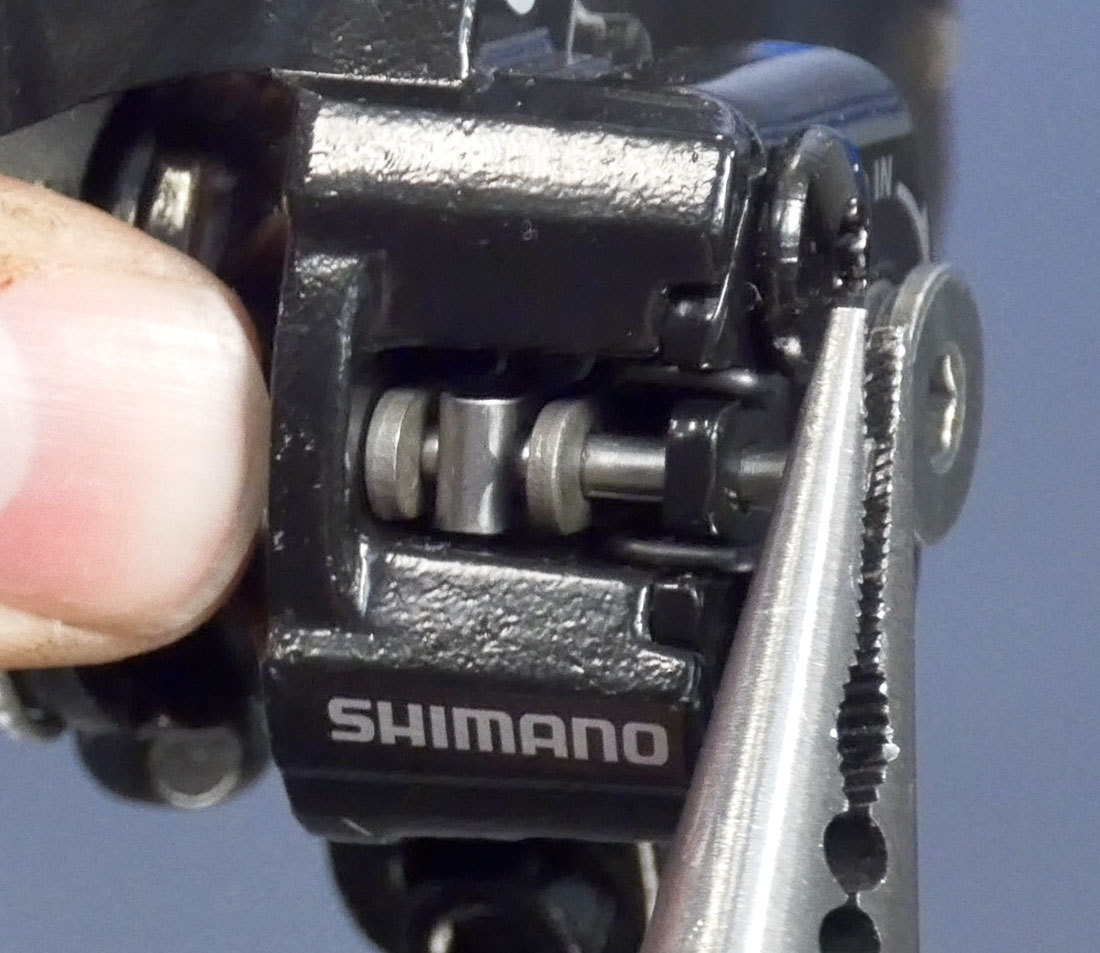
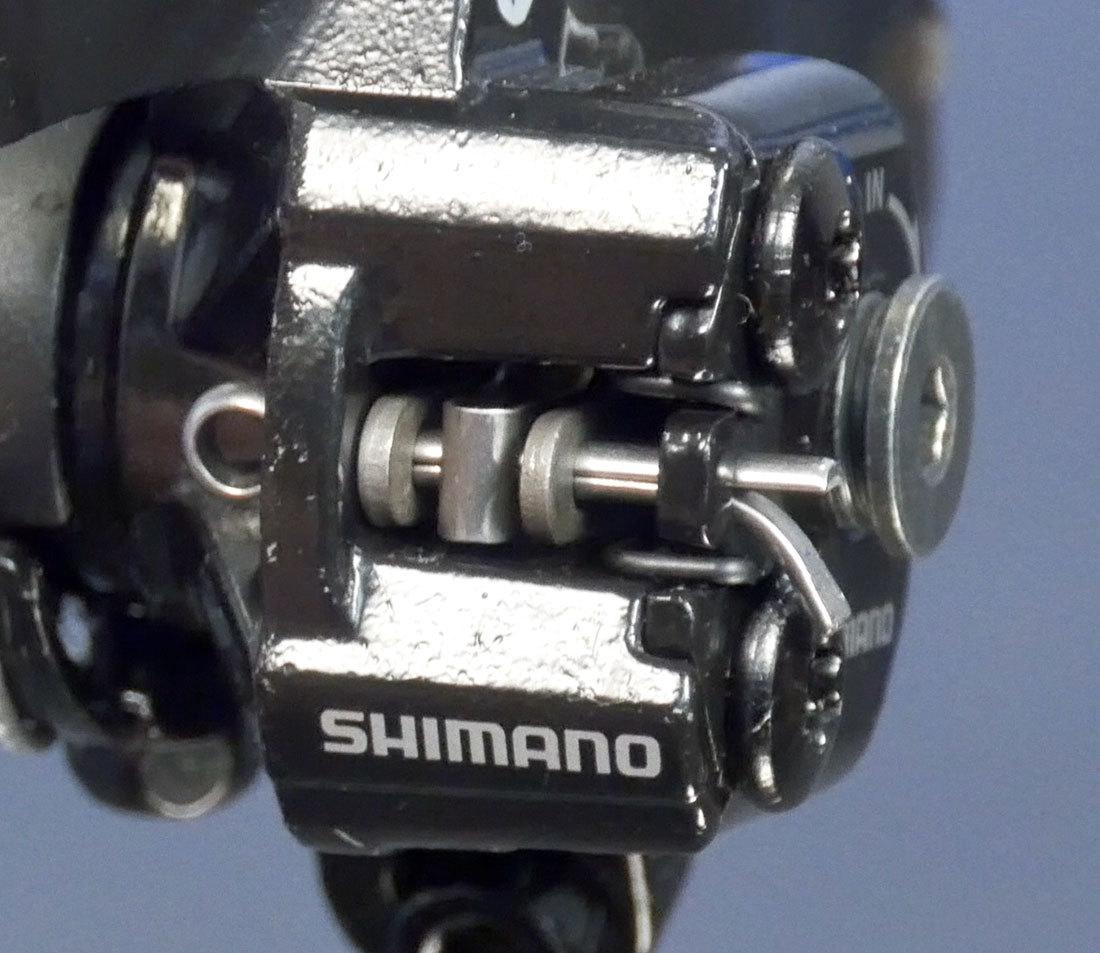
Some caliper designs use a a retaining pin to secure the pads. If one is present remove it.
This design uses a cotter pin. Bend the ends straight to remove.
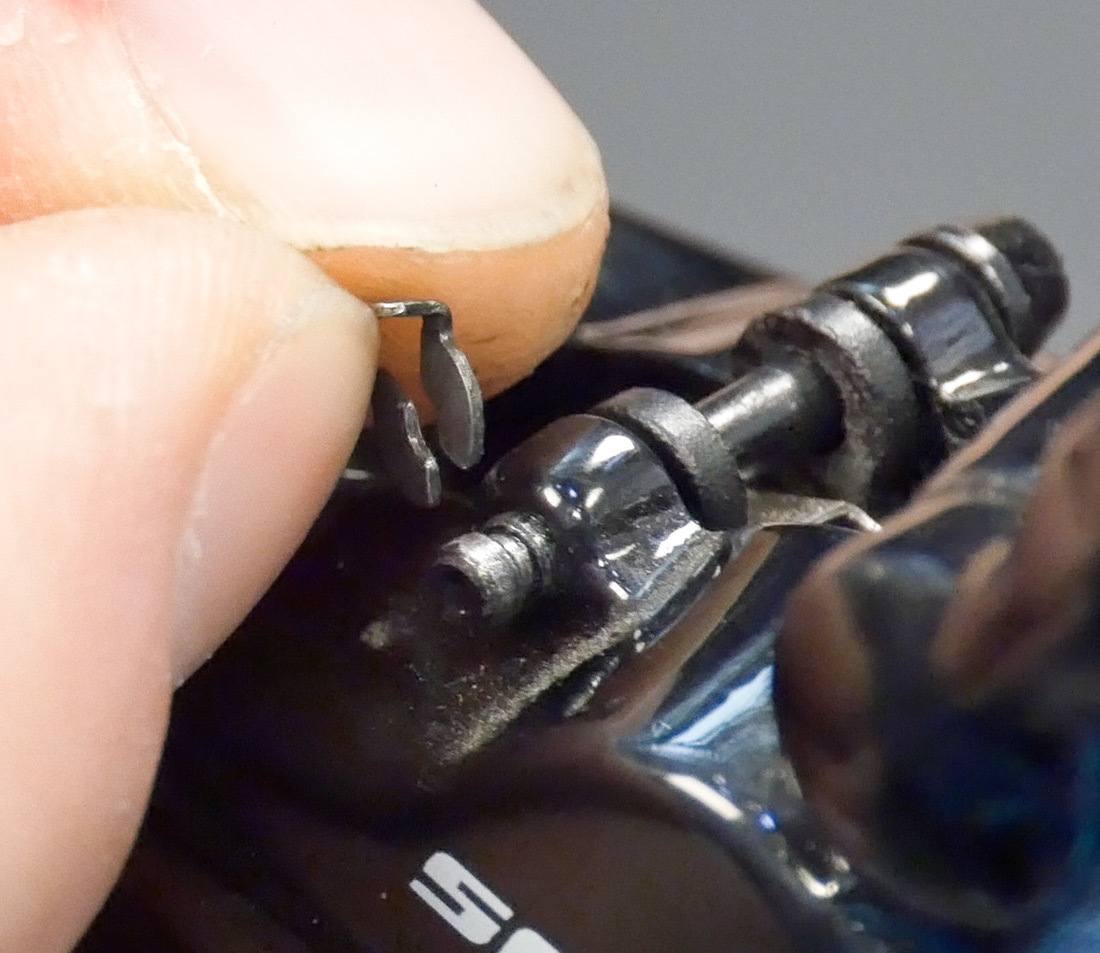
Some designs have a pin clip. If so, remove it before removing the retaining pin.
Springs
Some pads systems use a spring that is removed with the pads. Note that new pads come with a new spring.
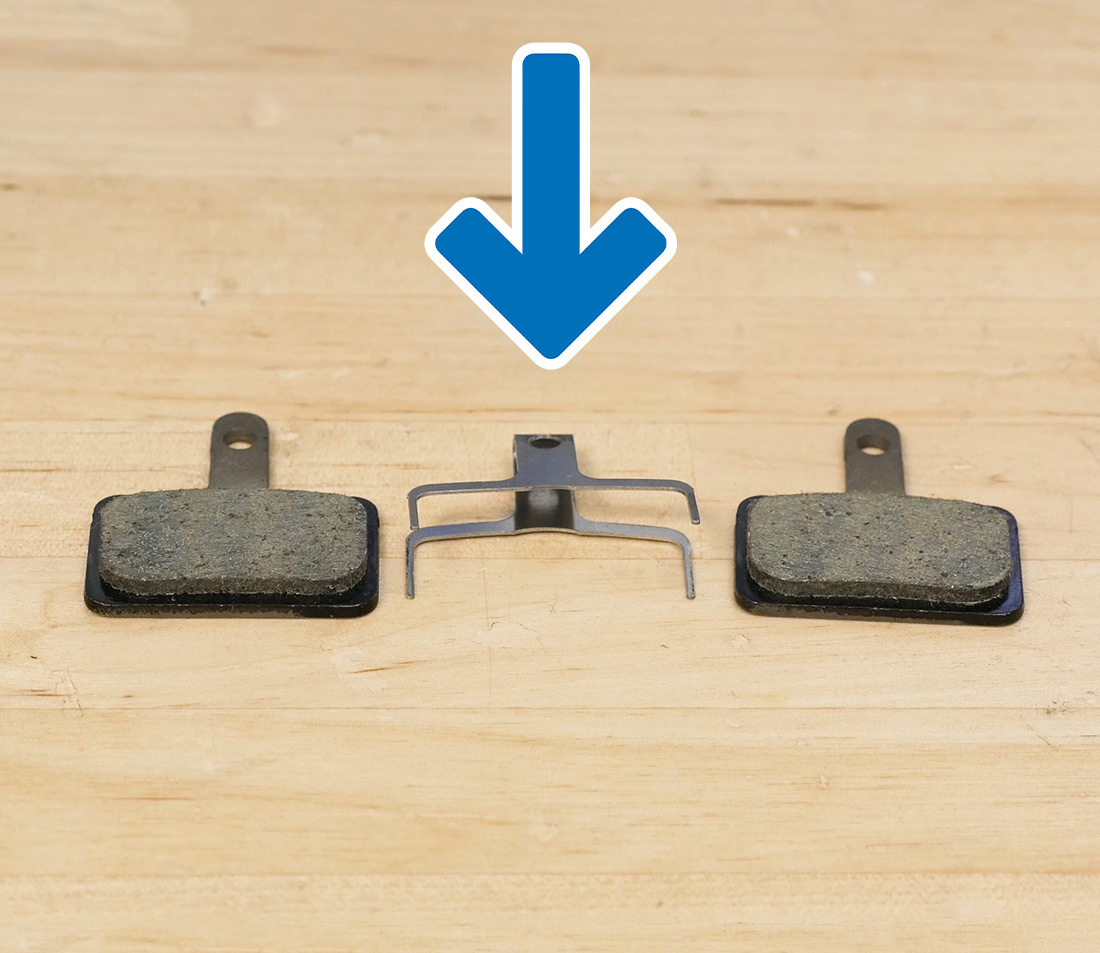
Set of Pads with spring
Pads & Spring assembled and ready to install
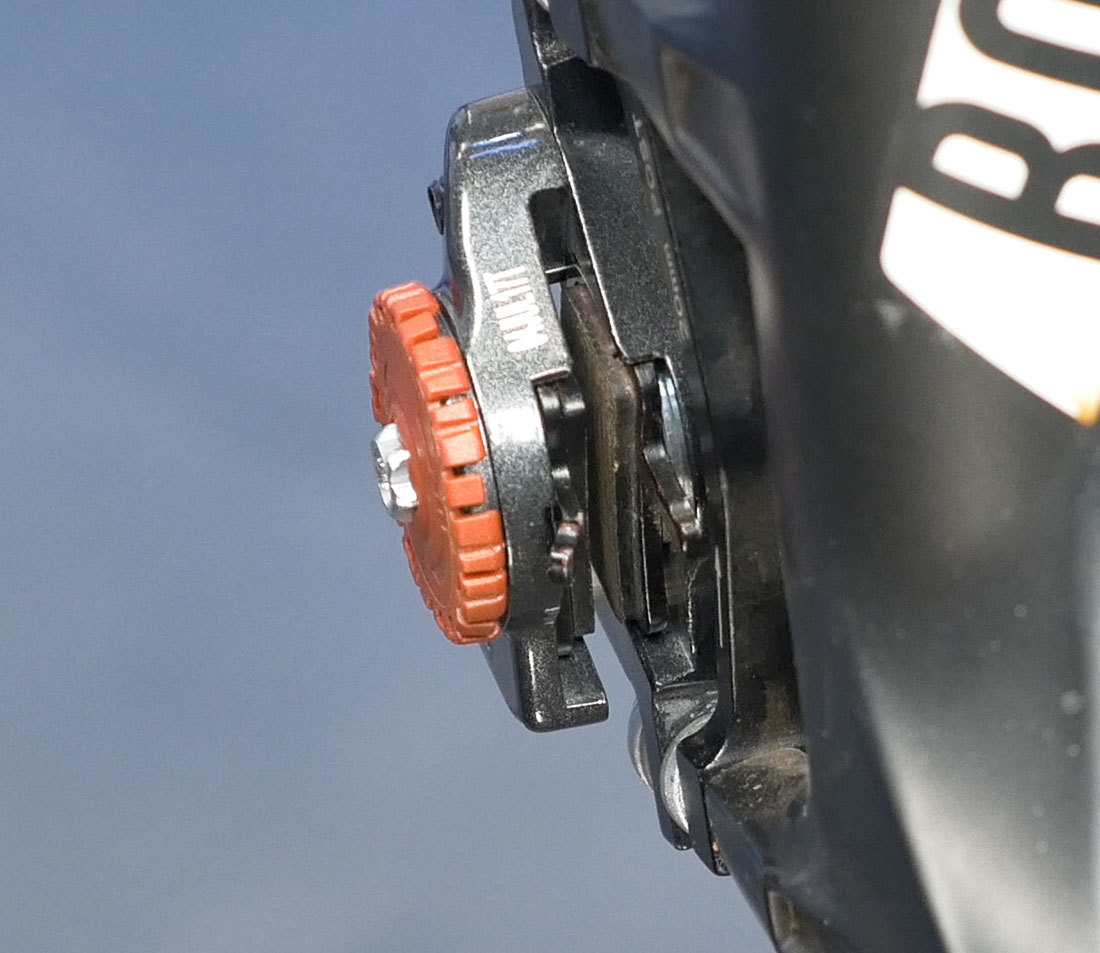
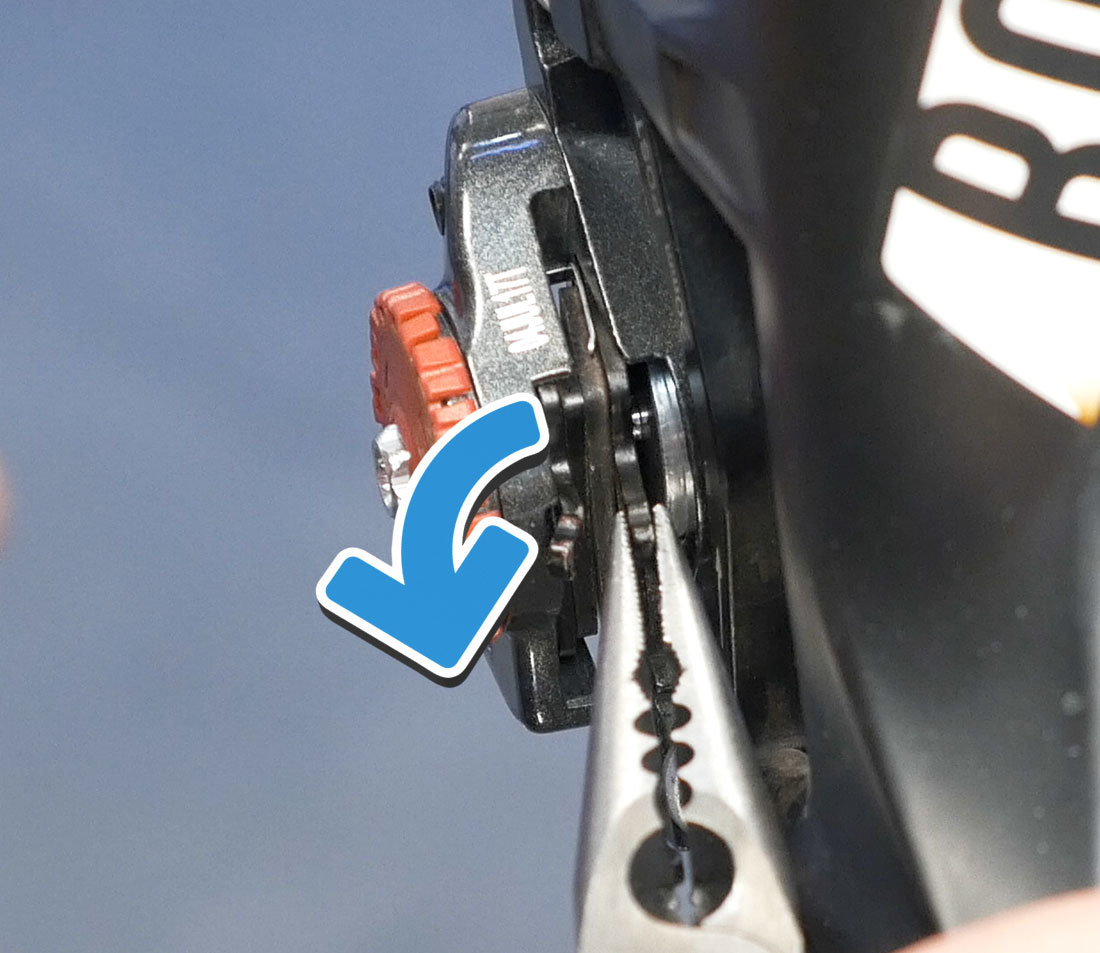
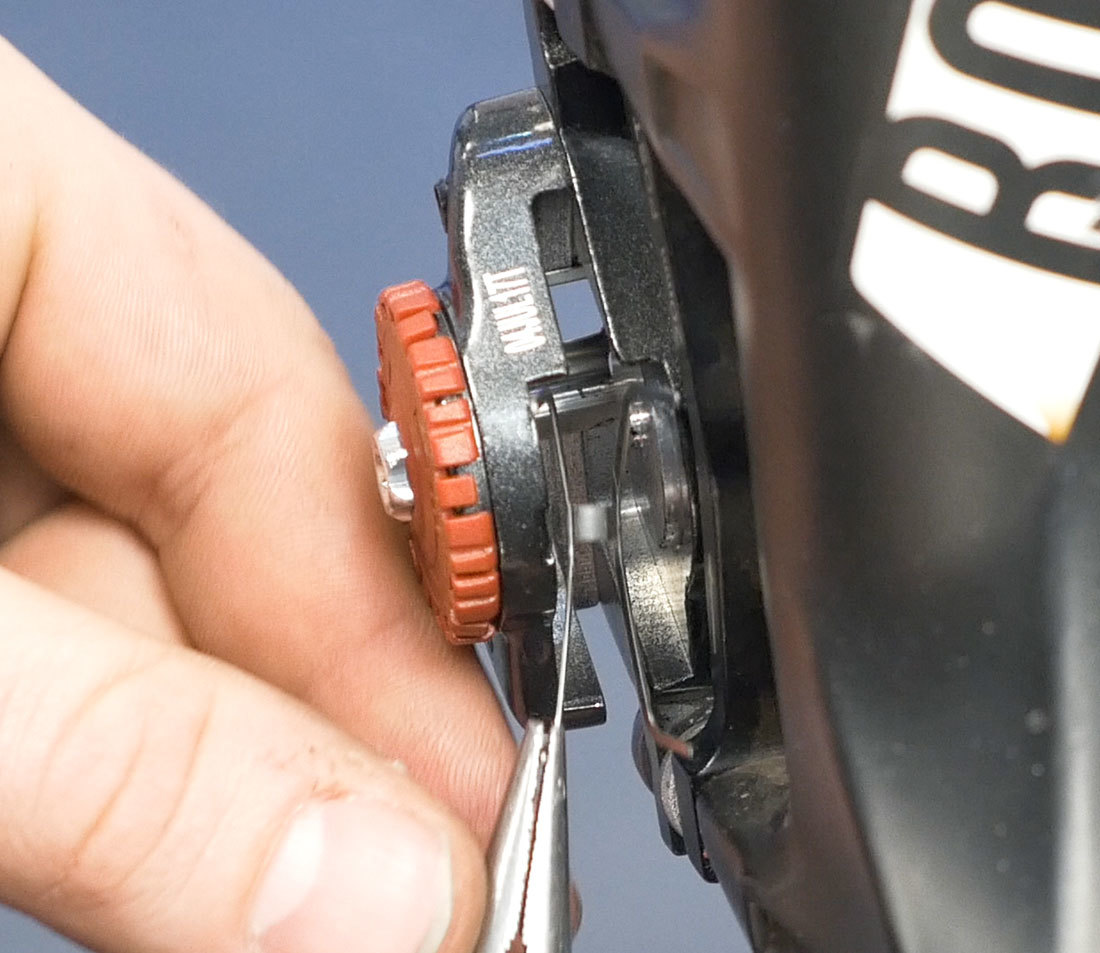
Magnets
Some designs use a magnet to hold the pads against the pistons. Magnets may be found on calipers with or without a retaining pin.
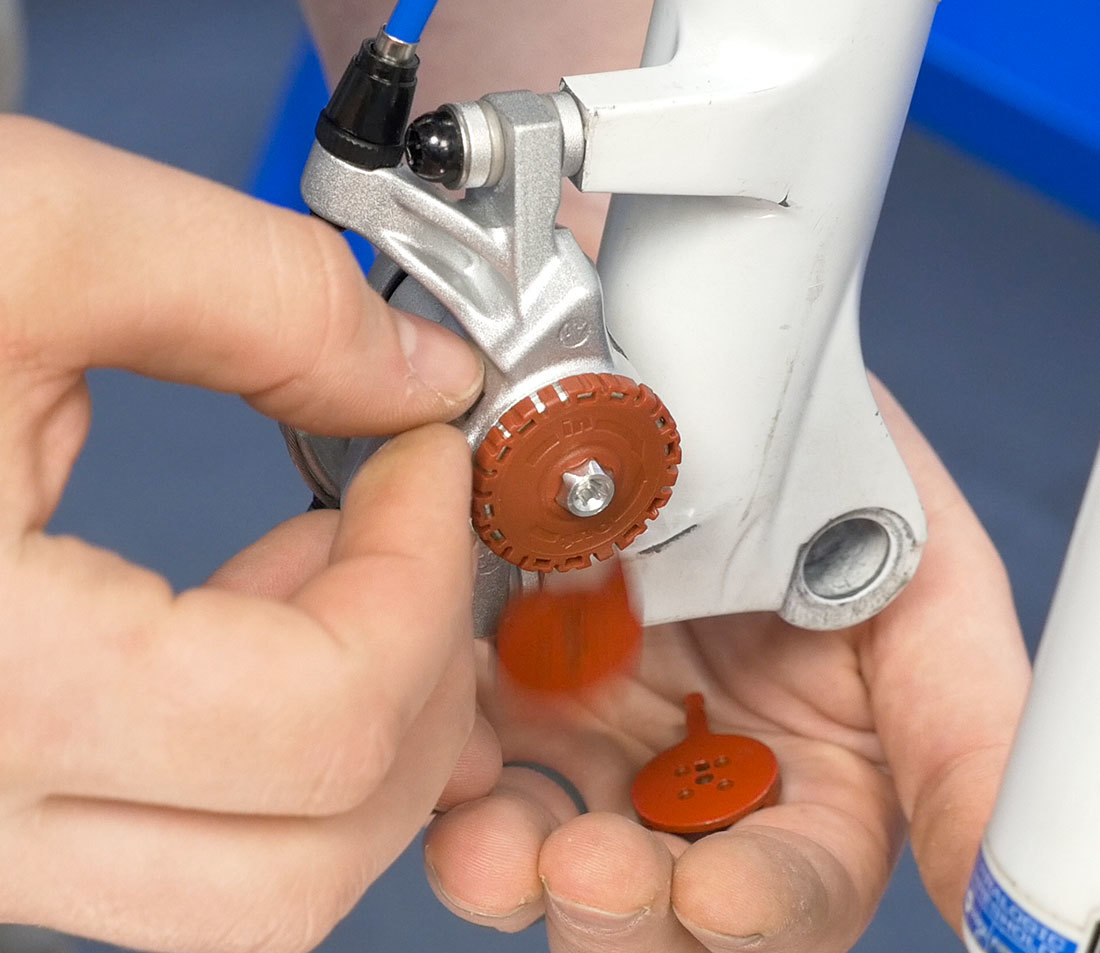
The design below has an additional consideration. If the outer pad is removed first, the inner pad will come out easier. If the pads are still getting stuck, it can also help to bring the pad adjuster all the way out.
Clips
This design uses a clip on the pad to hold it in place. It may take some force to remove the clipped pads.
Other Design Considerations
For this design you will grab the pad and move it inwards, and then pull. Remove the spring as well.
This design can be tricky

First, push the outer pad to the center and pull to remove
next, push the inner pad to the center and pull to remove
Be sure to remove the clip
This design is a bit unique. Remove the spring first from the top, then the pads can be removed from the bottom.
Caliper Preparation
Before installing the new pads, we need to fully retract the pistons. This makes room for the extra pad material on the new pads.
Hydraulic
For hydraulic calipers, press the pistons back into the caliper body. If you don’t have a purpose-built tool such as the PP-1.2 Piston Pad Spreader, use a flat non-marring tool such as a tire lever or cone wrench. If you accidentally squeeze your brake lever at any point in the process with the wheel removed, the pistons will come back out and you will need to repeat pressing them into the caliper.
- NOTE: The TRP High Road caliper should be treated like it is hydraulic. Even though there is a cable, the internals are hydraulic.
- NOTE: If you have have a flat mount Shimano hydraulic brake, take extra care to apply even pressure on the pistons so as not to damage the ceramic pistons.
PP-1.2 Pad Spreader
Cone wrench
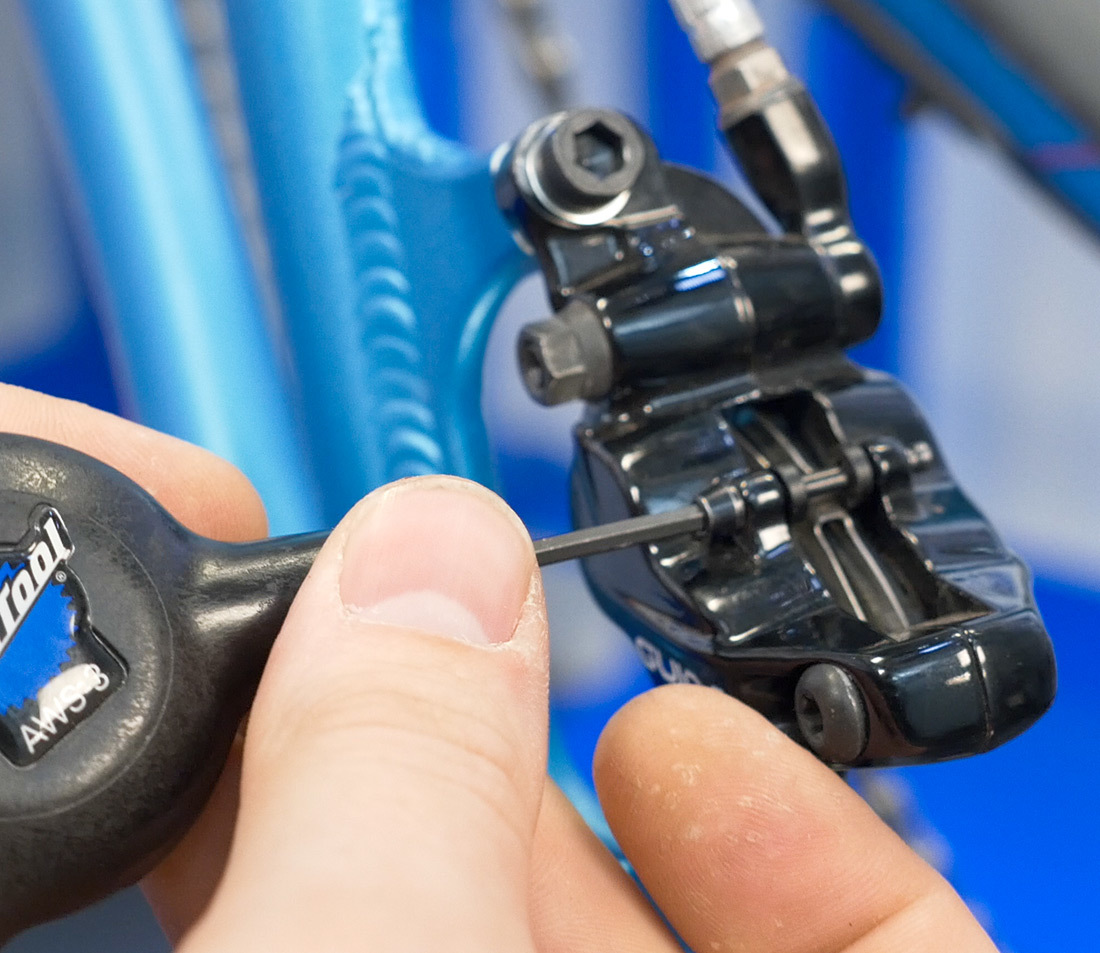
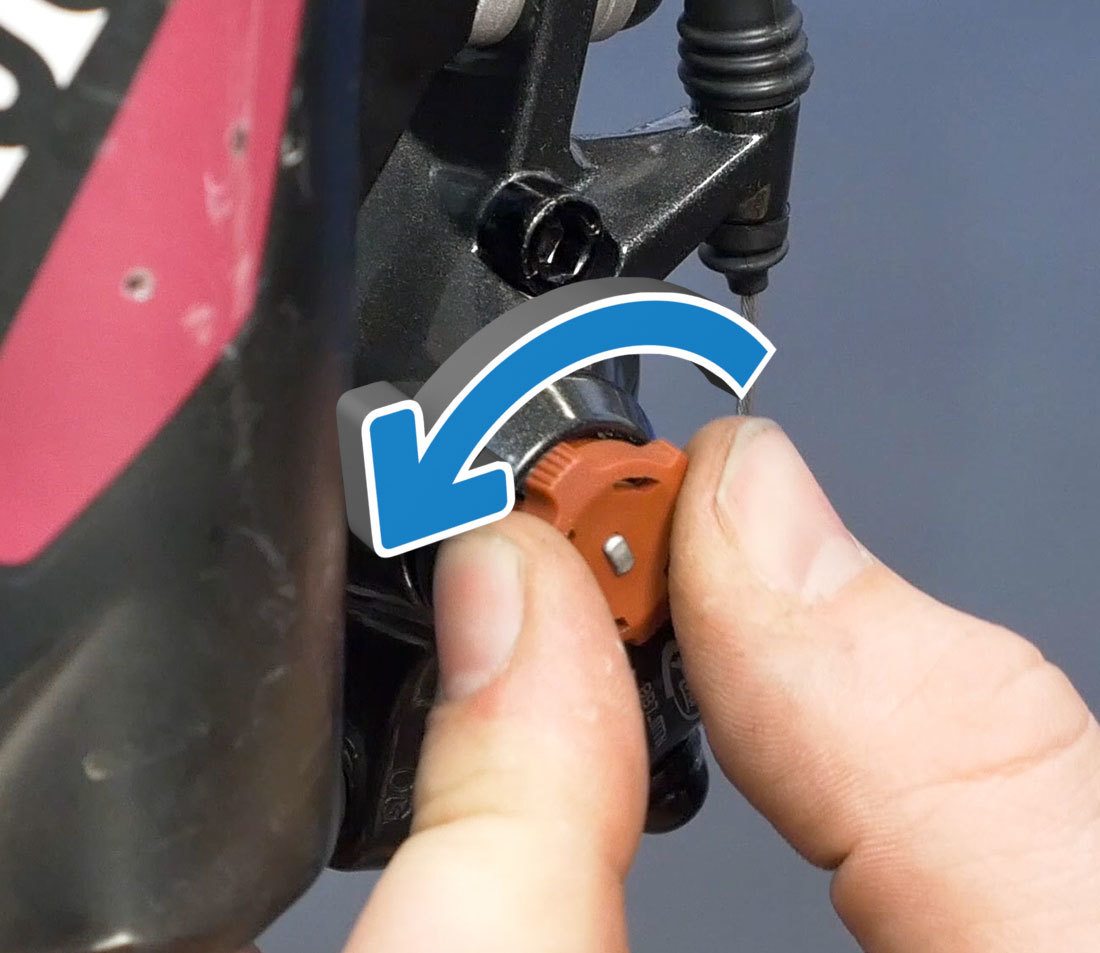
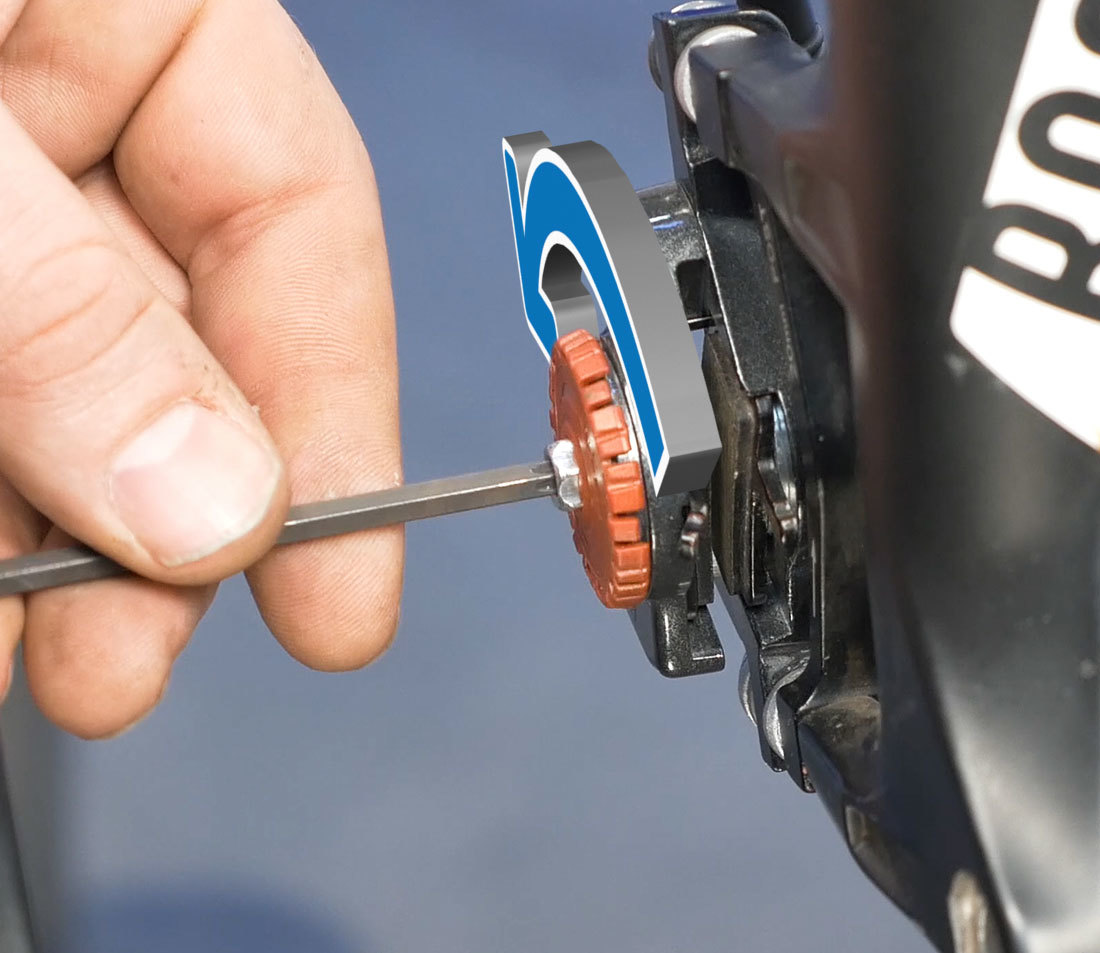
Mechanical
For mechanical calipers, turn the pad adjuster(s) counter-clockwise until they stop.
Pad Installation
The steps for pad installation are simply the steps for removal in reverse.
Keep the following in mind:
Installation order
If the pads required one pad to be removed before the other could be removed, reverse this order for installation.
Clips
It may take some force to install the clipped pads.
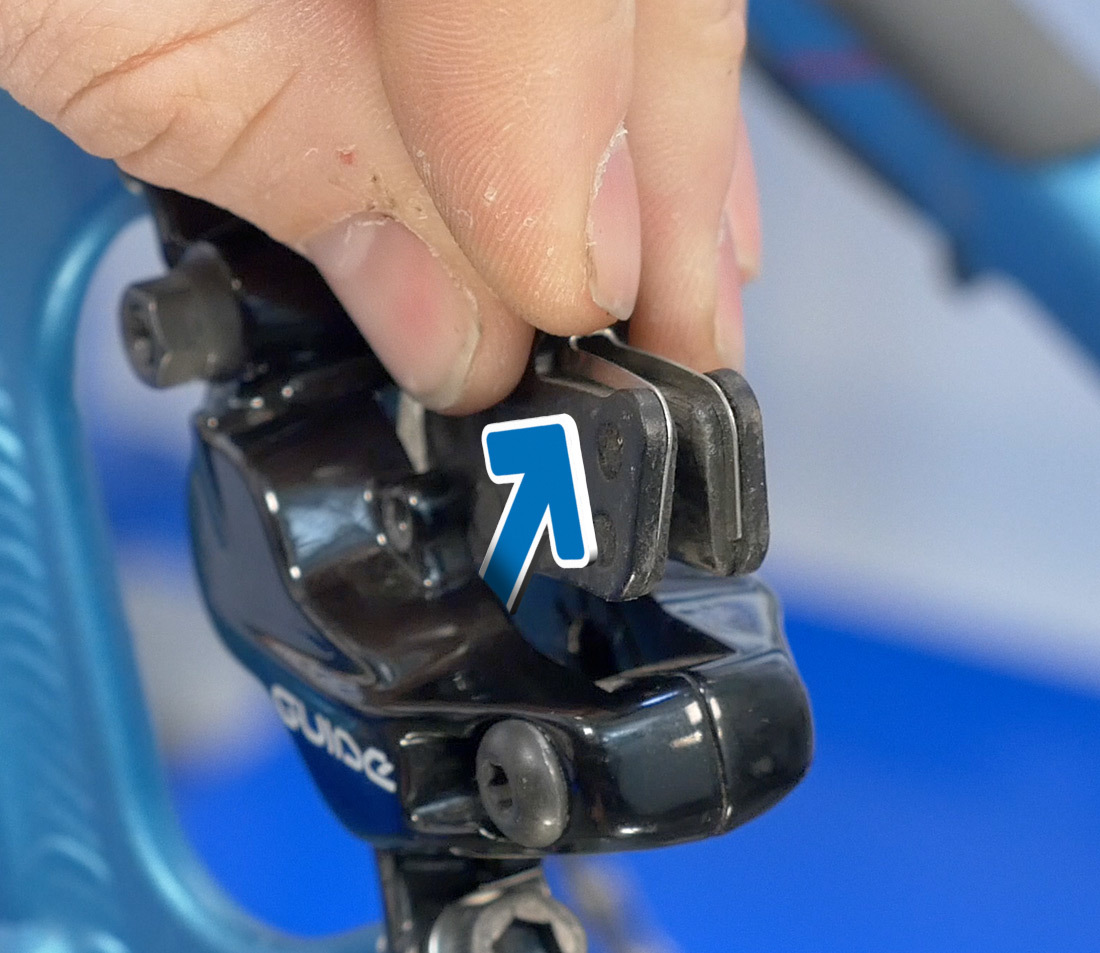
Springs
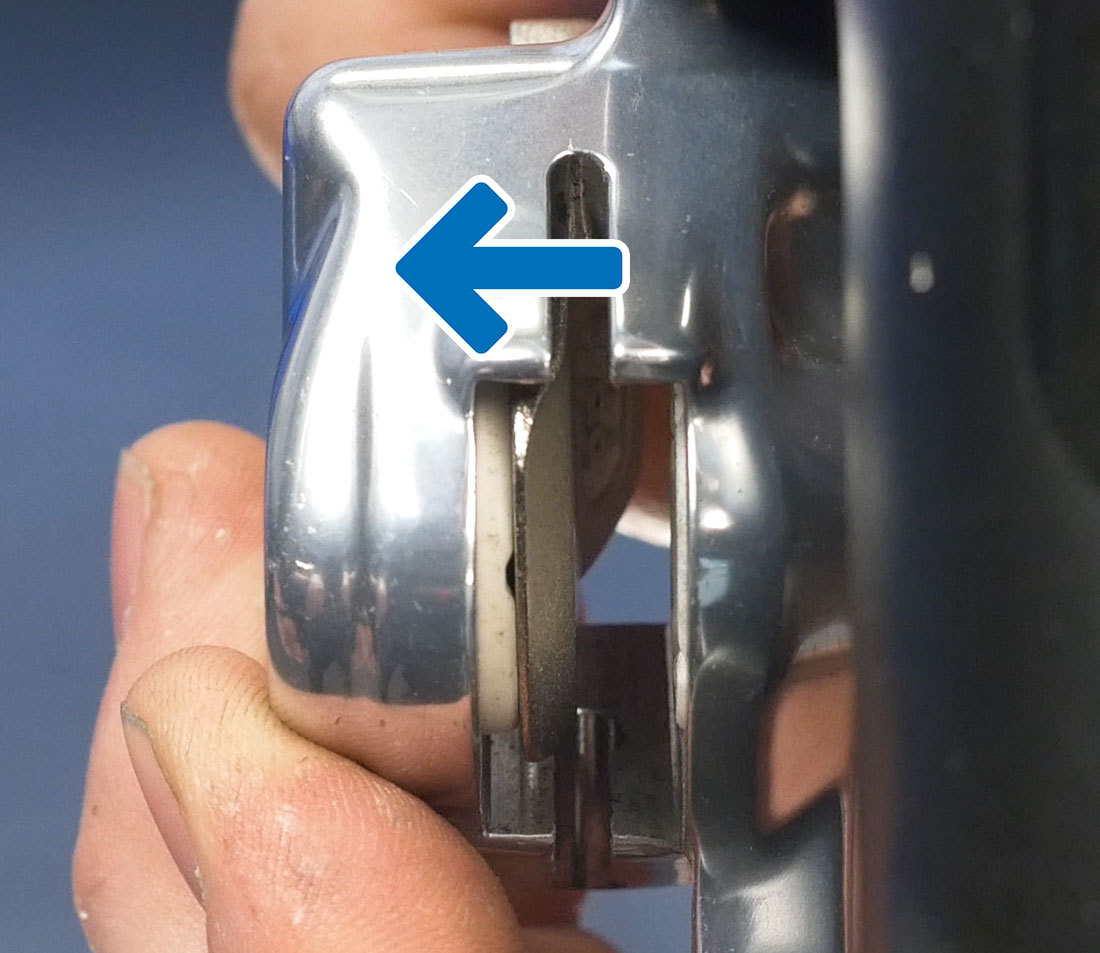
Some springs have a correct and incorrect orientation. This information should be included with the pad packaging.
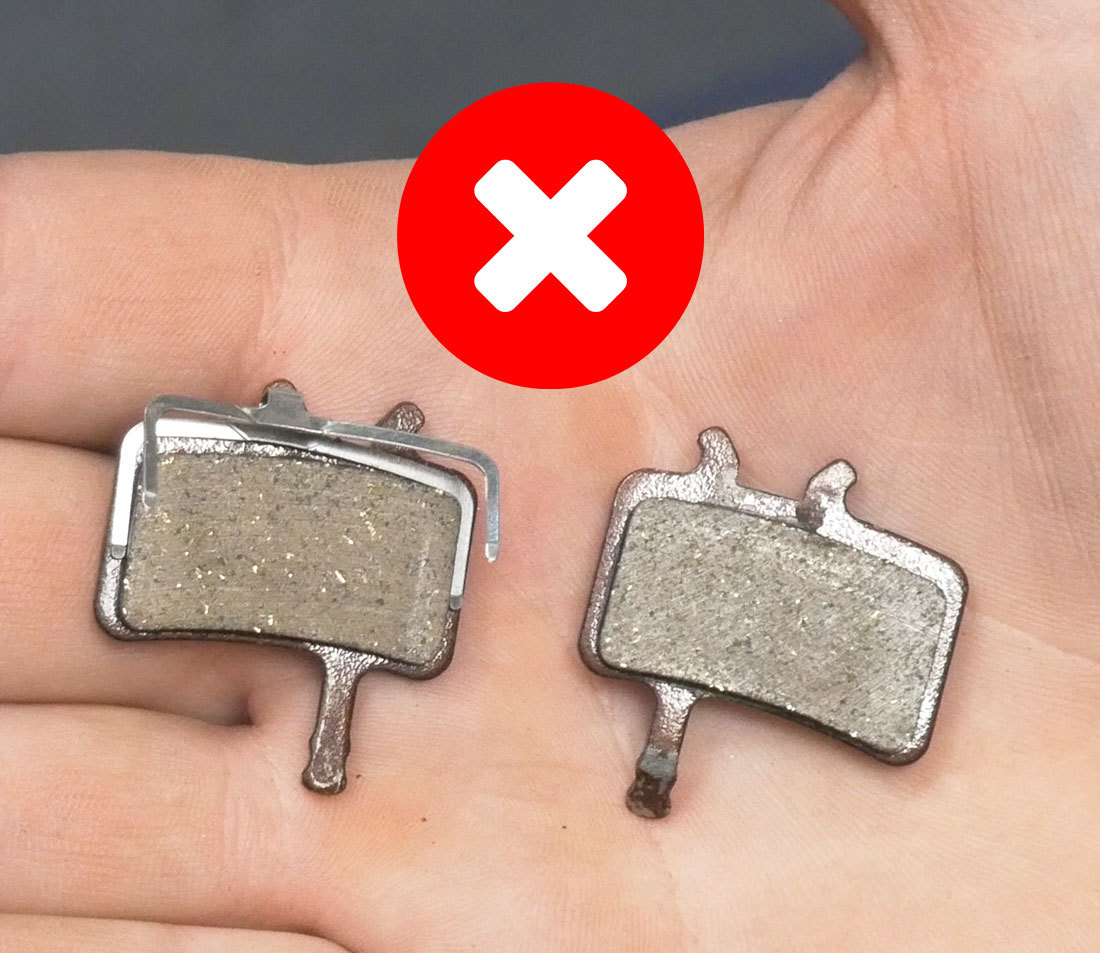
Example of incorrect clip orientation
Proper clip orientation
After putting the pads in the spring, line up the pads appropriately and use a bit of force to get them to click in. This can require several attempts to get the pads and springs properly seated.
Retaining Pin
Install any retaining pin. On systems with a cotter pin, make sure to give the cotter pin a good bend to prevent it from sliding out.
On systems with a threaded retaining pin, be aware of any torque specification from the manufacturer. In general, the pin should be snugged to the caliper body.
Be sure to reinstall any pin clip.
NOTE: it is normal for correctly installed pads to have a bit of wiggle once they are installed.
Reinstall the wheel, making sure it is properly seated.
- For mechanical disc brakes, after installing new pads you will need to align your calipers.
- For hydraulic disc brakes, pump the lever to move the pistons and pads back to the working position. Pump until you feel the pads firmly contacting the rotor. Spin the wheel and inspect the pads for alignment. If there is no rubbing, you are done. If there is rubbing, it’s likely an alignment issue — see Hydraulic Disc Brake Alignment.
Related articles
Disc Brake Rotor Removal & Installation View Article
Mechanical Disc Brake Alignment View Article
Hydraulic Disc Brake Alignment View Article