Derailleur Hanger Thread Repair
An exploration of potential options for repairing damaged threading on derailleur hangers.
Overview
Repairing Threads with a Tap:
Coil Repair Kits:
T-Nut System:
- "Dropout saver"/T-nut insert
- Power drill
- Retaining Compound: RC-1
- Adjustable wrench (or appropriately-sized wrench for T-nut)
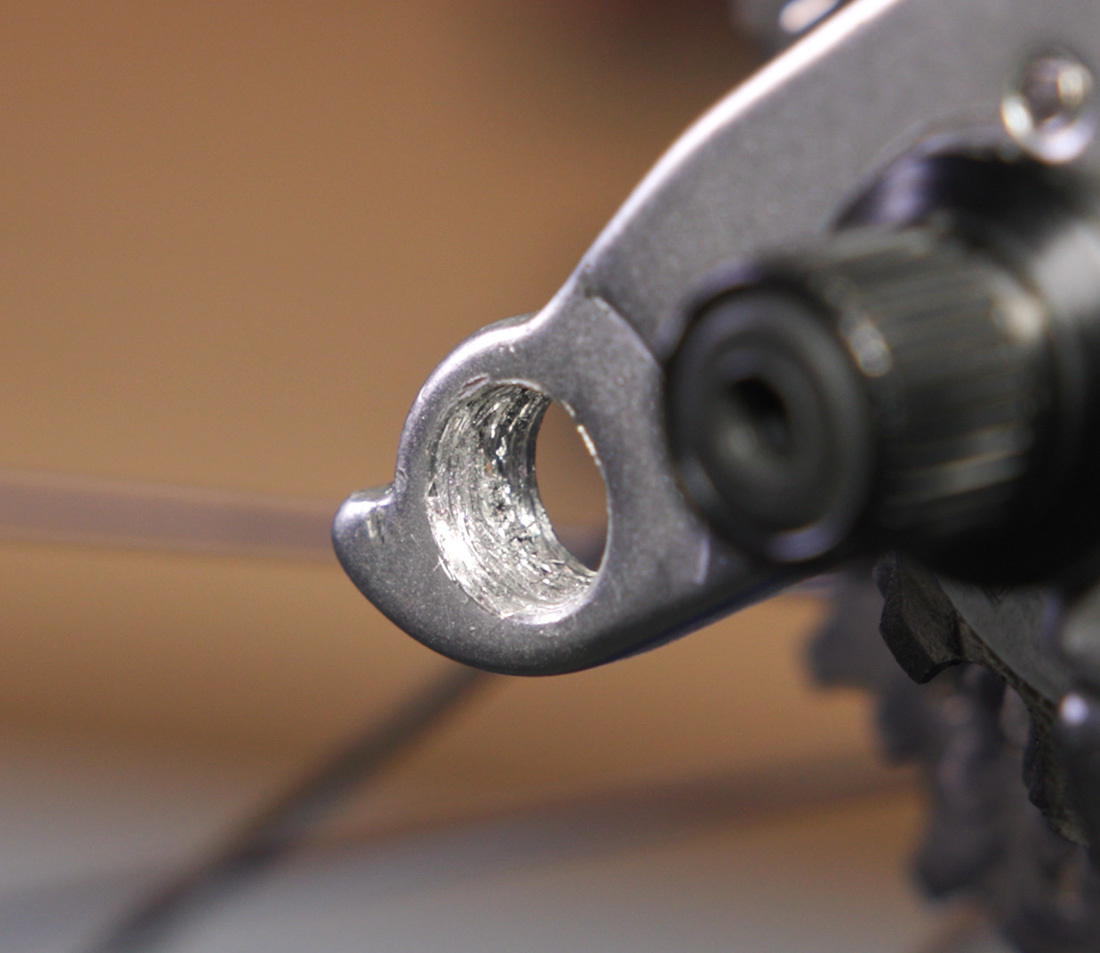
If the mounting threads found on a derailleur hanger are damaged, it can be difficult or impossible to install the derailleur.
If a bike uses a replaceable hanger, replacement can be the best solution. However, this is not always an option. A replacement may be difficult to source, or the hanger may be built into the frame itself. In these cases, it is necessary to try and repair the hanger thread. Below are three potential options for addressing damaged threads.
Repairing Threads with a Tap
It is often possible to use a tap to repair partially damaged or mangled threads. The Park Tool TAP-10 features the industry standard M10 x 1.0 thread size found on virtually all derailleur hangers.
Begin by removing the rear wheel. Because the threads on the back side are usually undamaged, run the tap from the inside outward. This makes it easier to correctly align the tap before it moves through the damaged section. Use a tap handle to give yourself good control, and apply some cutting fluid to the tap before beginning.
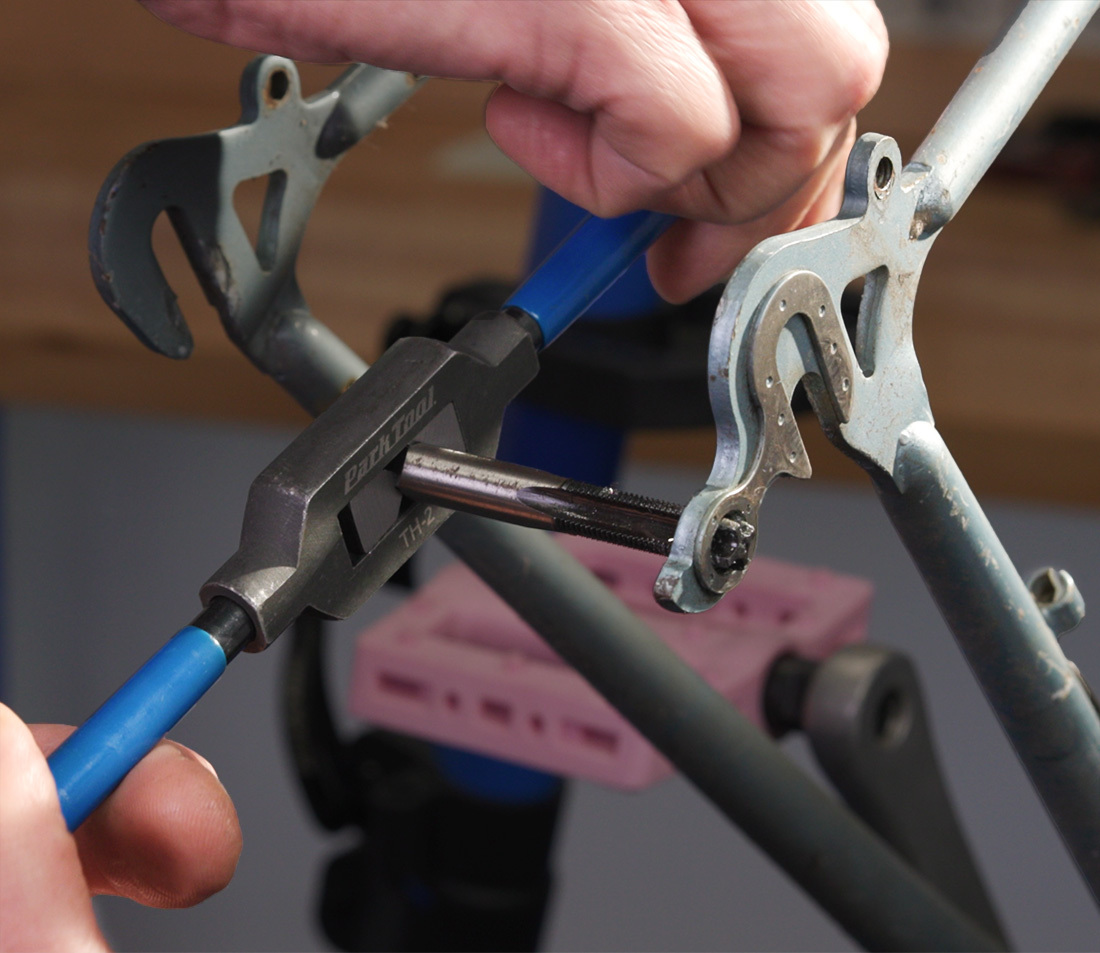
Turn the tap slowly through the dropout. You will eventurally meet more resistance when it contacts the damaged threads. For aluminum threads, continue to turn slowly through the damaged area. For steel threads, cut a turn or two, then back up the tap a half-turn to break the chip inside the dropout, then advance again.
Once the tap threads are through the dropout, use a brush and clean them off. This avoids dragging the cut material back through the hanger threads. Unthread and remove the tap. Clean off the tap and clean out the internal threads using a clean rag.
This repair can work well on slightly mangled threads. However, if there was extensive damage, the threads may or may not be acceptable even after tapping. There is a simple test for hanger thread integrity to determine if they hold up to use:
The recommended torque for derailleurs is generally from 8 to 10 Newton meters (Nm). So, install the derailleur as normal and tighten to the high end of the torque range — 10Nm. If the bolt tightens properly and reaches this torque, the threads are acceptable and the derailleur hanger will be usable.
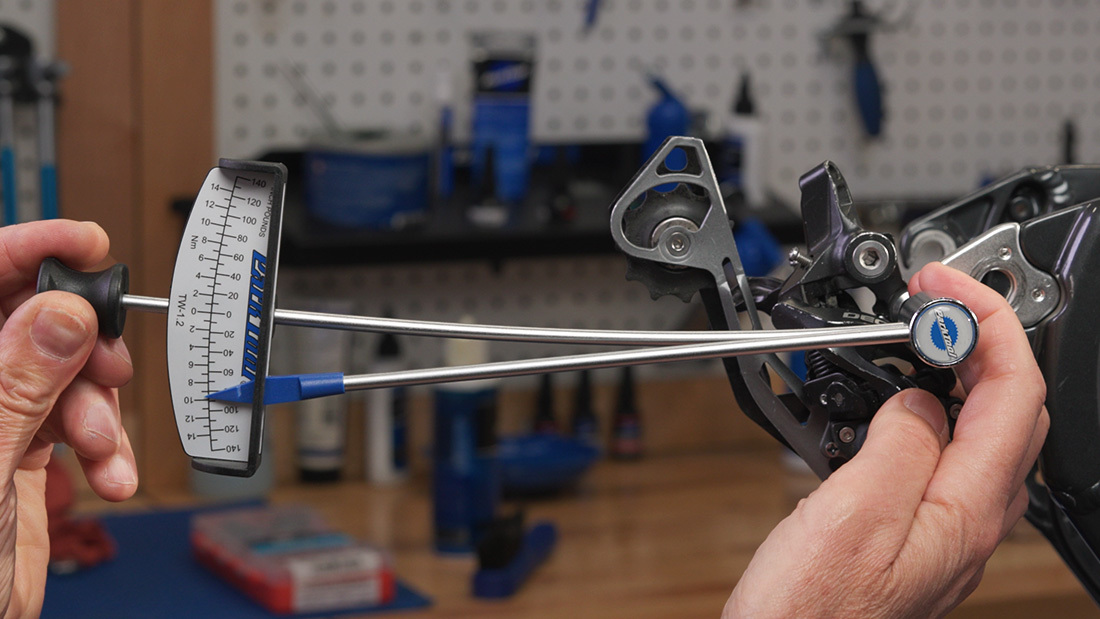
If the threads in the hanger failed before reaching torque, they would not have held up during use. In that case, it’s time to explore other thread repair options:
Coil Repair Kits
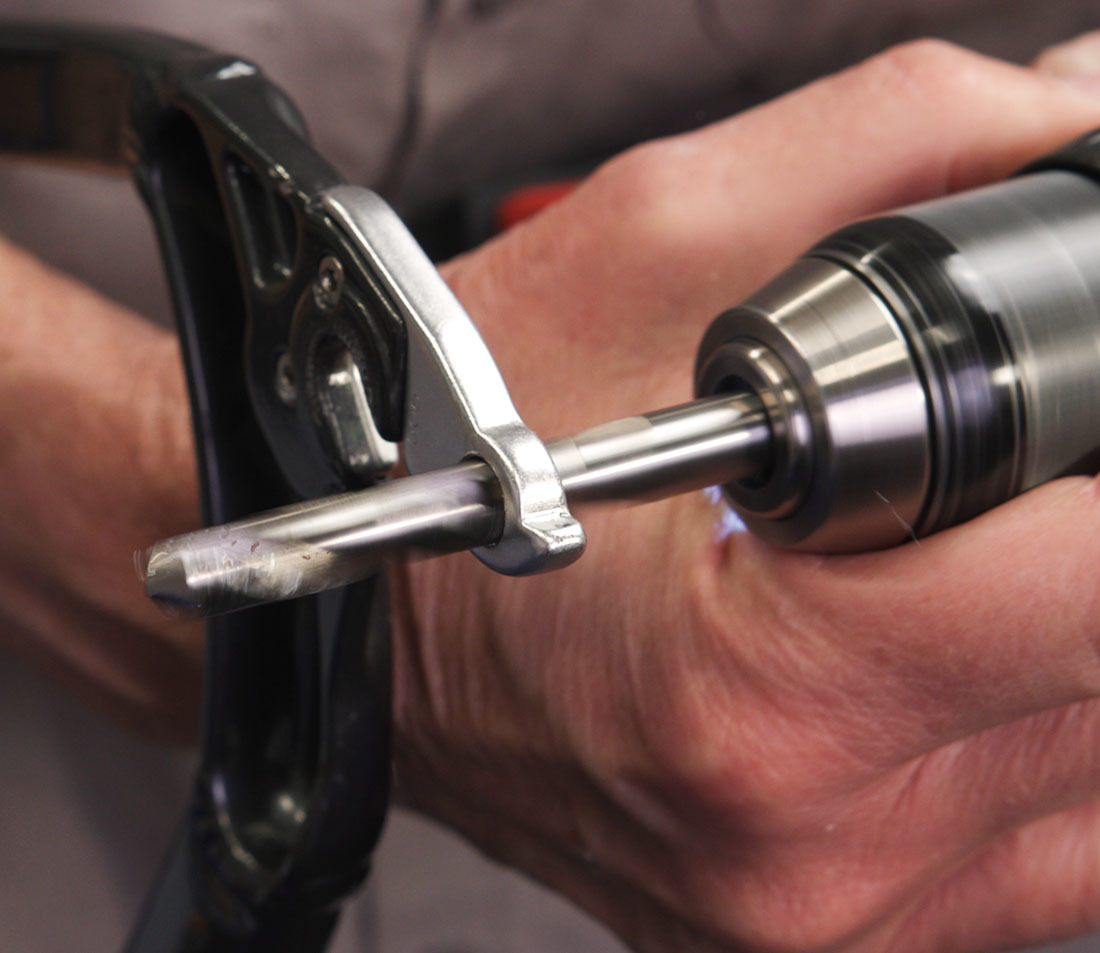
If the thread damage is beyond repair by tapping, another option is to install a coil repair kit from manufacturers such as Helicoil® and Recoil®. These kits typically include:
- A drill bit to properly size the hole
- An oversized tap to cut new larger threads
- A coil driver
- Coils that reduces the size back to the original M10 x 1 sizing (These are basically tightly wrapped springs)

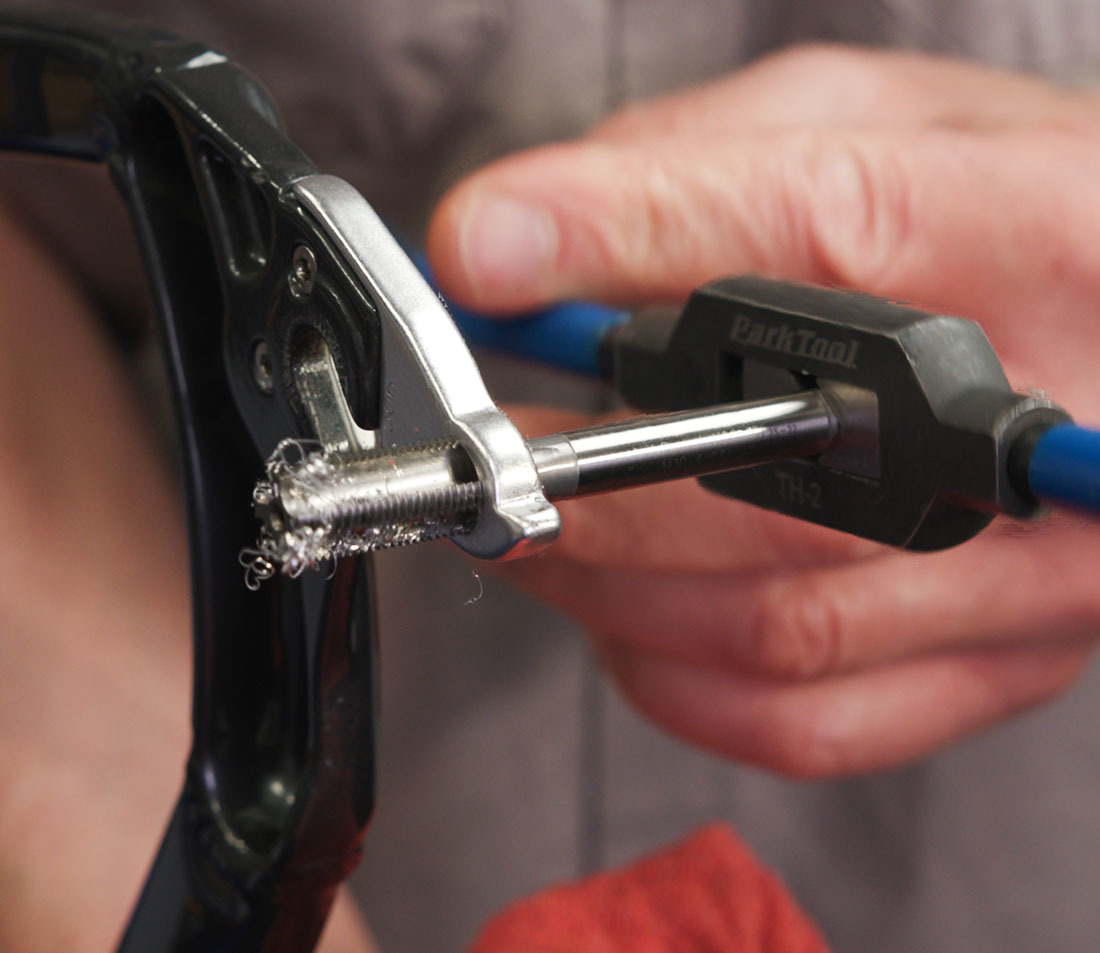
Use the included bit to remove the remaining threads and properly size the hole for the proprietary tap.
Using a tap handle, start the tap squarely and begin to slowly cut new threads. Pass the tap all the way through and then out the dropout. Clean off the tap and clean out the internal threads.
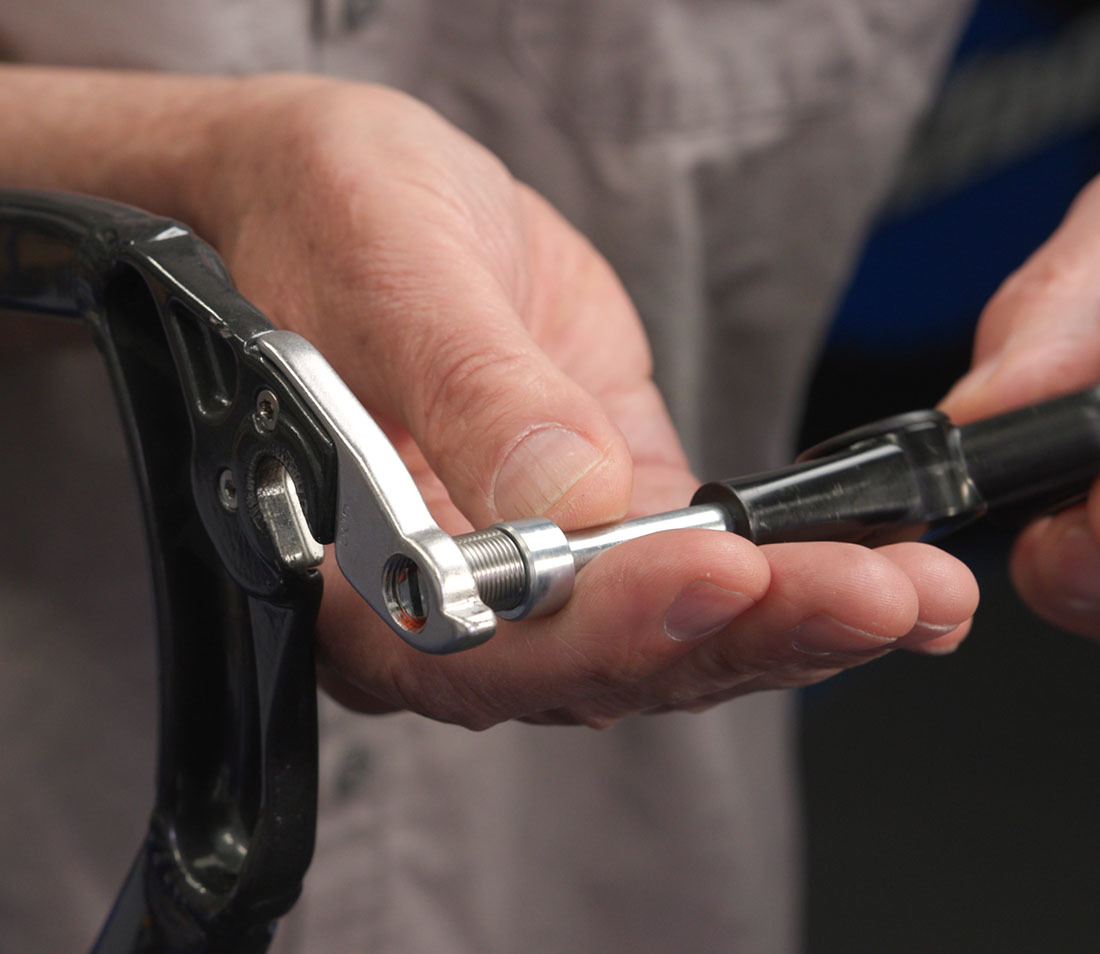
Install some strong thread locker such as Park Tool TLR-2 on the new threads.
One end of the coil features a “tang”. This is used to thread the coil into the hanger with a special driver. Install the coil over the driver. Align the driver to the threads and turn clockwise to install.

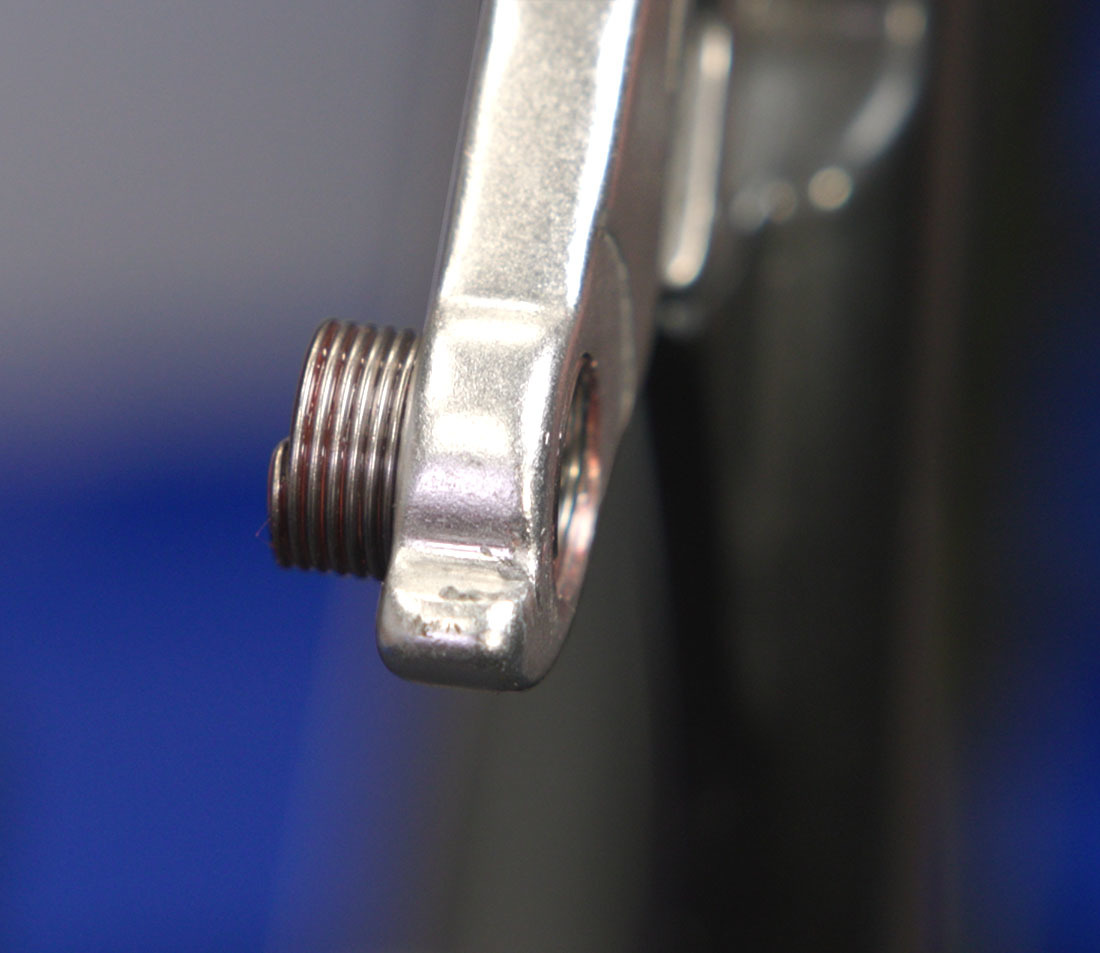
Watch the end of the coil as it enters the dropout thread — it needs to be slightly inset to the dropout face. This ensures that the derailleur will press against the dropout face when fully tight.
Allow time for the threadlocker to dry. Leave it overnight if possible.
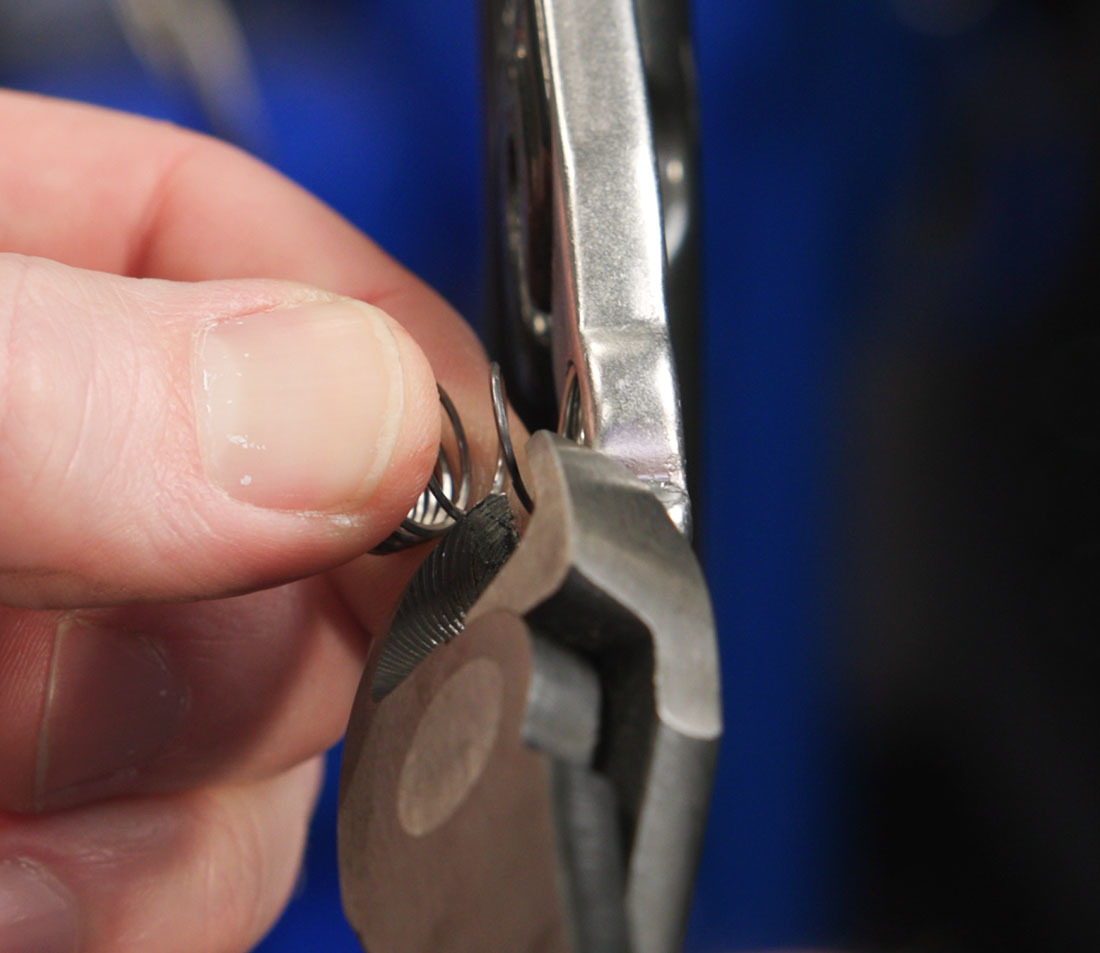
If the coil is sticking out the back end of the dropout, it can be cut. A little bit of coil sticking out the back of the hanger is not a problem.
The hanger should be ready to go. Install the derailleur and fully torque the mounting bolt as outlined in the previous process.
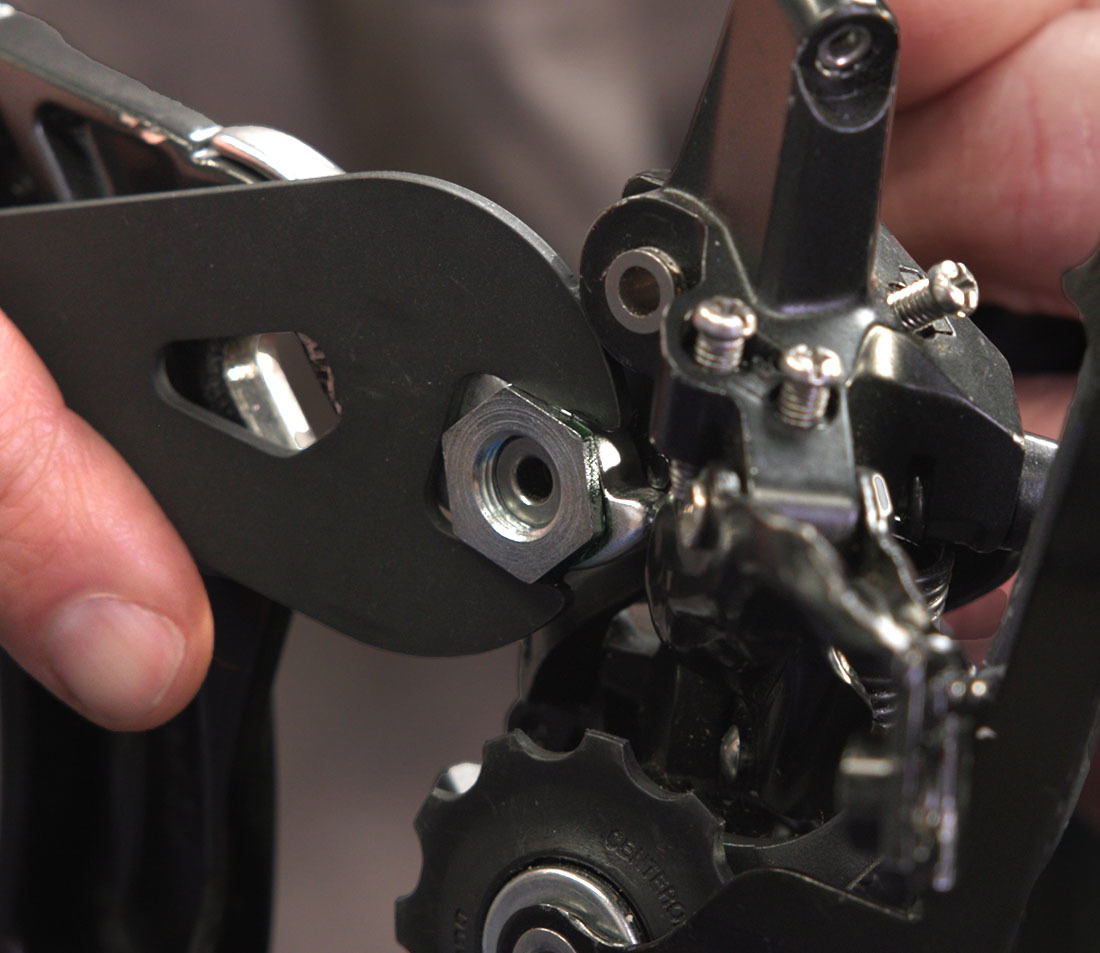
T-Nut System
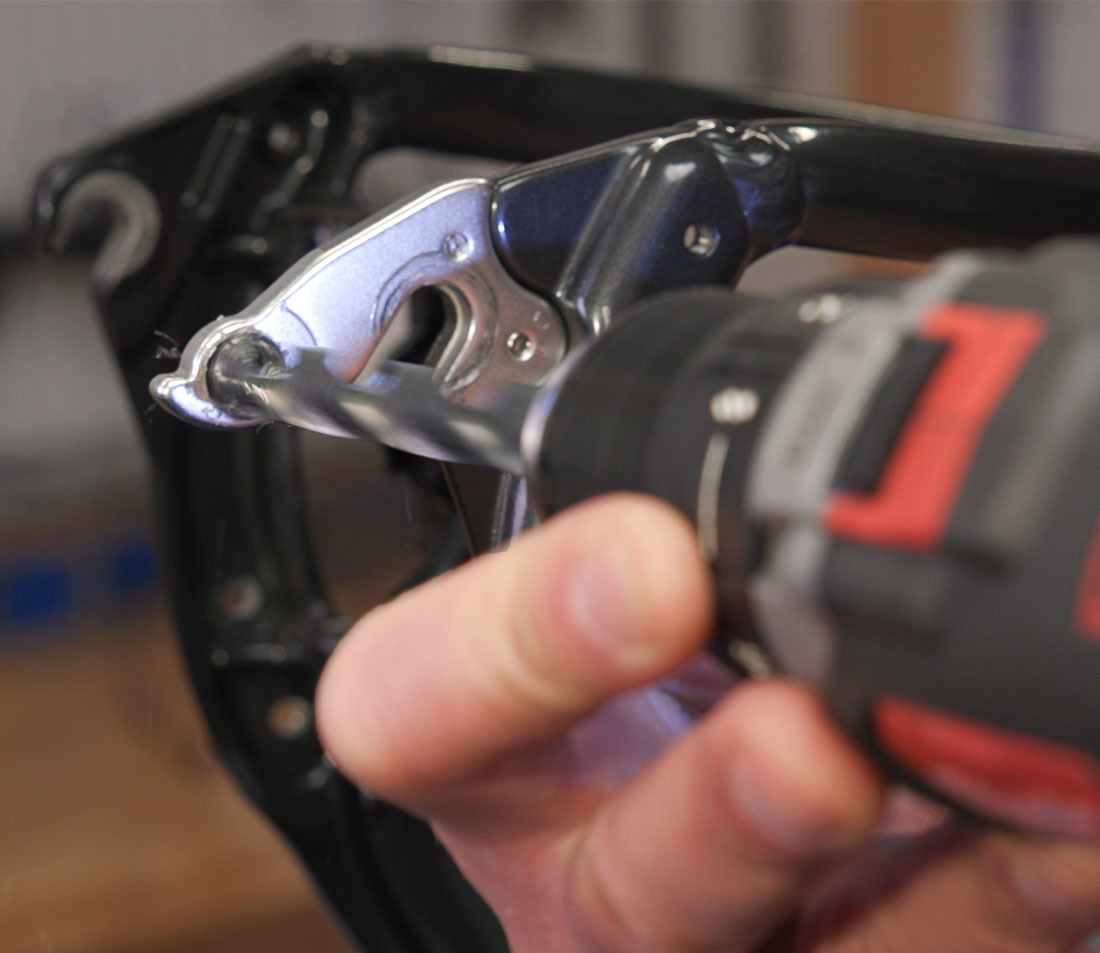
Another thread repair option is sometimes marketed as a “dropout saver”. This is a sleeve nut, or T-nut, with a M10 x 1.0 internal thread. This system requires the hanger be drilled out to achieve a slip fit with the outside of the T-nut.
Begin by checking that the T-nut width is slightly narrower than the dropout and will not extend past the dropout face. The derailleur needs to tighten against the hanger face, not on the T-nut.
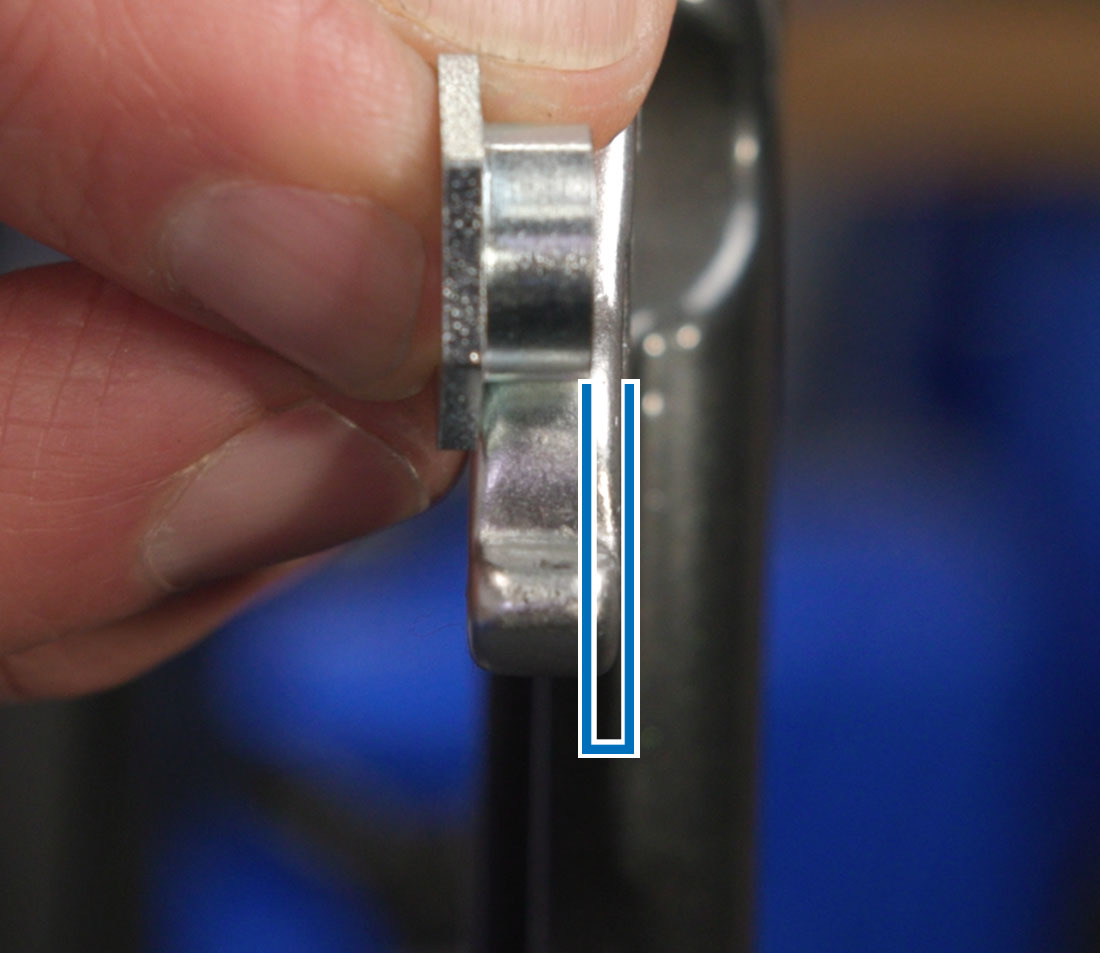
If the T-nut manufacturer didn’t specify a drill bit size, begin by measuring the outer diameter of the T-nut. Select a drill bit that is about 0.1 mm larger than the outside of the T-nut. This provides a slip fit without being too sloppy in the drilled hole.
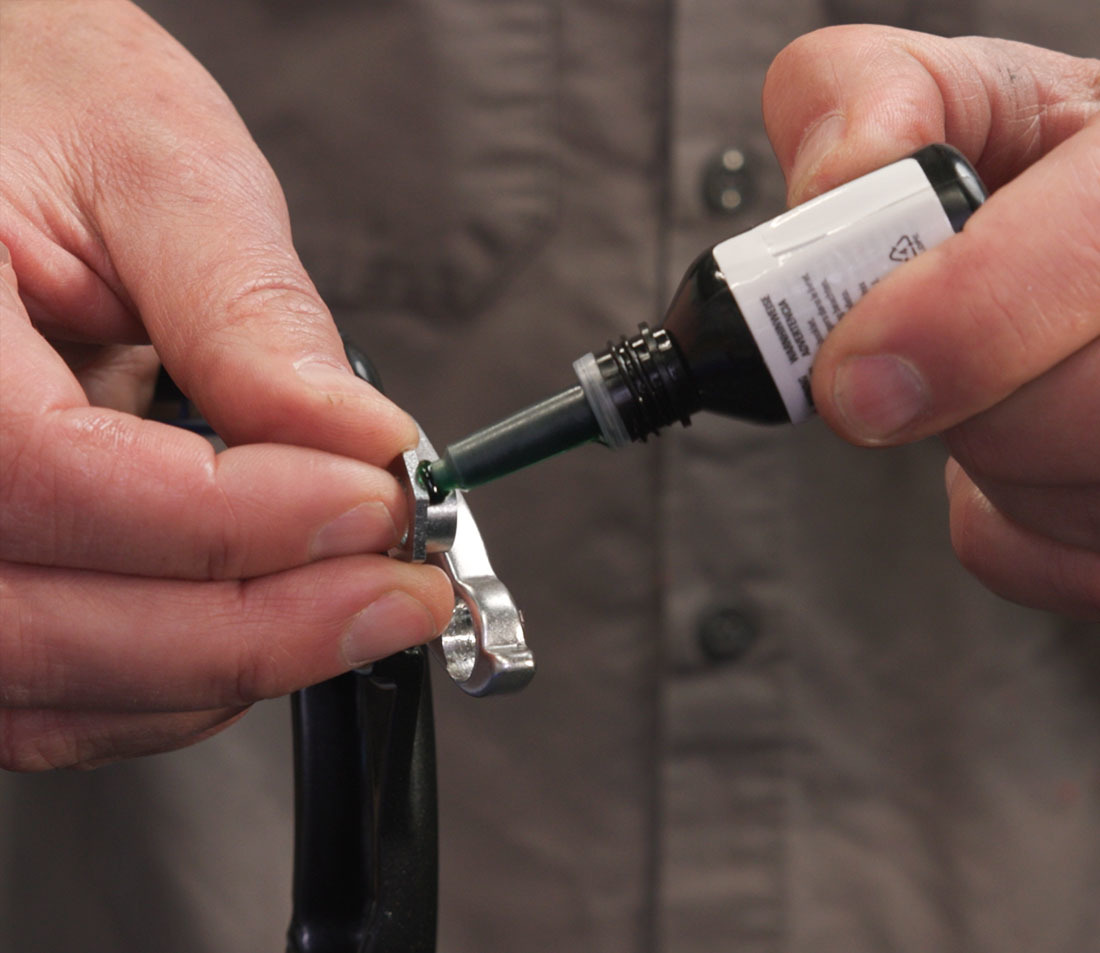
When available, apply a retaining compound such as Park Tool RC-1 on the outside of the T-nut prior to installation.
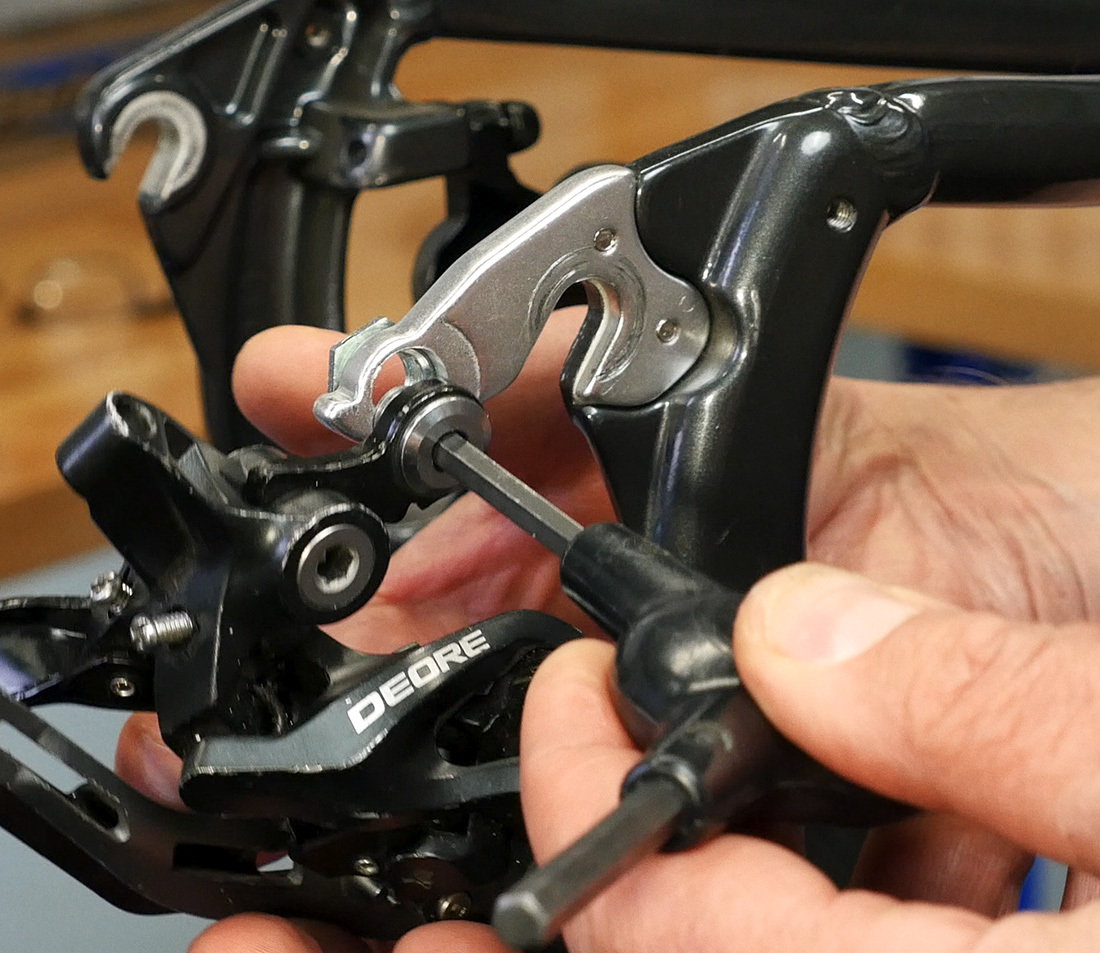
From the inside face, push the T-nut into the dropout. Install the derailleur and tighten. If the T-nut spins while installing the mounting bolt, use a wrench on the back to hold it. Installing the derailleur will pull the T-nut fully into the dropout and hold it in place while the retaining compound dries.
Once the retaining compound has cured, the derailleur is secure and the bike is ready to ride.
Related articles
Rear Derailleur Hanger Alignment View Article
Derailleur Hanger Replacement View Article