Star Fangled Nut and Expansion Plug Installation
This article reviews installation and removal of "star-nuts" into threadless fork steering columns, as well as "expansion plug" installation.
Getting Started
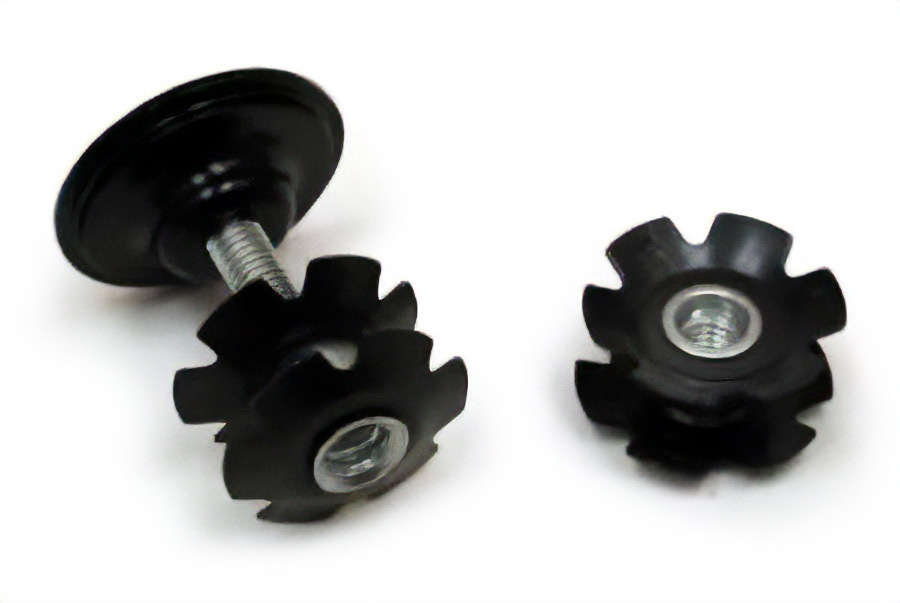
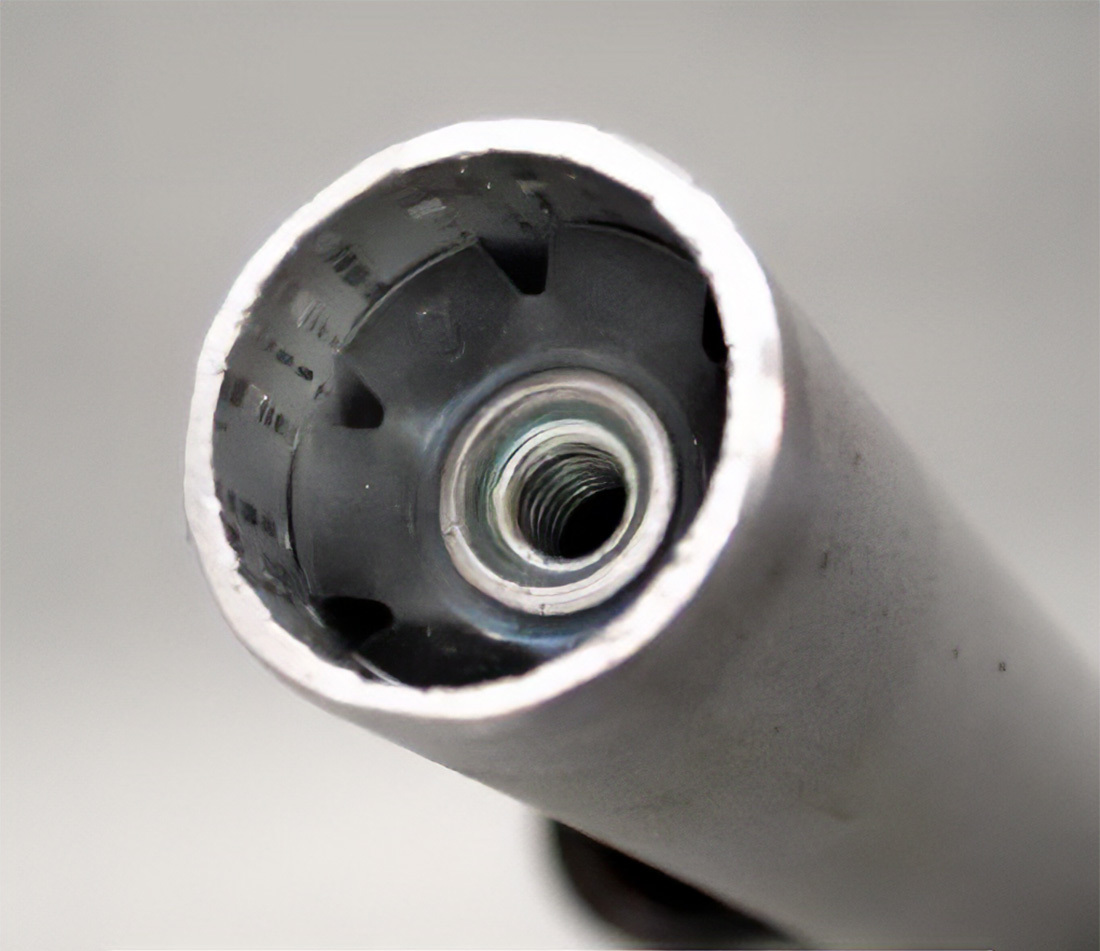
Threadless headsets are adjusted by pressure on the top bearing race. Pressure is applied when the bolt in the top cap is tightened. The stem bolt(s) must be loosened, which makes the stem effectively a spacer during the adjustment. The bolt is threaded into the star fangled nut which be fitted into the inside of the fork column. The star nut is designed not to pull upward. In other words, it is designed not to be removable.
The star-nut outer diameter is slightly bigger than the inside diameter of the fork column. This allows the flanges to bite into the fork walls and hold it tight.
Star Nut Installation with TNS-4
The TNS-4 is designed to help guide the starnut straight as it is pressed into the inside of the steering column.
Thread the star-nut onto the threaded stud inside the TNS-4.
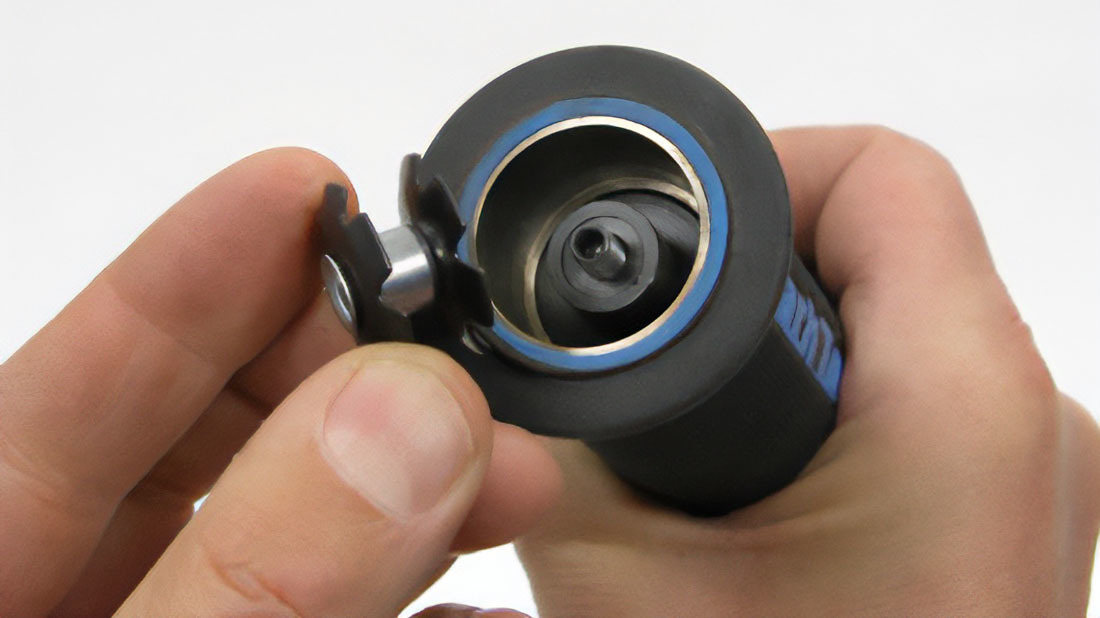
The convex surface will face outward of the tool, and face the steering column.
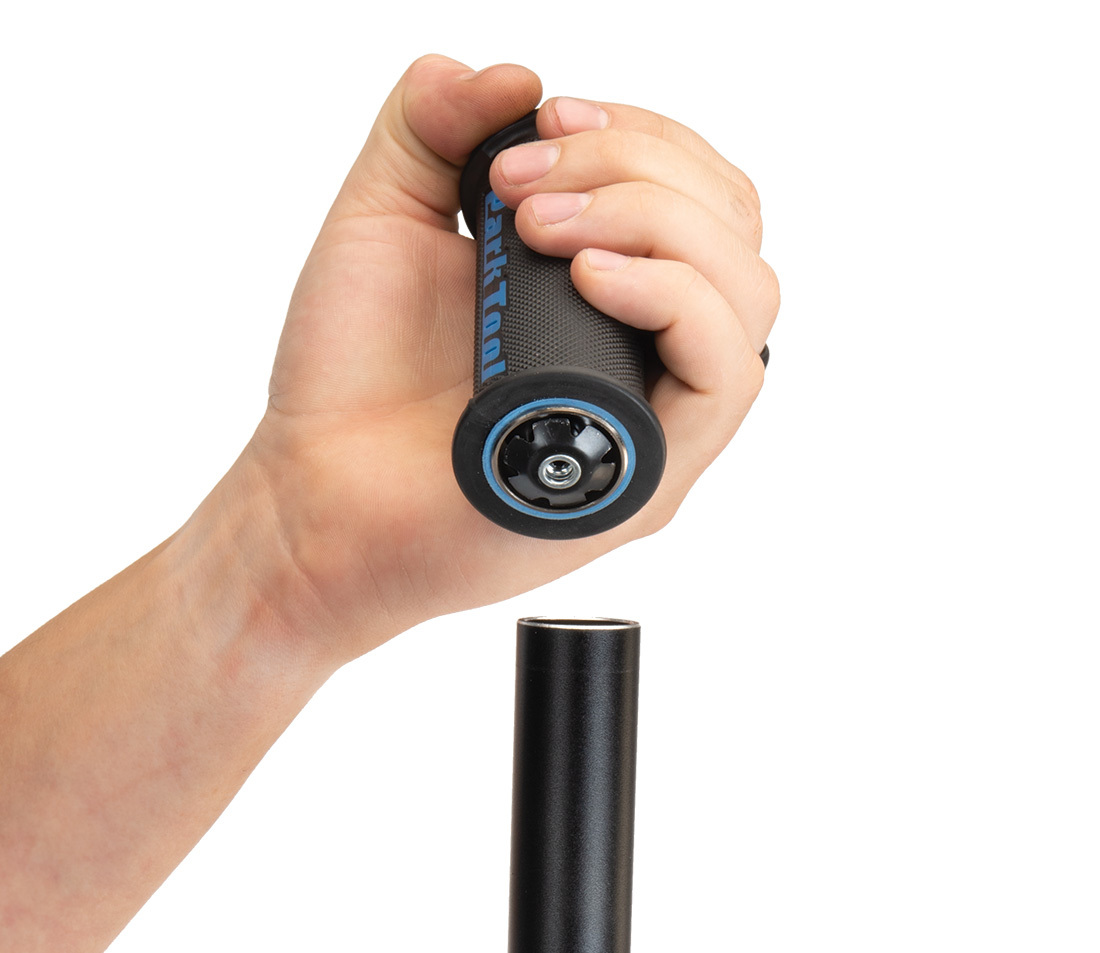
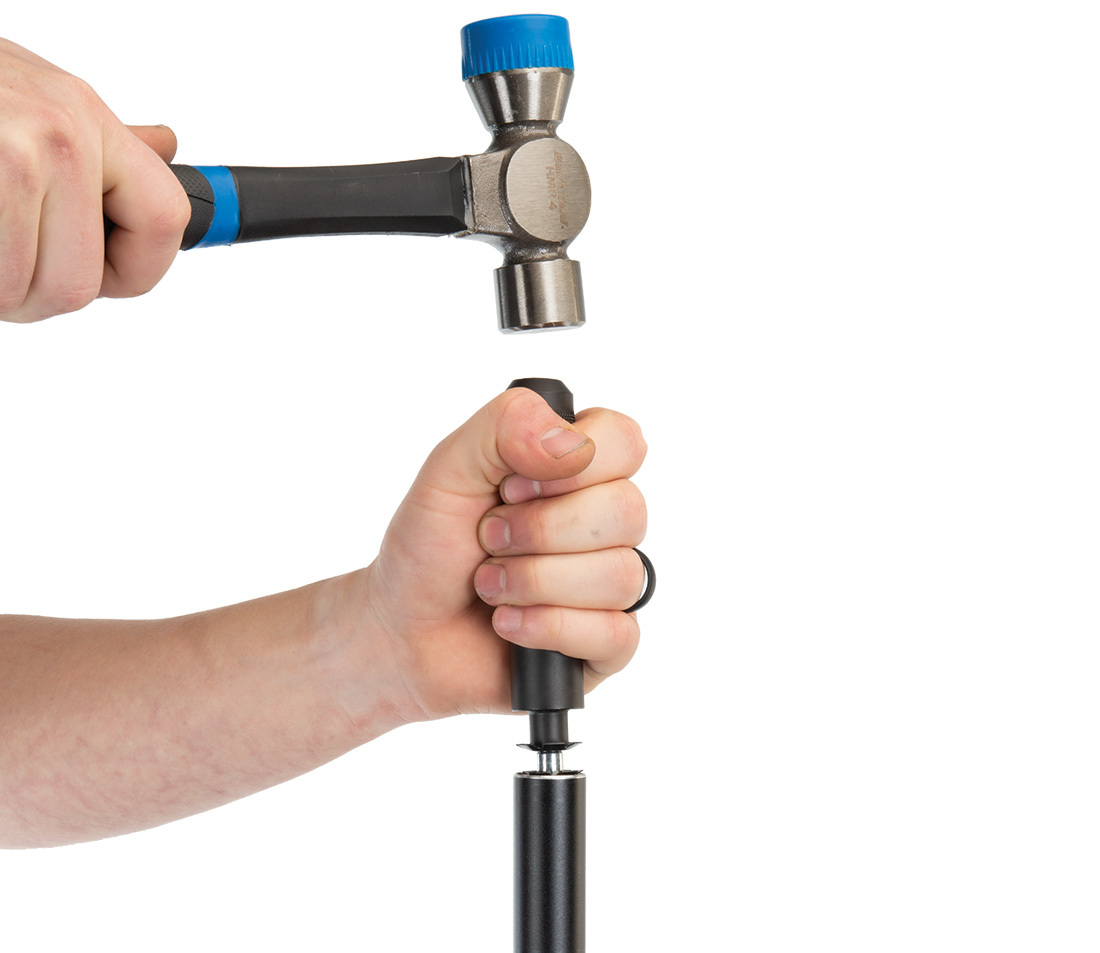
Place the TNS-4 over the top of the steering column. The inner mandrel will rise upward and the outer housing is slid over the column.
Hold the TNS-4 straight and in line with the steering column. Strike the top of the TNS-4 with a hammer to drive in the star-nut.
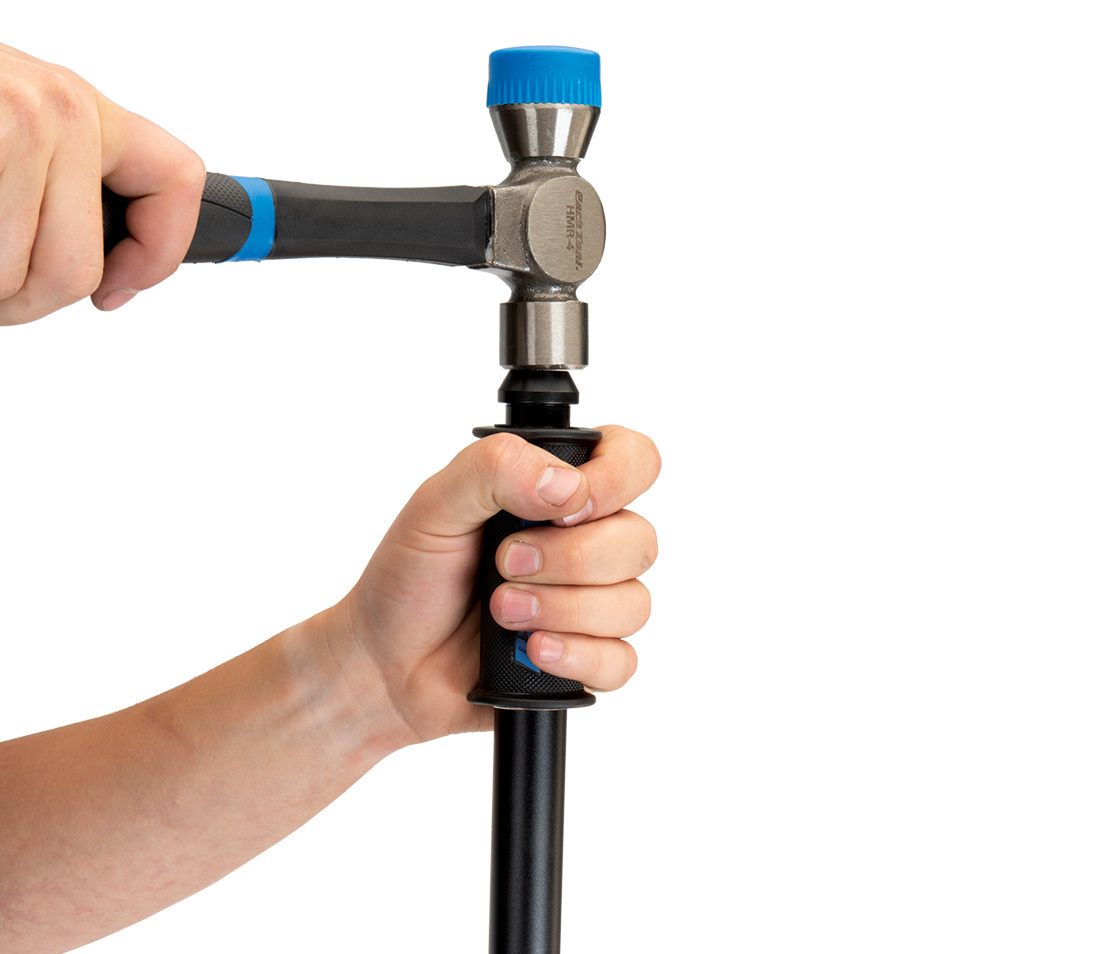
Continue driving the nut until the driver meets the outer portion of the tool. Unthread the handle from the fork. The nut is installed.
Star Nut Installation with TNS-1
Mount the nut with the concave side toward tool thread. Hold the TNS-1 over the steering column and tap on the TNS-1 with a mallet. Hold the tool aligned while driving in the star nut.
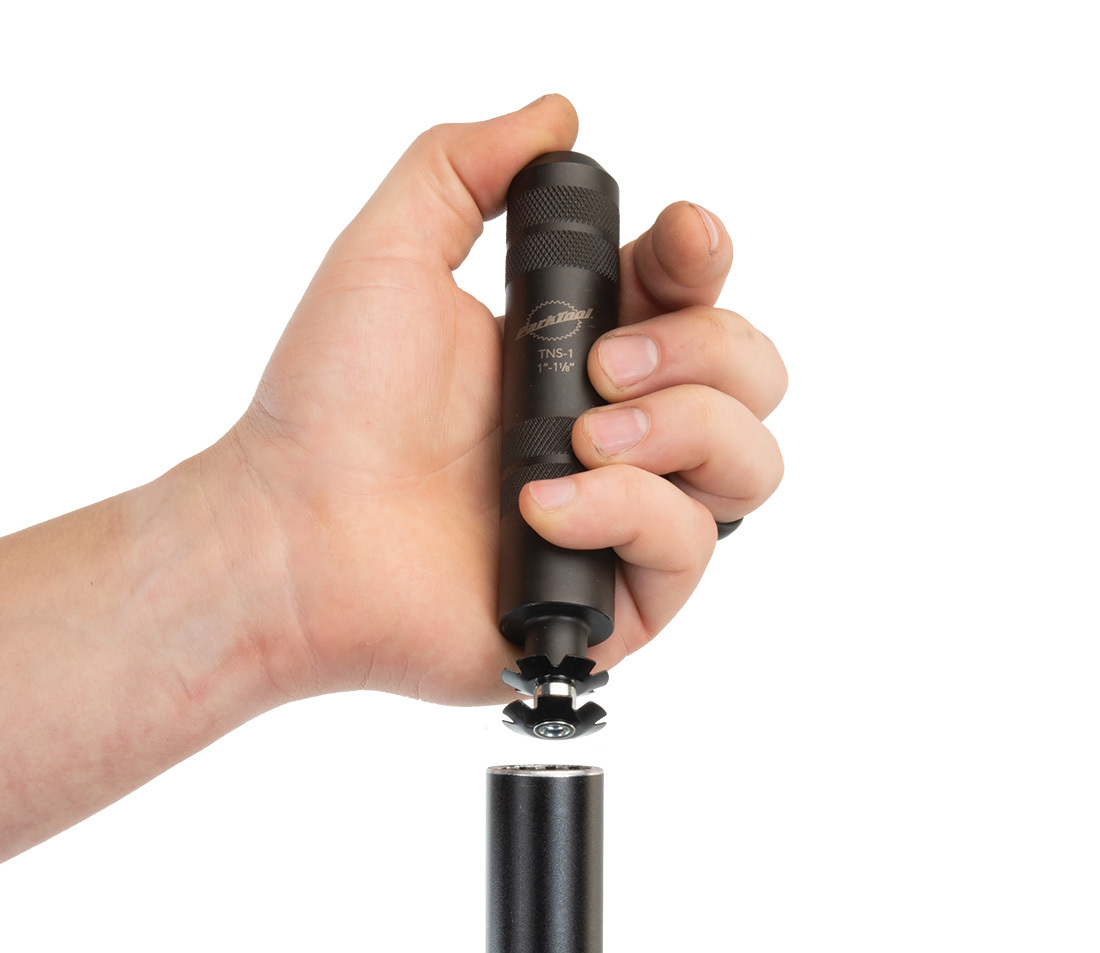
The TNS places the nut about 15 mm (9/16″) below the top of the steering column. This allows the adjusting bolt to thread fully into the nut for adjustment pre-load.
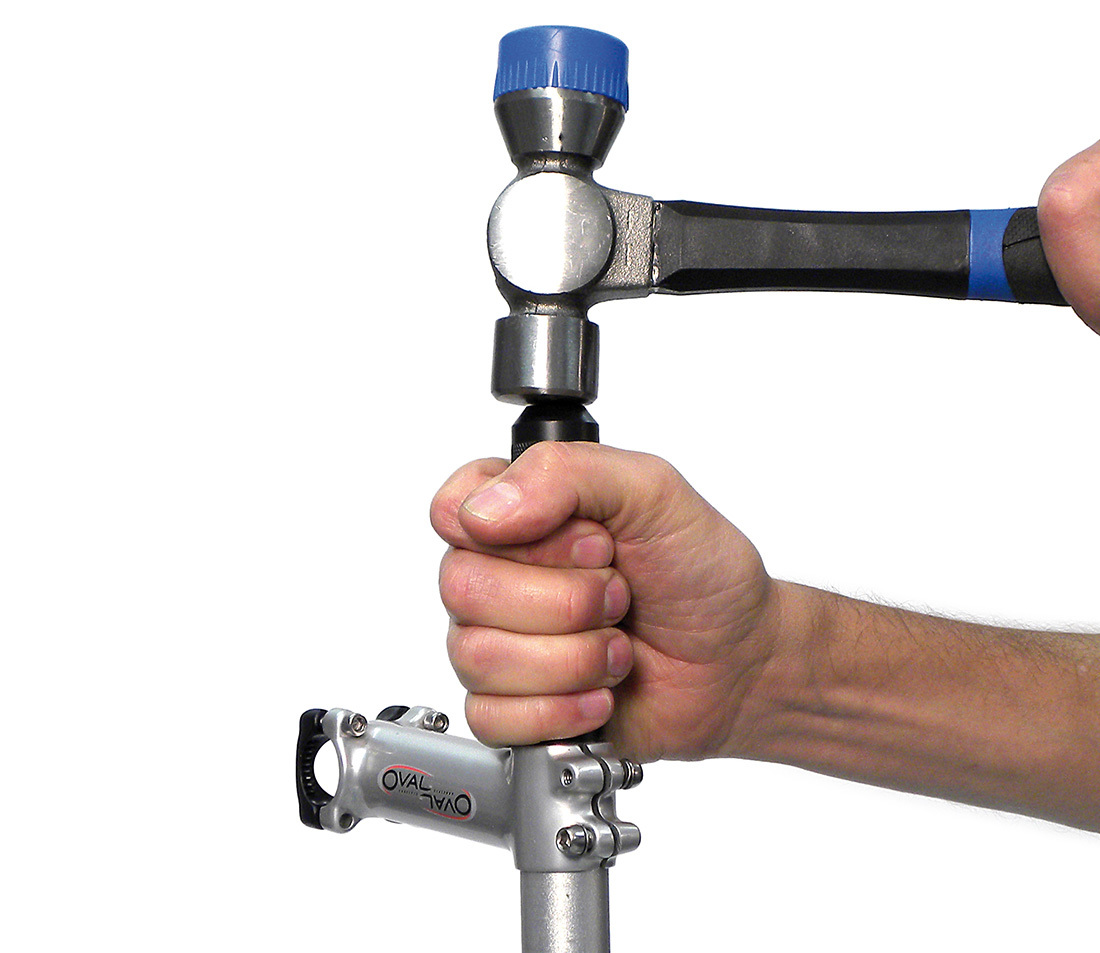
It can also help maintain alignment to use the stem as an alignment guide. This technique works ONLY if you use the newer longer TNS models. Install stem onto column. Engage so most of the stem sticks up above the column. Do not tighten any upper pinch bolt. Place TNS with nut inside stem and column and tap downward.
Star Nut Removal
Well... a star nut is not designed to be removable. If it is necessary to install another nut, simply use a punch and drive the first nut down until it is deeper than the new nut will sit. It is not necessary to completely remove the old nut. It is also possible to drive the old nut completely through the column and out the bottom. This will make the nut unusable. It can also work to drill out the center of the nut, and then tap out the remaining pieces.
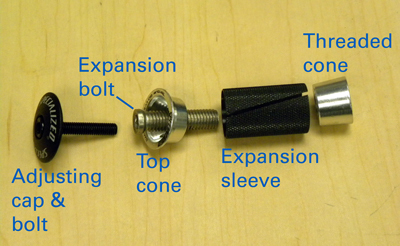
Expansion Plug Installation
Another option for threadless headsets is the “expansion plug” system. These insert inside the steering column and then expand and jam against the inside walls. This system is especially popular with the carbon steering columns.
A typical expansion plug system consist of an expandable sleeve. There is a cone at the top and bottom, and a hollow bolt passes through the sleeve. As this expansion bolt is tightened, it draws together the two cones and this expands the sleeve. As with most all threaded fasteners, grease or oil the threads. The headset adjusting cap and bolt then fit into the top of the expansion plug.
Install the assembled expansion plug and secure it inside the steering column.
Install the top cap and headset adjusting bolt just as you would with a star nut system.
Related articles
Threaded Headset Service View Article
Threadless Headset Service View Article
Fork Steering Column Length and Sizing View Article
Head Tube Reaming and Facing View Article
Headset Standards View Article