Wheel Dishing (Centering)
Bicycles are designed with the front and rear wheels centered over the midplane of the bike. If the wheels are not centered, or out of dish, the bike can handle poorly. This article will review how to check and adjust bicycle wheel dishing by making changes to spoke tension.
Preliminary Info
- Dishing tool such as WAG-4 or WAG-5 Wheel Dishing Gauge
- Correctly-sized spoke wrench
- Tire levers (optional)
- Truing stand (optional but handy)
For optimal handling and performance, the rim of the bicycle should be centered to the middle of the frame or fork, which also places the rim over the middle of the hub.
The rim is centered between the hub locknut faces, which are the contact points for the fork or frame.
On quick-release systems, the locknut face is behind the quick-release skewer
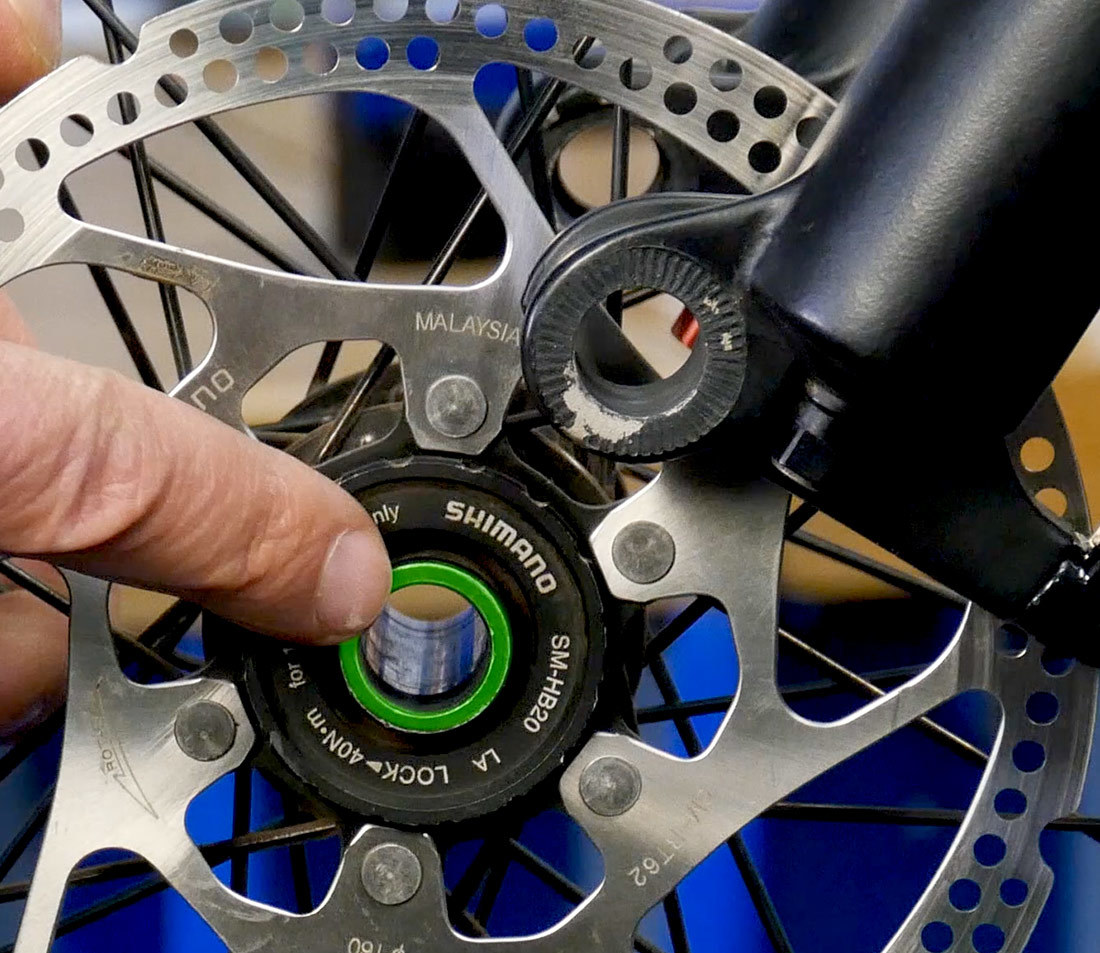
On thru-axle systems, the locknut face is simply the outermost part of the hub
On front wheels with rim brakes, both the left and right hub flanges are set at an equal distance from the middle of the hub. The rim will be centered to the hub contact points, as well as being centered between the left and right hub flanges.
On a rear hub, the rim is also centered between the frame contact points. However, the left and right flanges are not at equal distance from the hub center. The drive side spokes are offset inward to allow room for the sprockets.
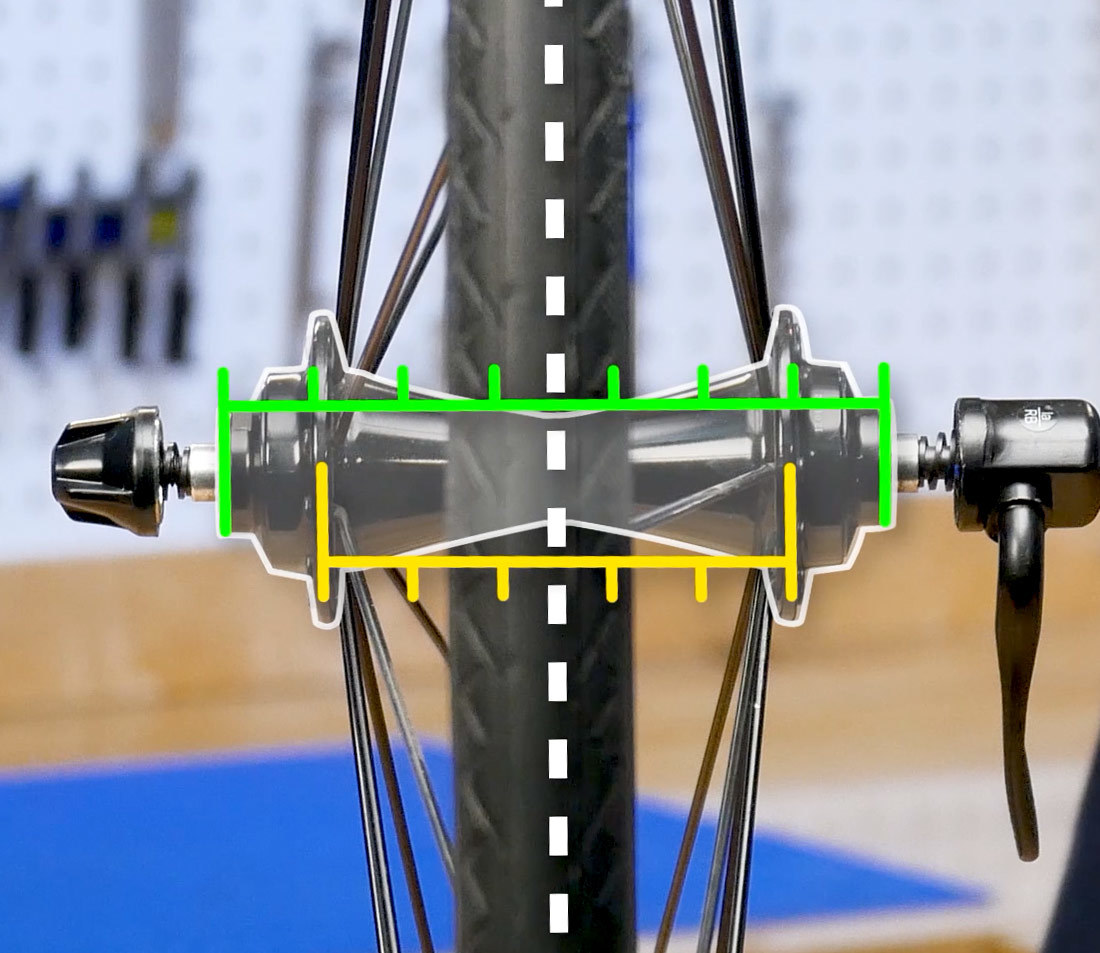
The hub flanges of this front wheel are evenly spaced from the hub contact points
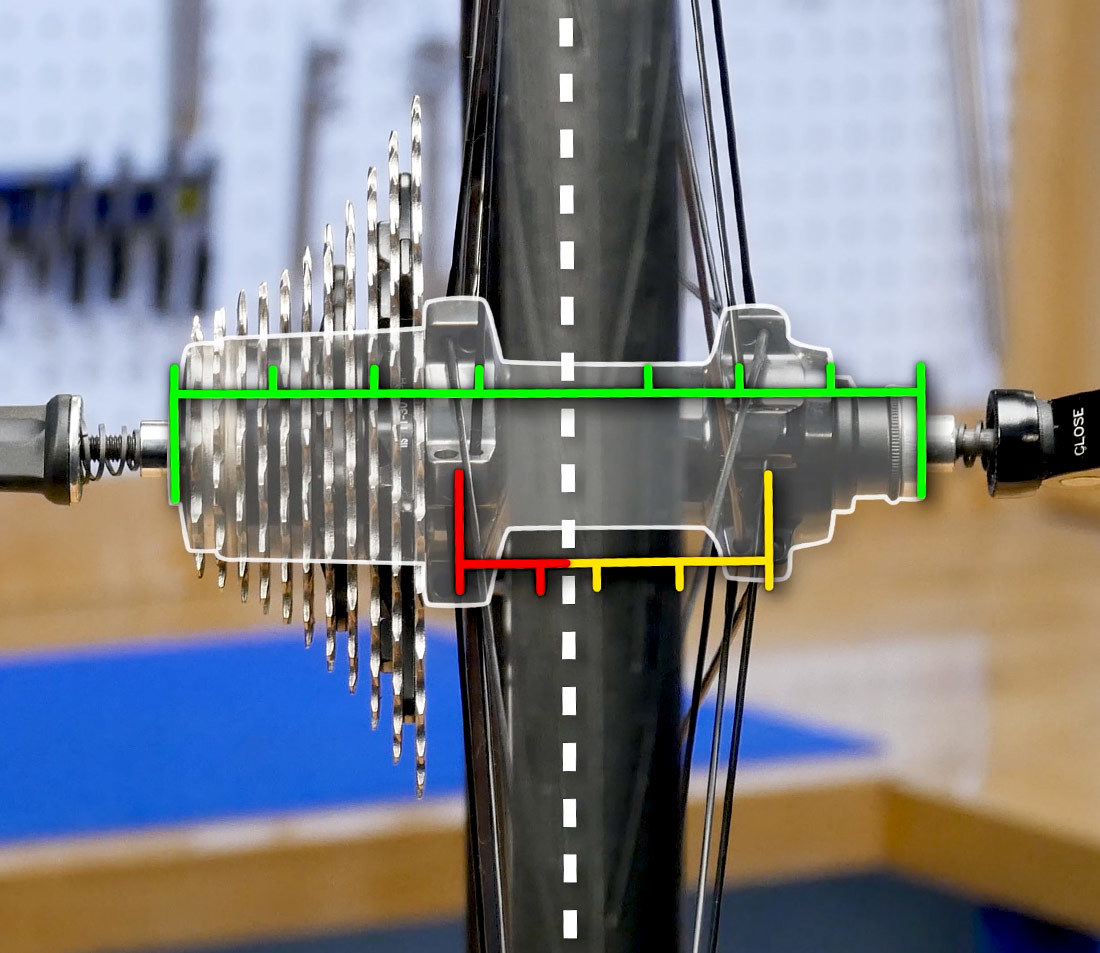
The hub flanges of this rear wheel are offset from the hub contact points to accommodate for the freehub body
Visual Test
The most accurate method to check wheel centering is with a dishing tool. However, there are some simple visual checks to get an idea of the centering.
Sight how the wheel is sitting in the frame. Does it appear off to one side? Double check that the wheel was mounted correctly in the fork or frame.
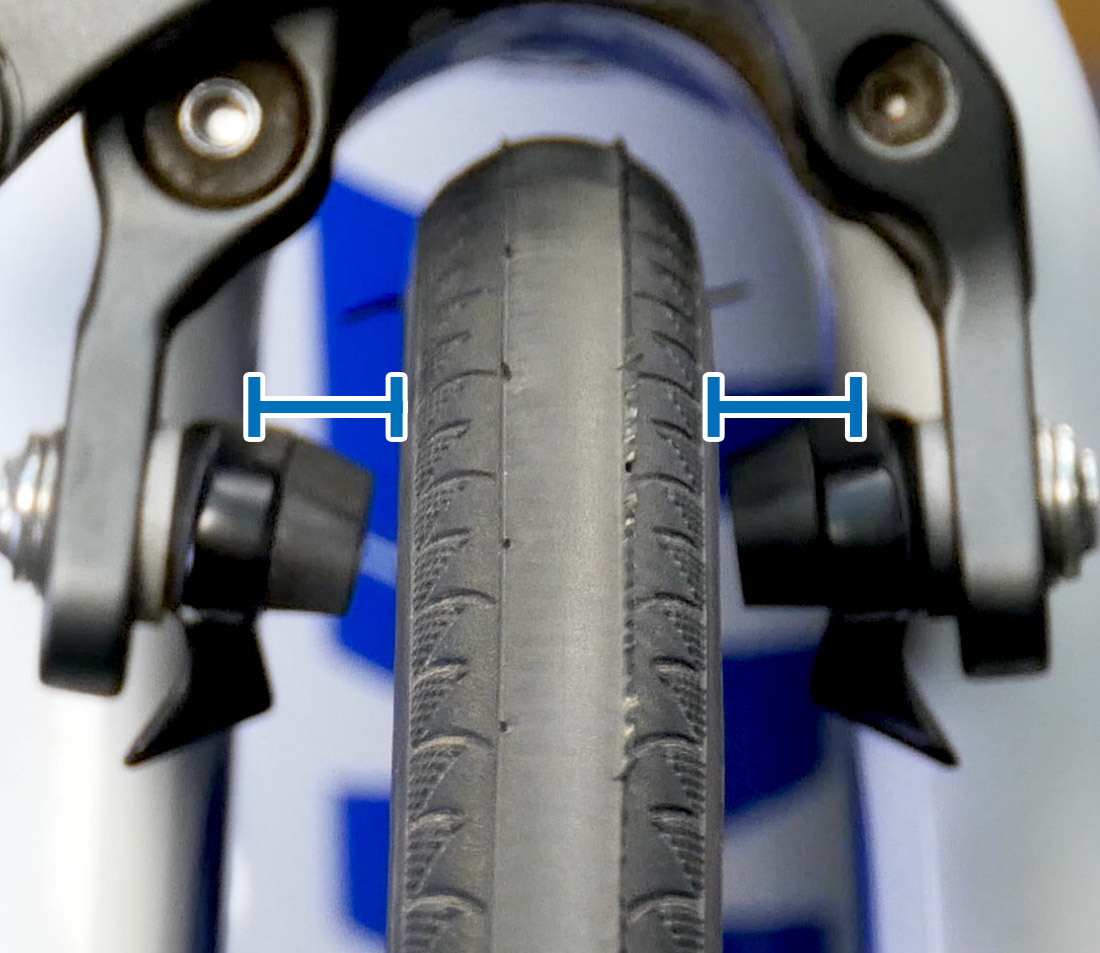
This front wheel appears to be centered to the fork
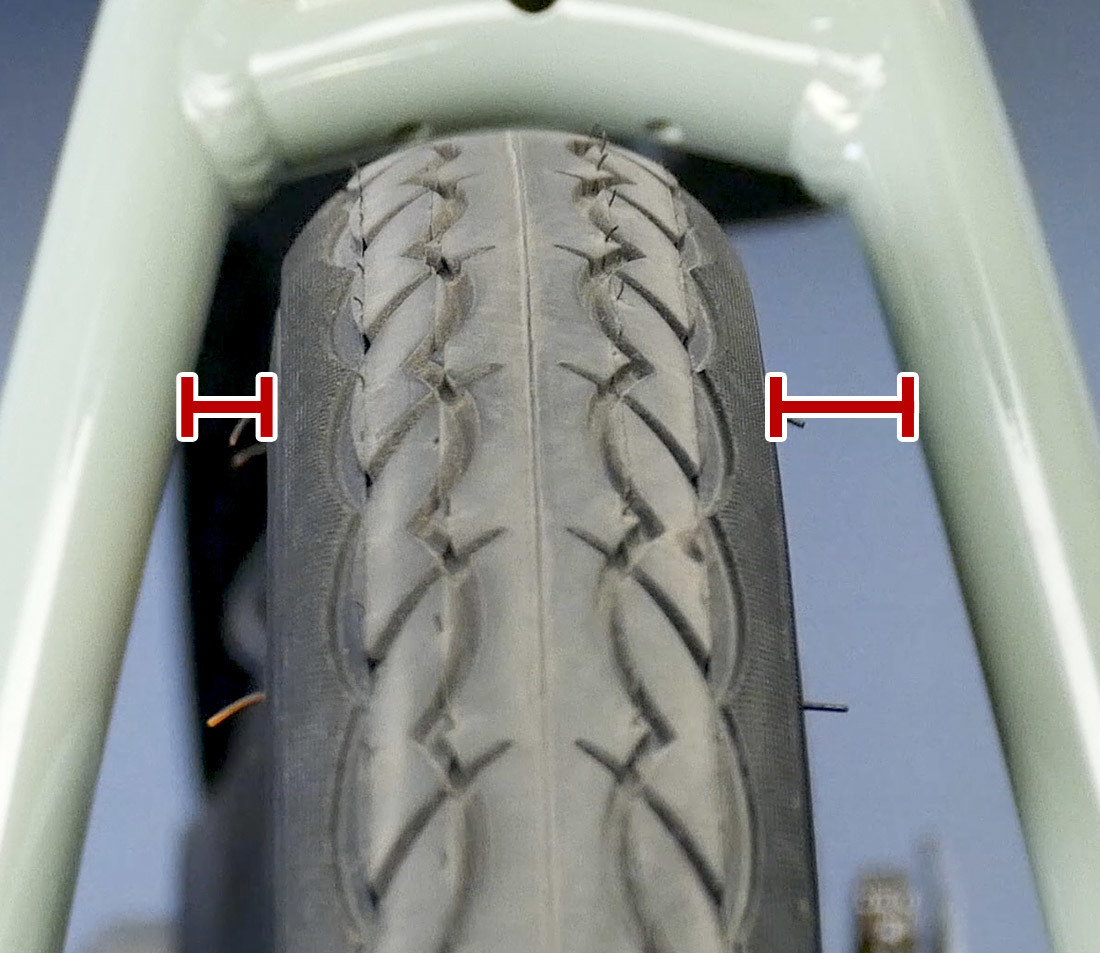
This rear wheel appears to be off-center toward the left side
Measuring dish with a dishing tool
A dishing tool, such as the WAG-4 or WAG-5, is the most accurate method for checking wheels for centering. Before using a dishing tool, begin by checking the trueness or straightness of the wheel. If the wheel is badly out of true, the dishing tool will not be as accurate. Correct any lateral errors before beginning the dishing process.
To use a dishing tool, it is easiest to remove the wheel from the bike. For consistency’s sake, lay the wheel flat on a bench with the drive side (or right side, when looking at the bike from behind) facing up.
If you are using the WAG-5 or similar tool, be sure the legs of the dishing tool contact the rim, and not the tire. Deflate the tire and fold it back so the tool legs are on the rim. The WAG-4 has sliding feet allowing rim contact with the tire still in place.
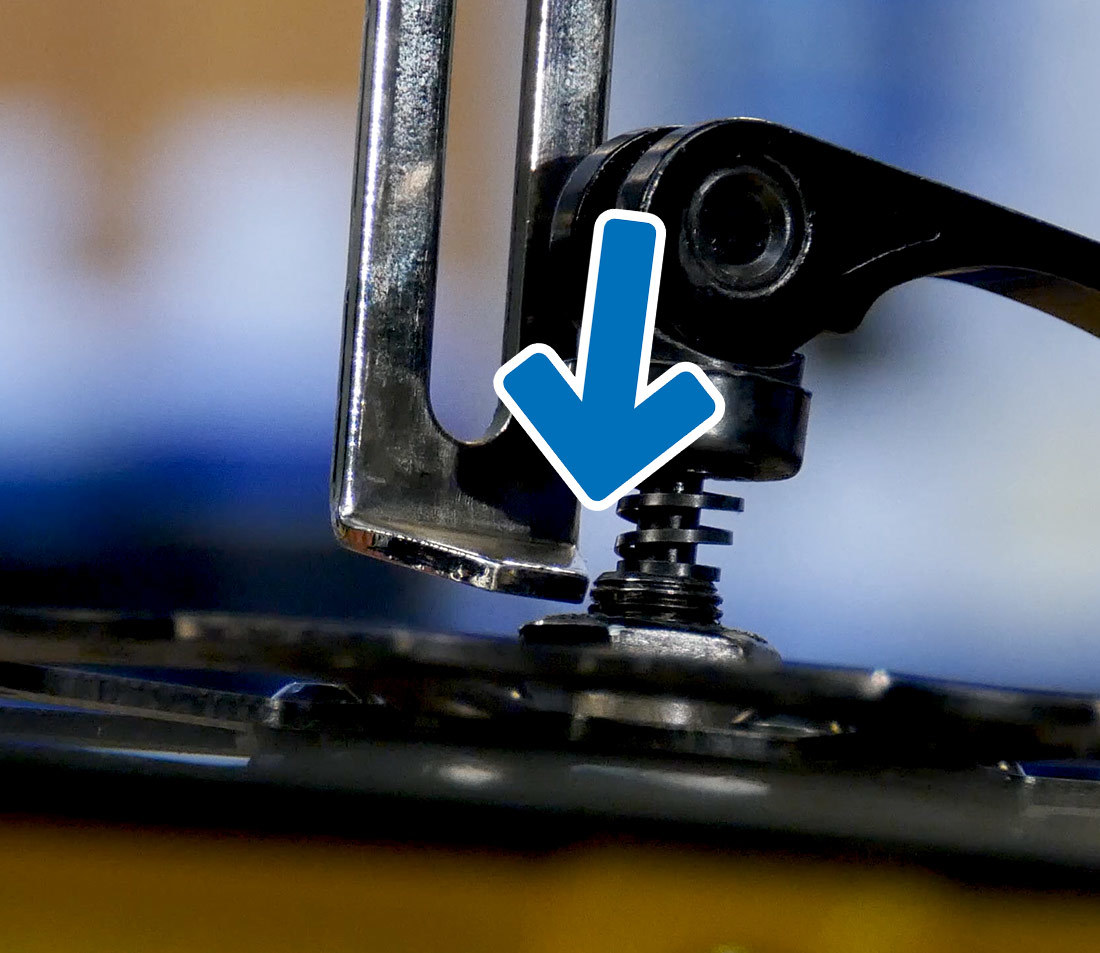
With the feet of the tool on the rim, lower the sliding indicator until the end rests on the part of the hub that contacts the inside face of the fork or frame dropout. These three points of contact - two on the rim, one on the hub - represent the centering of the rim relative to the right side of the hub.
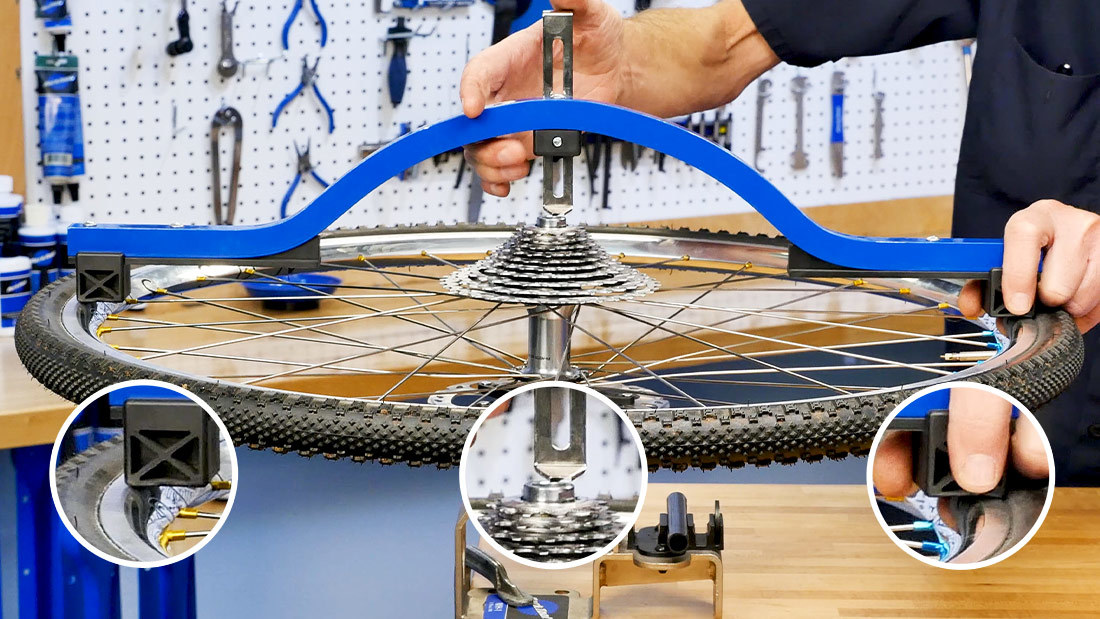
Snug the slider knob and lift off the tool. Flip the wheel over to compare this right side template to the same points on the left side. There are three possible scenarios you might see:
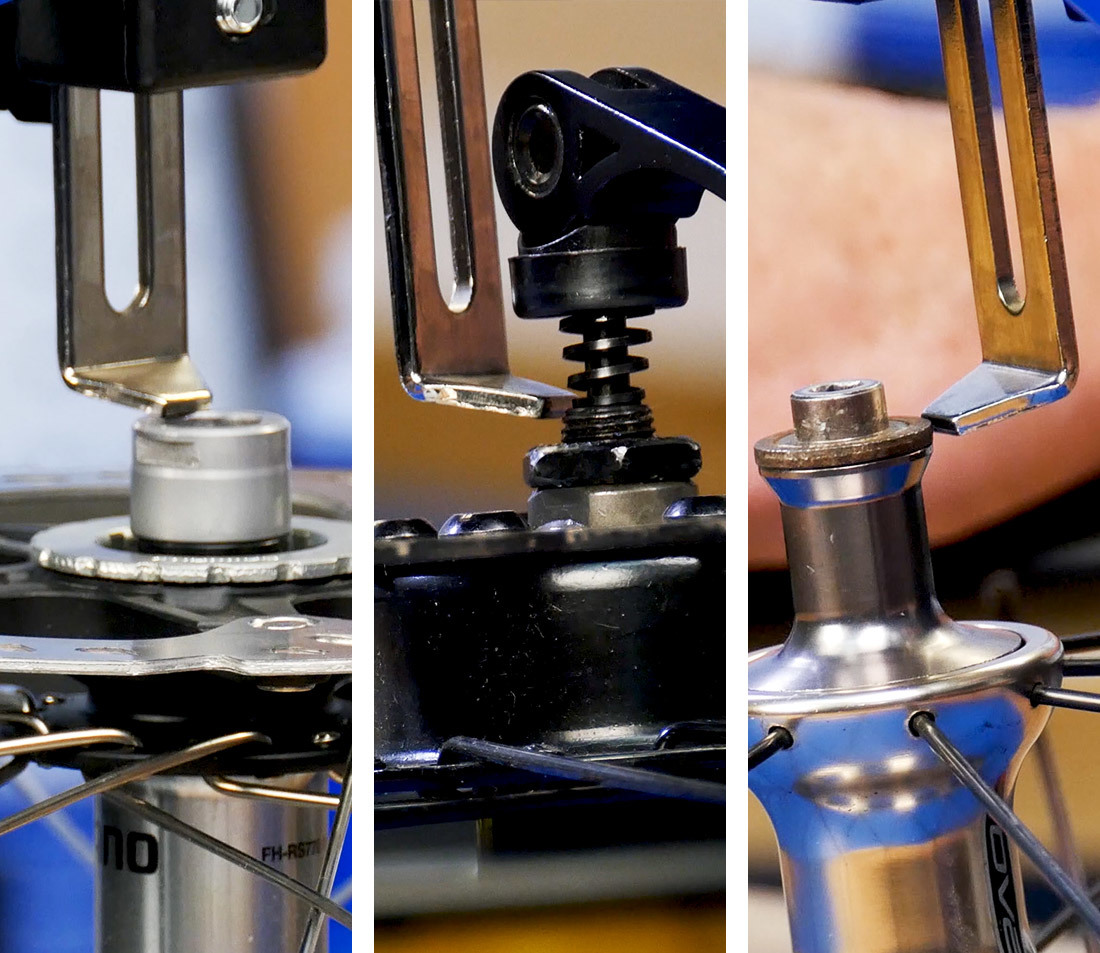
Scenario 1: No Gap
No significant gap is seen at the rim or the hub. Both right and left sides match relative to the hub. This means the rim is well centered to the hub and the wheel needs no centering correction
Scenario 2: Significant Gap
In this scenario, we see a fairly large gap between the indicator and the hub on the left side. This wheel is clearly not as nicely centered as the thru axle rear wheel in scenario 1. However, a wheel need not be perfectly centered to be fully usable.
The center of this wheel will be off-set to the mid-plane of the bike by only half the size of the gap seen at the indicator. Generally, if the gap seen at the hub is roughly one millimeter or less, the wheel should be consider adequately centered for any use, as it is off-center by less that 0.5 millimeter when in the bike.
A scrap of shift cable is generally about 1.2mm, and can make a simple and available go/no-go gauge. If the gauge easily fits in the gap, the wheel needs correction.
Here is another measuring test if the wheel uses a threaded axle: A threaded axle commonly has a 1mm pitch. So if we can see 3 threads between the indicator and the locknut faces, we have a roughly 3mm error.
Scenario 3: Negative Gap
In this scenario, when the tool is arranged so both feet are placed on the rim, the indicator sits below the locknut face. Again, if the difference between the indicator and face is under 1mm it should be considered within tolerance.
To get a gap you can measure more easily, reset the dishing tool and use the left side as the beginning reference side. When you check this measurement against the right side, you will find a gap between the the indicator and hub.
Theory: Moving the Rim
If the wheel needs correction, it is important to understand how the rim moves relative to the hub. When there is a gap between hub locknut face and tool indicator, the rim needs to move down, or toward the side opposite the dishing tool. This example rim will need to move right, which effectively moves the hub left. That will reduce the gap between indicator and hub.
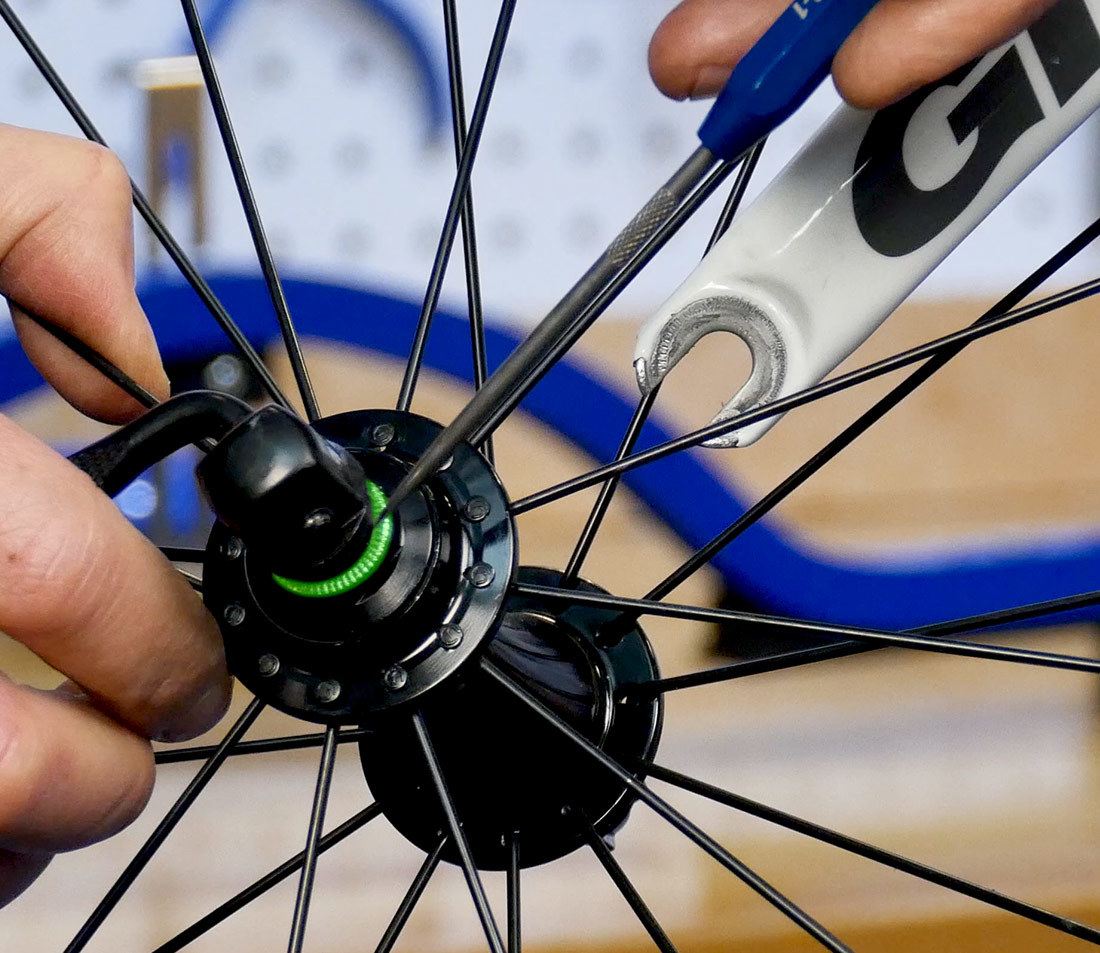
This is an easy place to get confused and move the rim the wrong way. We can visualize what is going to happen with a simple test to simulate what tightening spokes on one side would do. Squeezing a pair of spokes on the near the foot of the dishing tool simulates tightening the spokes on this side, and moves the rim accordingly. If we can see the gap getting smaller at the indicator, we know tightening the spokes on the side we are squeezing will bring the wheel closer to dish.
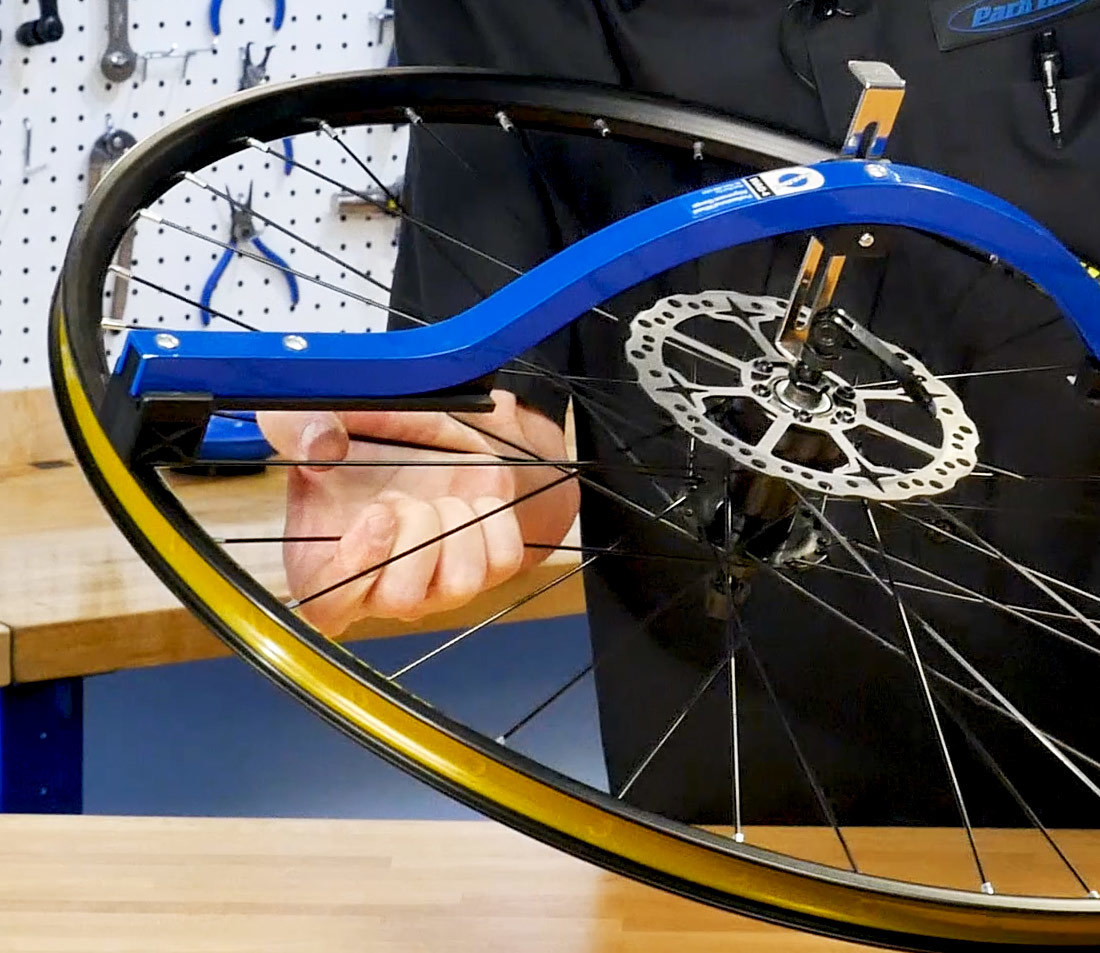
By squeezing a pair of spokes on the underside of this wheel...
...we can see that it moves the indicator towards the hub. Tightening the underside of this wheel will improve the dish
To move the rim relative to the hub, we change the tension of all the spokes on one side. Each side is pulling the rim toward their own flange. Tightening spokes on the left flange moves the rim towards the left, and vice versa. The opposite applies to loosening - loosening spokes on the left flange will move the rim to the right, because the right side’s higher tension will pull it over.
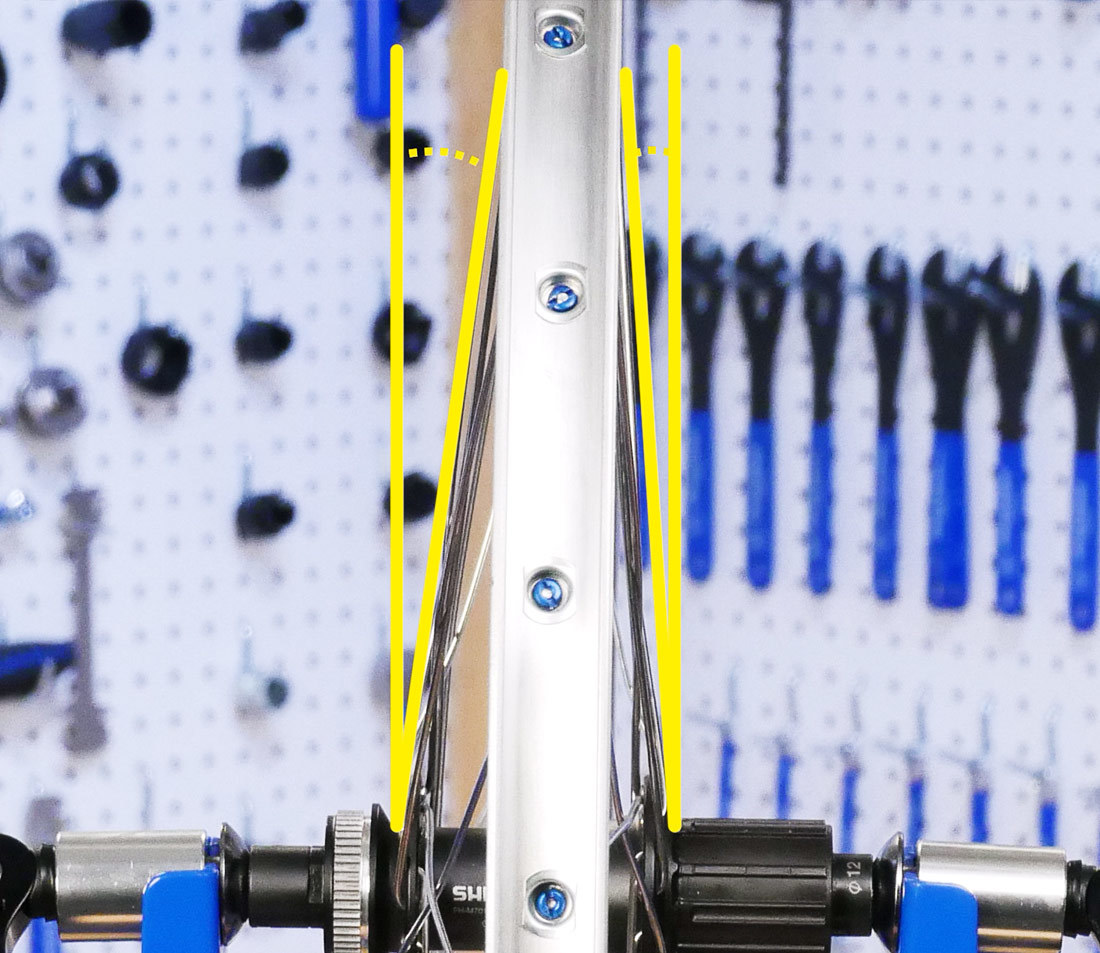
On wheels with one hub flange inset different from the other, the spokes will approach the rim at different angles. You see this on rear wheels with multiple sprockets, and front wheels with a rotor disc: the left and right flanges are spaced at different distances from the center. As a result, when the rim is properly centered, the left and right spoke tension will be different. This is inherent to the design of the wheel, and is not a problem. Pay attention to the tension on the tighter side, and the less-tight side will simply be something lower when the centering is correct.
When adjusting tension, keep in mind that changes to just one side will also affect overall spoke tension. For example, tightening the right side moves the rim to the right, but it also raises the overall spoke tension, including the left side spokes. It is a good idea to get a sense of the wheel’s spoke tension before correcting dish. With experience you may be able to squeeze spokes to get an idea of how tight it is, but it is better if you have a tensiometer, such as the TM-1, and check a few spokes, to avoid over-tightening the wheel. See Spoke Tension Measurement and Adjustment for more information on spoke tension.
Correcting Dish
If available, install the wheel into a truing stand, with the right side on your right as you face the stand. This helps you orient yourself to the wheel so you can remember which way the rim needs to move. Adjust the caliper indicators out of the way – the dishing tool has already provided the most accurate information on which way to move the rim.
This example wheel has an error seen at the left side of the hub. The rim needs to move right.
Use the tire valve hole as an easily recognizable reference point. Select the spoke from the right flange that is adjacent to the valve.
When just learning to make dish corrections, it is best to work in small increments. Install the spoke wrench fully on the nipple and take note of the wrench orientation on the nipple. Turn the wrench ¼ turn, or 90 degrees, to tighten the nipple.
After turning this first right side spoke nipple ¼ turn, advance to the next spoke on the same side and again tighten ¼ turn. Continue all the way around the rim, tightening only the spokes originating from the right side of the hub, until you are back to the valve hole.
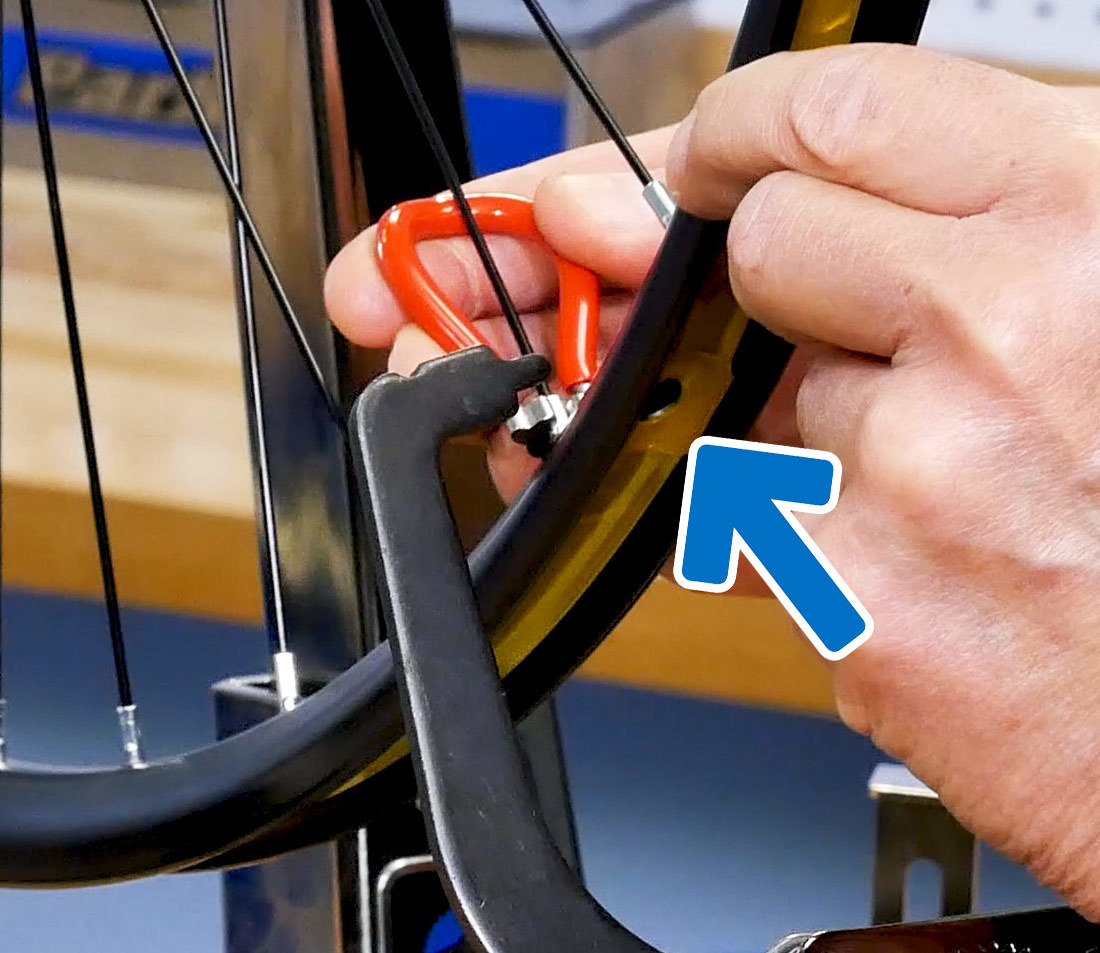
This presents a good opportunity to point out a common point of confusion: looking from the outside of the rim you will turn the nipple clockwise to tighten and counterclockwise to loosen. Working on a truing stand or bicycle, however, it appears as though you are tightening by turning counterclockwise, since we perceive the nipple as upside down.
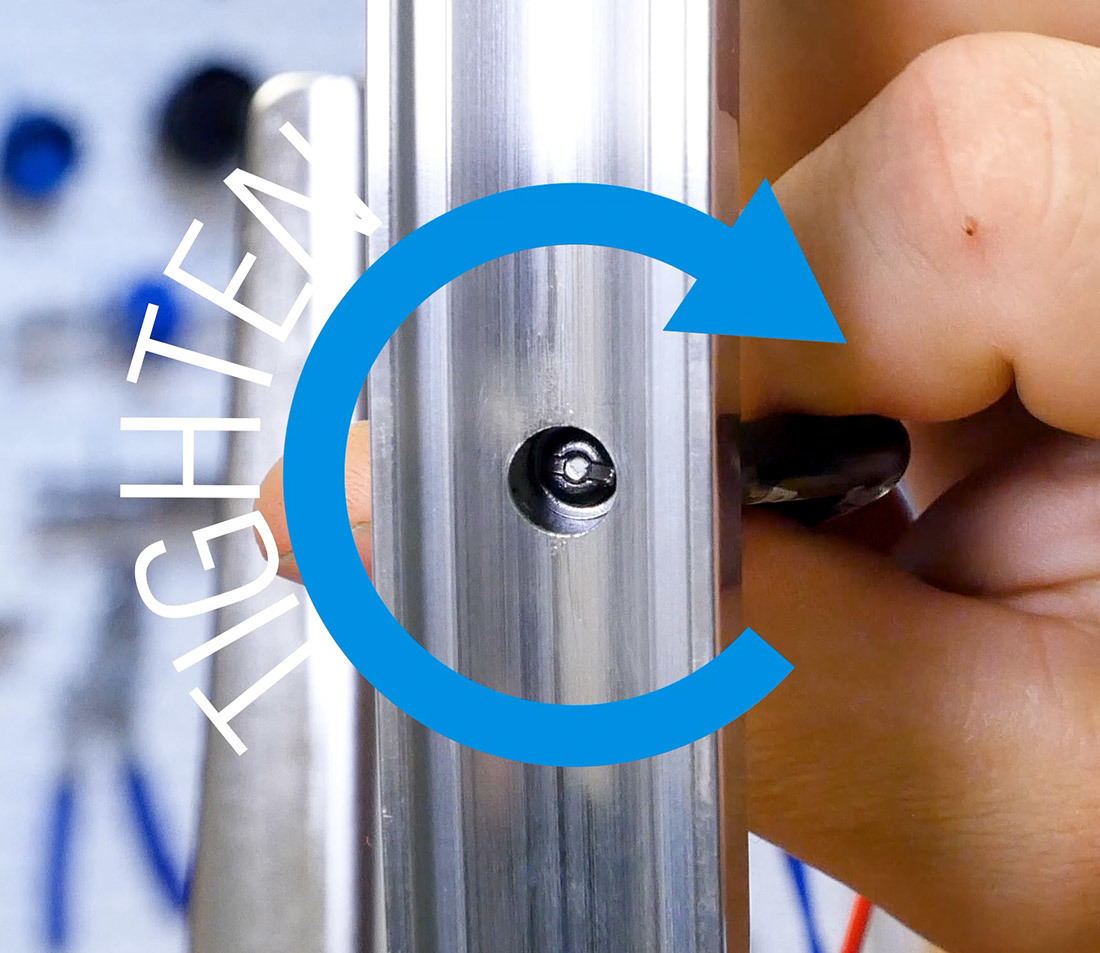
the spoke nipple, as seen from below the rim
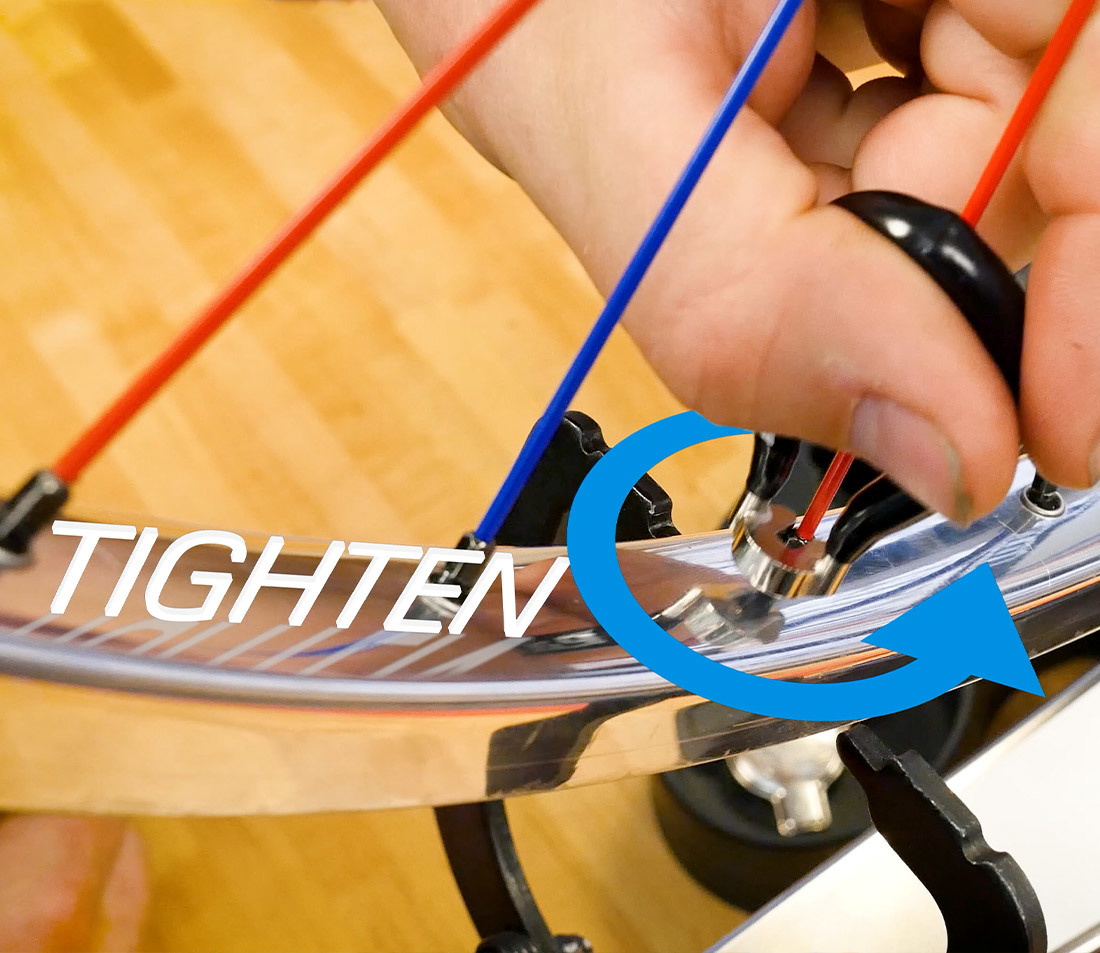
the spoke nipple, as seen from above the rim
It is not uncommon for the wheel to develop some minor lateral truing issues from this change in tension. Check for and correct any lateral errors after adjusting the dish.
Check your progress using the dishing tool. Because the rim has moved relative to the hub, you’ll need to reset the dishing tool starting again from the right side.
We want to see an improvement and a reduction of the error gap. If the error is still too large, but getting smaller, repeat the correction, again using ¼ turns. Check the dish reference on both sides, and repeat as necessary until the wheel shows a 1mm or less gap at the hub.
Tightening vs. Loosening
On wheels with the left and right flanges spaced at different distances from the center, it is extra important to pay attention to the tension of the wheel. Specifically, the side with the disc or sprockets will always have higher tension when correctly dished, as noted earlier. For all wheels, as you make corrections to the dish, make sure that the tension on either side does not exceed the maximum tension for your wheel.
If a wheel is out of dish, but has good or high overall tension, you may adjust tension by loosening. As noted earlier, loosening spokes on the left flange will move the rim to the right, because the right side’s higher tension will pull it over. Do not combine both tightening and loosening into one pass around the wheel - adjust one side, check the dish and lateral trueness, and then adjust the other side if necessary. See Spoke Tension Measurement and Adjustment for more information on spoke tension.
Next article in this series
Spoke Tension Measurement and Adjustment View Article
Related articles
Wheel Truing (Lateral & Radial) View Article
How to Center Park Tool Truing Stands View Article