Water Bottle Fittings
This article will discuss the service of built-in water bottle fittings.
Procedure
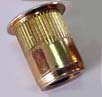
The water bottle frame fittings are used with bolts to hold the water bottle cage to the frame. These fittings are sometimes welded directly to the tubing of some frames. Another design is uses a “threaded insert” (Figure 1). The threaded insert or “rivet nut” is a fitting that is placed in a drilled tube, and then expanded to hold tight in the hole. With time and use these fitting can loosen in the frame tubing.
The threaded insert is sized slightly smaller than the hole. A tool is then threaded into the nut and the nut is pulled tight. This acts to expand (deform) the outside of the nut and clinches it tight in the frame tube.
If the threaded insert has loosened, remove the bolt from the cage and remove the cage. This is often the most difficult part of the process. If the fitting is loose in the frame it may simply spin, and the bolt will never loosen. It is possible in some cases to drip in some wicking thread locker such as Loctite 290 or DT Swiss Spoke Freeze. Allow this to cure for several hours and then attempt again to loosen the bolt.
It is first necessary to remove the bolt from the fitting. In some case, if the bolt is only marginally stuck, simply using the hex wrench to apply a side load will cause the nut to stick enough to free the bolt (Figure 2). Pull upward on the wrench while turning counter-clockwise.
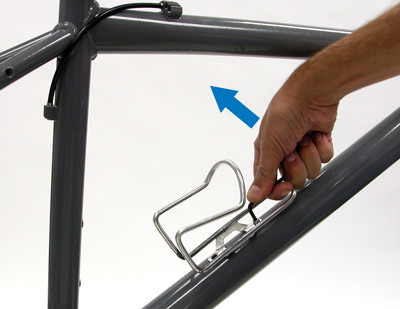
Figure 2
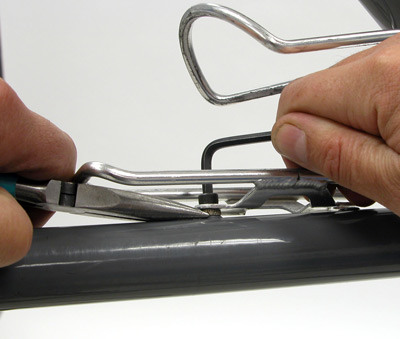
Figure 3
If there are spacers between the cage and fitting, needle nose or other narrow pliers may in some cases be used to grab and hold the nut (Figure 3). Expect some marring of the finish.
Once the bolt is successfully removed, it is possible to simulate the installation tool used when these fittings are originally installed. If the nut was not fully expanded during the original installation, it may be crimped further. However, if the tubing hole is oversized, or if the nut is already fully expanded, there may be no successful repair that is easy performed.
To attempt a repair, you will need a front skewer and front axle with locknut or cone. Spacers may be needed in some cases. Almost all skewers use the common 5 x 0.8mm threading of the water bottle fittings.
In Figure 4, there are two “tool” options. The hub is shown with a large nut that acts as a spacer on the cam side of the quick-release lever. The axle with skewer seen below has the cone and locknut back up to be flush with the axle end. The cam housing will press against the locknut.
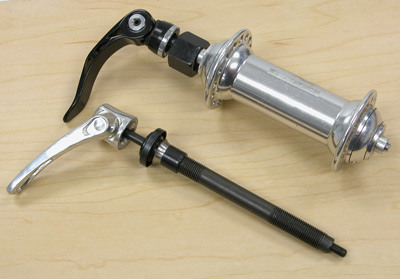
Figure 4
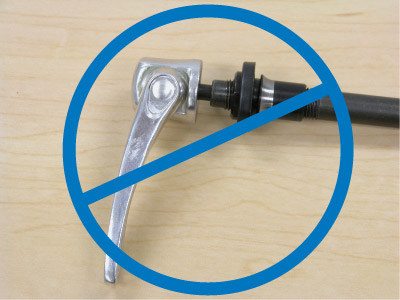
Figure 5
The cam must be able to press against something in order to pull on the skewer. In Figure 5, the axle is protruding past the cone, and the cam housing will be unable to press against it. Spacers may be added, or the may cone threaded.
With the skewer installed in the axle or hub, thread skewer end into fitting. Leave the skewer in the open position (Figure 6).
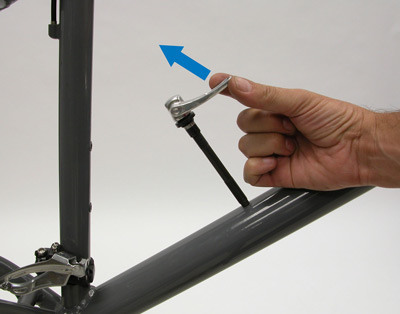
Figure 6
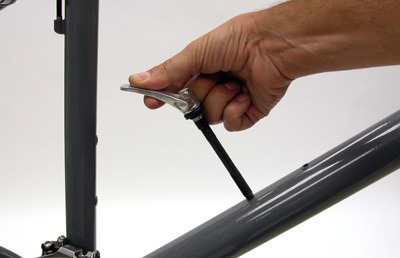
Figure 7
Adjust skewer tension lightly. More tension can be added if necessary. Pull the lever over to a closed position, which draws the skewer end into the axle (Figure 7). This will pull or crimp the nut tighter.
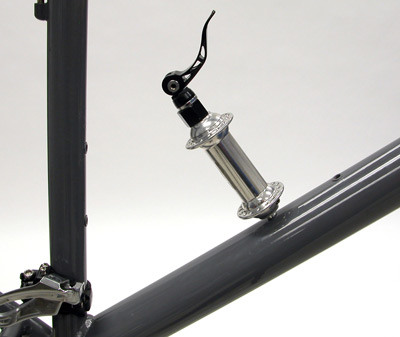
A hub may also used for this repair (Figure 8). A rear axle, or rear hub will also work, however the longer axles may not fit inside some of the smaller frames. The front axles simply allow for more room.
Related articles
Frame Alignment View Article