Shimano® Dura-Ace® 7800 Rear Hub Service
This article will discuss the service of the Shimano® Dura-Ace® 7800 rear hub.
Getting Started
- Cone wrenches to fit
- 5mm hex wrench
- Rags and cleaning solvent such as CB-4 Bio ChainBrite™
- Grease such as Park Tool Polylube PPL-1
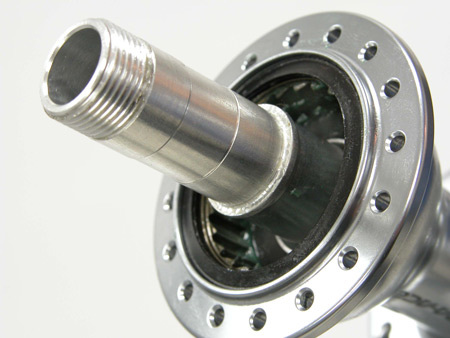
The Shimano® Dura-Ace 7800 rear hubs utilize both loose ball bearings and cartridge bearings (Figure 1). There are 14 loose ball bearings per side for the axle bearing. Loose balls are 3/16 inch. The freehub body rotates on cartridge bearings and is considered a non-serviceable part. If the freehub is worn, the entire freehub unit is replaced.
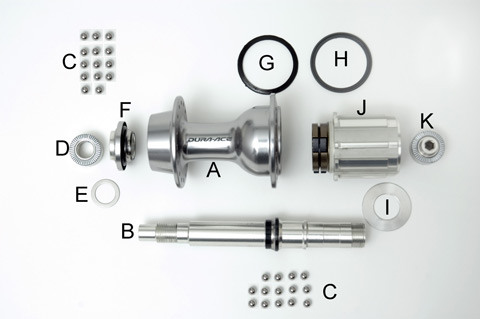
- Hub body
- Axle, with right side cone in place
- Bearings—14 bearings each side, 3/16″
- Left side locknut
- Left side locknut washer
- Left side cone
- Right side body seal
- Freehub seal
- Right side washer
- Freehub body
- Right side locknut
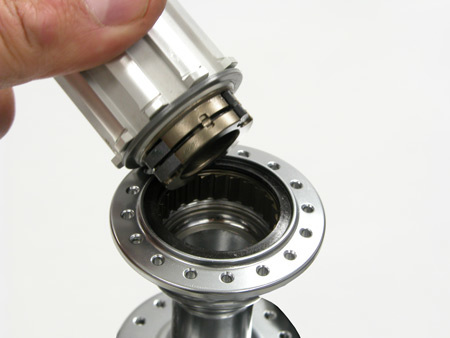
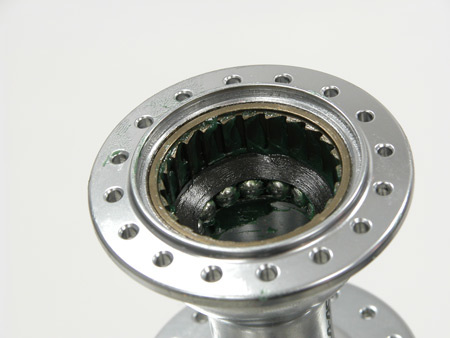
The freehub mechanism of this hub is a ratchet system. There are three pawls on the freehub body. The hub shell holds an internal ratchet ring (Figure 2). The axle bearings are behind the freehub body.
Overhaul Procedure
- Remove cassette cogs. See Cassette and Cog Removal.
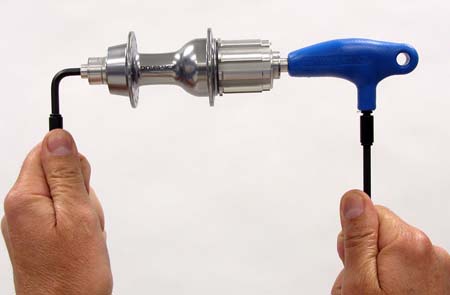
- Insert a 5mm hex into each side of the axle (Figure 3). The right side axle has a LEFT-HAND threaded lock nut. Turn the right side locknut clockwise to remove.
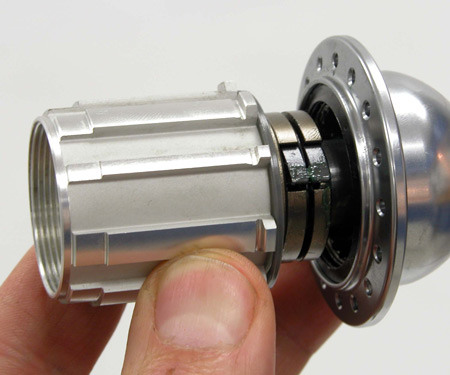
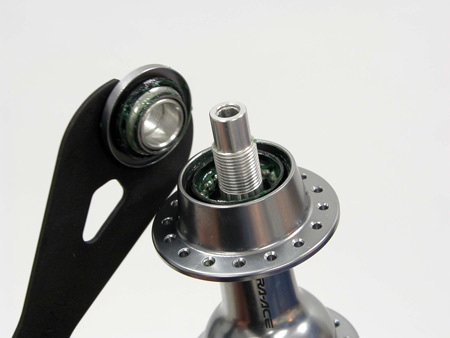
- Pull freehub to remove from axle (Figure 4 and 5). Make note of spacer under locknut and of seals between freehub body and hub shell.
- Loosen and remove left side locknut. Hold cone stationary with a cone wrench and loosen locknut counter-clockwise. Unthread left side cone from axle (Figure 6).
- Pull axle from right side to remove. Right side cone on axle is permanently pressed axle. Do not remove right side cone from axle
- Remove seal from right side and remove ball bearings. NOTE: Do not remove seal from left side of hub shell. Removal may damage seal. Leave seal in place and clean under and around hub seal. Right side seal is pliable and removable (Figure 7).
- Clean bearings and parts with degreasing solvent.
NOTE: Brush off and wipe freehub body clean. Do not soak freehub in degreaser or solvent as cartridge bearings may become contaminated. Freehub bearings are not considered replaceable, and the freehub is considered replaceable as a unit.
Assembly and Adjustment
- Grease both bearings cups in the hub body. Install 14 bearings per side. Cover bearings with grease.
- Install right side seal into hub shell.
- Install axle from the right side and thread on left side cone.
- Install left side washer and left side locknut. Do not secure at this time.
- Place black seal over hub body gears. Place gray plastic seal onto freehub body.
- Grease inside ratchet wheel and grease pawls of freehub body.
- Install freehub body onto axle and rotate counter-clockwise to engage and insert freehub into ratchet ring.
- Install freehub spacer and thread on right side locknut. Turn locknut counter-clockwise to install.
- Insert 5mm hex wrenches on each side of the axle and tighten right side locknut. Secure right side locknut clockwise to 86-130 inch pounds
- Adjust bearings using cone wrenches on left side. Adjust hub bearings in small increments so the bearings are as loose as possible without lateral play or knocking. Axle have very little effective flex when loaded by the quick-release skewer. Allow only a very slight amount of play when the bike is out of the dropouts.
Related articles
Hub Overhaul and Adjustment: Cup and Cone Style View Article