PFP-6 and PFP-3 Service
This article will discuss the service of the PFP-6 Home Mechanic Floor Pump and the PFP-3 Floor Pump (both discontinued).
Pump Head Replacement
- Pump Head Replacement:
- Hammer (HMR-4)
- Small punch
- 4mm hex or similarly sized punch
- Plunger Gasket Replacement:
- Phillips screwdriver
- Silicone-based lubricant
- Base Replacement:
- Phillips screwdriver
The pump head (part #1081) uses two gaskets that may be replaced or simply reversed. It is first necessary to disassemble the pump alloy head assembly . Each gasket is exactly the same, and can be used twice. By flipping and reversing the valves, the presta and Shrader positions will effectively get new gasket material.
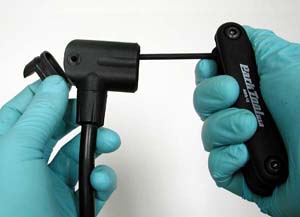
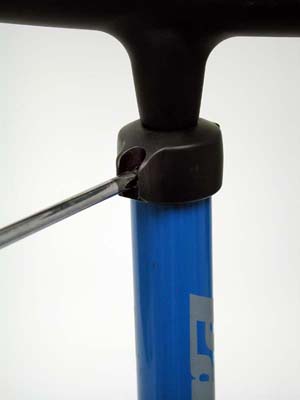
- Place pump head lever so it is parallel to hose.
- Use a small punch to tap the lever pin from the head. Remove lever from pump head body.
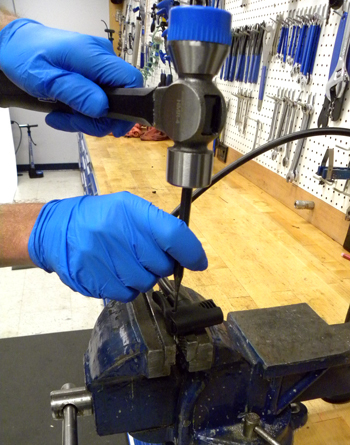
- Use a 4mm hex wrench or similar sized punch to push from the presta hole of the head housing until seat retainer is removed.
- Continue to push from the Schrader hole and presta hole alternatively to remove the Schrader and presta ball-seats from head housing.

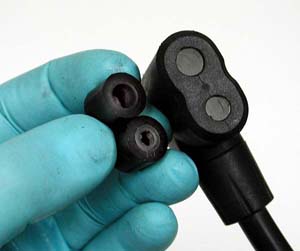
- Using a hex wrench or similar tool to push out both head gaskets. Reverse/Replace both gaskets. Schrader and presta gaskets are identical. Presta side will have smaller opening toward inner tube valve. Schrader side will have larger side toward inner tube valve. Note head housing marking and place gaskets accordingly. Push on backside of head housing until gaskets are fully seated.
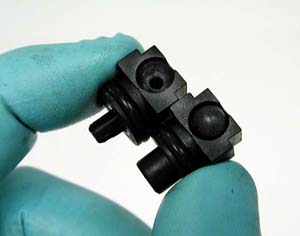
- Install head ball between ball-seats. Ball-seat with cross-shaped stud is Schrader side, and the seat with the hole is the presta side. Install ball seats on top of gasket accordingly. Push ball seats from backside to fully seat them against gaskets.
- Install and press seat retainer until fully seated. Install so the lever body remains clear for lever installation.
- Install lever and lever pin. Push or tap pin fully in place.
- Pump head assembly is ready for use.
Plunger Gasket Replacement
With time and use, the plunger gasket (part #1087) may require replacement or lubrication. If possible, use a silicone based lubricant.
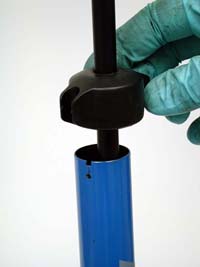
- Use a Phillips screwdriver and remove screws on either side of top cap.
- Pull upward on pump handle and remove shaft from pump body.
- Pull seal from pump head and replace with new seal, part #1087.
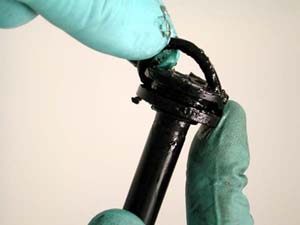
- Grease new seal using a silicone based grease if possible.
- Install shaft into pump body.
- Install screws to secure top cap.
- Pump is ready to use.
Elbow End Cap Replacement
The hose connects to the gauge holder and is held in place by the end cap (part #1086). Double check tightness of compression fittings if pump leaks. No wrench is required.
Gauge Replacement
The gauge may be replaced on the PFP-3 or PFP-6. The concept of replacement is the same between the two pumps.
- Loosen the blue locking cap ring counter-clockwise and remove. There will be an indicator ring under the cap.
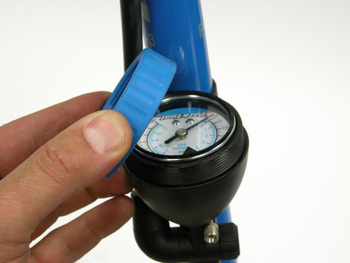
- Plug the end of the pump head and work the plunger up and down to create pressure. The pressure will build up in the pump body and will lift the gauge up from the gauge seat.
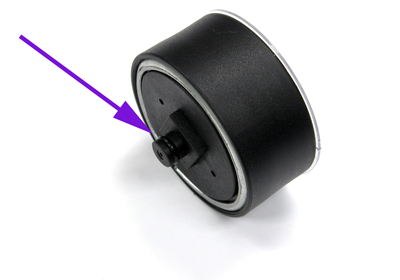
- Replace gauge with new gauge. NOTE: Inspect gauge for presence of O-ring.
- Replace indicator ring. Install and secure blue locking ring.
Short Hose Replacement
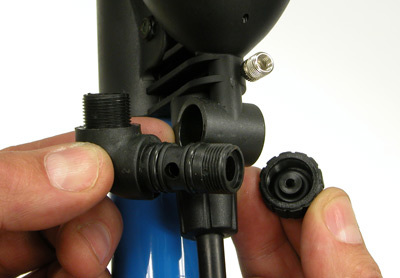
- To replace the short hose below the gauge (part #1091), loosen both the upper and lower compression nuts.
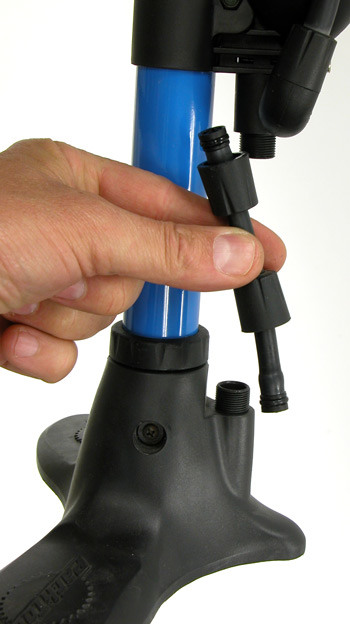
- Pull from each end the fittings inside the hose. These will be reused in the new hose. Reuse the compression nuts as well. NOTE: Use care not to loose rubber ball inside base at hose fitting.
- Install the hose back to each fitting and secure compression nuts.
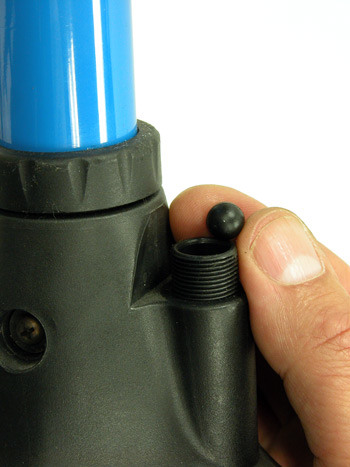
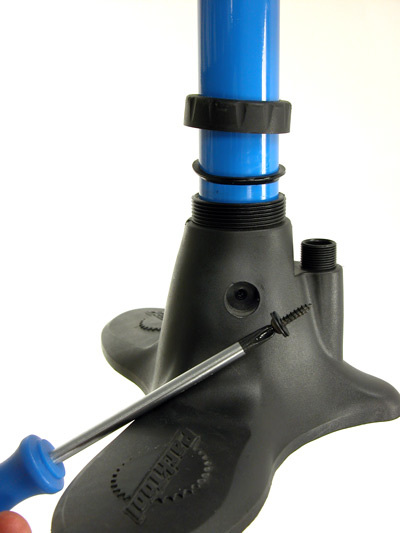
Base Replacement
- Remove the screw at the base. Loosen the compression fitting on the blue tube of the pump body. Pull the old base off the blue tube.
- Remove from the base hose fitting the rubber ball. This ball acts as a check valve and must be transferred to the new base.