Mavic® Cosmic® Carbone SLR Service
This article will review the truing and service of the Mavic® Cosmic® Carbone SLR. For measuring tension on the Cosmic® Carbone SLR use the TM-1 with the most current tension chart (downloadable via the TM-1 product page).
Getting Started
- Truing Stand
- Compatible spoke wrench: SW-15 or SW-18
- Spoke holder such as CSH-1 or BSH-4
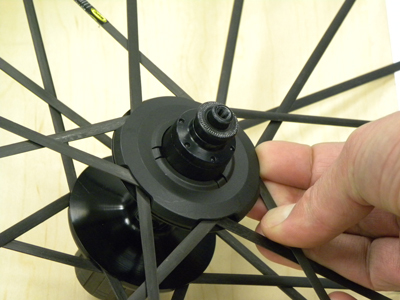
The Mavic® Cosmic® Carbone SLR wheel systems uses bladed carbon spokes. One long blade connects from one side of the rim to the opposite, a system called “rim-to-rim” or “R2R”. Each spoke has a threaded stud fitted at the end that engages a spoke nipple (figure 1).
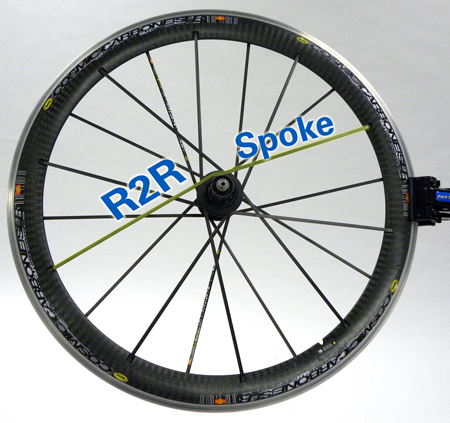
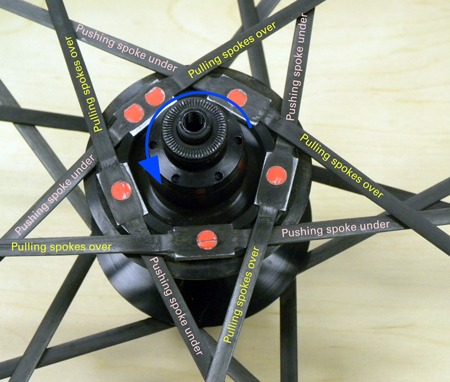
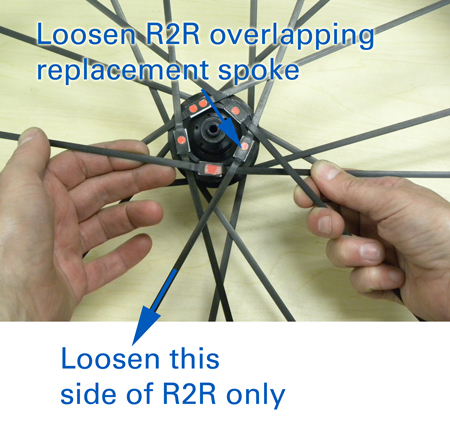
The spokes overlap or cross one another at the hub. At first glance, the wheel appears to be a “20 spoke” wheel but there are only five of the R2R spokes per side. It is effectively a two-cross, with each R2R blade crossing another twice. Like other tangential laced wheel there are “pulling” and “pushing” spokes (figure 2). Each R2R will be on one half a pulling spoke while on the other end it will be a pushing spoke. On the rear hub, the pulling spokes are laced over the pushing spokes.
The Mavic® hub is a proprietary design and cannot accept a conventional hooked spoke. The R2R spoke has a rectangular aluminum plate called the “pallet” that is molded in the middle of spoke length. The pallet fits into a machined “housing” in the hub flange.
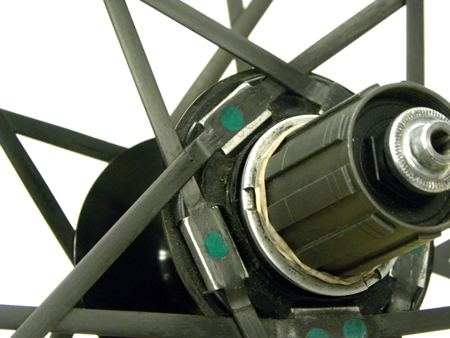
There are two different length R2R spokes. Spokes with a red mark of any sort on the pallet are longer and are for the non-drive rear and front hubs (figure 3). The R2R with a green mark of any sort on the pallet are shorter and are for the drive side of the rear hub (figure 4).

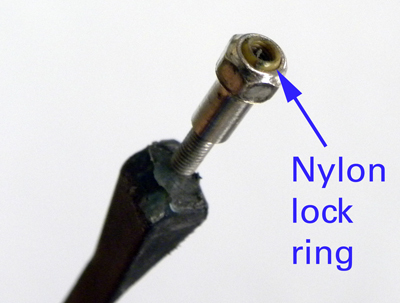
The R2R spokes uses a “nyloc” nipple design. A ring of nylon is built into the nipple to help keep the nipple from loosening. Do not lubricate the spoke threads of the R2R spokes or of any fastener using a nylon or “nyloc” system.
Spoke Replacement
Spokes, of course, can become damaged. In figure 6, the spoke was damaged from the pedal of another rider. The R2R spokes are a uni-directional carbon fiber design. This spoke was able to maintain full tension from only the small strands seen in the image.

Begin spoke replacement by removing the plastic hub covers (figure 7). These covers are a snap fit. Gently pry them off the hub flanges.
Inspect the spoke pattern and duplicate the same when lacing in a new R2R spoke. Loosen fully each side of the R2R that will be replaced. Remove both nipples from spoke and rim. Inspect hub flange. Find the R2R spoke overlapping the replaced spoke. Loosen only the side that overlaps the replace spoke and remove the R2R being replaced (figure 8).
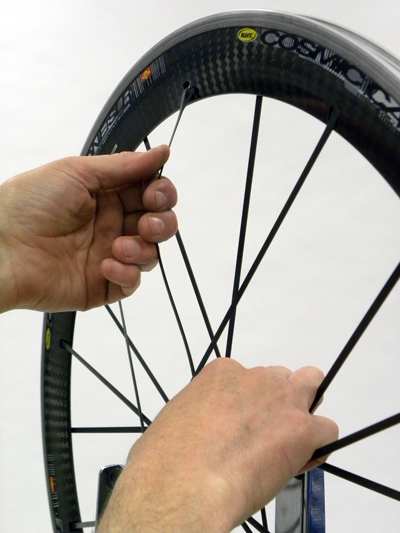
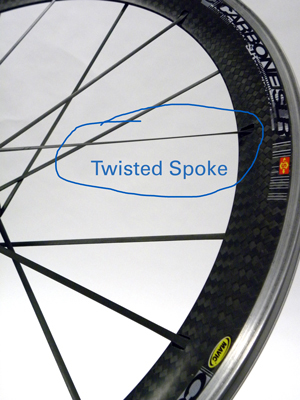
The bladed spoke shape is susceptible to twisting when the nipple is turned. Mavic® provides a spoke holder to help prevent spokes from twisting (figure 9). Insert the tool along the spoke.
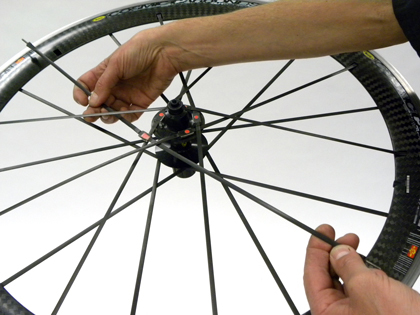
Feed the new R2R into the wheel following the previous spoke pattern (figure 10). Take note of similar spokes and duplicate the same pattern.
The R2R must be flexed to feed the threaded stud through the rim carbon cover and through the aluminum rim (figure 11). This does not damage the R2R spoke.
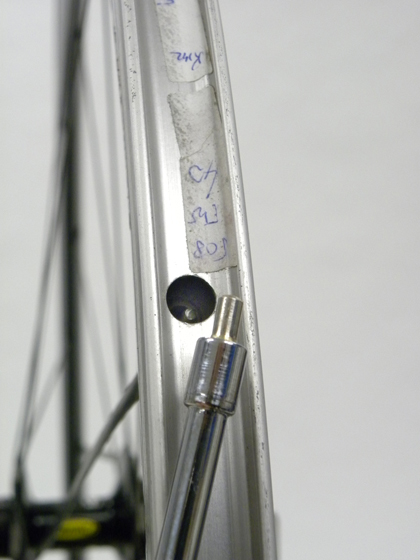
The nipples feed through the rim onto the threaded stud at the end of the R2R spoke. The Mavic® internal nipples are a 5.5mm hex. Place the nipple in the socket of the SW-15 or SW-18 (figure 12). Engage the nipple and turn clockwise until nipple threads on spoke. Inspect thread showing at end of nipple. Thread each side evenly until threads just protrude past nipple.
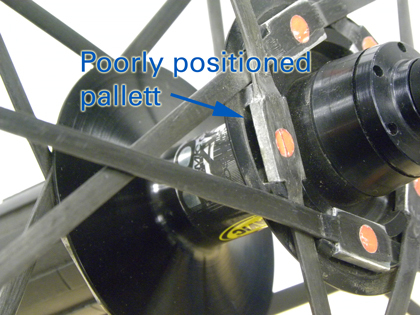
Inspect the pallet in the hub (figure 13). The pallet should fit evenly and securely in the flange housing of the hub flange. Press or gently tap the pallet into place as necessary.
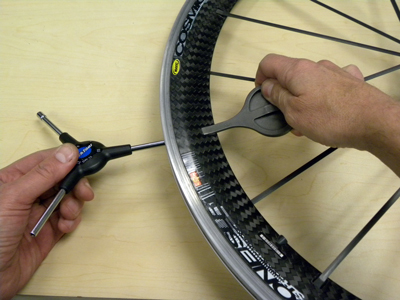
The Cosmic® Carbon is trued in concept like a conventional spoke wheel. The spoke tension is increased or decreased to move a section of rim as appropriate. It is important to keep the spoke from rotating by using an anti-rotation devise (figure 14). Inspect the spoke to insure it is properly aligned and parallel to the rim for the best aerodynamic results.

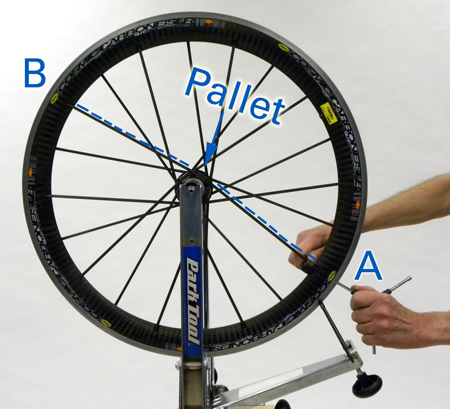
The unique design of the Carbon Cosmic® R2R system does present a unique and interesting phenomenon while truing. The R2R spoke is one spoke that spans from rim to rim. It is for the most part fixed in the middle with the pallet in the flange housing. However, there is some transfer of tension from one side of a R2R to the other through the pallet. When one nipple is loosened, it relaxes tension on the spoke, but it also will relax to some degree the opposite side of the R2R. The same occurs when tightening the nipple. As an extreme case, a spoke pulled to full tension backed down to zero can reduce tension on the opposite side of the spoke span by 20%. In figure 15, tightening or loosening at “A” will have an effect at “B”.
For any spoked wheel with flat “aerodynamic” spokes, end with a check that all spokes are correctly aligned (figure 16). Correct any spoke angling either left or right.
Related articles
TS-2Di Dial Indicator Use in Wheel Truing View Article
Wheel Truing (Lateral & Radial) View Article
Spoke Tension Measurement and Adjustment View Article
Wheel Tension App Instructions View Article