Chain Length Sizing
Replacement chains for bicycles are usually longer than you need. This repair help article will take you step by step through the different methods of sizing a bike chain.
Preliminary Info
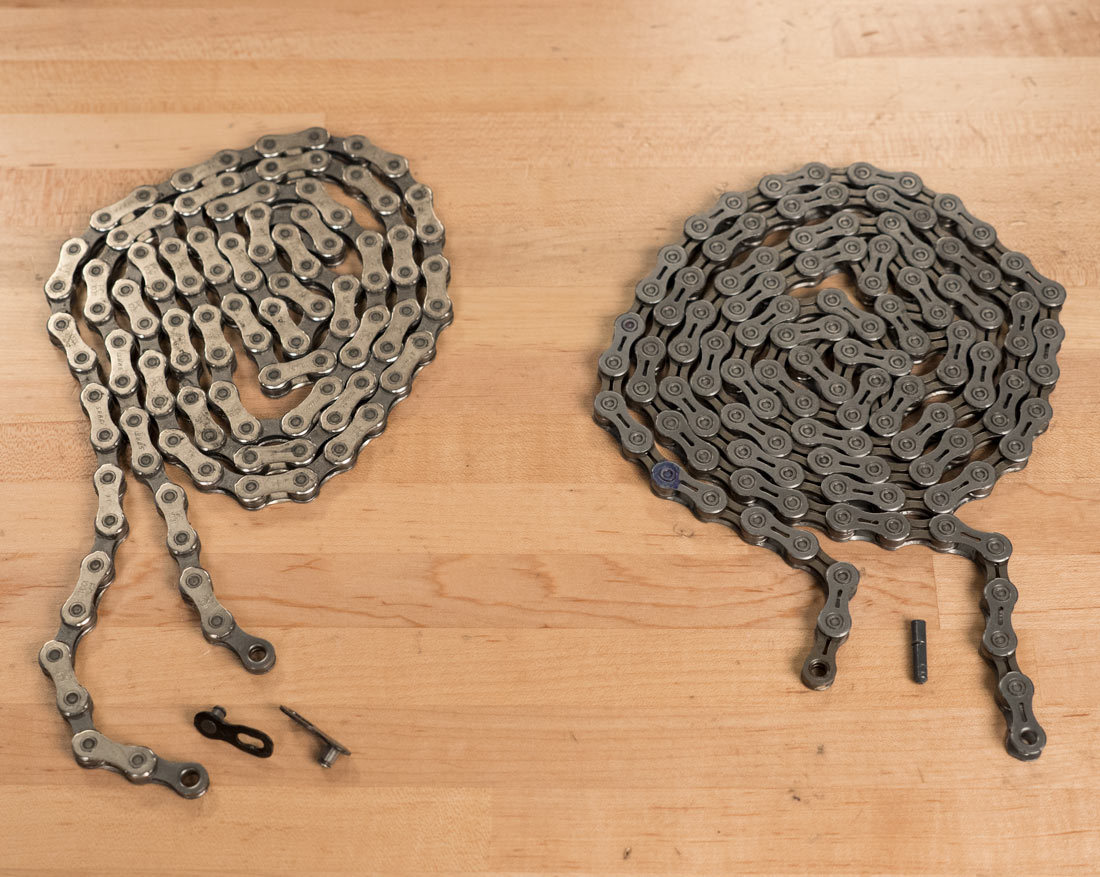
Before we begin the chain sizing process, let’s first define the two types of multi-speed bicycle chain. There are chains that use a master link (or “quick link”) and chains that use a special connecting rivet chains. Master link chains use two removable outer plates to connect the chain. Connecting rivet chains use a special rivet to connect the chain.
Check & Remove Chain
Before removing the old chain, verify that it is the correct length.
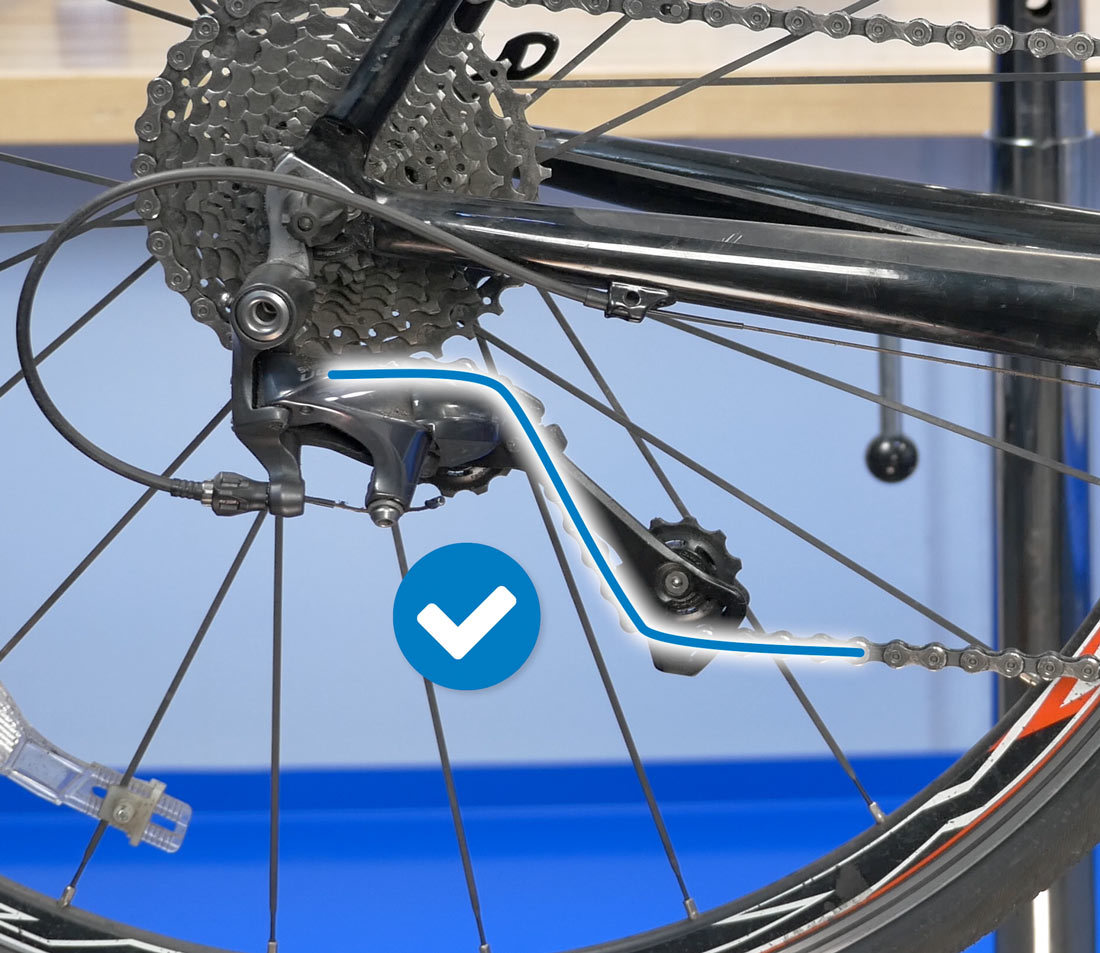
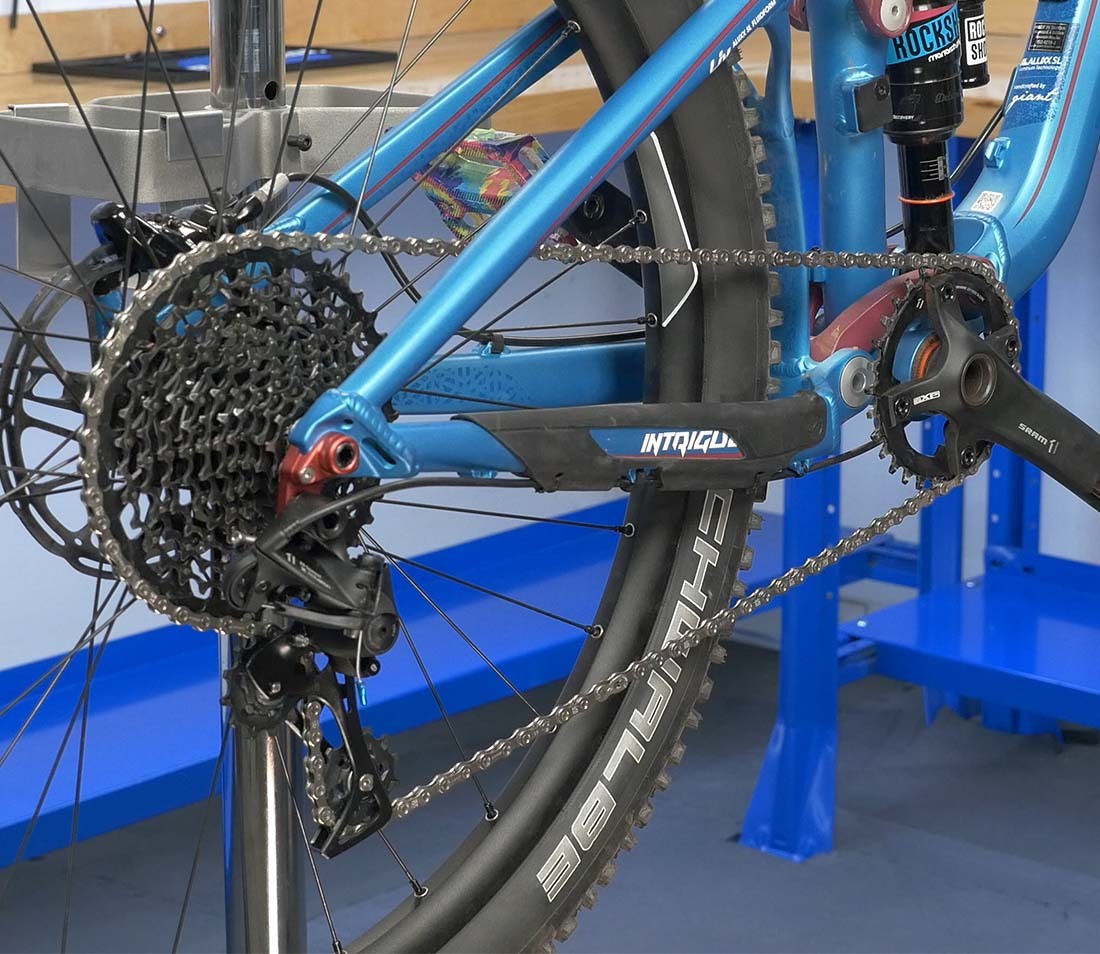
Shift the bike into the largest chainring and largest rear cog. The chain should be long enough to make this shift with two slight bends at each pulley of the rear derailleur.
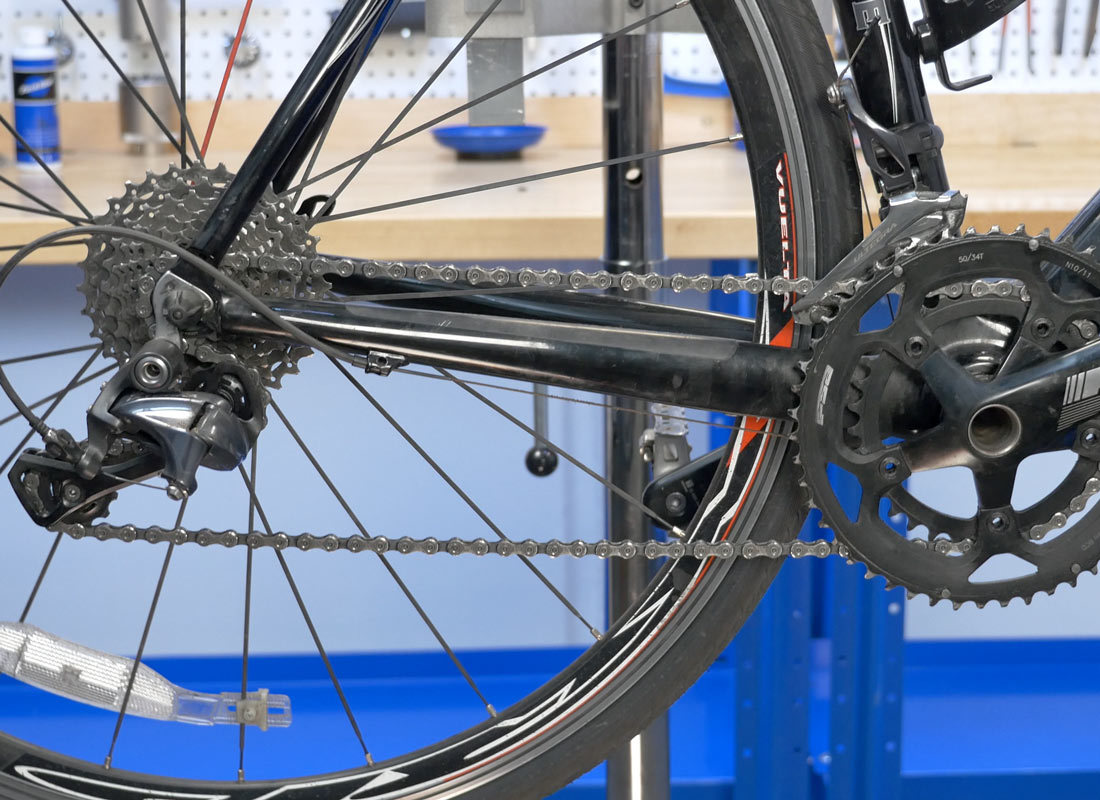
Next, shift to the smallest chainring and sprocket. There should be no slack in the chain, and the derailleur should not pull so far back that the chain contacts itself.
Next, remove the rear wheel. This will take tension off the chain and give you better access to the chain. Inspect the chain for a master link.

Master Link Chains
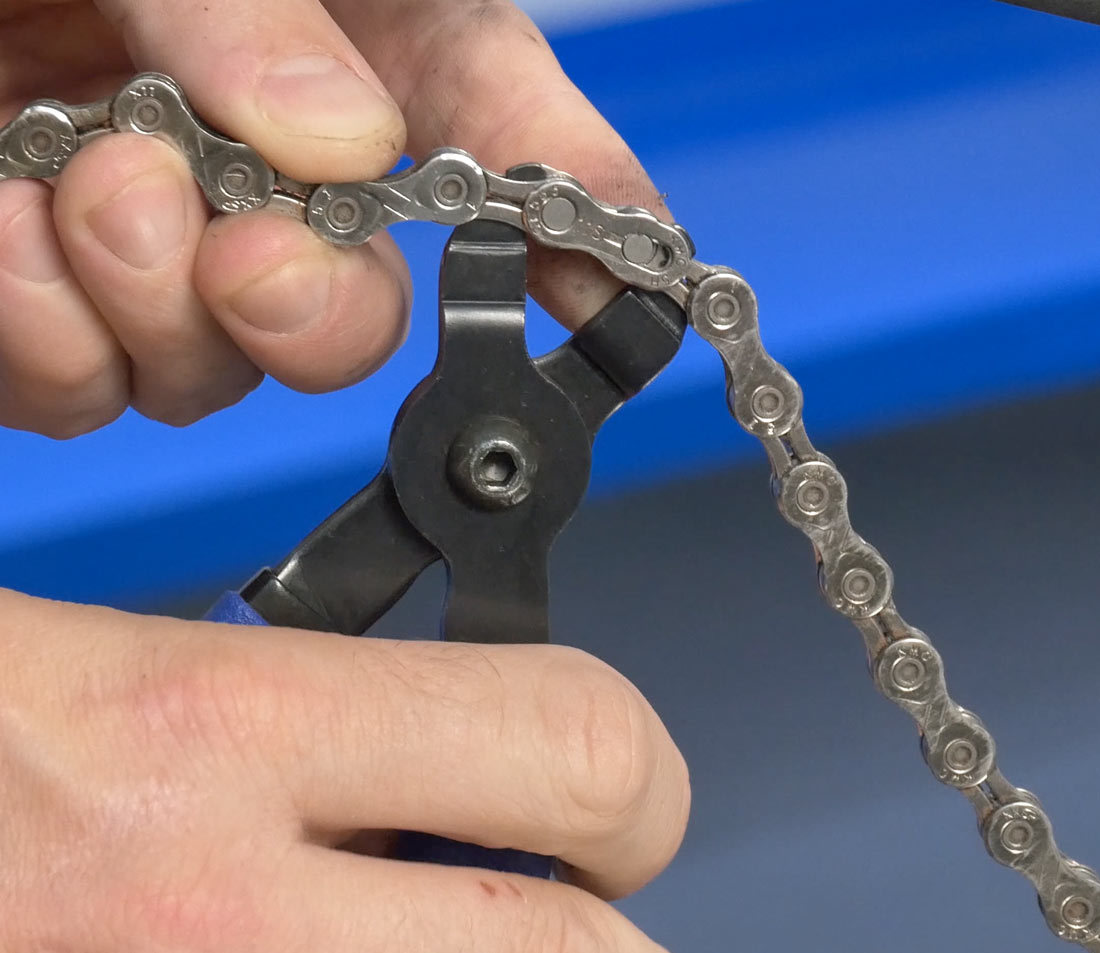
If a master link is present, use a master link pliers such as the Park MLP-1.2 to disengage the link. If you have a chain tool and your chain is worn out, you can ignore the master link and simply cut the chain using a chain tool.
Connecting Rivet Chains
Connecting rivets will appear visually different from other rivets. When selecting a rivet to break, be sure that it is at least a couple of links away from any connecting rivet already installed in the chain. Install the chain tool and bring the driving pin of the chain tool into contact with the connecting rivet. Ensure the chain tool pin is driving in a straight line into the chain rivet. Turn the handle with force and drive out the rivet, then remove the chain.
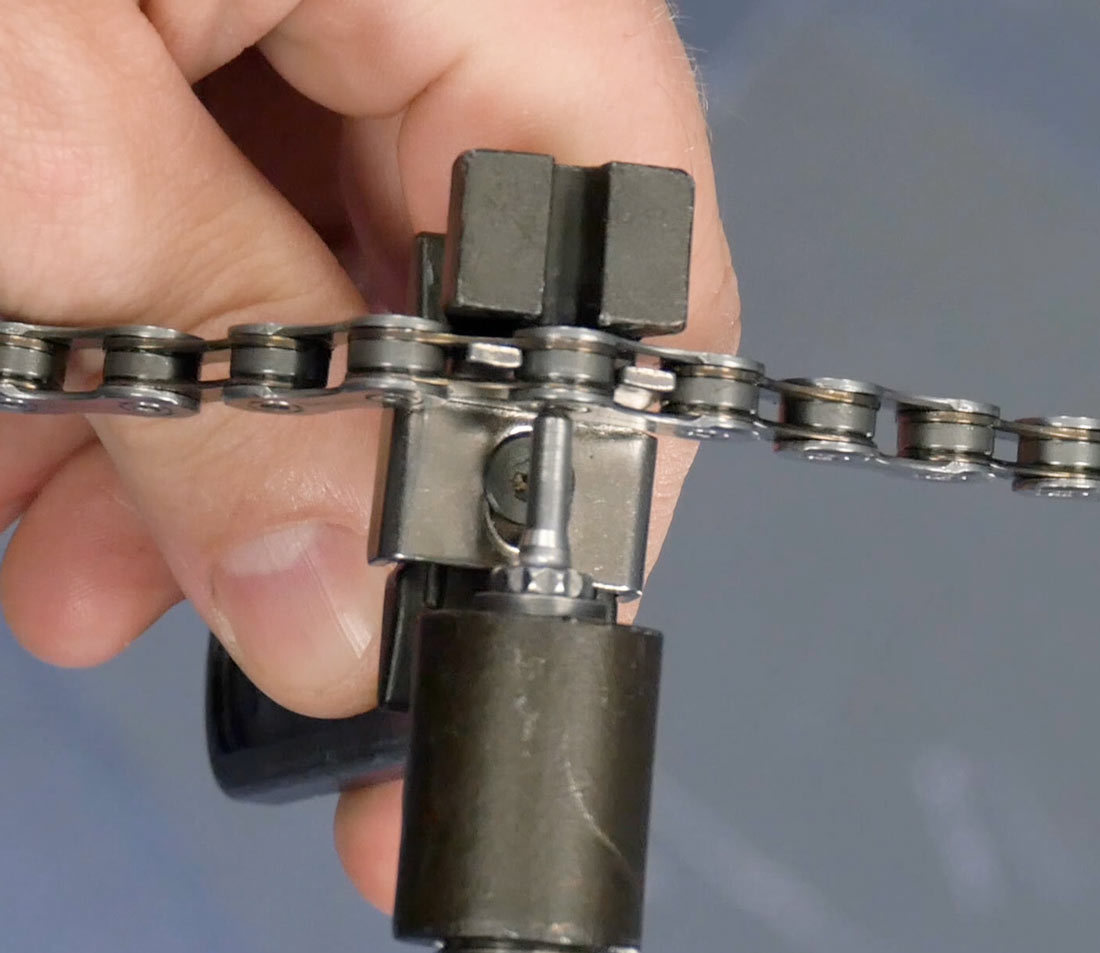
Bring tool into contact with rivet
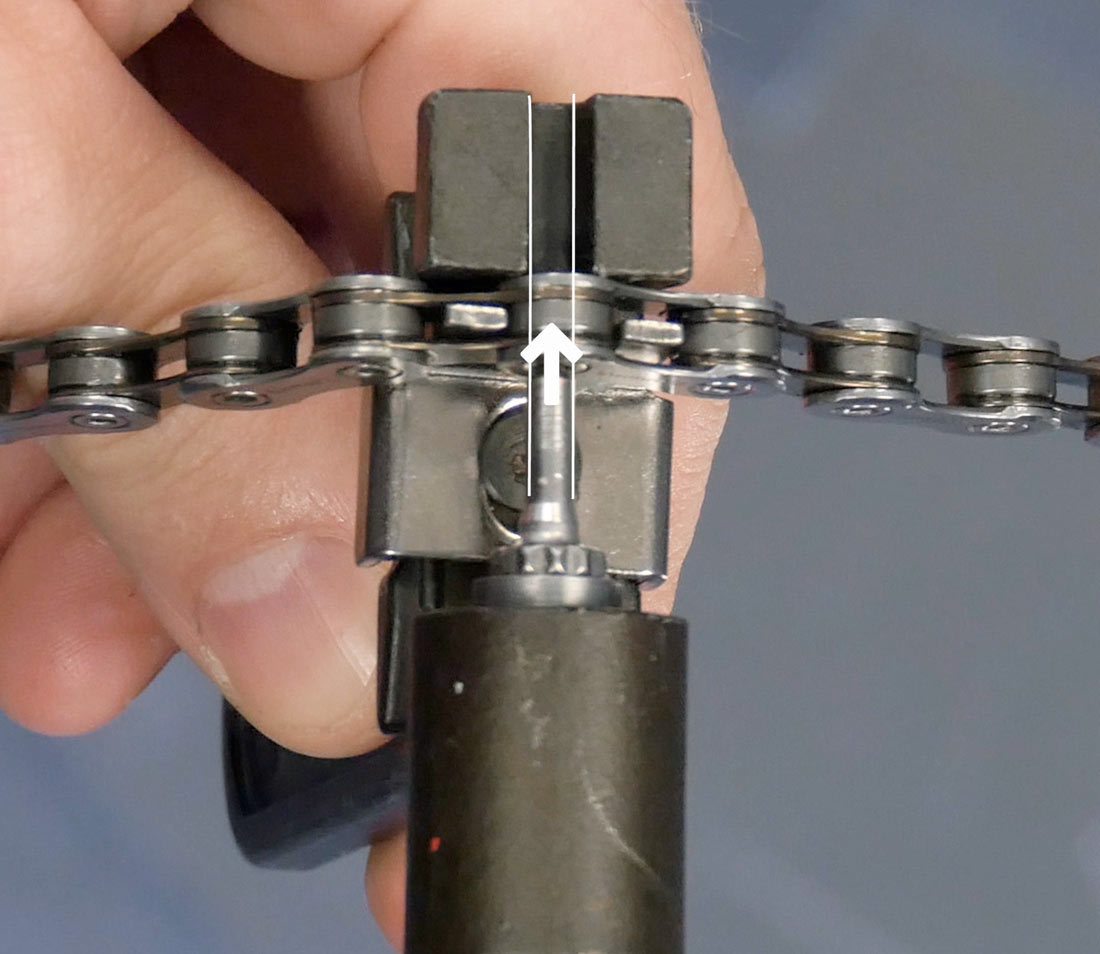
Drive out in straight line
Sizing to Original Chain
If the old chain is an acceptable length, lay it next to the new chain. Always line up outer plates with outer plates or inner plates with inner plates. Insert the master link if applicable to get a true side by side comparison. Take care to match them rivet by rivet, noting that old chains will lengthen as they wear.
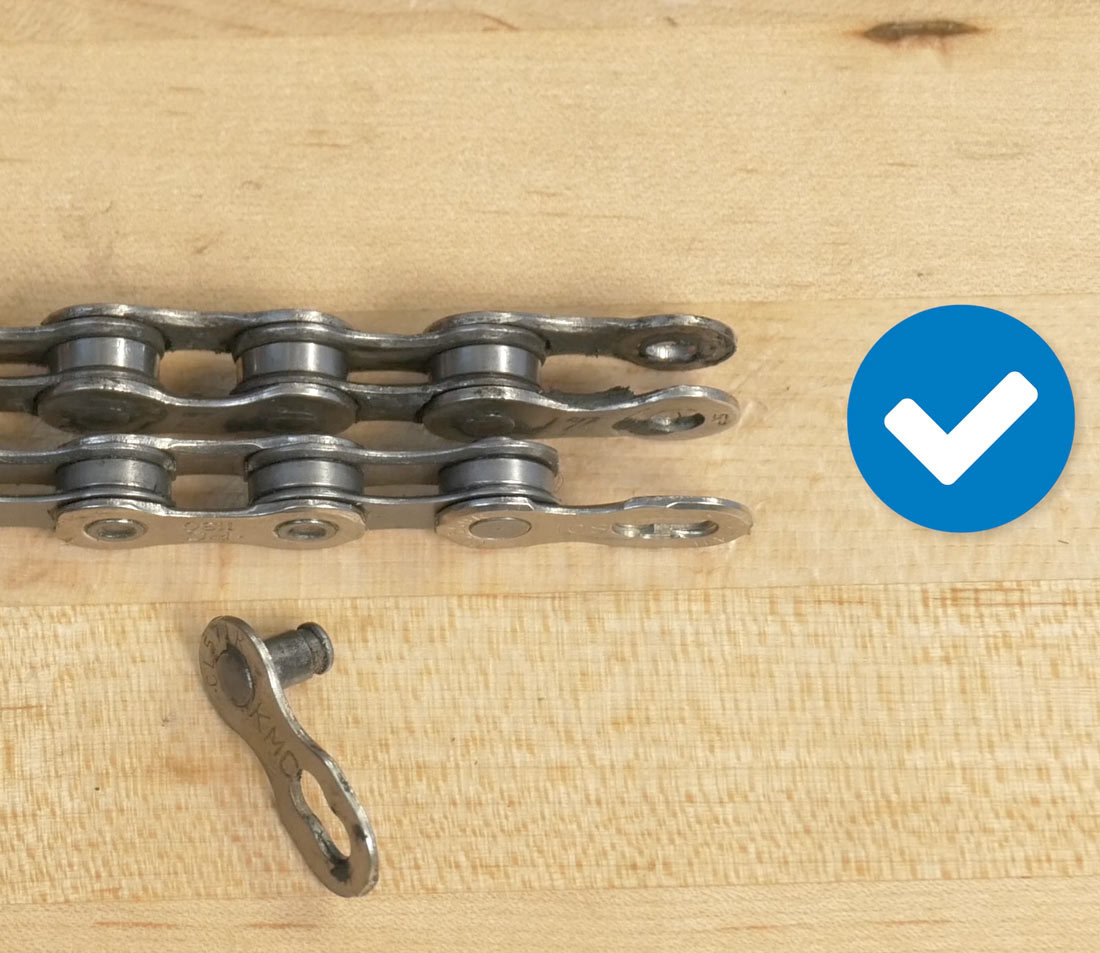
Add master link for comparison
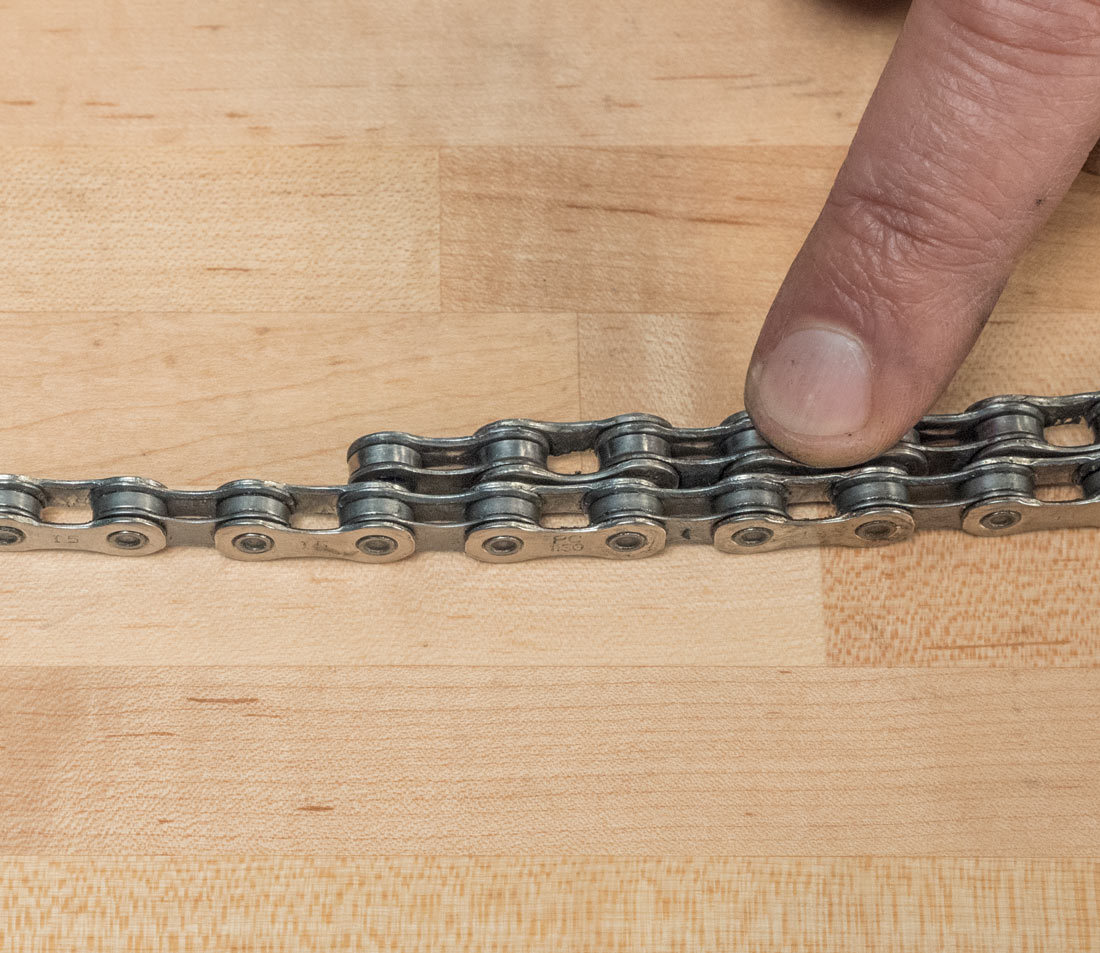
Match rivets on used chain to new chain
Largest Cog & Largest Chainring Method
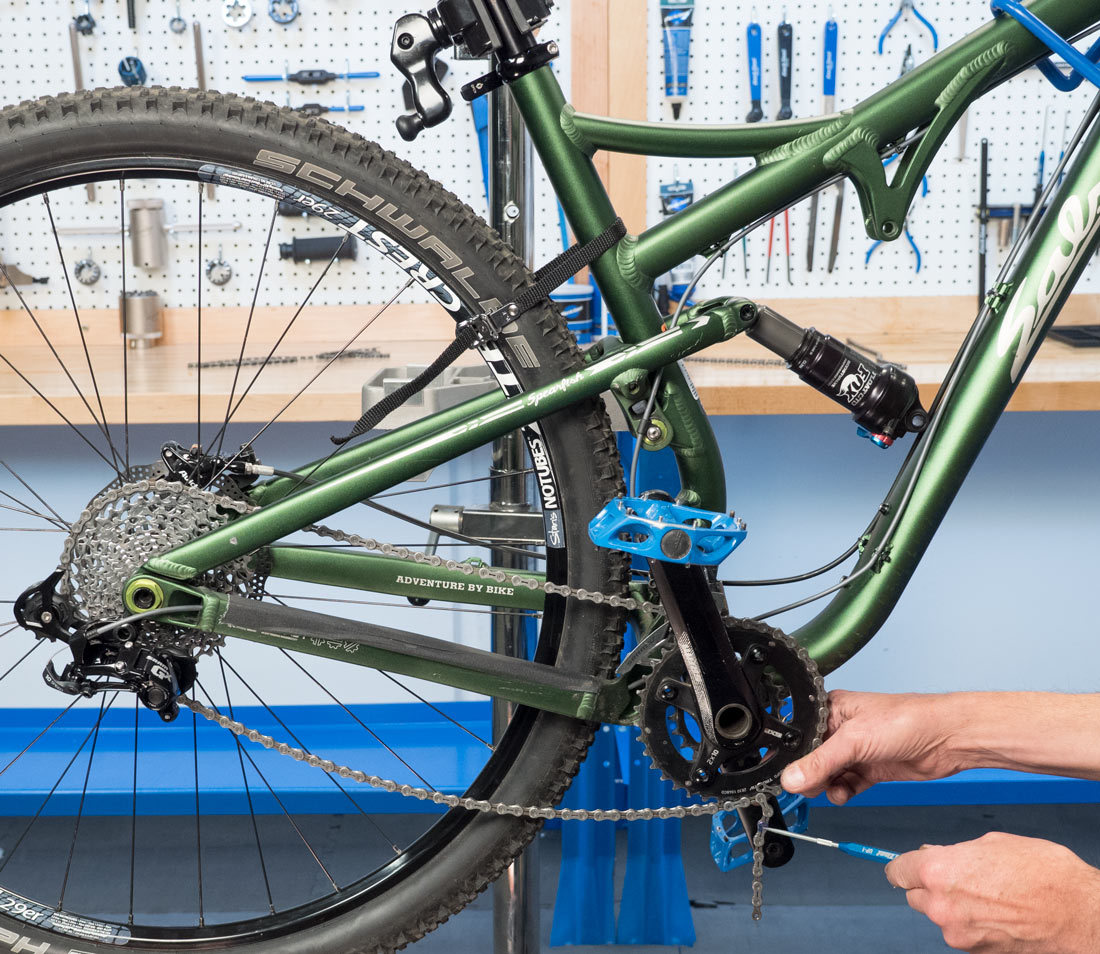
To measure a chain from scratch (for example, when changing out drivetrain components such as cassettes or derailleurs at the same time as a chain, or when the previous chain was incorrectly sized), there are a few methods depending upon the range of gearing in the system. For bikes with rear sprockets that are a maximum of 36 teeth or smaller, the common method is to measure using the largest rear sprocket and largest front ring as a reference. Two rivets (one inch) are then added to determine final chain length.
If the rear sprockets are 42 teeth or larger, such as on a dedicated 1X system, extra chain is added as described in Section 5.
Be sure to read Section 6 - Exceptions & Considerations - before making the final cut.
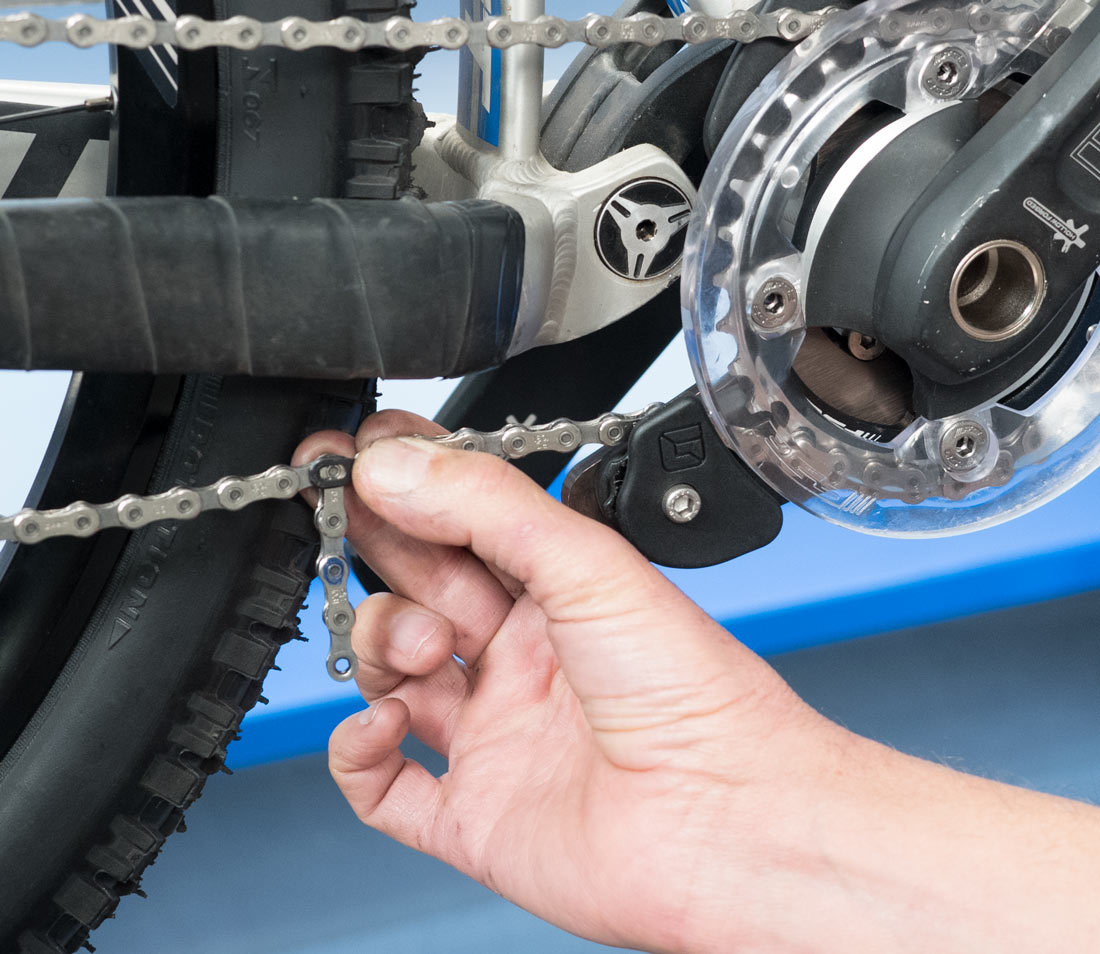
For the largest-to-largest method, first shift the front derailleur over the largest chainring and the rear derailleur to the smallest cog (this moves the rear derailleur out of the way during the process). Begin by wrapping the chain around the largest rear cog. If the new chain has one end with an outer plate, it should be routed toward the front chainring. Pass the chain end through the front derailleur cage onto the largest front chainring and hold it at about the five o’clock position.
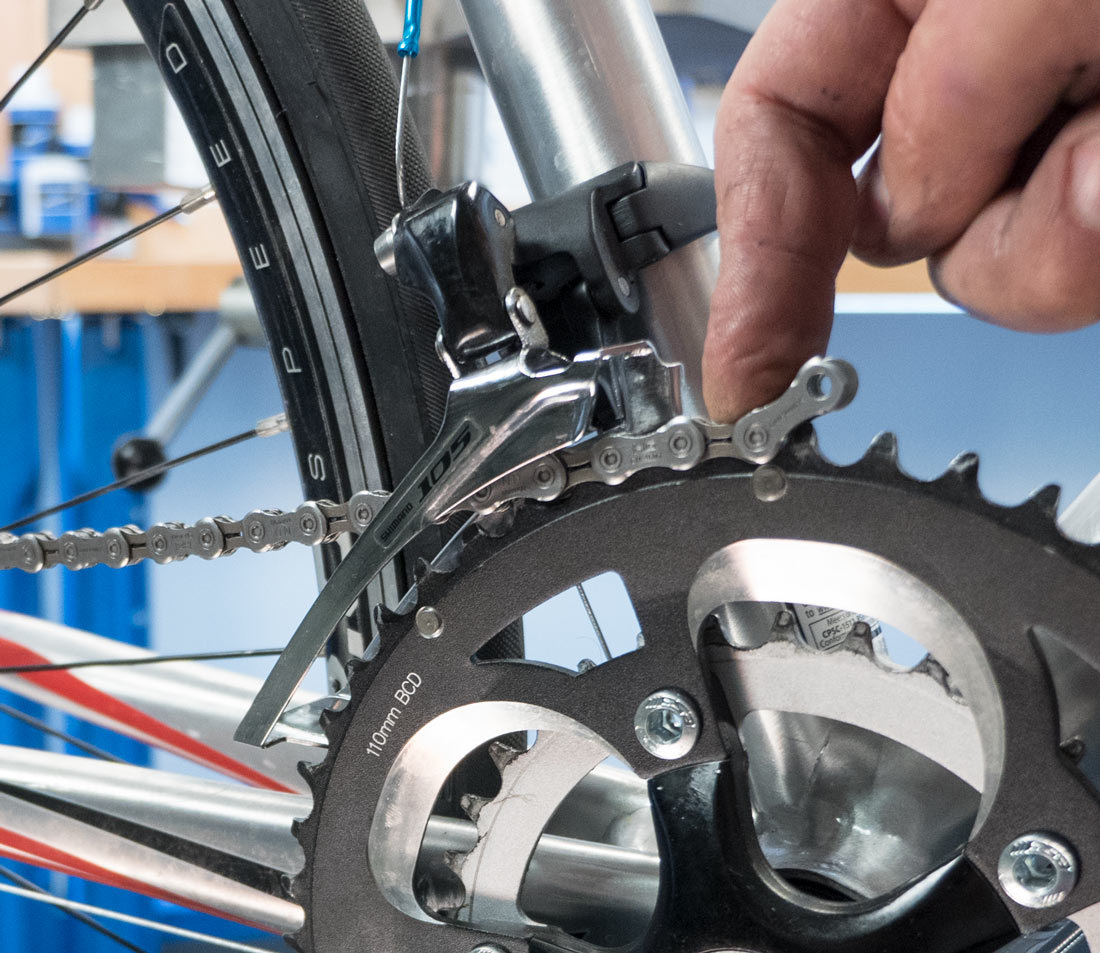
Pass chain through front derailleur

Hold at five o'clock position
If the chain uses a master link, install half of the master link. This will account for the extra half inch the master link provides. With this plate installed, the rest of the process is the same for master link and connecting rivet chains. Pull the lower section of chain snug and engage it on the front chainring.
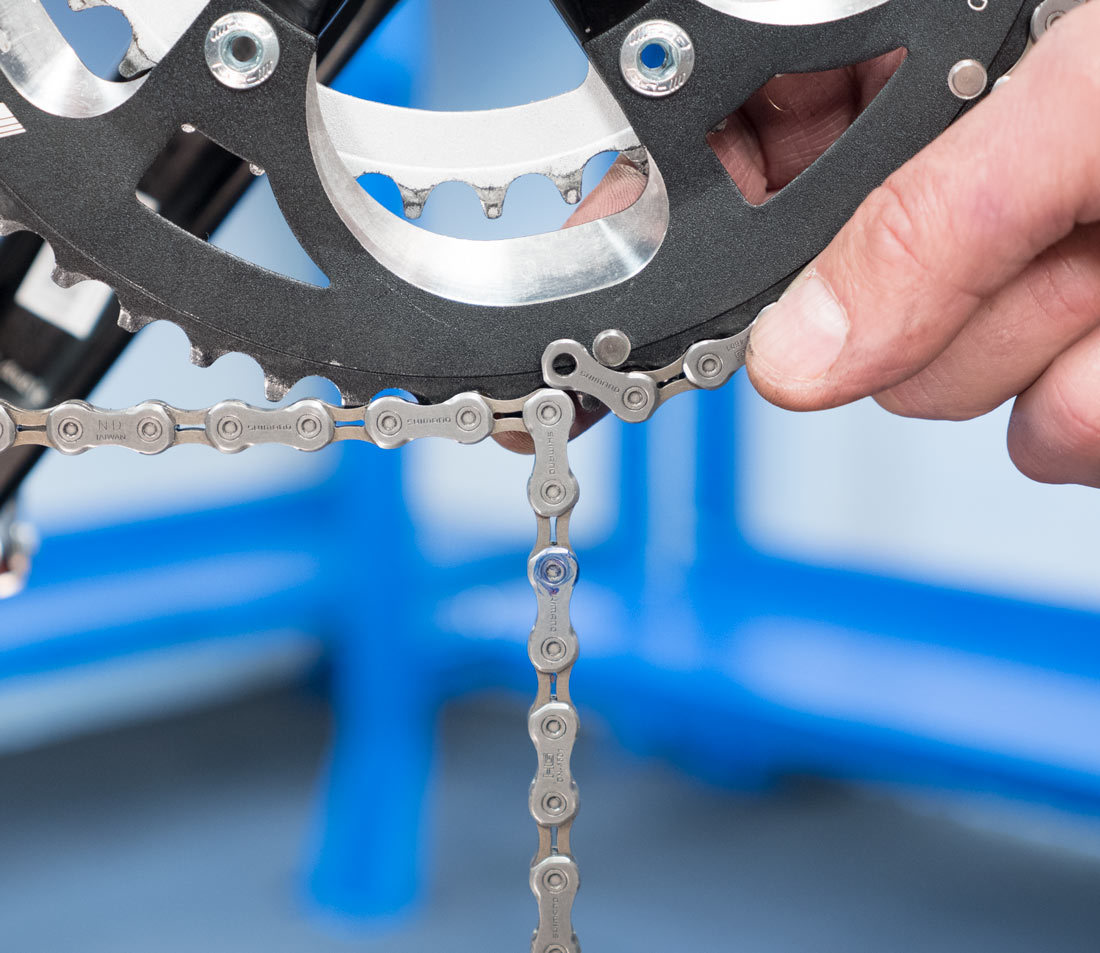
Pay special attention that the chain is fully engaged on the largest rear cog for accurate sizing. You will bypass the rear derailleur entirely for this step and extra length will be added later to account for this. Find the closest rivet where the two chain ends could be joined. You will match inner plates to outer plates in order to join the chain. The rivet closest to where the chain can be joined is the reference rivet. From the rivet we add two additional rivets.
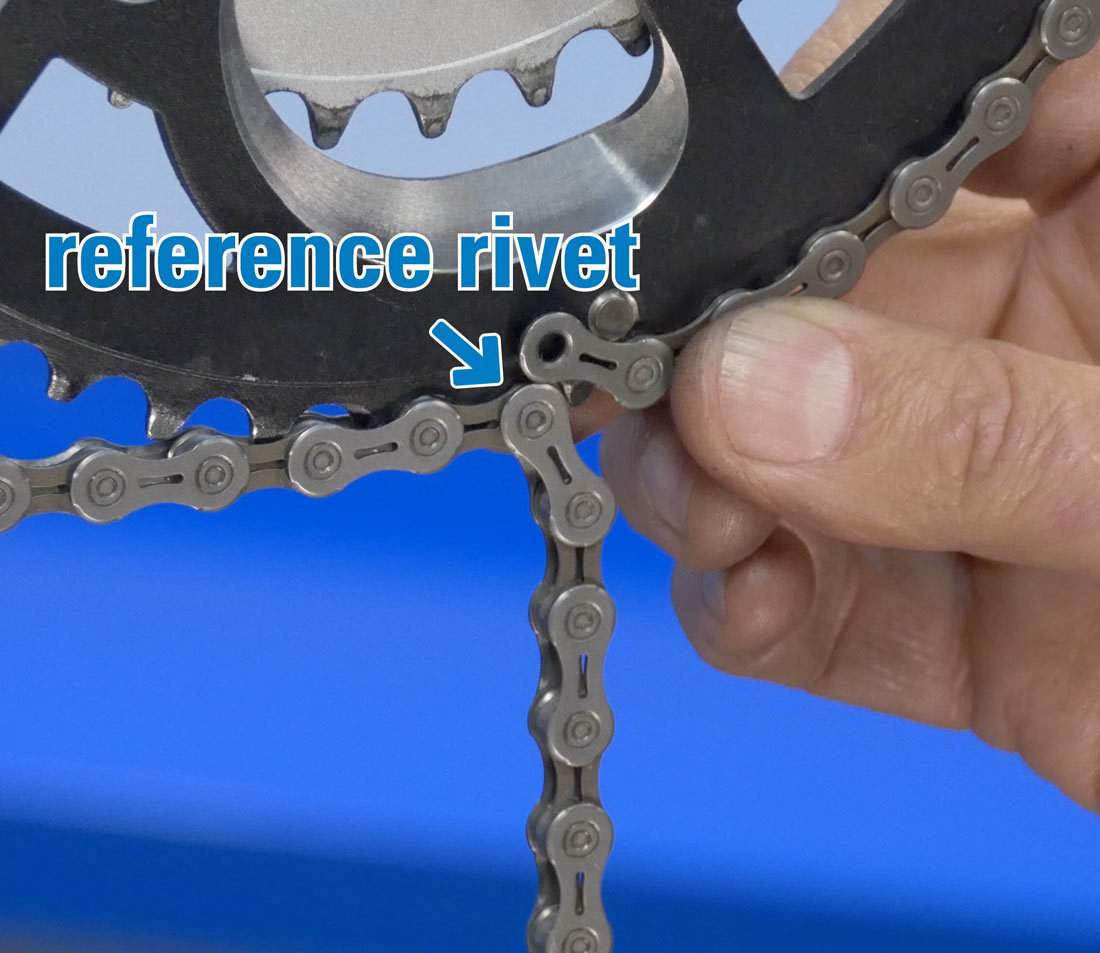
Reference rivet - note that inner plate joins to outer plate
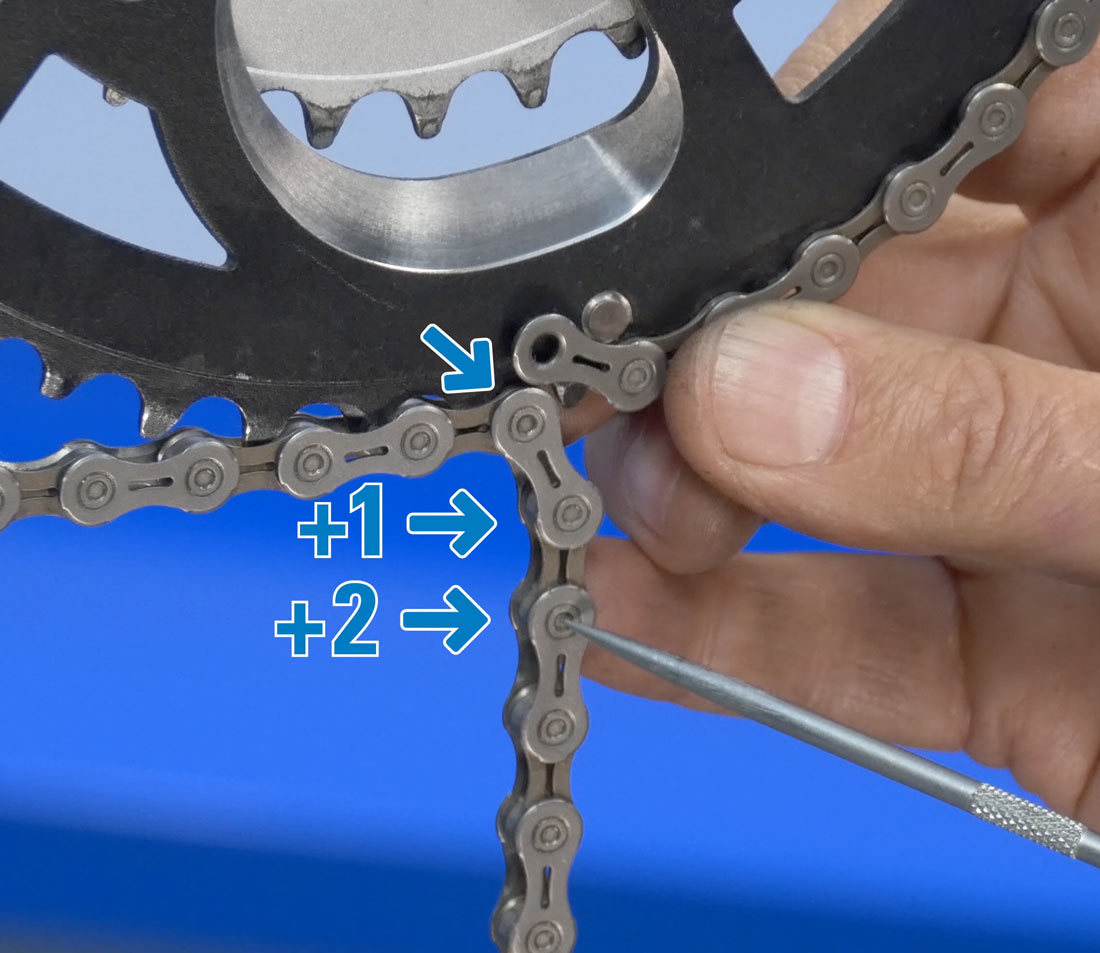
Add two rivets
This is the cutting point for your chain. It can occur that, when we pull the lower section snug, an outer plate meets an outer plate. This cannot be the reference rivet because the chain cannot be joined here. Add one rivet. This becomes the reference rivet and from here we add two additional rivets, cut the chain with a chain tool, and the chain is sized.
Method for drivetrains with large rear cogs
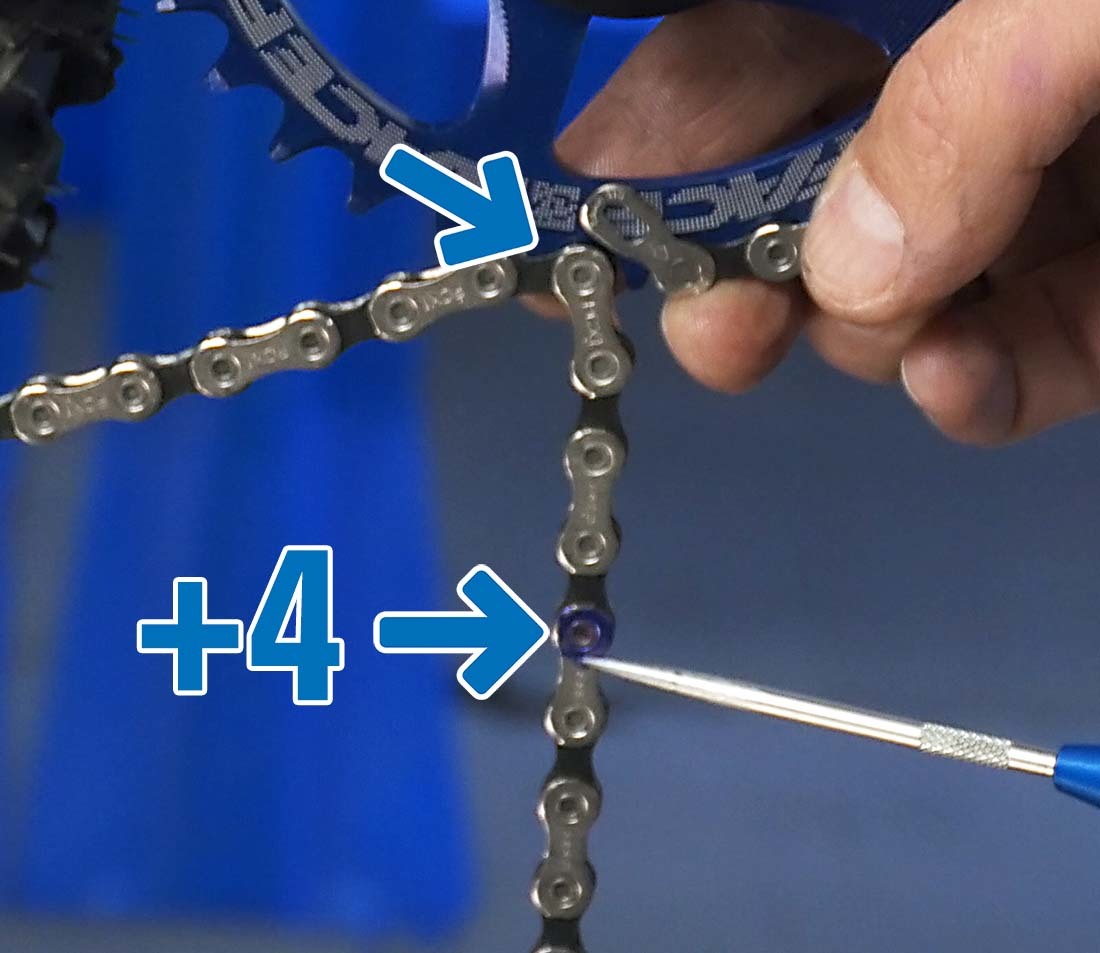
Dedicated 1X systems use a single front ring in combination with an extra-wide range of rear sprockets — 42 tooth and larger. These systems require a longer chain compared to bikes with a narrower range.
Without passing through the rear derailleur, route the chain over the front ring and the largest rear spocket. Determine the shortest length where a chain would connect inner and outer plates. From this rivet, count four additional rivets (two inches) to determine the position to shorten the chain.
Exceptions & Considerations
If the bike uses a chain guide, make sure it is routed through the system before determining chain length. The rest of the process is the same.
Another consideration deals with rear suspension. The distance between the rear cogs and front chainrings will change as the suspension compresses and moves for bumps. To account for that, disconnect the shock, and compress the linkage so that it is bottomed out.

Disconnect shock
Compress linkage
Next article in this series
Chain Replacement: Derailleur Bikes View Article
Related articles
Chain Length Sizing: Campagnolo® View Article