Brake Bleeding for SRAM® Hydraulic Brakes
This article will review the bleeding procedure for SRAM® hydraulic brakes while using the Park Tool BKD-1.2 or BKD-1 Bleed Kit.
Preliminary Info
- BKD-1.2 Hydraulic Brake Bleed Kit (DOT)
- PP-1.2 Hydraulic Brake Piston Press
- Hex & Torx®-Compatible Wrenches
- NP-6 Needle Nose Pliers
- Zip ties
- Toe strap or something similar
- Torque wrench
- Isopropyl alcohol
- Rags
This bleeding procedure will work on SRAM drop bar and flat bar brakes that do not feature Bleeding Edge. See this article for the Bleeding Edge procedure.
Brake bleeding is considered an advanced service procedure, and requires a thorough technical knowledge of the braking system. If in doubt, or if this procedure is not working, contact the brake manufacturer for model-specific information.
It is important to always use the appropriate brake fluid for the brake being serviced. Never use mineral oil in brakes designed for DOT brake fluid, or vice versa. Never share bleed kits between DOT fluid and mineral oil systems. Mixing fluids can cause damage to components and lead to brake failure, which is dangerous.
DOT fluid is corrosive, and it can irritate the skin and eyes, and damage paint and other finishes - so it is important to take care. Wear gloves and eye protection during this procedure. Have plenty of rags handy for wiping up spills as quick as possible. Isopropyl alchohol is a good cleaner to help clean and neutralize the DOT fluid, if spilled. You may want to also cover your work area to avoid getting fluid on the floor.Dispose of any spent fluid in accordance with your local waste disposal authorities
Bicycle Prep
- Install the bike in a repair stand if available.
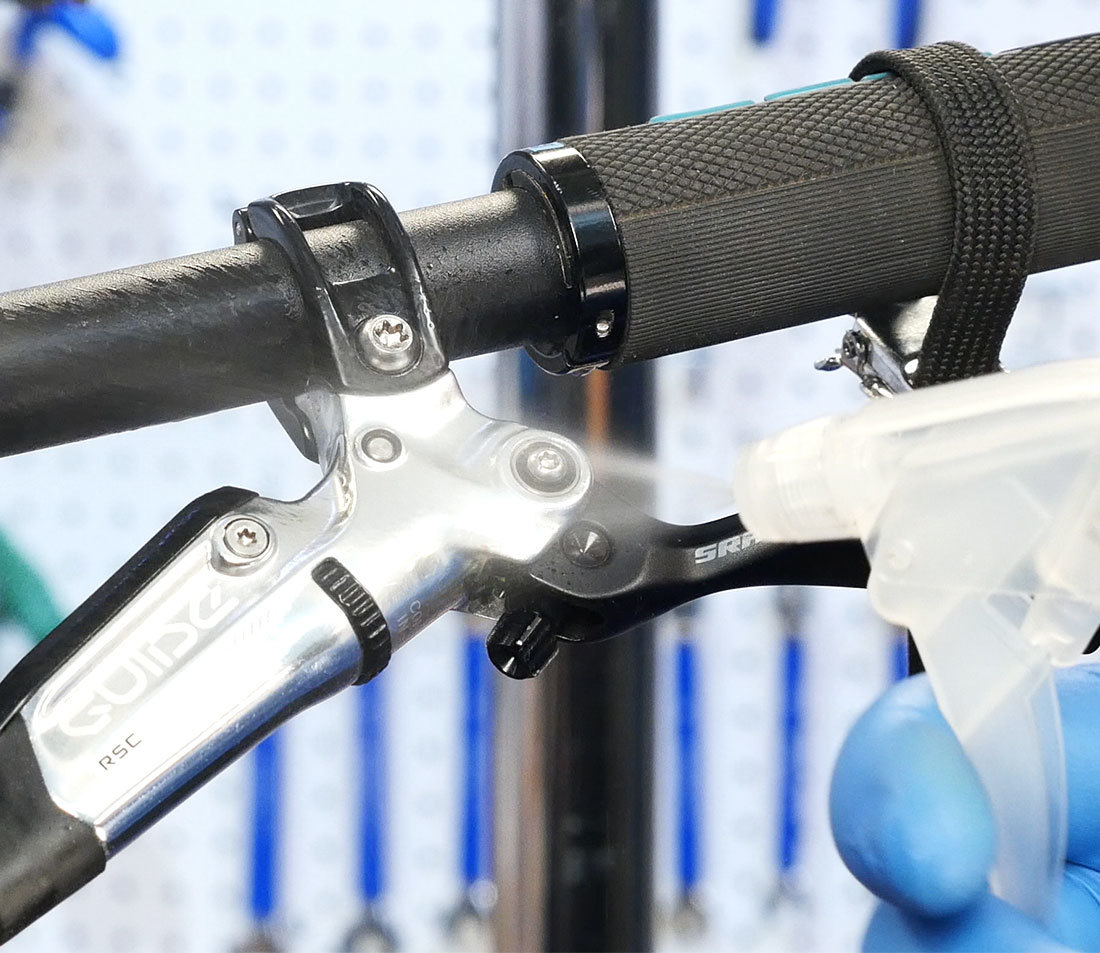
- Begin by prepping the lever.
- If your flat bar lever is equipped with a contact adjuster, turn it opposite the arrow until it stops.
- Measure the amount of reach from the centerline of the handlebar to the tip of the brake lever. To bleed it needs to be between 75mm and 80mm. if not, make note of your current adjustment and then adjust to between 75mm and 80mm. On some models, this is a tool-free adjustment, while other models require a hex wrench.
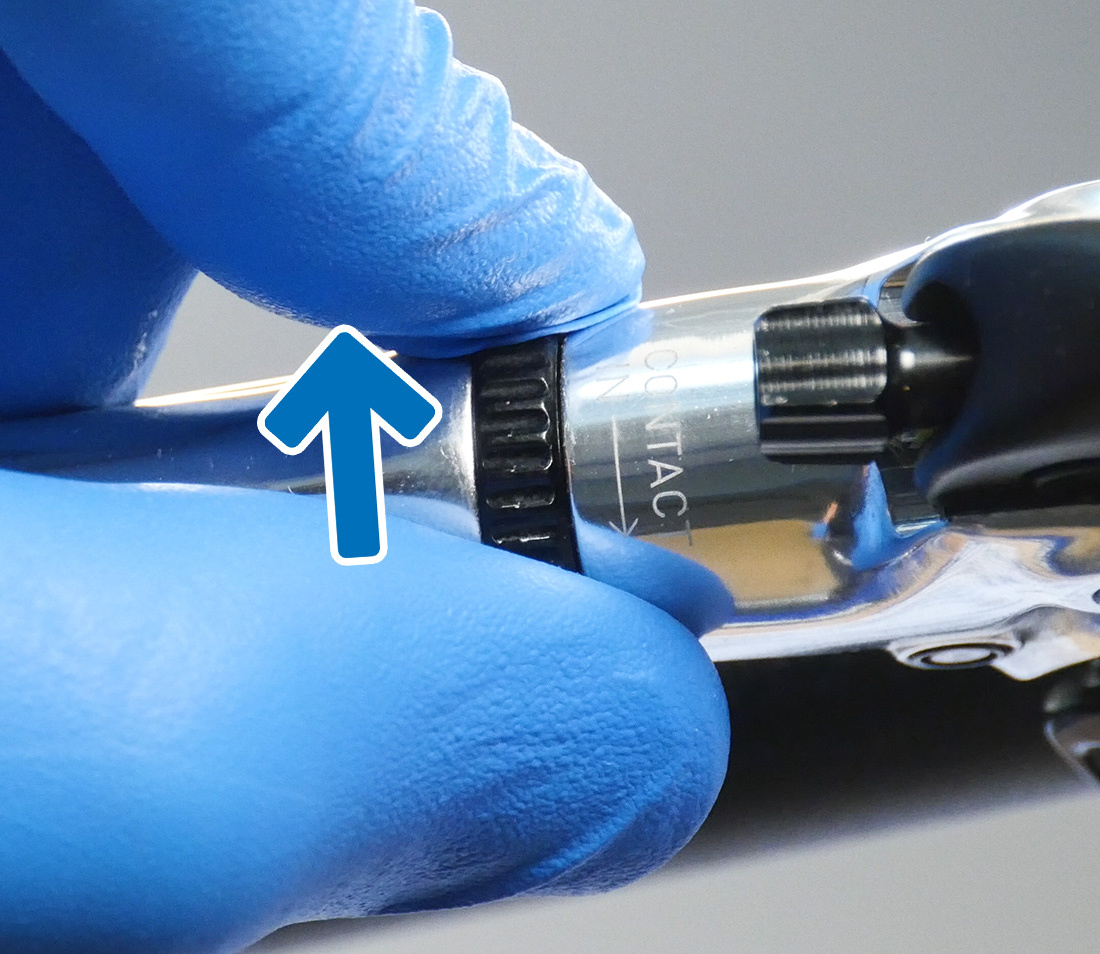
Turn contact adjuster until clicking stops
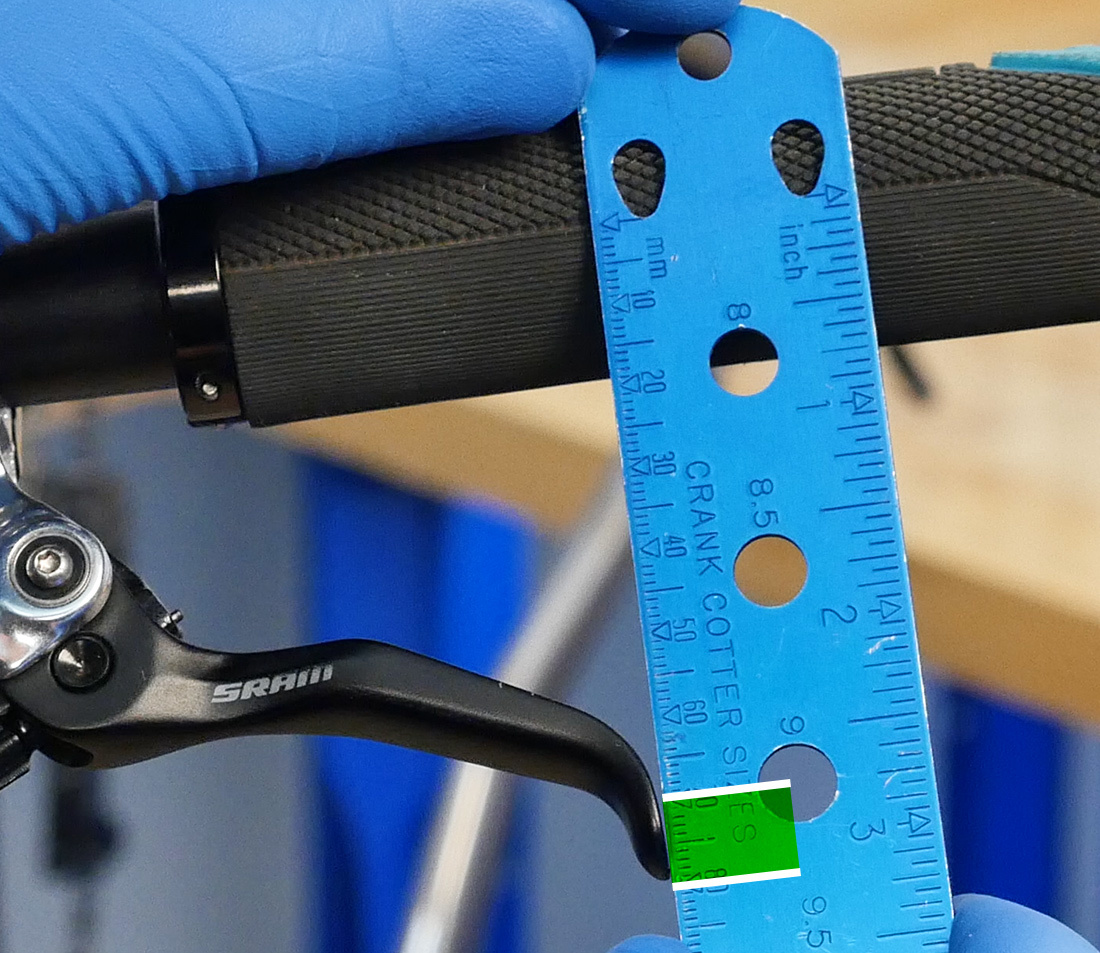
Tip of lever should fall between 75-80mm from center of handlebar
- Tie a rag around the lever to catch any spills.
- Attach the syringe holder to the handlebar.
- Remove the wheel.
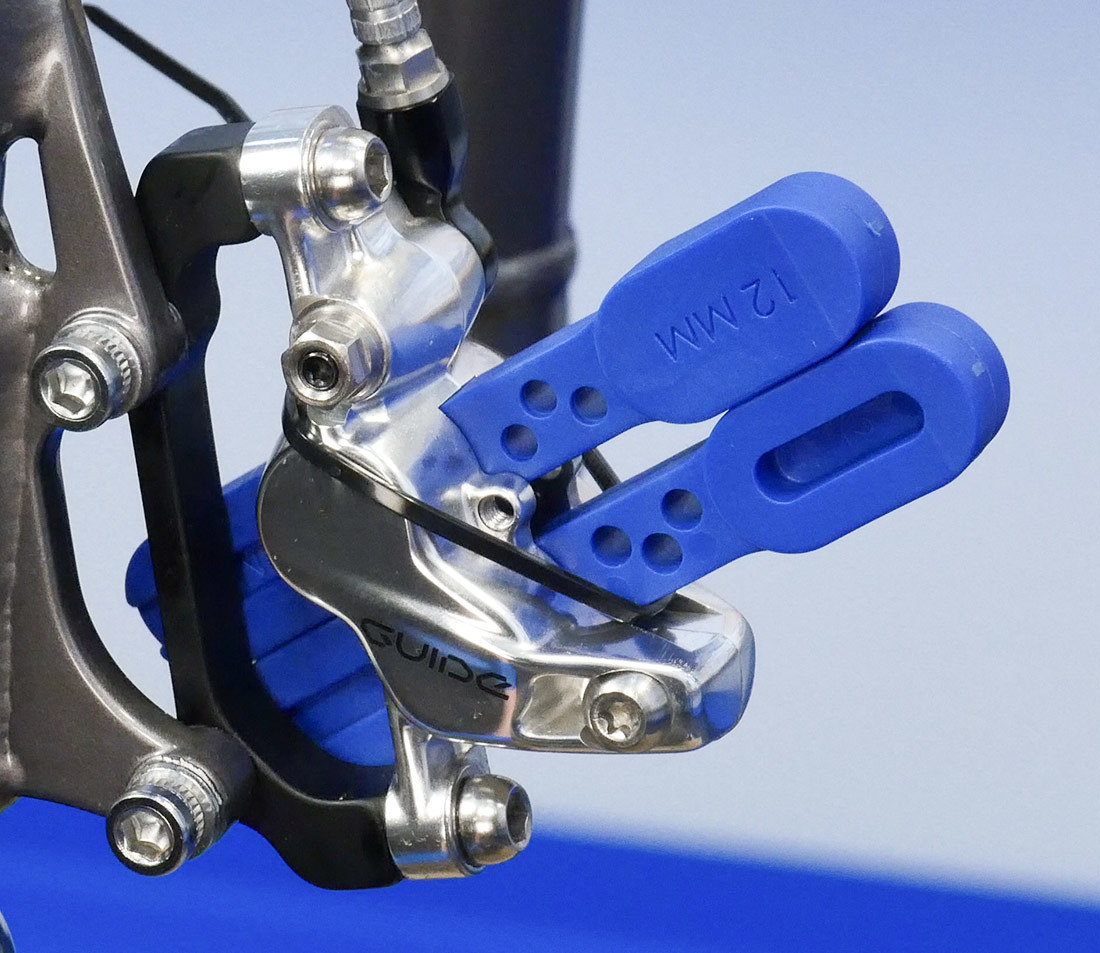
- Use a pad spreader such as the PP-1.2 to push the pads back to allow for the bleed blocks once the pads are removed.
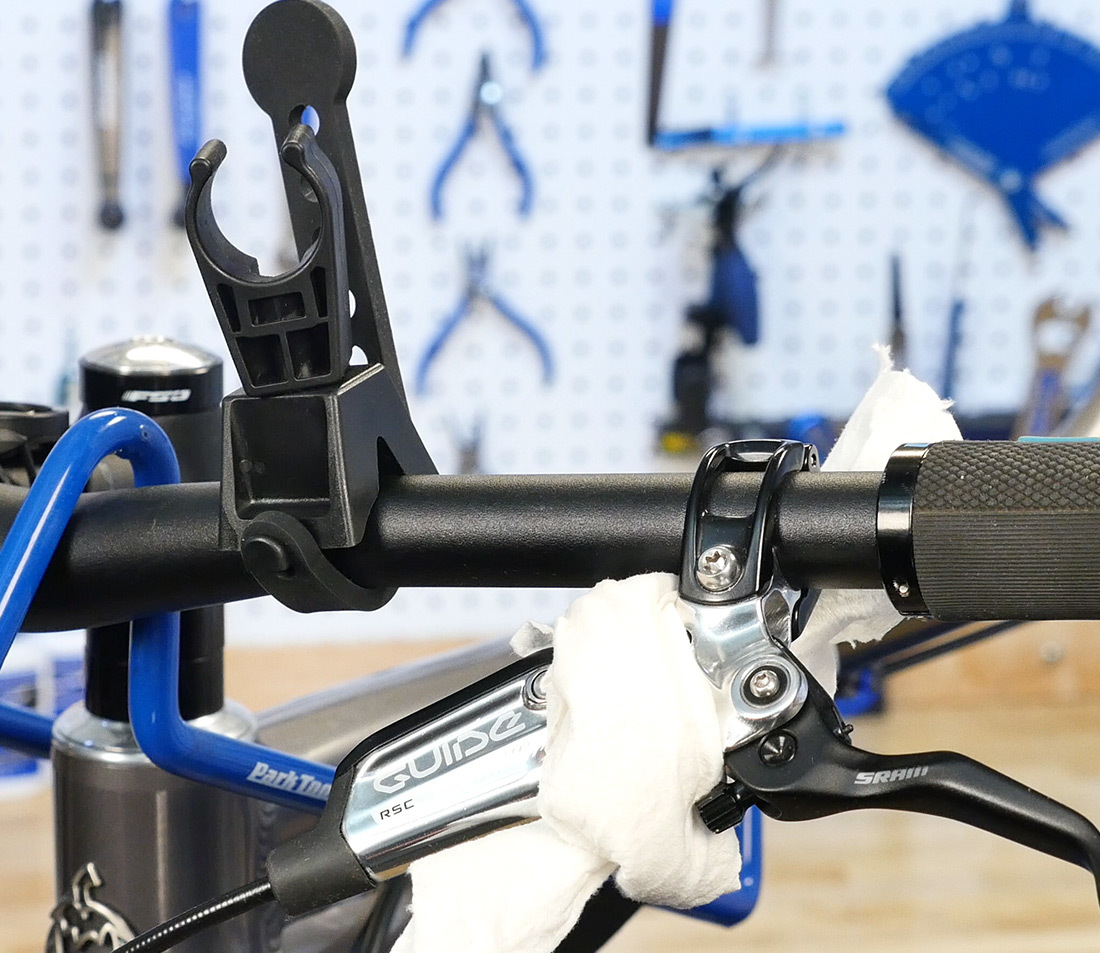
Lever prepped with syringe holder and rag
Spread pads to allow for bleed blocks
- Angle the bike in the stand so that the path of the hose from the caliper to the lever is consistently traveling upwards. It can also help to remove the caliper and let it hang, especially for rear calipers. This makes the path for air bubbles as easy as possible to follow.

- The pads are removed to prevent any contamination.
- Remove the pad pin clip with a needlenose pliers, and unthread the pad pin with a 2.5mm hex wrench.
- For pads with a split cotter pin, use a needlenose pliers to straighten the pin, then pull it out.
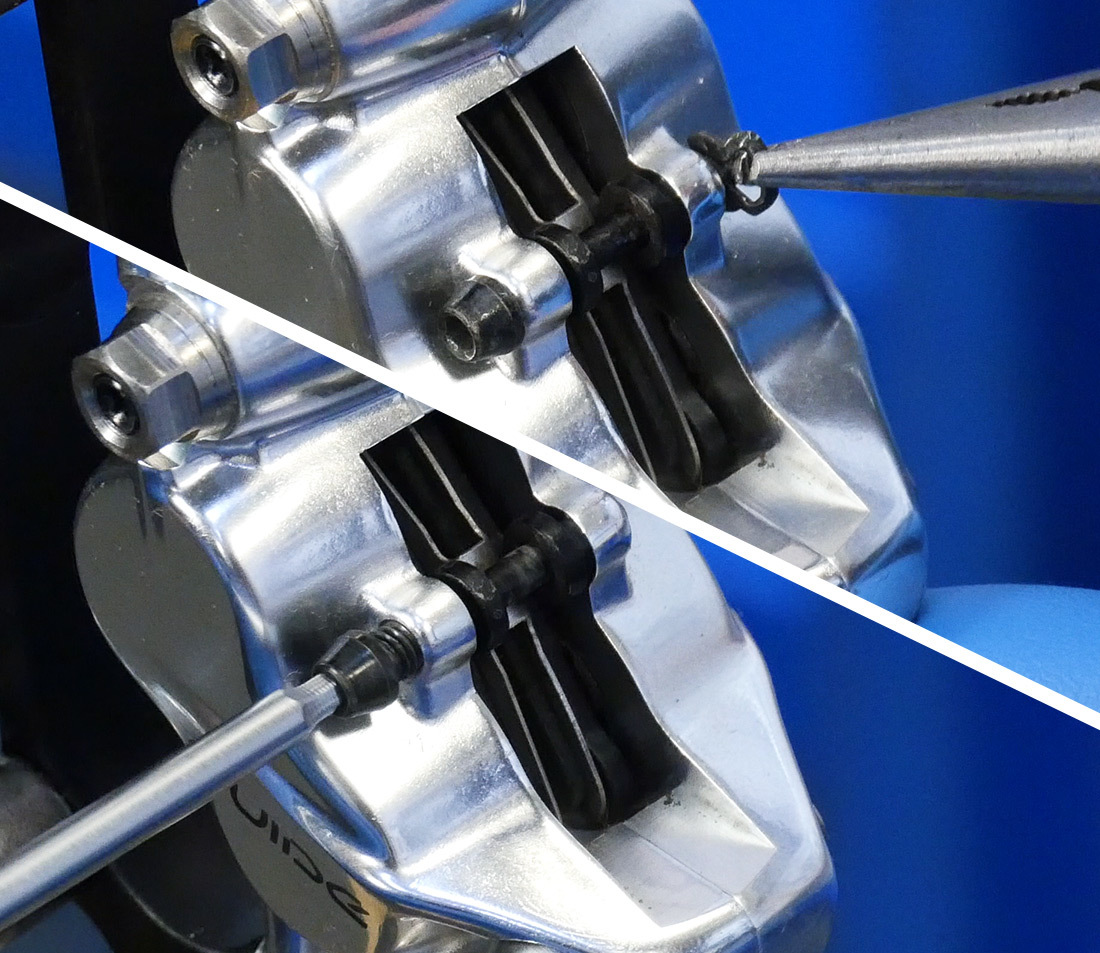
threaded pad pin: remove clip and unthread pin
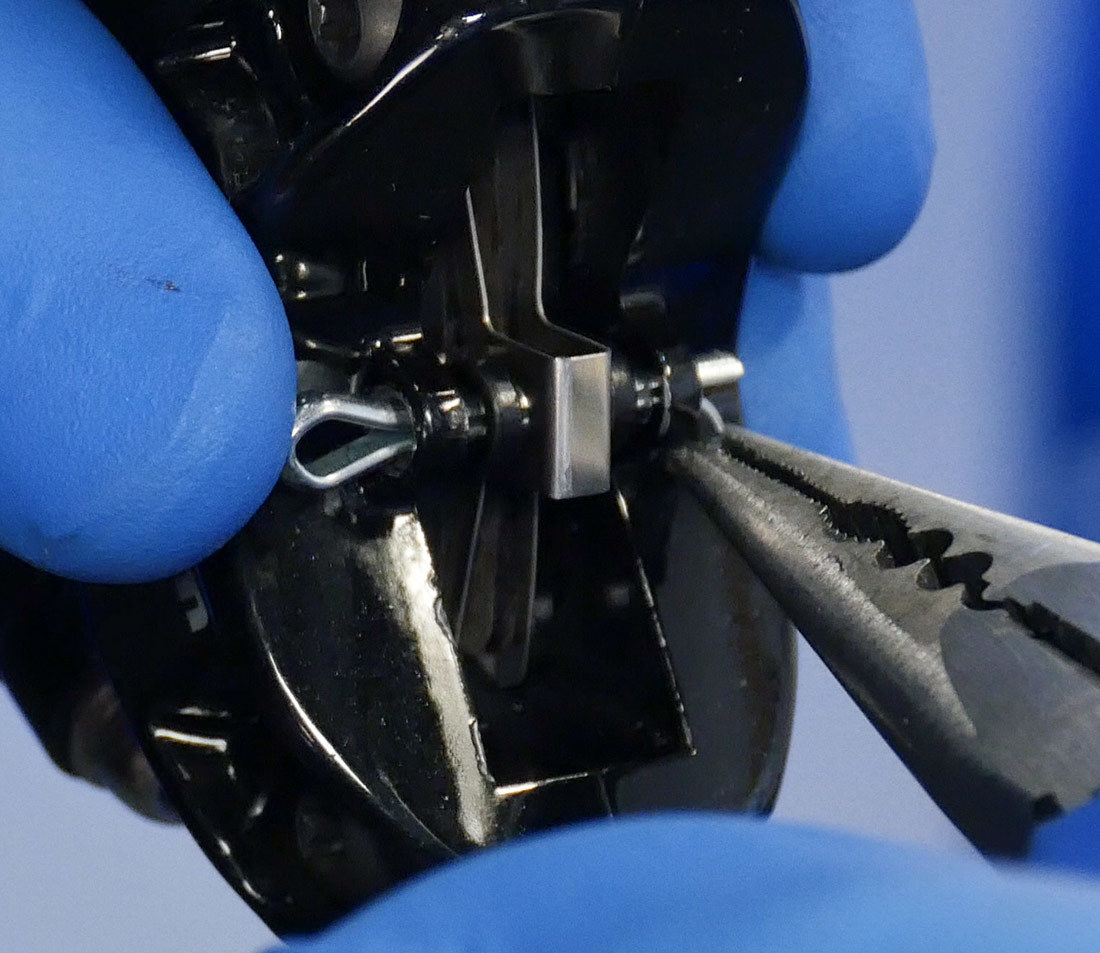
cotter pin: bend pin straight and remove
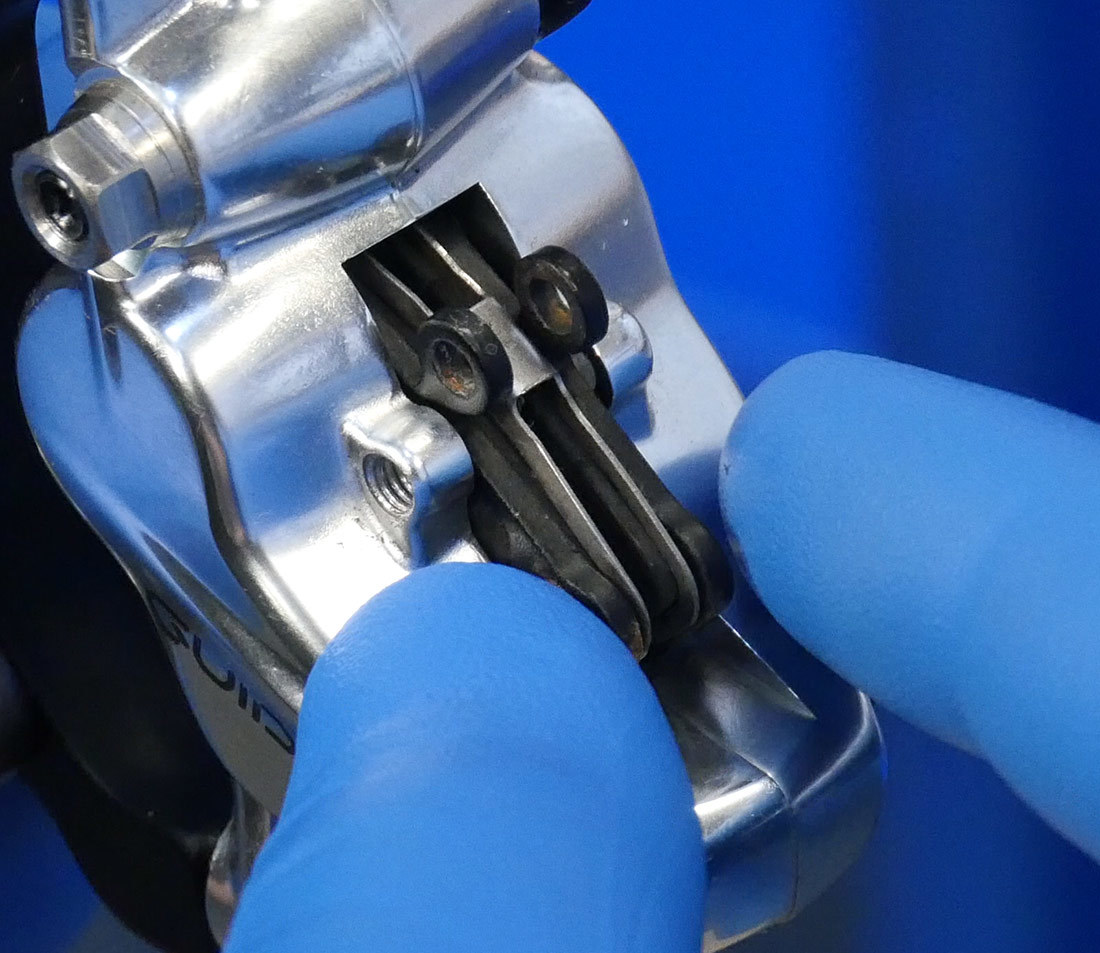
- Pull the pads out. It can help to push from the bottom initially.
- install the bleed block and secure with either the pad pin, a rubber band or a zip tie.
- If the caliper has two sets of pistons, use both bleed blocks.
Bleed Kit Prep
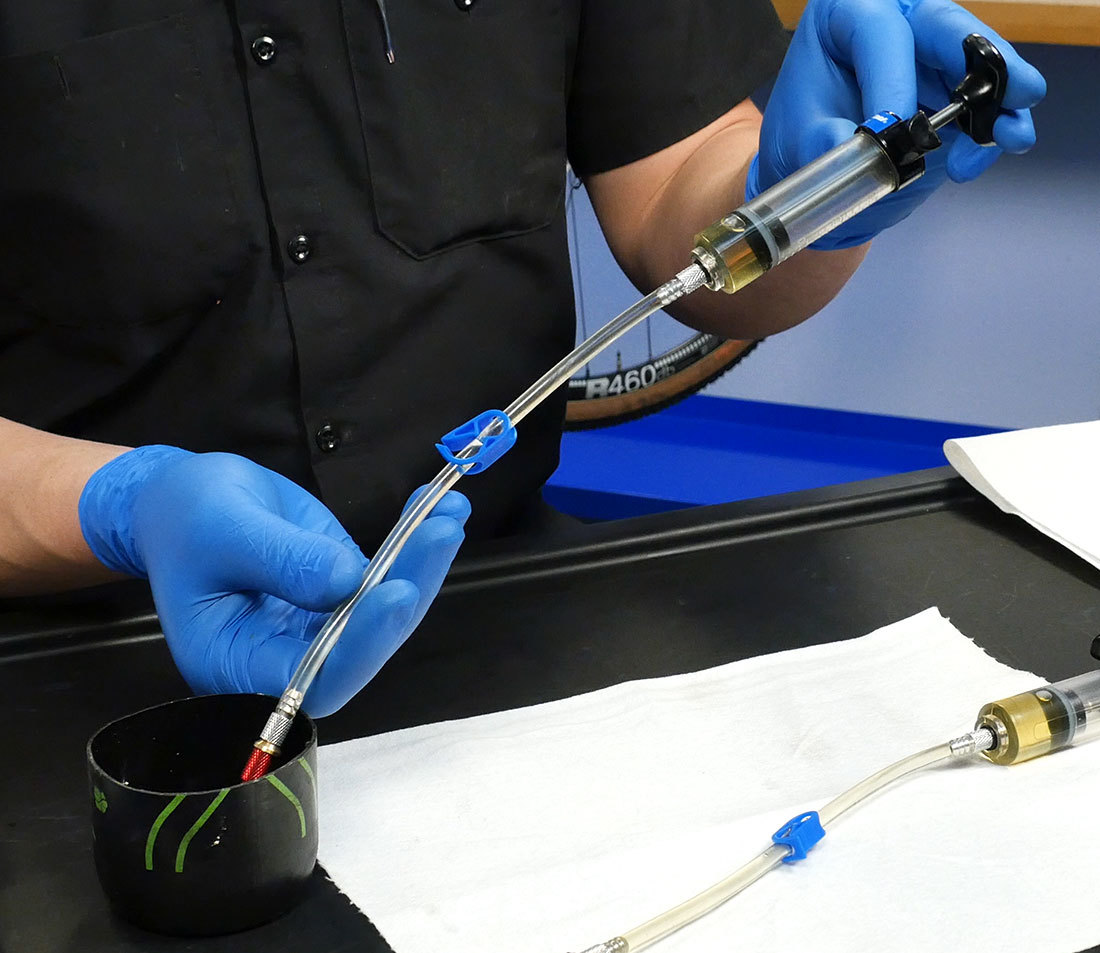
- Install the double ended hoses onto the syringes, with the o ring capture away from the syringe.
- Install the red adaptor ends (part #2618) onto the syringe hoses.
Thread double-ended hoses into syringes
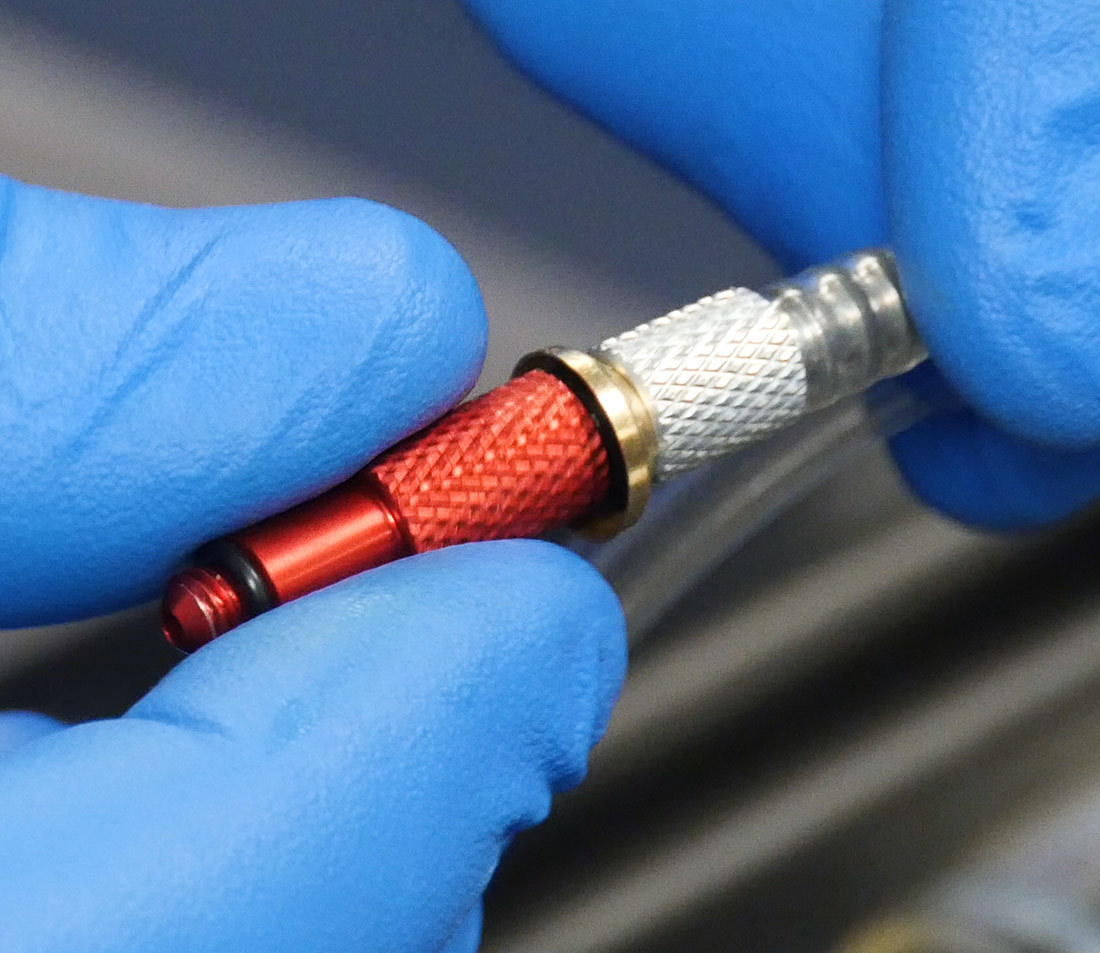
Thread adaptors #2618 onto hoses
- Fill one syringe 1/4 full. This will be the lever syringe.
- Hold the hose end up and push the syringe. Eliminate as much air as possible. Clip the hose.
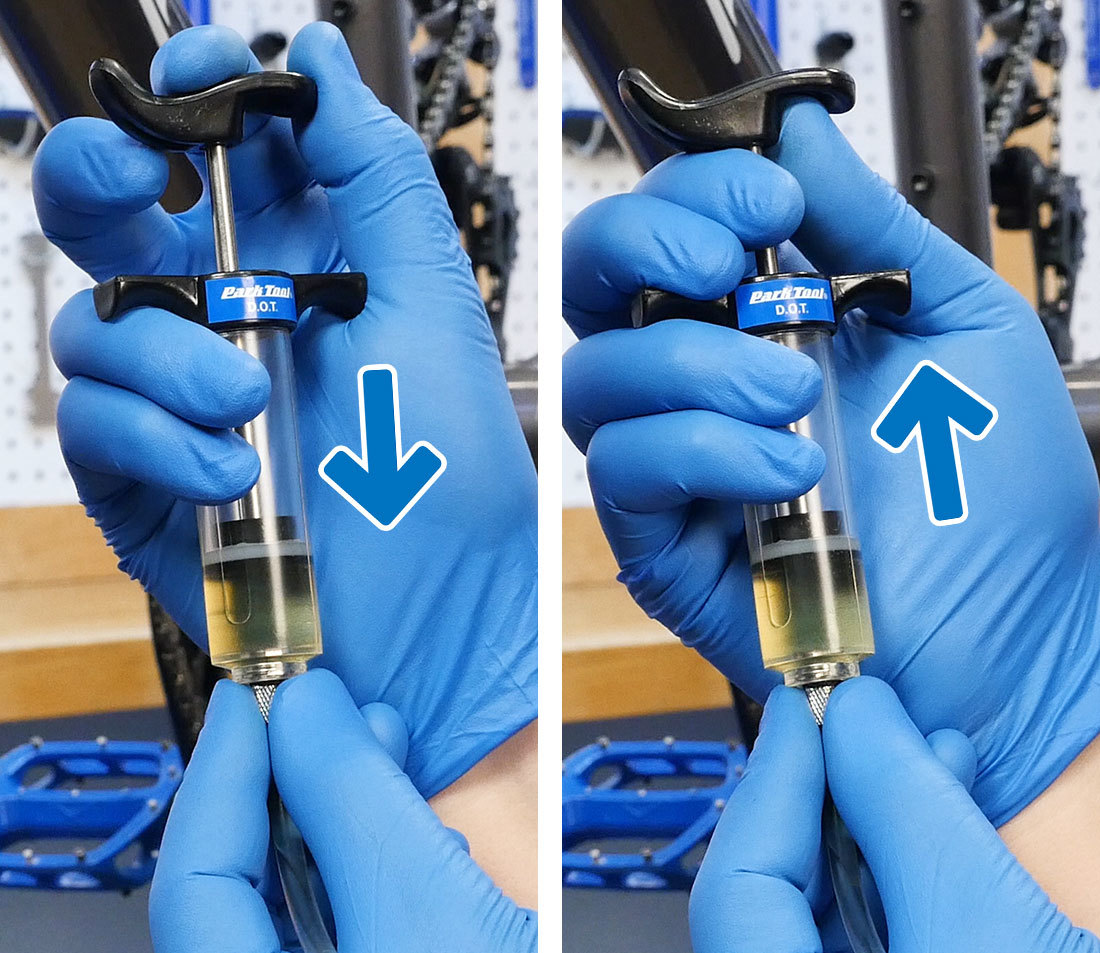
Hold syringe upright
push until no air remains in hose
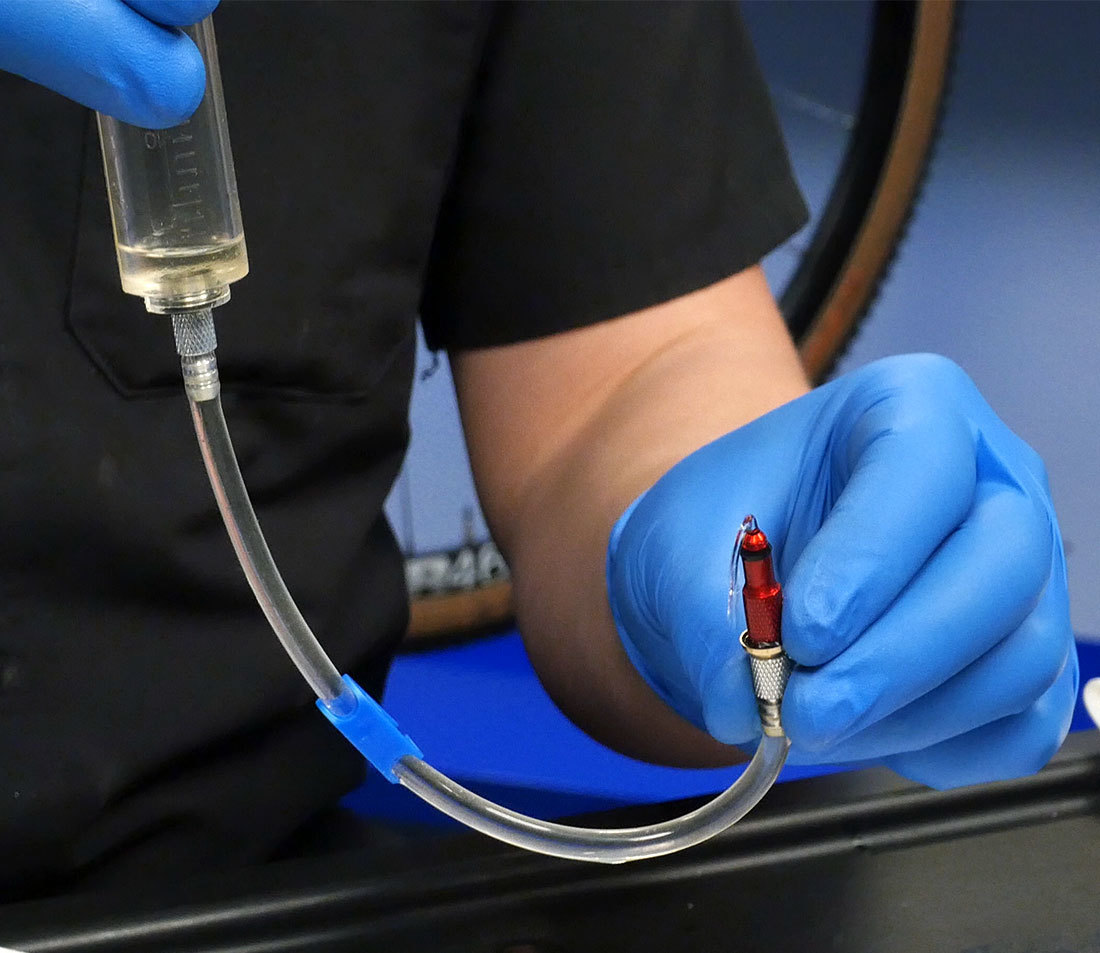
- Fill the second syringe 3/4 full. This will be the caliper syringe.
- Repeat the process of eliminating air from the hose and clipping the hose.
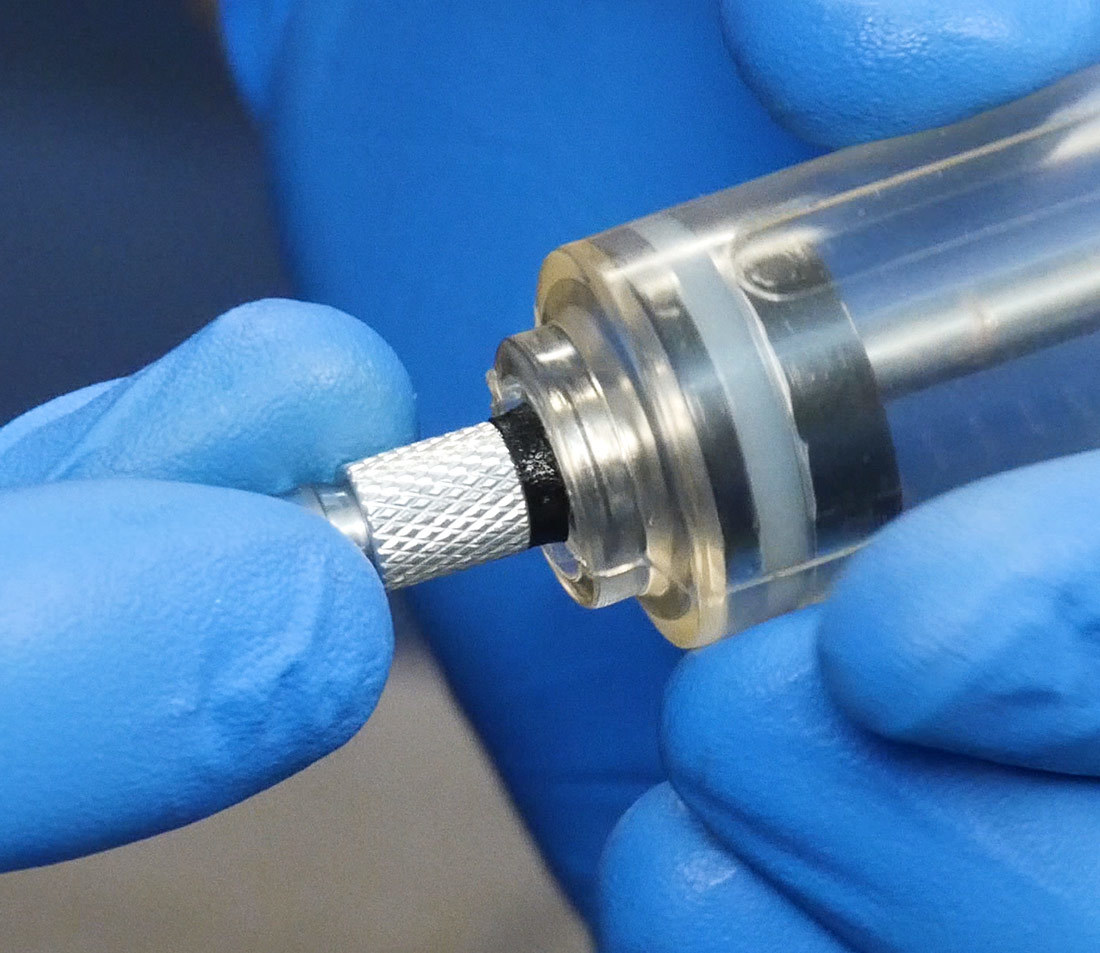
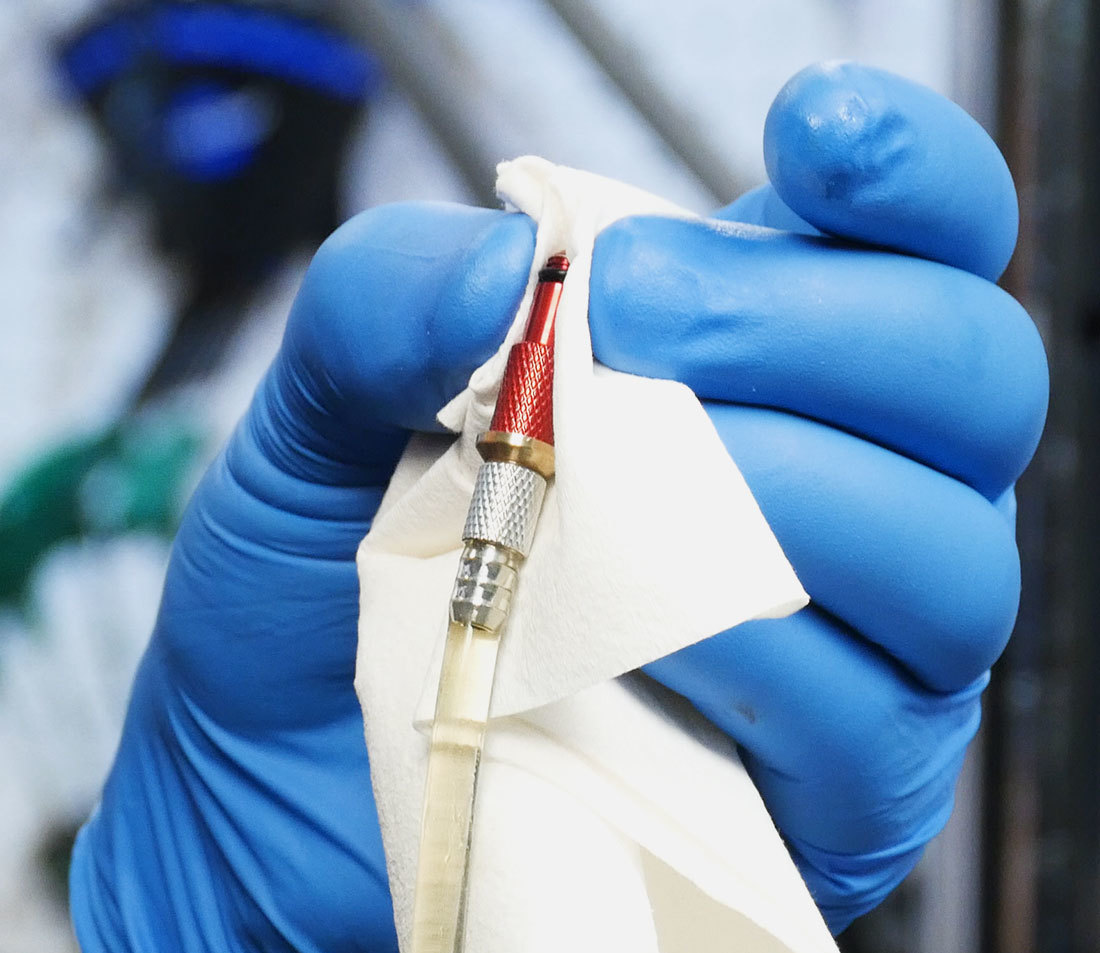
- Remove the bleed screw from the lever using a Torx®-compatible T10 wrench. There is an o-ring on this screw - make sure it also comes out.
- Install the 1/4 full syringe into the lever. Ensure the o-ring is seated fully and evenly in the capture of the bleed port as you thread in the adapter. Clean up any spilled fluid right away.
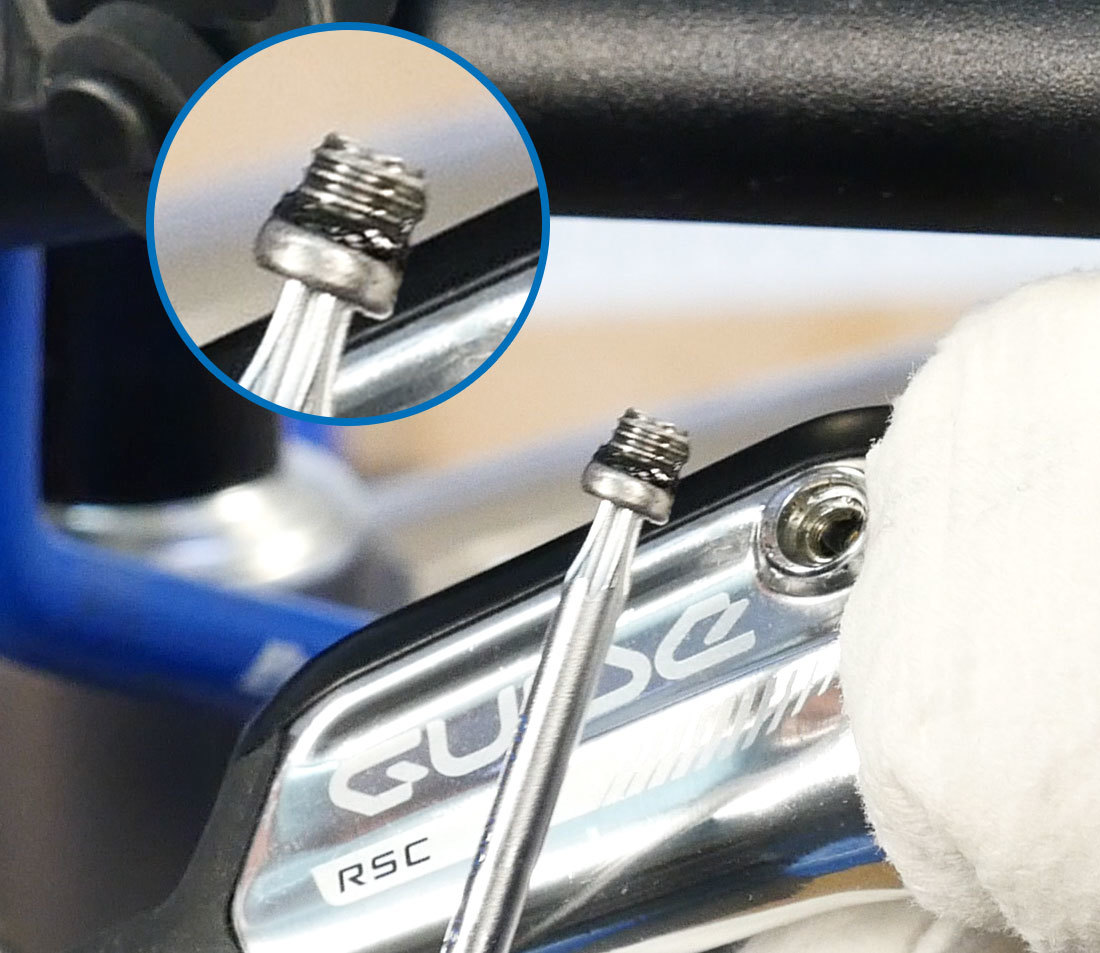
Ensure that o-ring is removed along with bleed screw
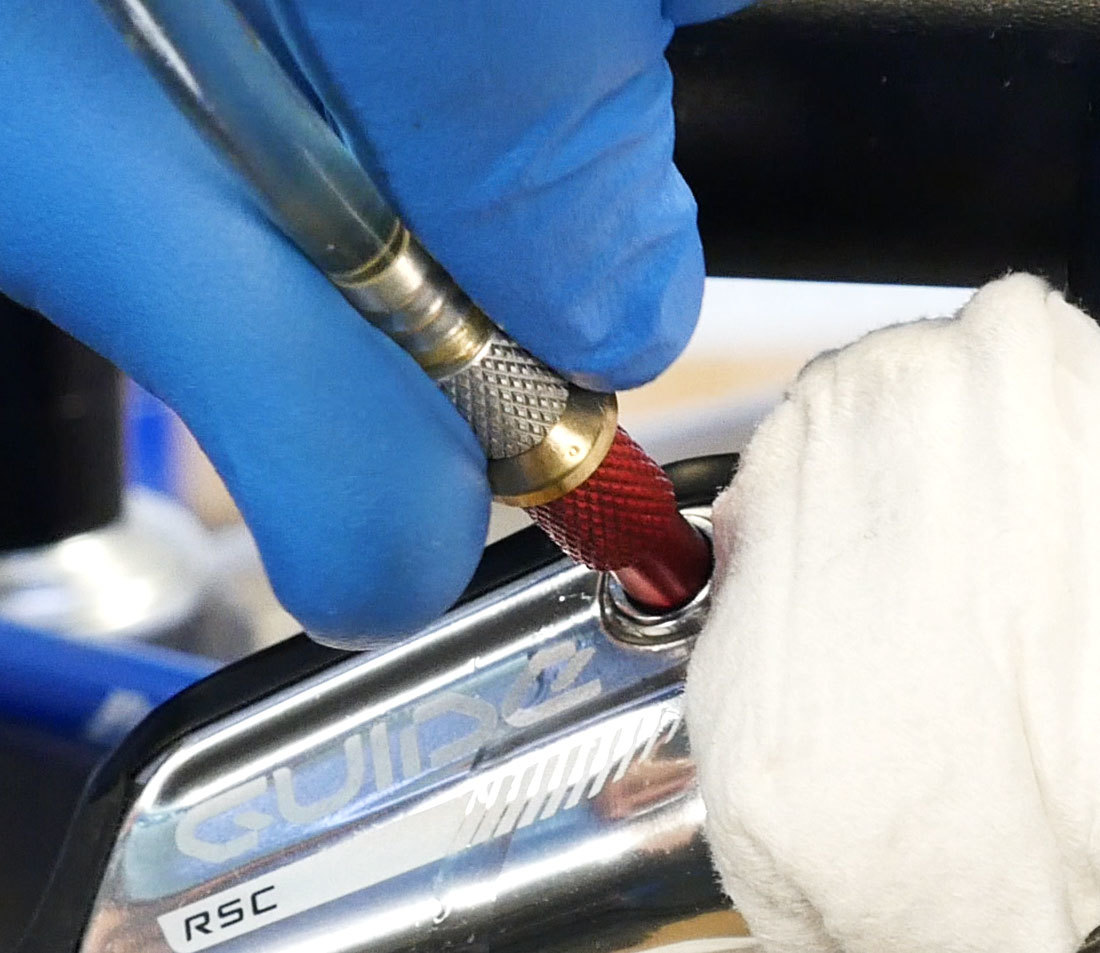
fully thread syringe into bleed port
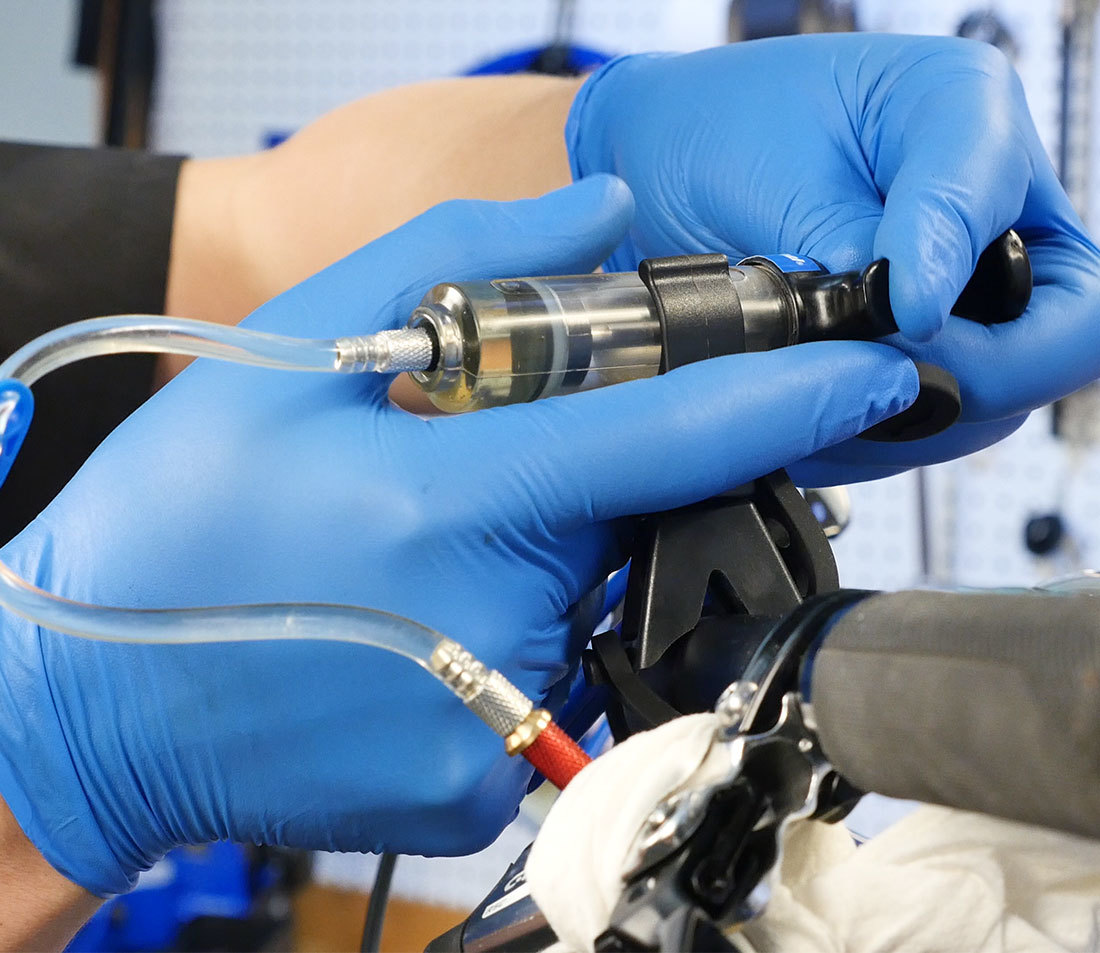
- Install the syringe in the holder.
- Remove the caliper bleed screw and install the 3/4 full caliper syringe into the bleed port.
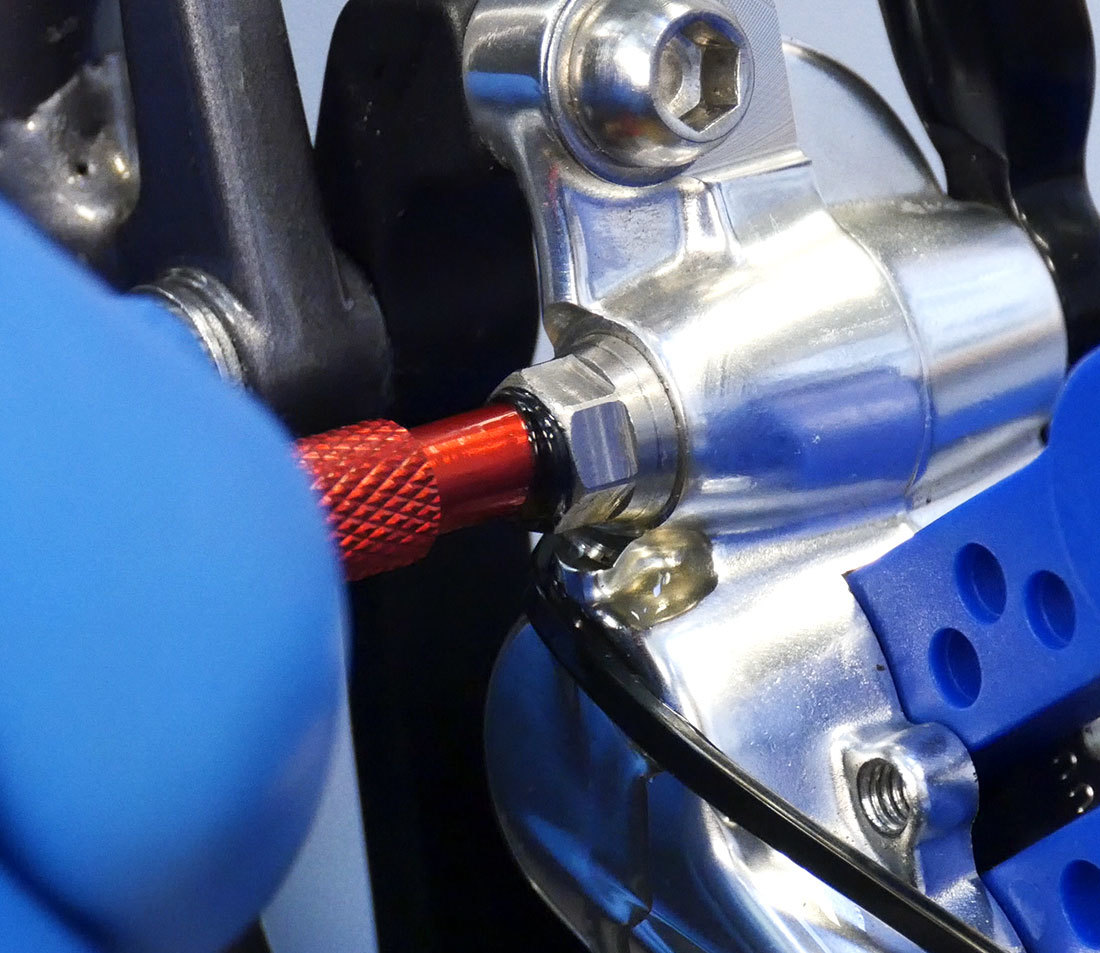
Bleeding
- Unclip both syringes.
- Hold the caliper syringe tip down and push fresh fluid into the system. As you push fluid into the system it will push excess fluid into the lever syringe.
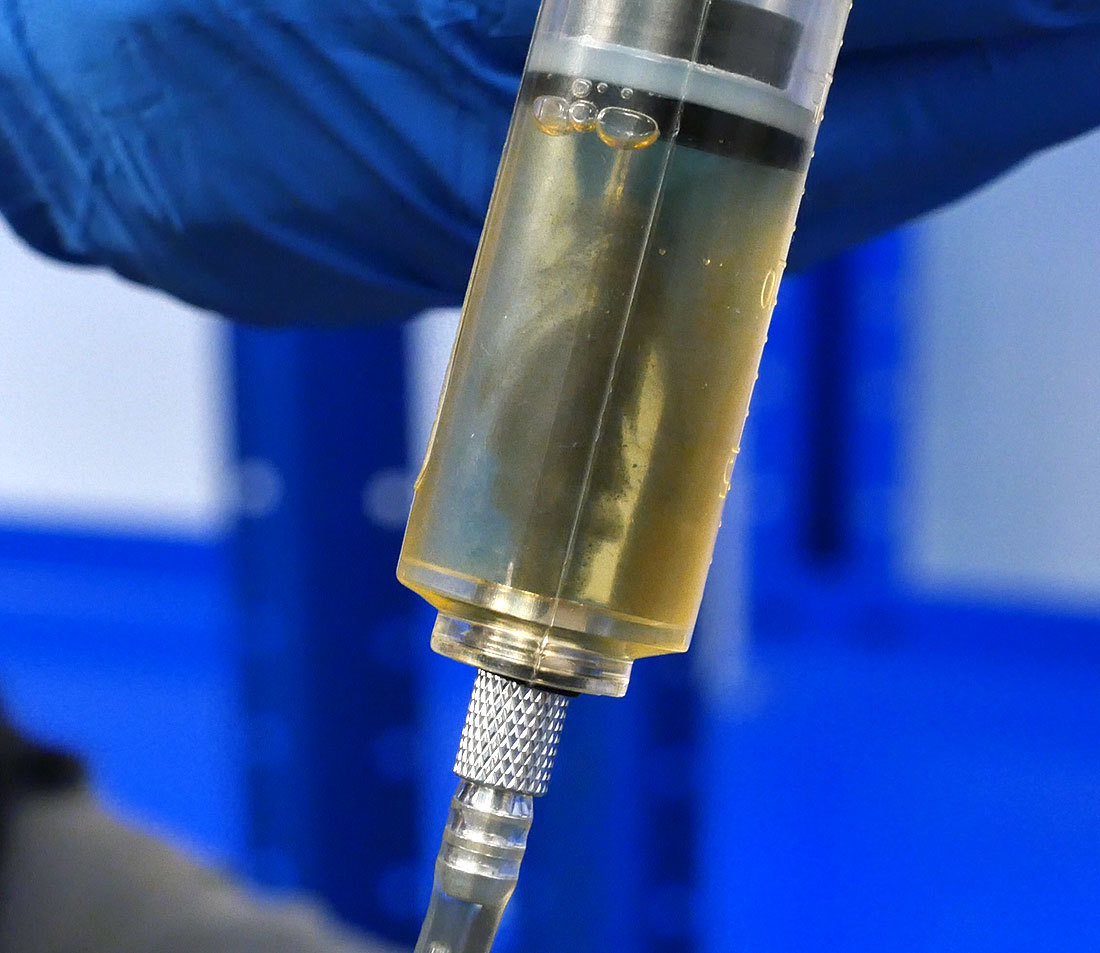
NOTE: If the fluid coming out is dirty or discolored, push all fluid to the lever syringe, remove the syringes, refill and start the bleeding process over. This will ensure that you brake system has clean fresh fluid.
- Once the lever syringe is 3/4 full and the caliper syringe is about 1/4 full, close the clip on the lever syringe.
- Pull the brake lever and hold it down with a toe strap, rubber band, or other suitable option.
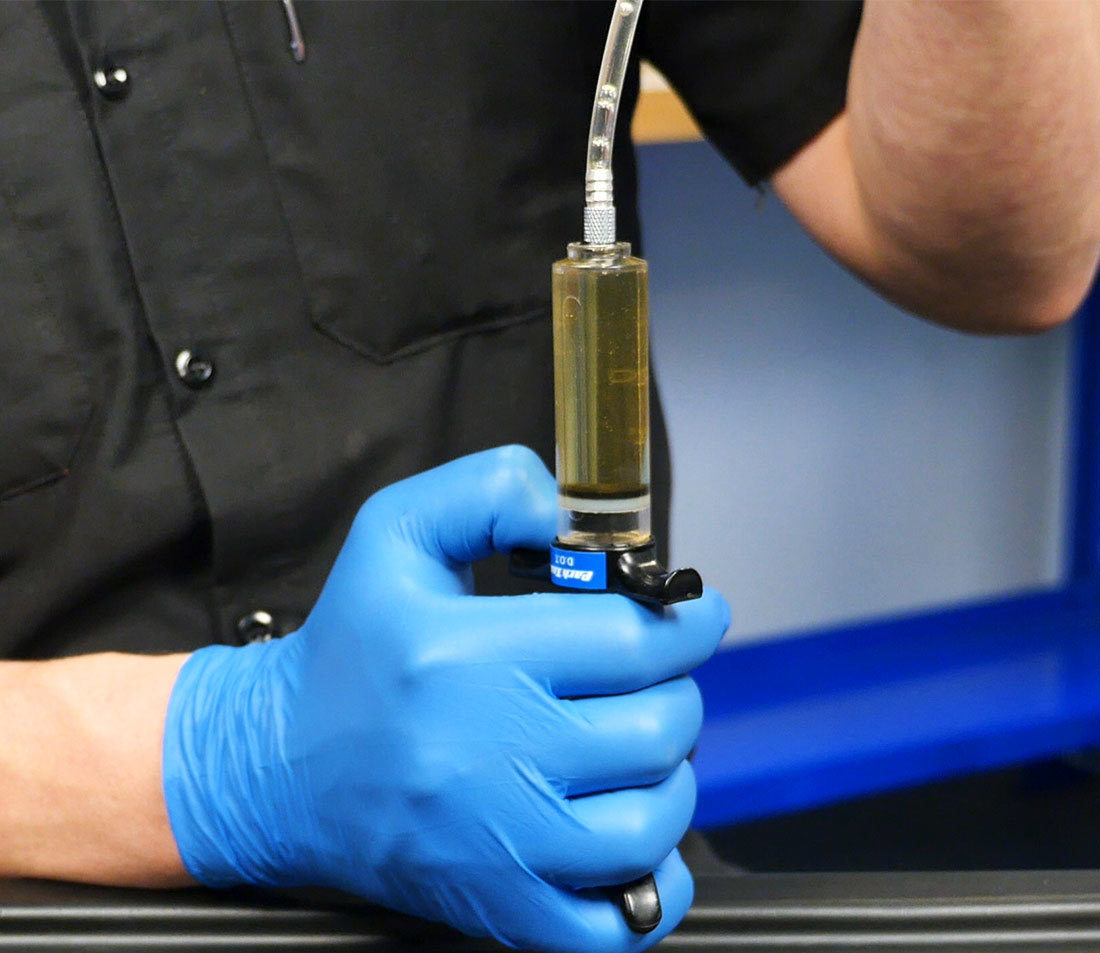
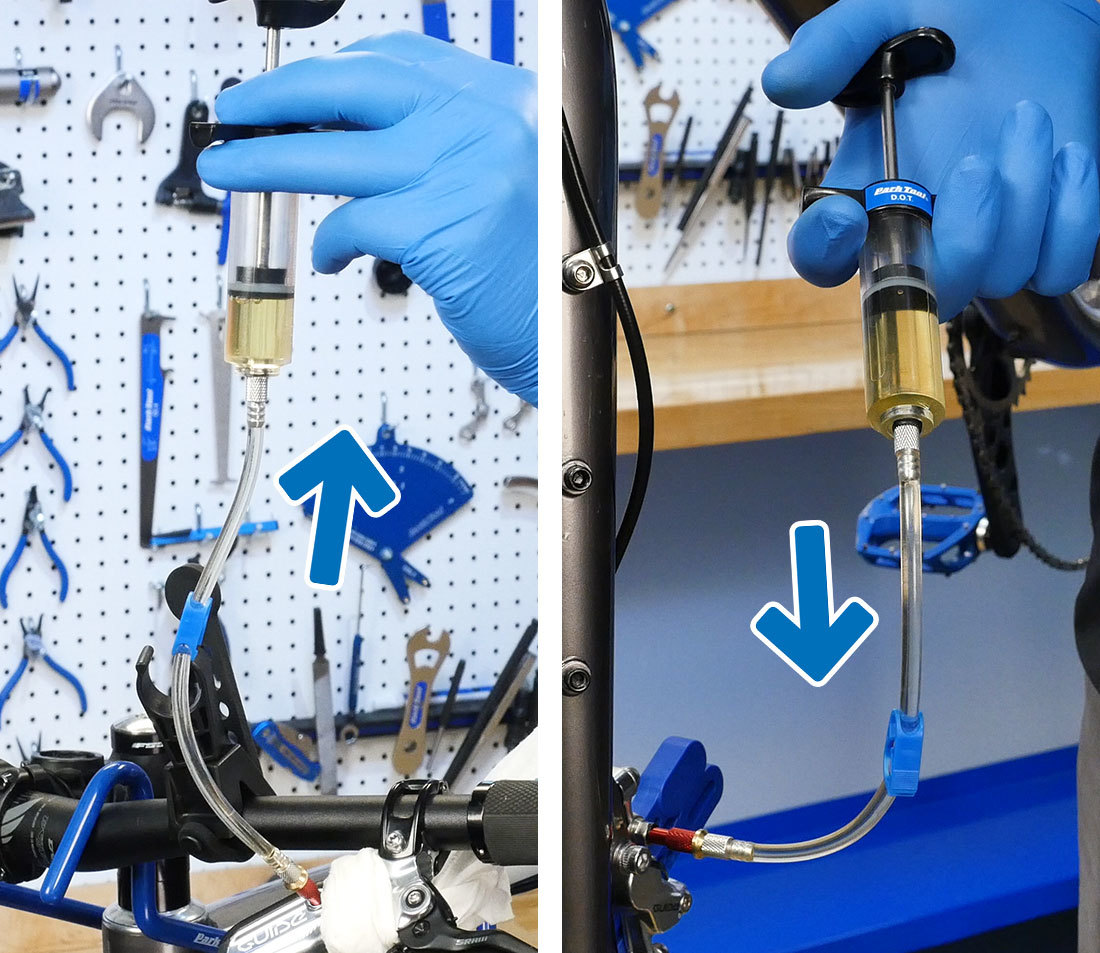
- Push, then pull, on the caliper syringe to create a vacuum.
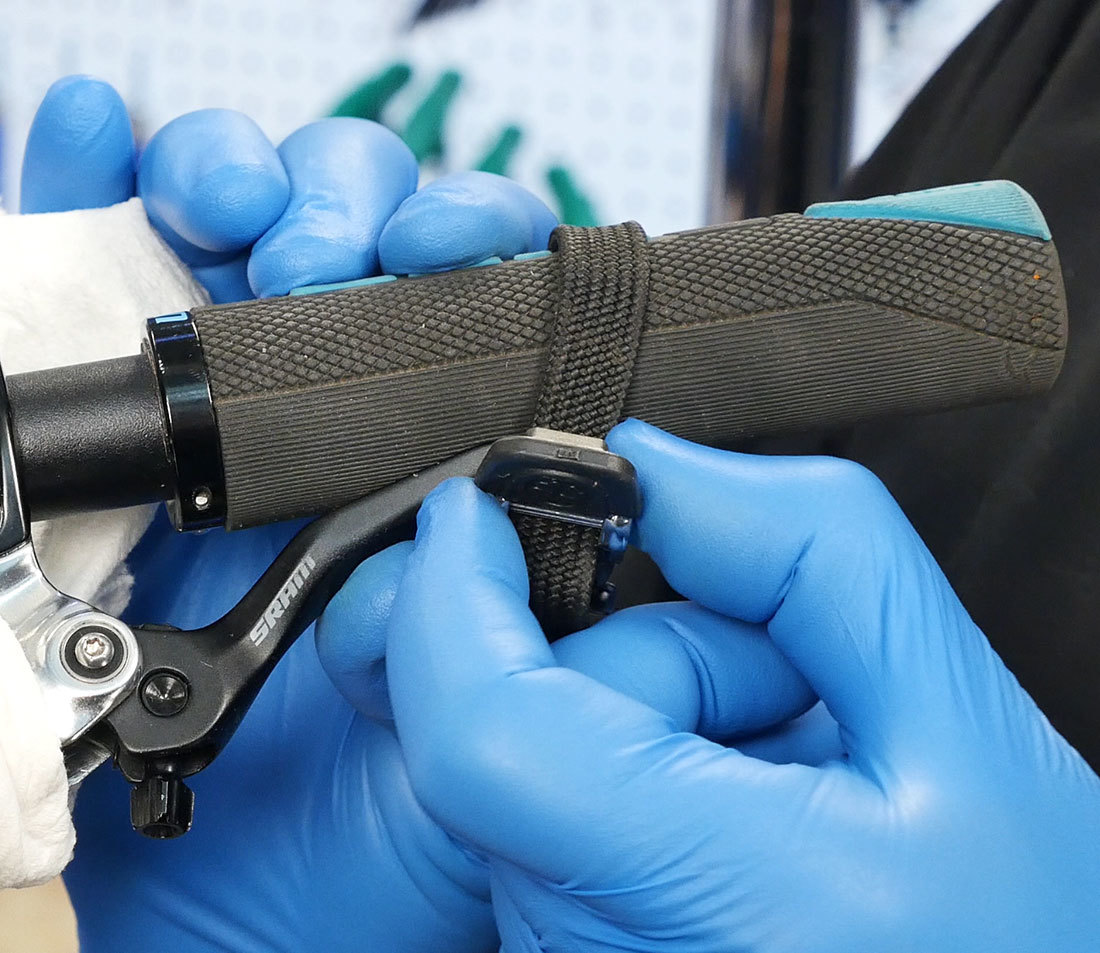
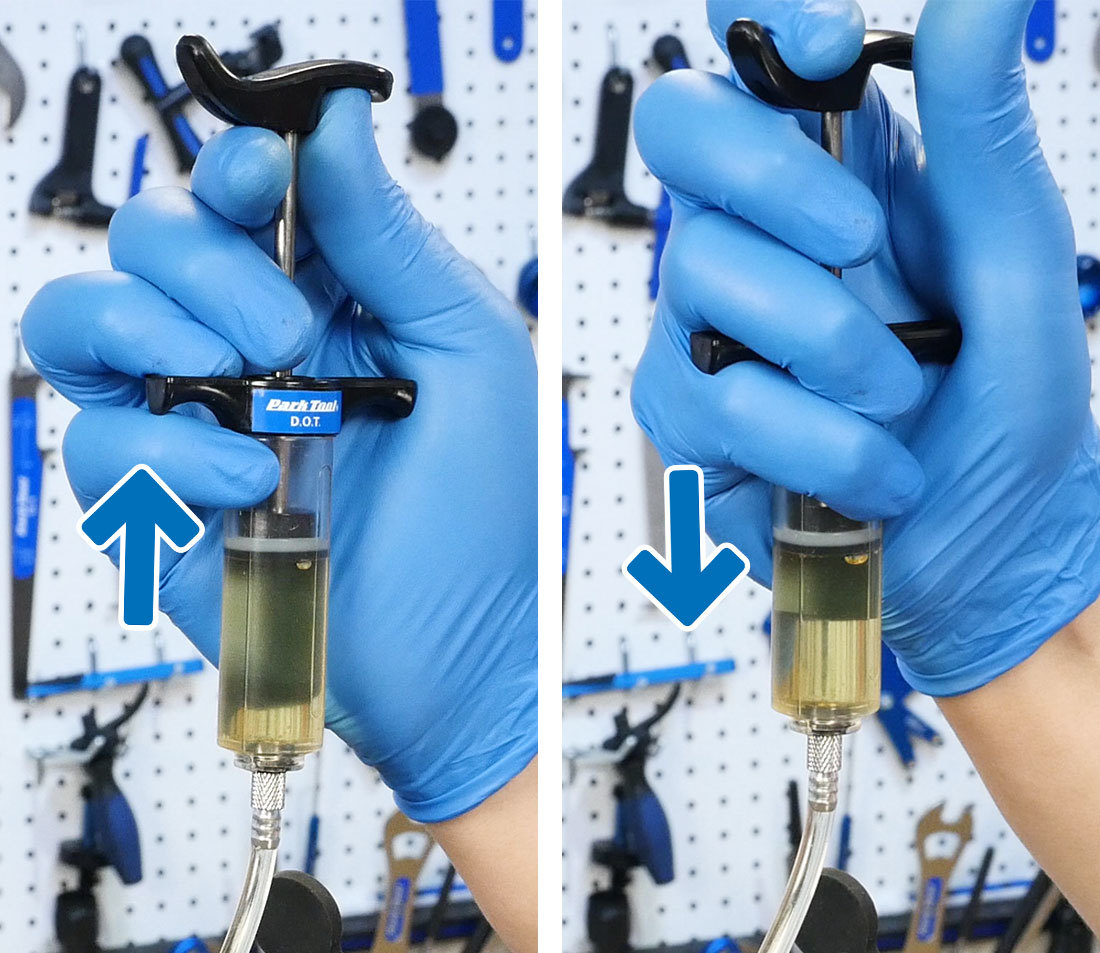
hold brake lever down with toe strap or similar
push then pull on syringe
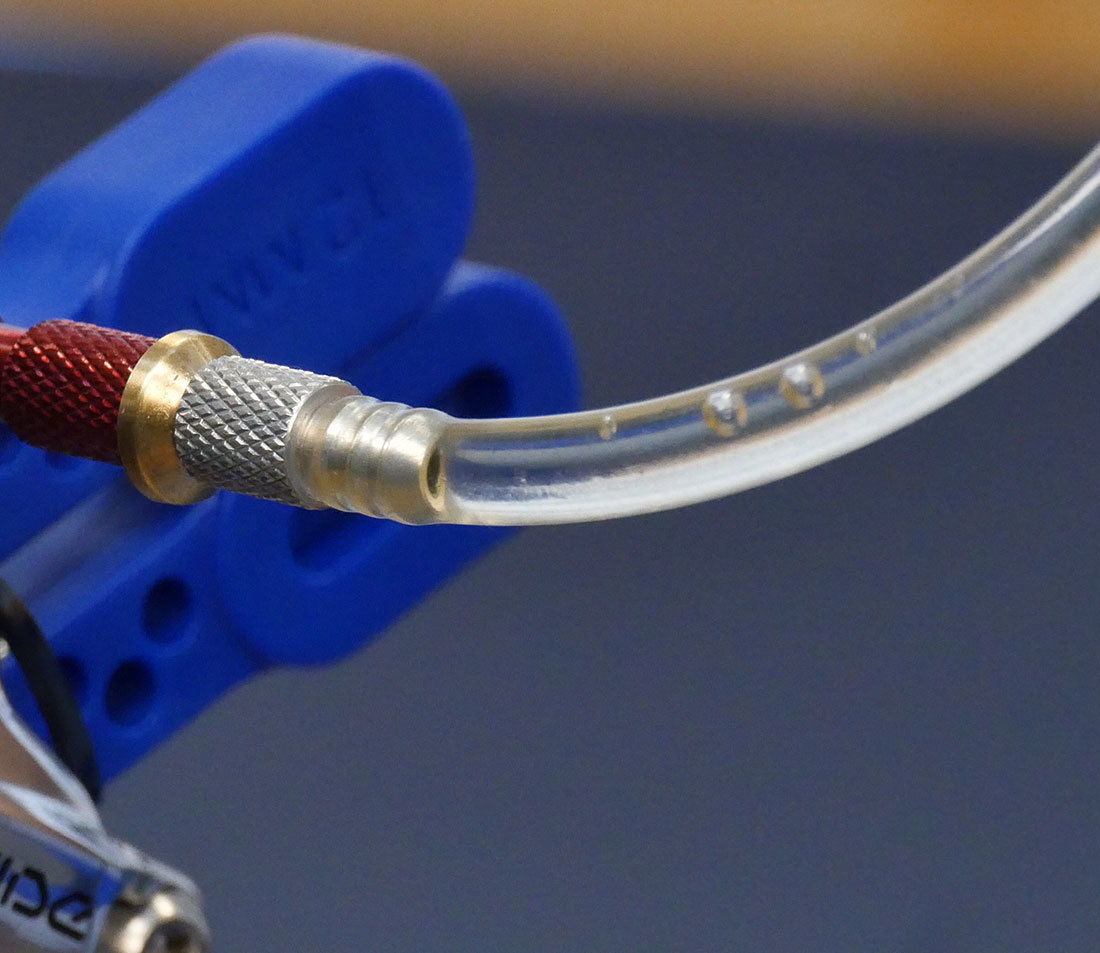
Once the vacuum is created you may see a few bubbles working their way out of the caliper.
- Continue the back-and-forth of pushing on the syringe to create pressure, then pulling on the syringe to create a vacuum again, until no more bubbles come from the caliper.
- Undo the toe strap or other holder while holding the lever. Then slowly release the lever while pushing on the caliper syringe.

- Clip the caliper syringe hose, and remove the caliper syringe.
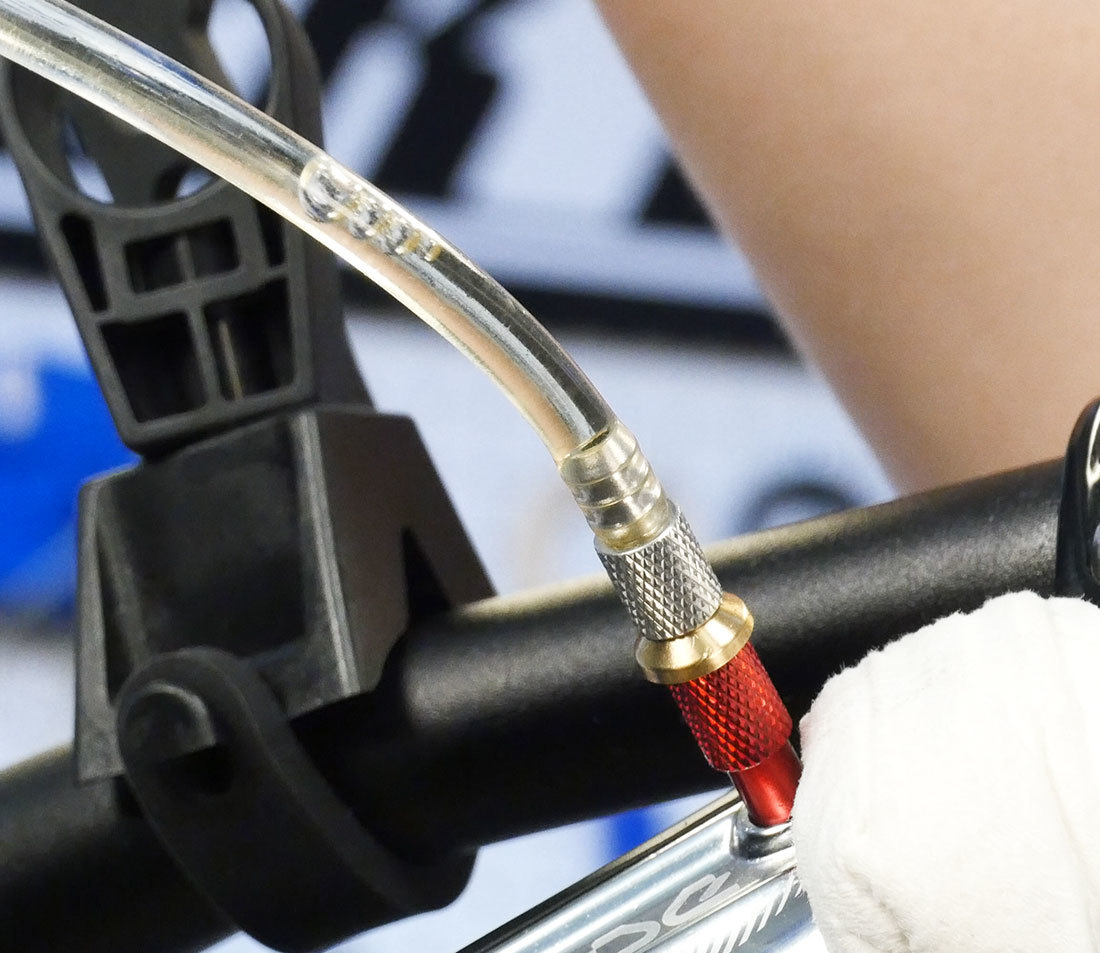
- Quickly reinstall the bleed port screw and clean up any spilled liquid.
- At the lever, unclip the syringe clip to allow fluid movement. Pull on the syringe to create a vacuum, drawing air out of the system. Then pressurize by pushing on the syringe.
- Let the syringe equalize and then pull and release the brake lever 10 times. Repeat these steps until there are no more bubbles.
- Push on the syringe, release the syringe to equalize, and you are ready to clip the hose, remove the syringe and replace the bleed port screw.
Reset Bicycle
- Remove the bleed blocks.
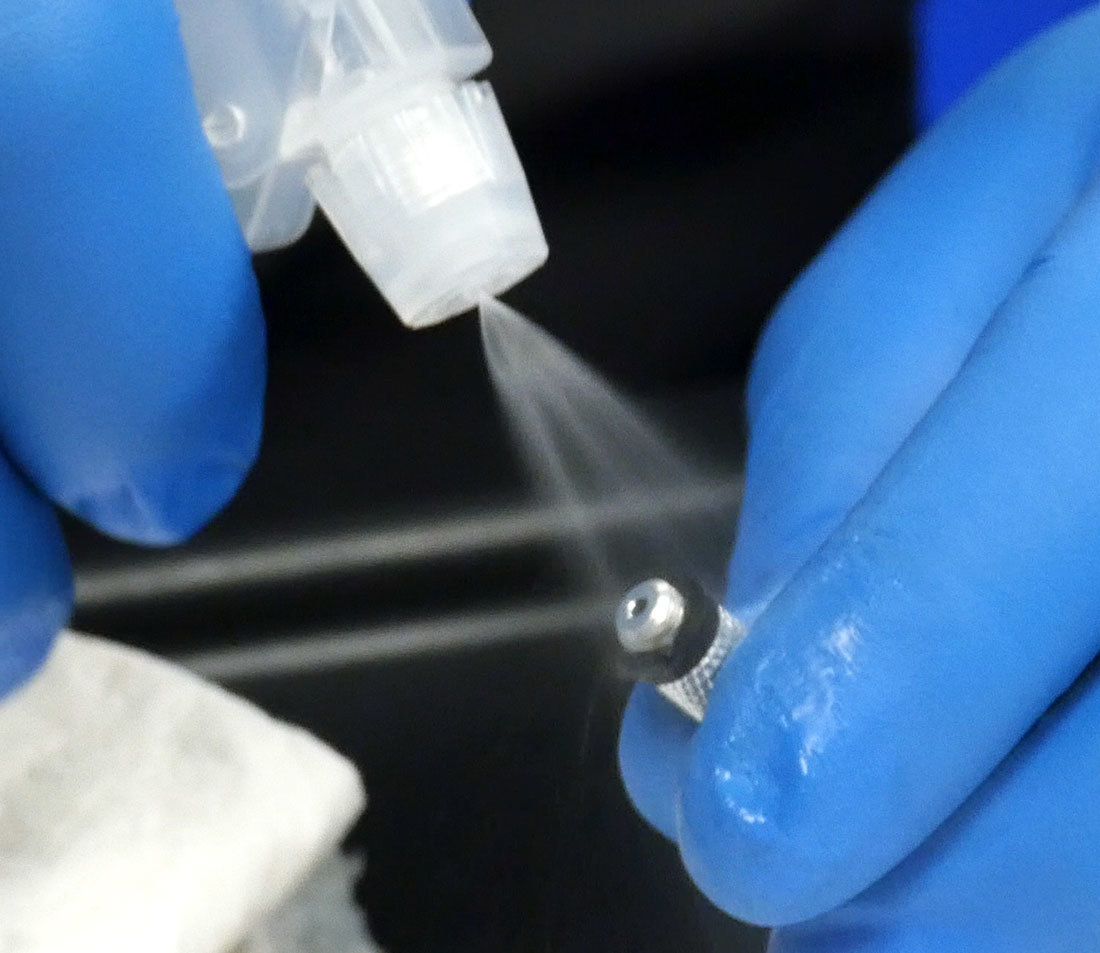
- Clean the caliper body, lever, and surrounding areas with alcohol and rags.
Spray each component with alcohol

Wipe each component thoroughly
- Reinstall the pads, pad pin and clip.
- If you removed the caliper, reinstall it.
- Reinstall the wheel.
- Reset the lever reach back to the desired setting and pull the brake lever 3 times. This will self adjust the system to the pad life that is left.
NOTE: If you encounter rubbing, you may need to realign your calipers at this time.
Clean Kit
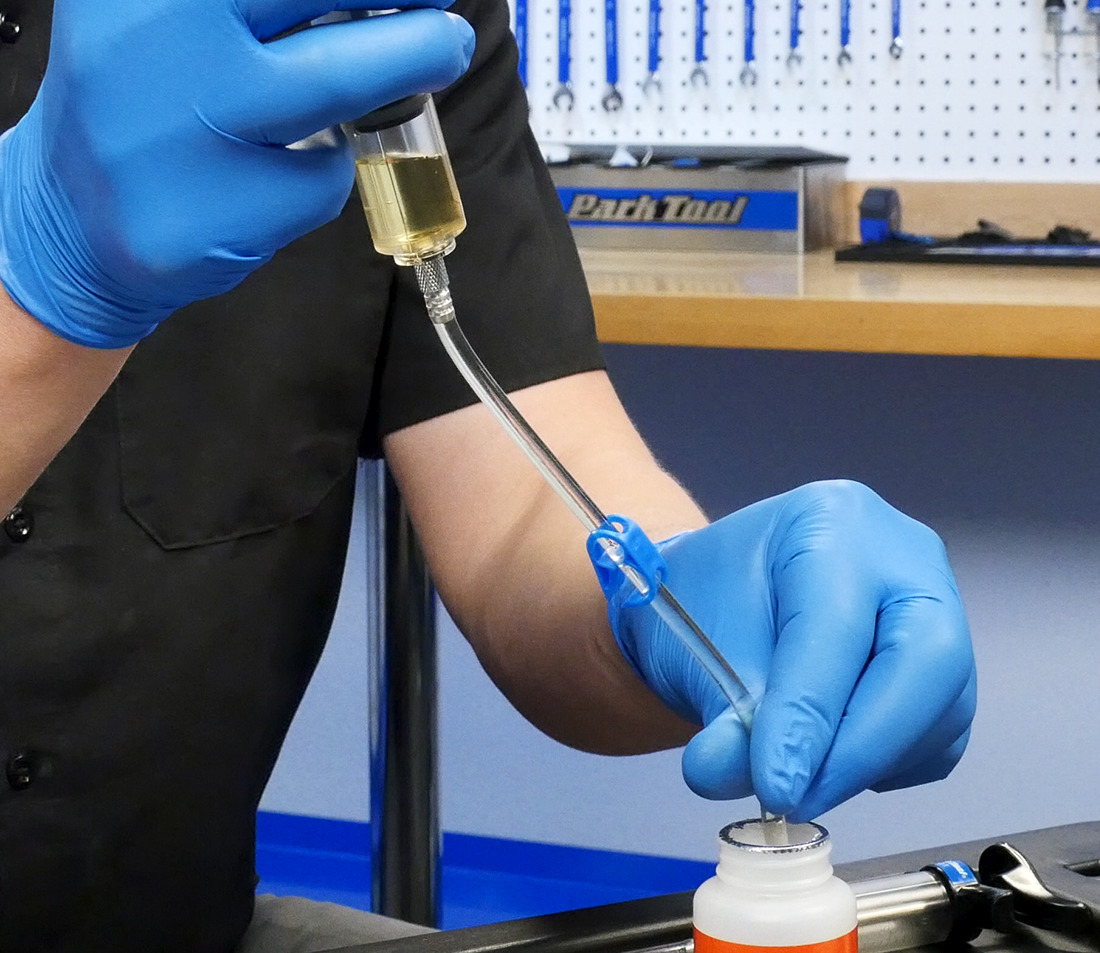
- After bleeding, clear the syringes and hoses of all fluid.
- To prolong the life of your bleed kit, it’s recommended to clean the whole system with alcohol. Start by running alcohol through the hoses.
Empty spent fluid into appropriate container
pour alcohol into syringe assembly and run back and forth
- Disassemble the kit and wipe down each piece, especially the parts that came into contact with DOT fluid.
Thoroughly clean all threaded ends
Thoroughly wipe all surfaces
Related articles
Brake Bleeding for SRAM® Bleeding Edge Hydraulic Brakes View Article