Bottom Bracket Service: Power Torque™
This article will review bottom bracket service for the Campagnolo® Power-Torque™ crankset.
Getting Started
The Power-Torque™ crank uses a spindle integrated into the drive side crank. The left side crank is removed to get to the bearings or to remove the right crank. Before servicing bearings, you must remove both crank arms.
The drive side bearing is pressed to the spindle. There is a C-clip that must be removed before pulling this bearing. The aluminum and carbon arms share the same service feature for bearing removal and replacement.
Bearing Removal
- Use a screwdriver and work the clip up and off the spindle (figure 1).
- Install the bearing remover adapter on the crank (figure 2). Install adapter aligned with the arm of crank. Push adapter until fully engaged.
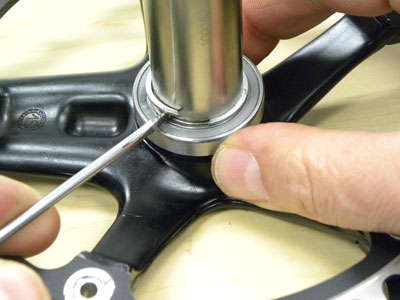
Figure 1. Carefully work free the C-clip on the drive side crank
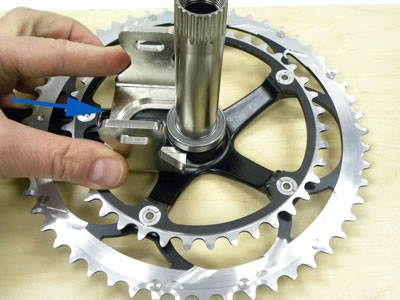
Figure 2. Install adapter below bearing
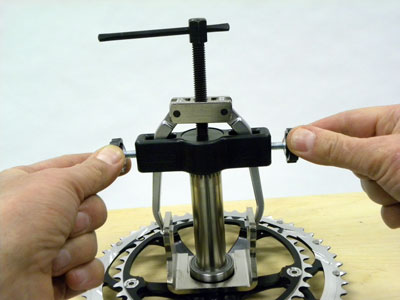
- Install puller and engage fingers into arms of adapters. Adjust knobs of puller to remove play in puller (figure 3).
- Tighten handle of puller to lift adapter and bearing from crank. Inspect the puller and adapter are lifting evenly and not twisting. Readjust as necessary.
Bearing Installation
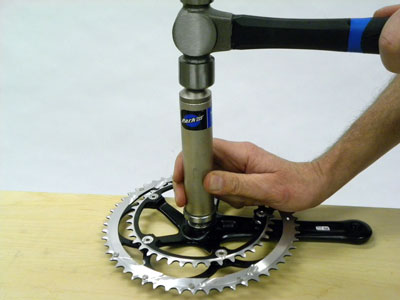
- Install new seal and bearing on crank spindle. Place crank on smooth workbench, and place bearing installer over spindle. Use a hammer to drive bearing fully into place (figure 4).
- Reinstall crank arms.
The left side bearing is pressed into the cup. It is Campagnolo’s intention that this entire cup with bearing should be replaced when bearing is worn out.
Related articles
Crank Removal and Installation: Campagnolo® Power Torque™ View Article