Written by Alex on November 20, 2014/Shop Rag Newsletter
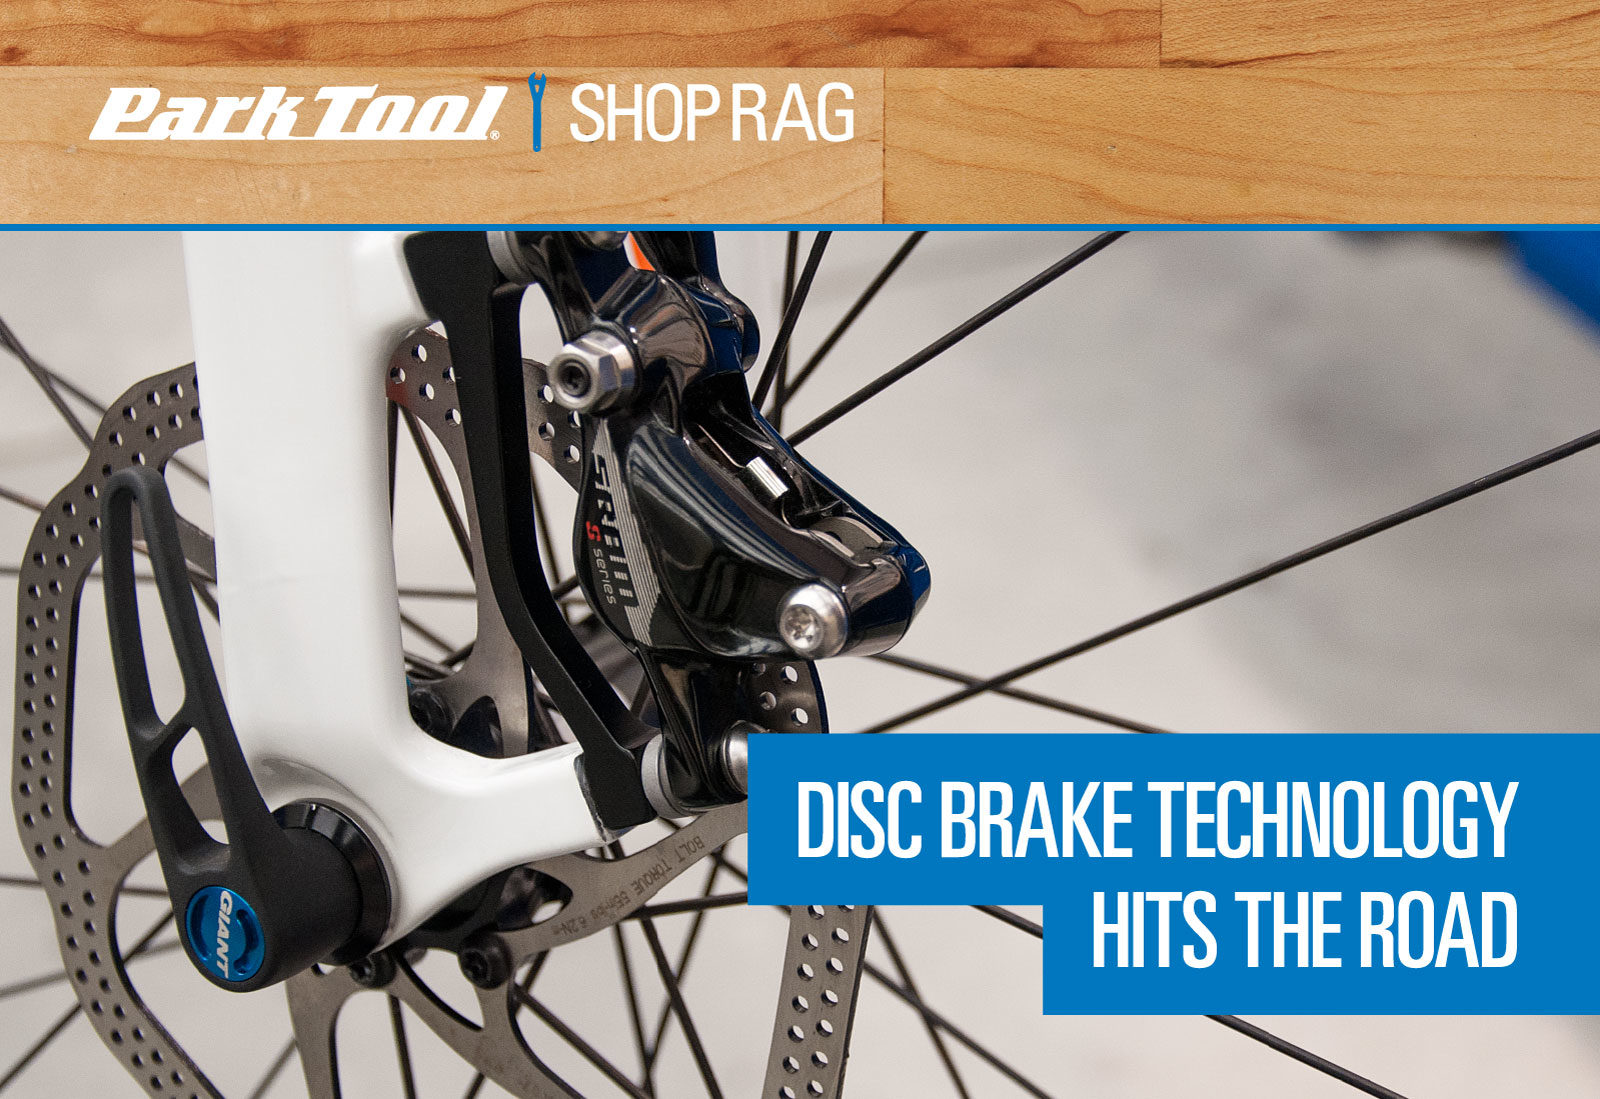
Shop Rag Issue 2 — Disc Brake Technology Hits the Road
Disc brake systems are well established in the bike world. Mountain bikes, hybrids, ebikes, and cyclo-cross bikes all come with this proven technology. So is it a surprise these are now coming to road bikes? No, it’s not a surprise, but the inclusion of the road category to the disc brake family brings with it other supportive requirements to make it all work well.
The most obvious change to road bikes will be thru axle systems (figure 1). Thru axle designs, common on mountain bikes, offer two important features for road (and all) disc brakes. First, thru axles make fork or frame ends stiffer, especially critical in the fork leg ends. The traditional open-dropout system for forks uses a nine-millimeter axle in the front fork, held in place by tightening the five-millimeter shaft of the quick-release. The weak link of this system is not the 9mm axle, but the five-millimeter quick-release shaft inside the axle.
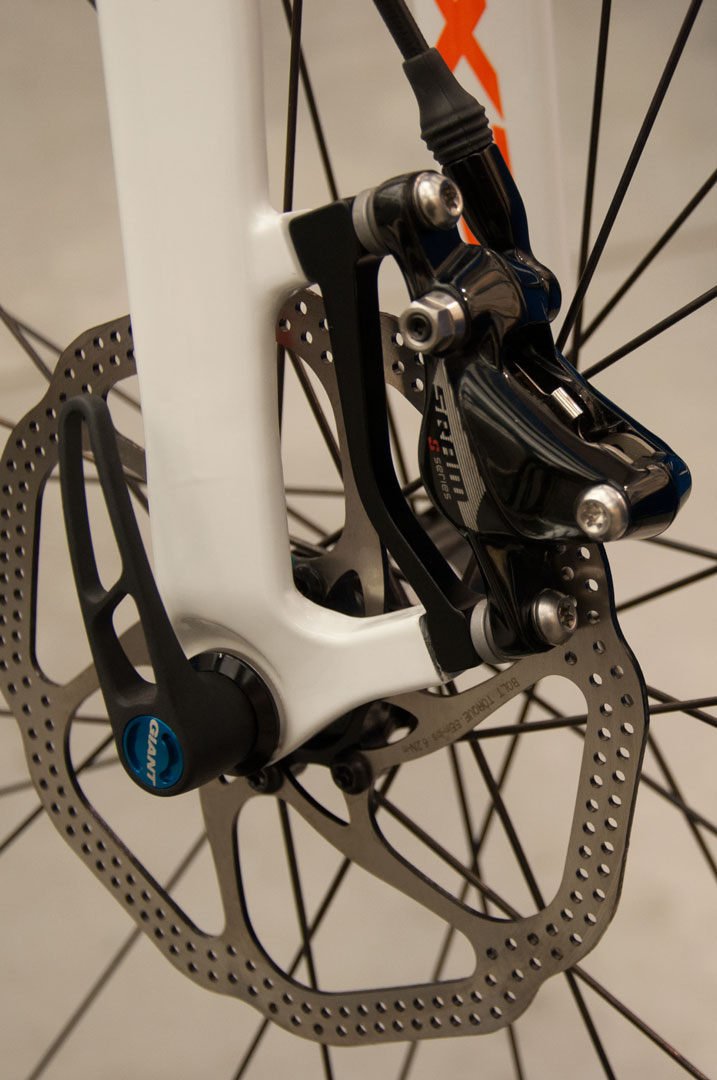
1. Thru-axle front hub and hydraulic disc brake
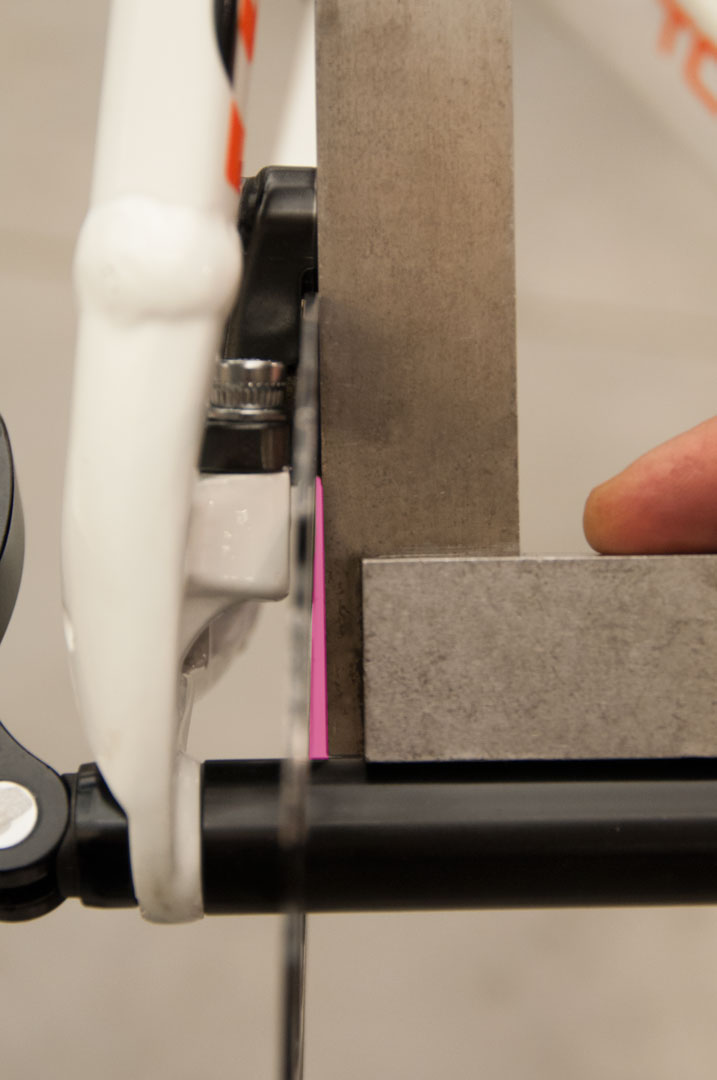
2. Poor rotor alignment before machining
This has not been much of an issue with rim caliper road brakes. Even when a cyclist is stressing the fork and causing movement in the leg ends, such as out of the saddle climbing, the movement is usually not noticed because the rim caliper brakes are not rubbing on the rim. However, on an open-dropout fork with a disc brake system, if the leg ends were moving even slightly relative to the rotor, the movement could cause the pads to rub against the rotor disc. Thru-axles help eliminate this movement, which helps keep the caliper body from moving relative to the rotor disc.
The second important feature of thru axles is that they do a better job of putting the wheel, and hence the rotor, in a consistent position. Traditional open dropouts do not precisely fit the axle ends. There must be some slop or tolerance between the two to make it easy to get wheels in and out. You can see the result of inconsistent wheel installation when riders take wheels off to transport a bike and then replace the wheel only to find the pads are now rubbing. Thru axle systems go a long way to eliminate this issue. The wheel and rotor will consistently install into the same place relative to the caliper body and pads.
Once a decision to add disc brakes to a road bike has been made, you’ll need to choose a mechanical or hydraulic system. If price isn’t an issue, it’s hardly a discussion. The hydraulic systems are far more efficient in transferring your hand pull to the brake pads that squeeze the rotor and slow your bike. Expect the higher end road bikes to use only hydraulic brake systems.
It is a truism, so to speak, that rotor discs do not spin perfectly straight at all times. Into the life of each rotor must eventually come some lateral run-out. The hydraulic pads must run very close to the rotor as it spins. A hydraulic caliper disc brake may have a total space between pads of about 2.2mm. A new rotor is 1.8mm thick. This leaves only about 0.2 per side for clearance. Mechanical calipers run a bit wider, at about 0.4mm gap per side, making precise alignment slightly less critical.
However, the aspect that interests me most in the coming change to road bike caliper disc brakes is the human element. This is a broad statement, but when we are mountain biking, there is more tire noise from the trail surface, and more stuff happening around us in general, so we can’t hear as much. In short, a little noise won’t bother us.
Continuing to paint with a broad brush, the “road rider” personality tends to be more finicky. The idea that there is even a slight noise or rubbing at the brake caliper would be repellent to many roadies. Recall the tight tolerances of the hydraulic system you will be working with.
While disc caliper bodies allow some pad adjustment over the rotor, it tends to be two-dimensional. But the pads still need to be aligned square to the rotor as it spins in all planes. If the frame mount for the brake is off square, even a small amount, it will be difficult to adjust the caliper to rotor. You need all the tolerance (space) you can get to make the hydraulic road disc brake system work as well as it can. If the frame maker does not precisely machine the caliper body mounts (as is often the case), your paper-thin clearances become a rub and your roadie customer is coming back to you with a complaint.
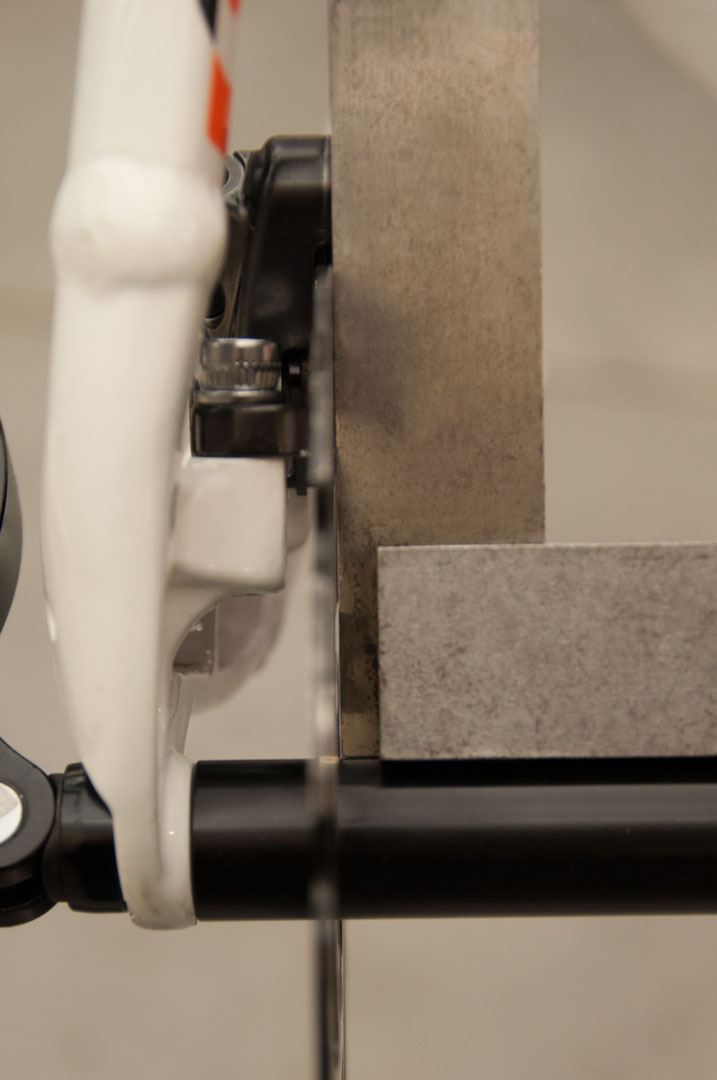
In image 2, the caliper and pads are holding the disc without the hub. You want the rotor and axle square, but because the caliper frame mounts are not square, the rotor is sitting crooked to the axle, as seen by the pink gap between the rotor and machinist 90-degree angle. The caliper body has no adjustment for error in this plane.
But there is help for the caliper mounts! The DT-5 Disc Brake Facing Set will machine the frame mounts and help get the proper clearance for these high performance systems.
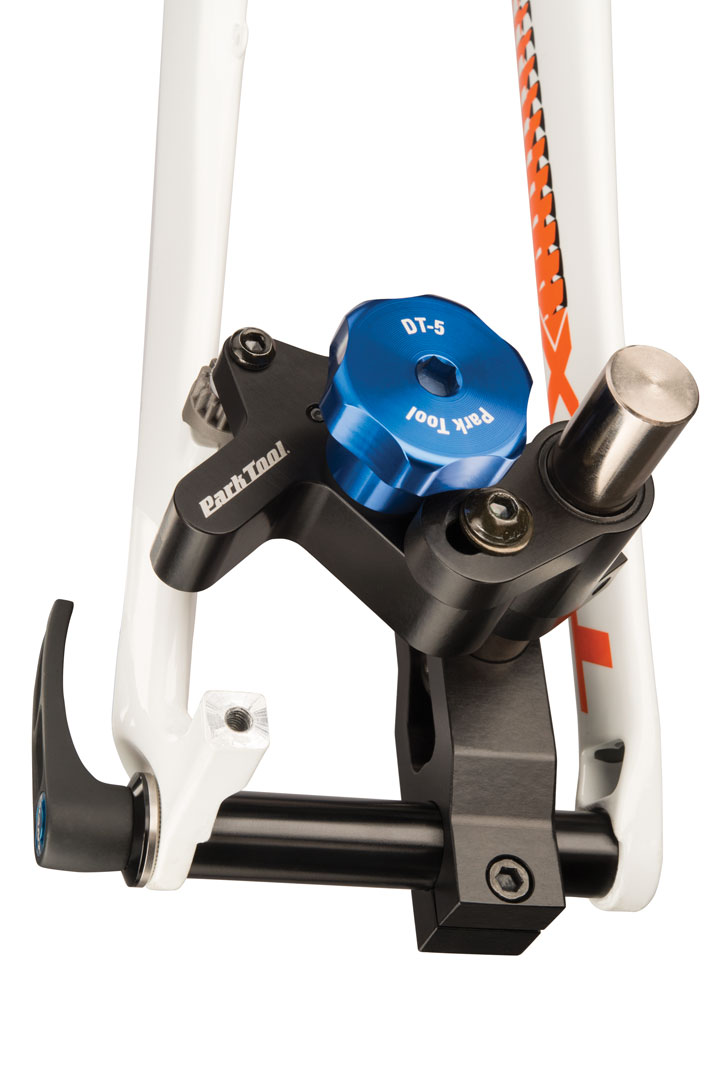
3. Park Tool DT-5 in use
4. Rotor alignment after machining
After machining the frame mounts, the pads are holding the rotor 90 degrees to the axle (image 4), which is where the rotor will spin. This provides maximum clearance of pads to rotor.
One technological change tends to lead to others; that is the way of the biker life. Braking at the hub rotor has many good features. Rims can be redesigned and lightened now that it no longer needs to act as a braking surface. The heat from hard braking will move away from the tire and tube. Rain during the ride will not mean huge increases in braking distances. But all this does not come without consequences. Be ready to deal with the close tolerances to make the road disc perform as intended.
Conversation with Erik Laing, Marketing Manager at Erik’s Bike & Board
What’s the benefit of our Park Tool School program to you and your customers?
Park Tool School gives us an opportunity to interact with our customers in a learning environment (dedicated training room). The curriculum that you have identified in the instructors manual gives us a starting point to custom design clinics for our MS150 corporate teams, women only, security forces, new rider, novice, advanced and our open shop nights. We have had customers at our Twin Cities clinics from all points of Minnesota and Wisconsin our core market, North and South Dakota, Iowa, Illinois and New York, some even planned family vacations to come here to take our clinics. Numerous customers stated they discovered our clinics through the Park Tool web site.
How does the Park Tool School specifically benefit Home Mechanics?
Park Tool School allows riders another way to connect with their bike and strengthens relationships between customers and staff through a shared understanding of bike mechanics. Having a group of riders in a class together can also help to build community among local riders. Because students see the purpose of a specific bike tool and its proper use, they see a value in owning it. As a result, customers do buy more tools and take better care of their bicycles, which reduces their repair bills.
Do your customers buy more tools because of it?
As a part of our classes, we open up purchases of parts and tools during the night. Sales as a result of this average over 100 dollars and often includes service parts as well as product suggestions from Park Tool School instructors in the form of grips, bar tape, tires and more. We create a coupon for class participants to get the tools they need during the class and have brought to the following night. Many people do buy tools as a result of this and we help them select the right tools for them.
To read our Park Tool School article featured in Bicycle Retailer, click here.
The Park Tool School class that I attended at Erik’s was fun, educational and empowering. I feel so much more confident now in my ability to handle on-the-road repairs and basic bike maintenance. I learned things about my bike that I hadn’t learned in all my years of cycling. So worth attending!!
- Shirley Johnson; Racer, Race Official, Mom, and NICA Coach
Eurobike & Interbike Show Recap
 We had a very busy show season, both at Eurobike in Fredrichschafen, Germany as well at Interbike in Las Vegas. Our Outdoor Demo water station at Bootleg Canyon was a hit as we served nearly 5,000 bottles of water and an additional 40 Cases of Sierra Nevada beer. Similar to Eurobike, our booth at Interbike was jammed every day of the show with dealers and consumers wanting to get a look at our 33 new products for 2015. Check out our photo album!
MTBR.com hosted our virtual trade show booth for those that weren’t able to attend the show. Check out their coverage of our booth, featuring new product review video with Max & Calvin.
If you didn’t catch #toolfever at the show, you can view the frenzy here.
Advocacy Spotlight
 Park Tool is proud to have joined together with several bike industry advocates to offer ten scholarships for women bike mechanics to attend UBI. This scholarship is dedicated to getting more women on bikes and supporting the development of female mechanics that would like to increase their technical knowledge and further their career in the bike industry. Applications are now closed. Winners of the scholarship will be announced in early January.
Sponsorship Update
- Aspire Racing: Park Tool has agreed to sponsor Jeremy Powers and his Aspire Racing program for the 2014/15 Cylocross Season. Jeremy is the best Cyclocross racer in North America and currently ranked 12th in the World UCI Rankings.
- Jam Fund: In addition, Jeremy has formed a non-profit foundation called the Jam Fund program to help young, motivated cyclists achieve their goals, both on and off the bike.
- Gwen Lemieux (Jorgensen): ITU World Triathlon Champion Gwen Lemieux recently visited us at our St. Paul, MN headquarters. We are proud to support Gwen and her mechanic/husband Patrick to continue her reign at the top of the sport of Triathlon.