Wheel Truing (Lateral & Radial)
If a bicycle wheel is out-of-true (meaning not sufficiently straight or round) it can affect riding performance and shorten the life of components. This article will outline the process of truing the common spoked bicycle wheel.
Preliminary Info & Setup
- Truing stand, or other method of fixturing the wheel and tracking deviations
- Appropriately-sized spoke wrench
- Spoke holder such as CSH-1 or BSH-4
- Light lubricant such as CL-1.2
- Rags
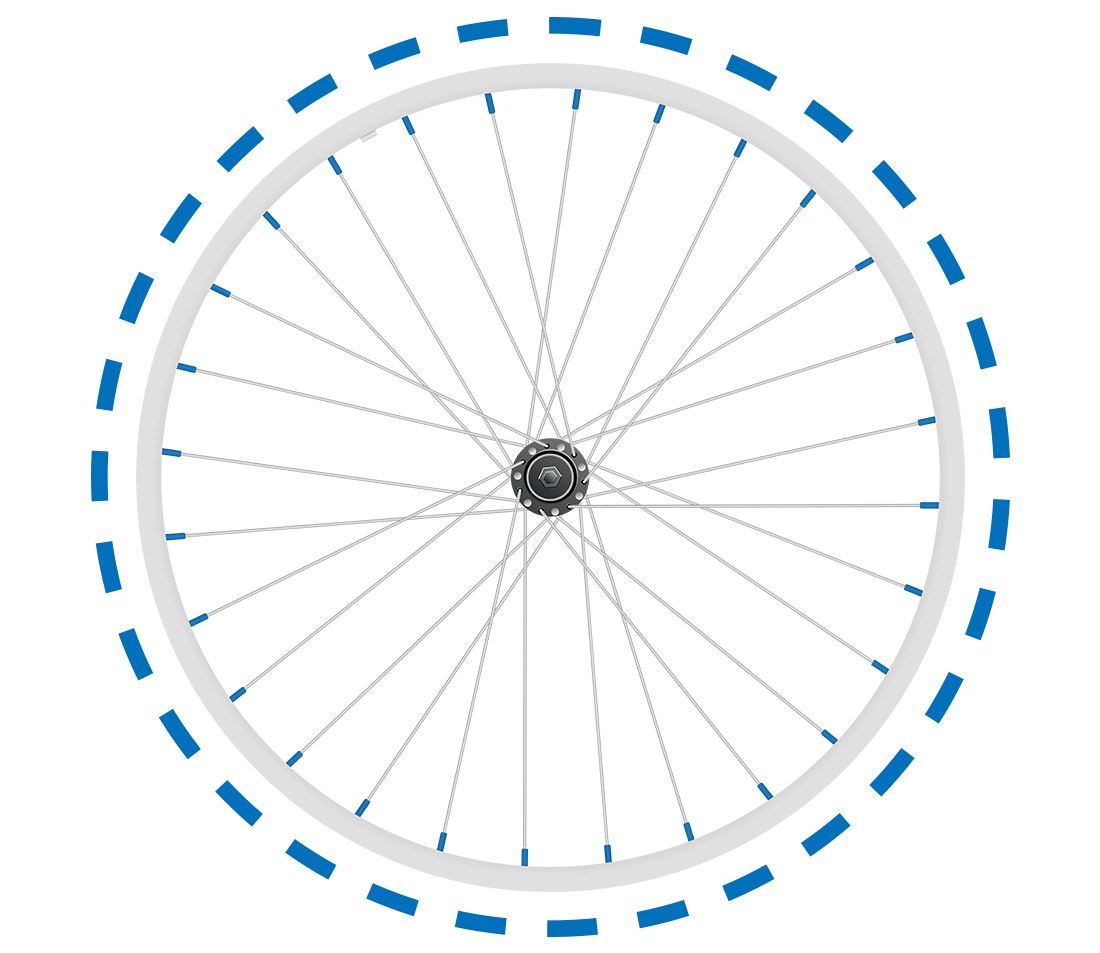
The bicycle wheel is a hoop, or rim, with a set of spokes that connect it to a hub. Spokes pull the rim from both the right and left side. Wheel truing is the process of using a spoke wrench to change the tension of spokes to improve the straightness and roundness, or trueness, of the wheel.
There are four basic aspects of wheel truing. The first two are covered in this article. A professional mechanic is able to adjust spoke tension so that each aspect is optimal. With the right tools, and experience, a thorough wheel truing will produce a durable and strong wheel.
1. Lateral Trueness
Lateral truing is the correction of side-to-side wobbles, or lateral deviations, as the wheel spins This aspect is the most critical for bicycles with rim brakes. When truing wheels, generally begin first by correcting the lateral trueness.
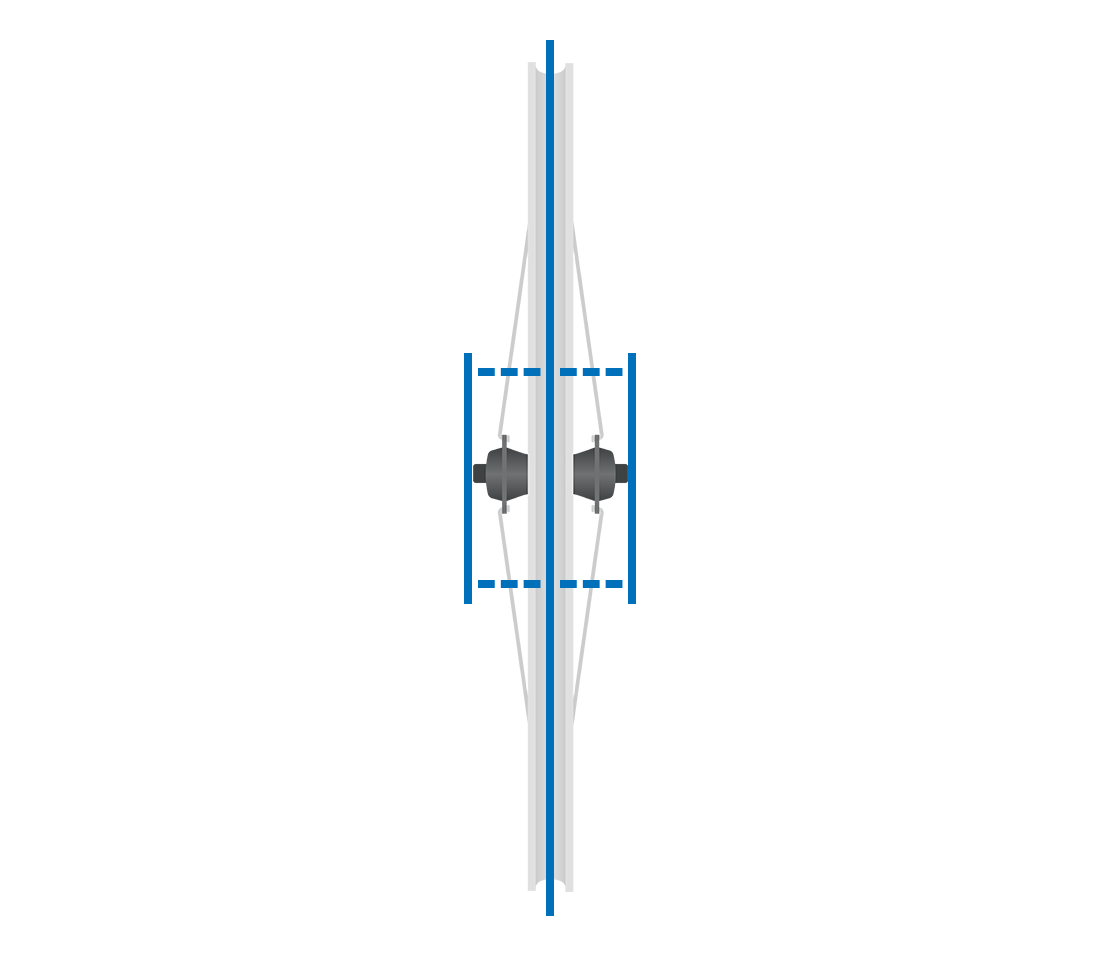
2. Radial Trueness
The wheel’s roundness, or amount of up and down movement as it spins, is its radial trueness. Radial truing is adjusting spoke tension to correct issues of roundness.
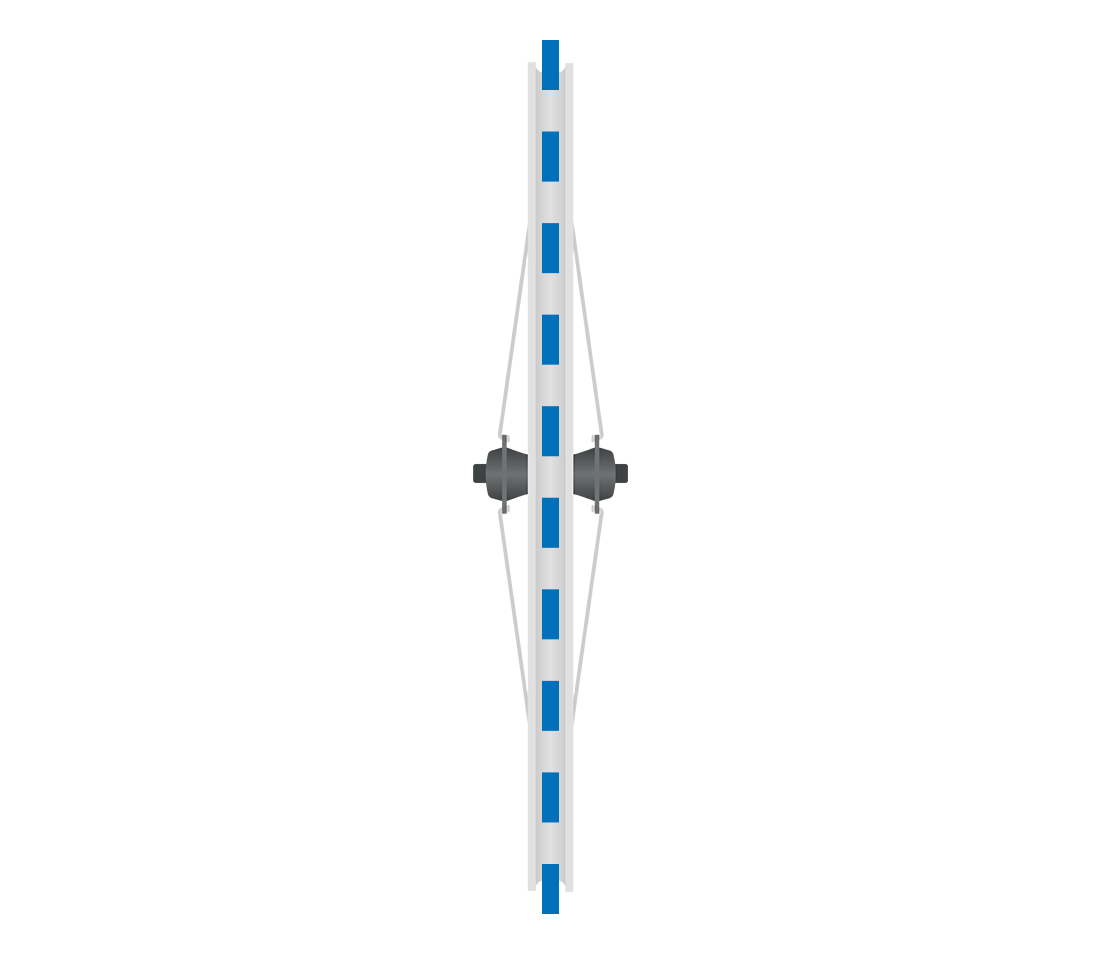
Lateral trueness (side-to-side straightness)
Radial trueness (up-and-down straightness/roundness)
3. Dish/Centering
The two wheels of the bike should be centered in the frame as well as aligned to one another.
4. Spoke Tension
Much like any other fastener system, spokes have a range of acceptable tightness, or tension. Wheels with extremely varied spoke tension will not stay true, or straight, for very long. Additionally, wheels with spokes that are either too tight or too loose overall can cause problems. Spoke tension is best measured using a spoke tension meter (tensiometer) such as the Park Tool TM-1.
Dish (Centering)
Tension (overal tightness)
This article will cover the first two aspects - lateral and radial trueness.
Wheel truing requires 3 things:
1. A Way To Fixture The Wheel
First, we need to hold the wheel steady as it spins. We recommend using a truing stand. Truing stands help isolate truing problems and allow for easier and faster work when truing.
If you don’t have a truing stand, you can use the bike to hold the wheel. The bike should be positioned so the wheel is able to spin freely. Put the bike in a repair stand or turn it upside down.
2. A Way To Track Deviations
We need a stationary indicator that will help find lateral and radial deviations. A truing stand has built-in indicator fingers that can be adjusted in and out or up and down from the rim to easily identify these deviations.
If you are truing in the bike, you can make an indicator by attaching something to the frame like a zip tie. These can be moved in and out or up and down to show deviations as the wheel spins in the frame. Put one on each side of the rim. Depending how your bike is set up, you may need to get creative with your indicator placement.
3. A Way To Adjust Tension
We increase or decrease tension by turning the nipple, or the nut of the spoke system. This is done using a spoke wrench - see Spoke Wrench Selection for more information.
This presents a good opportunity to point out a common point of confusion: looking from the outside of the rim you will turn the nipple clockwise to tighten and counterclockwise to loosen. Working on a truing stand or bicycle, however, it appears as though you are tightening by turning counterclockwise, since we perceive the nipple as upside down.
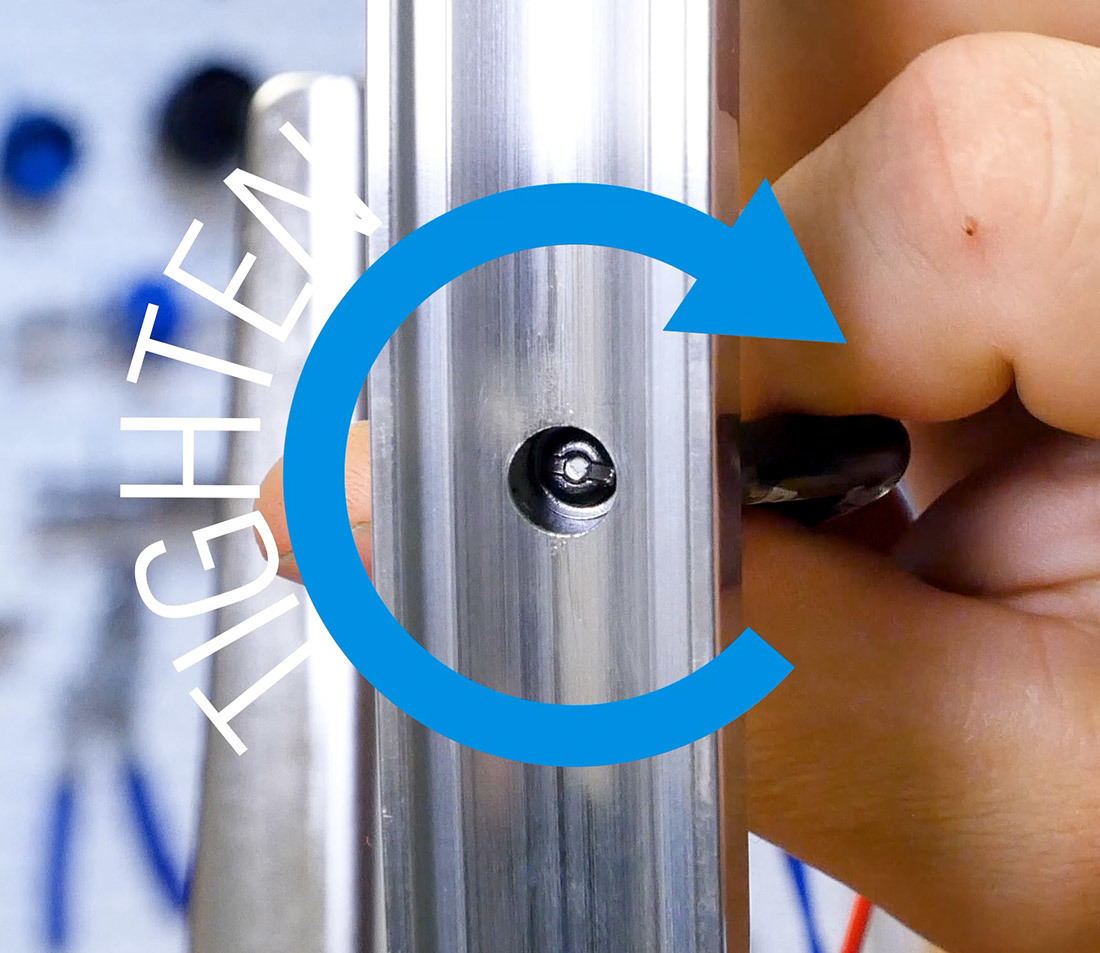
The spoke nipple, as seen from below the rim
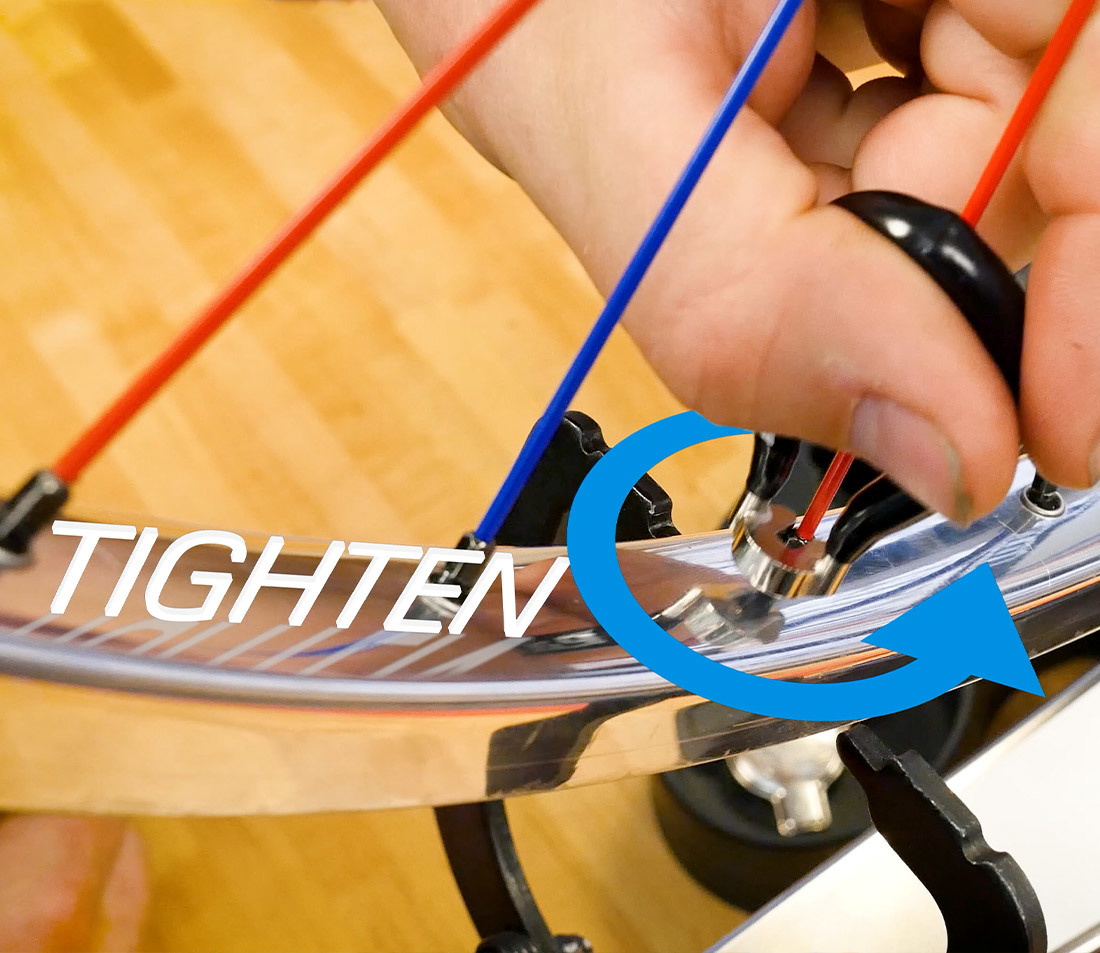
The spoke nipple, as seen from above the rim
Other Considerations
Tire Removal
If you are just beginning to learn wheel truing, it can be helpful to take the tire off of the rim. With the tire removed, the lateral deviations you’re looking for at the rim will be easier to see.

The tire can often obscure the indicators from direct view...
...removing it can make the process easier.
Lubricant
It’s a good idea to have some light lubricant on hand as well as a rag to clean it up. If the nipples seem hard to turn or are creaky, put a drop of lubricant where the spoke exits the nipple and where the nipple exits the rim.
Bladed Spokes
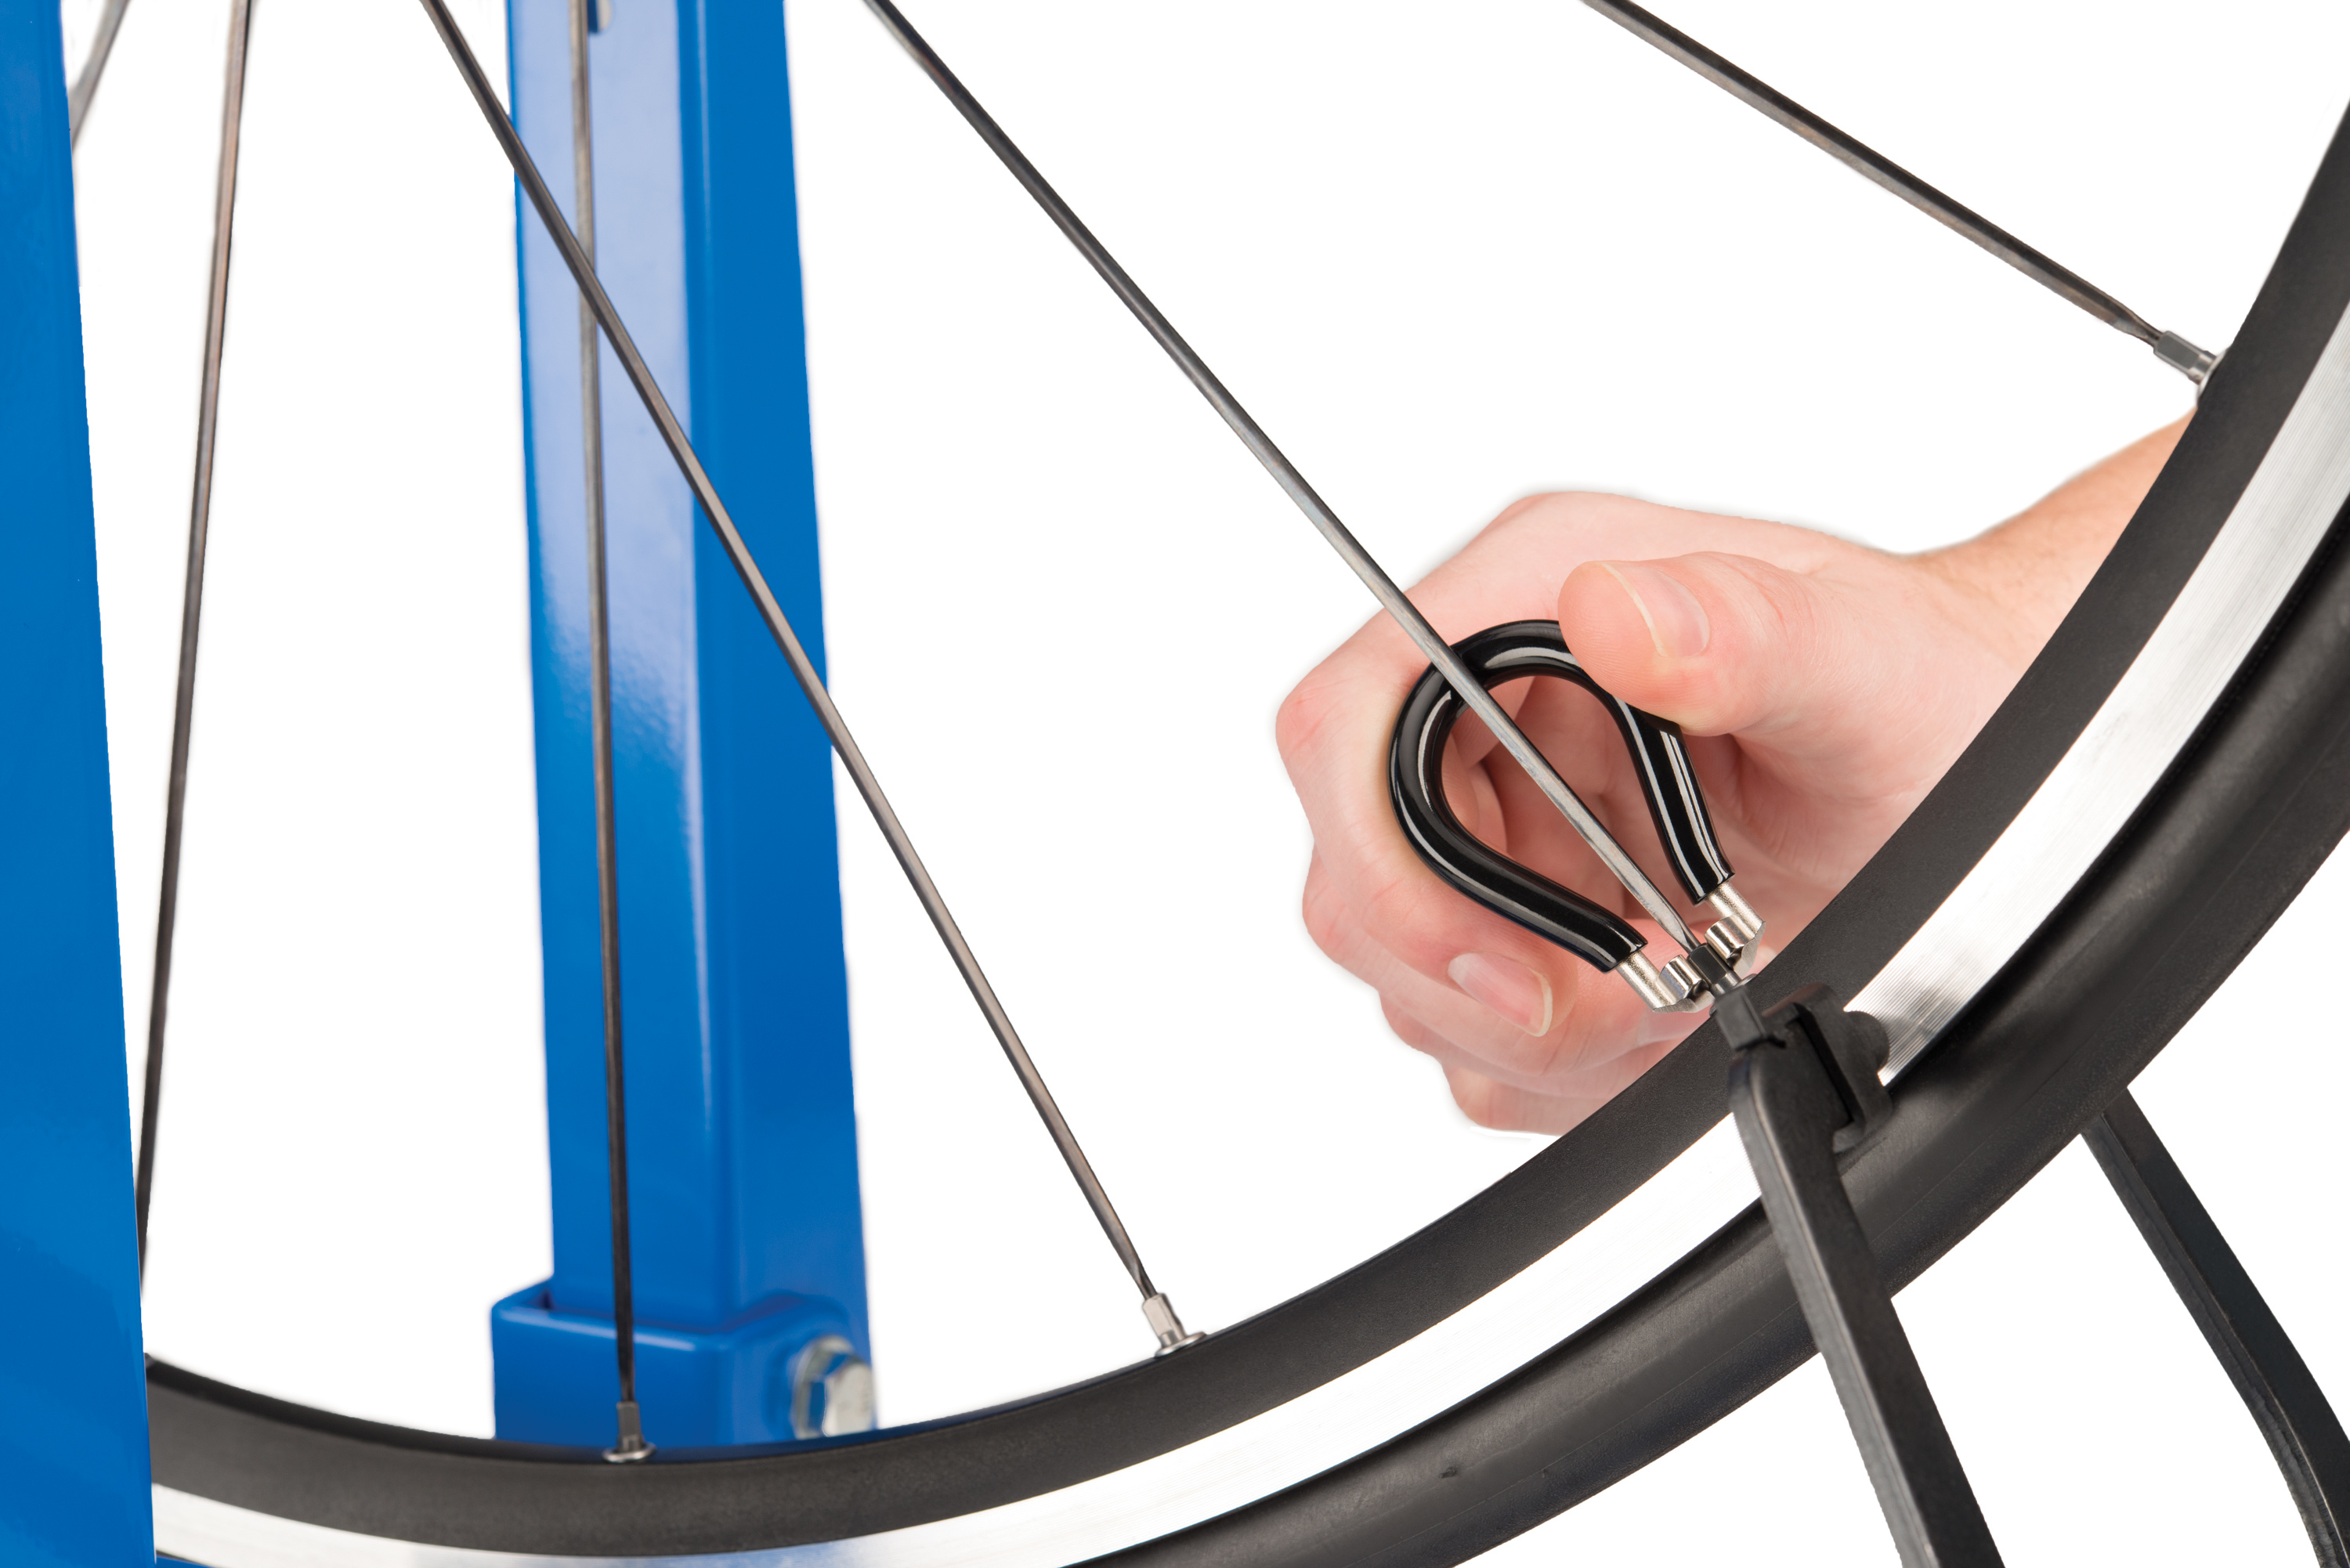
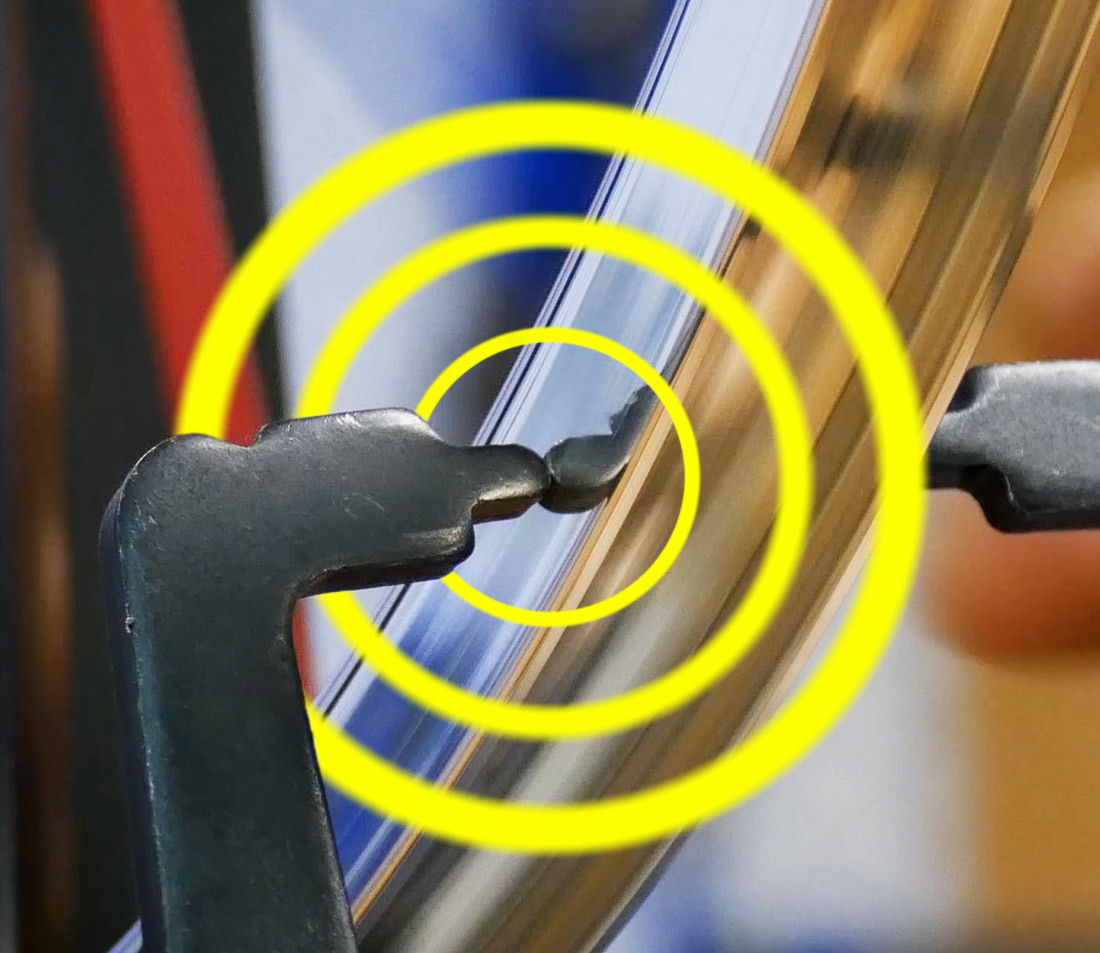
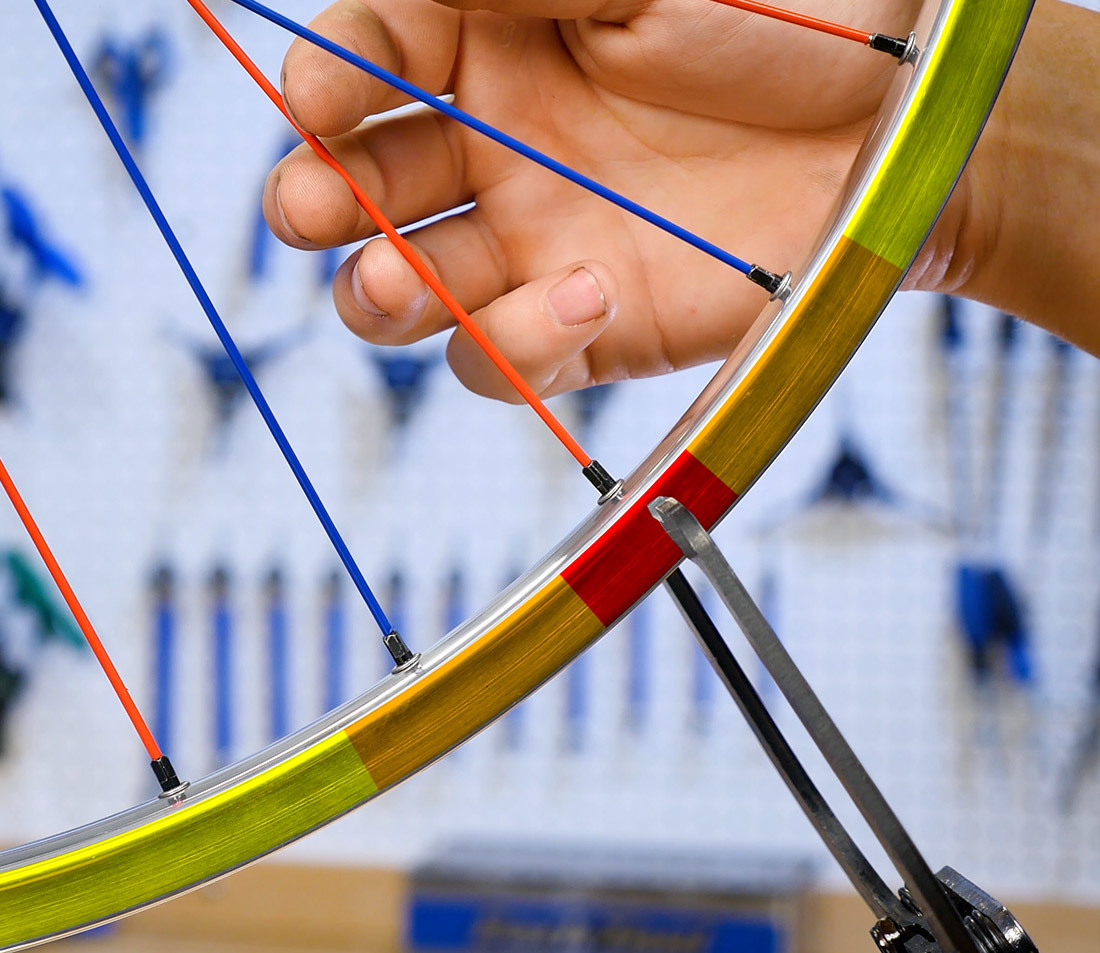
Bladed or flat spokes can twist around as the nipple turns, which can damage the spokes and work against their aerodynamic properties. To prevent this, hold the spoke in place while adjusting tension using a spoke holder such as the BSH-4. Pliers can be used in a pinch, but you risk damage to the spoke.

Internal Nipples
If you do not see nipples at the rim or the hub, it is likely the wheel has internal nipples. Internal nipples are located under the rim strip, inside the rim, and require a special tool to get at them. These are also discussed in the article on spoke wrench selection.
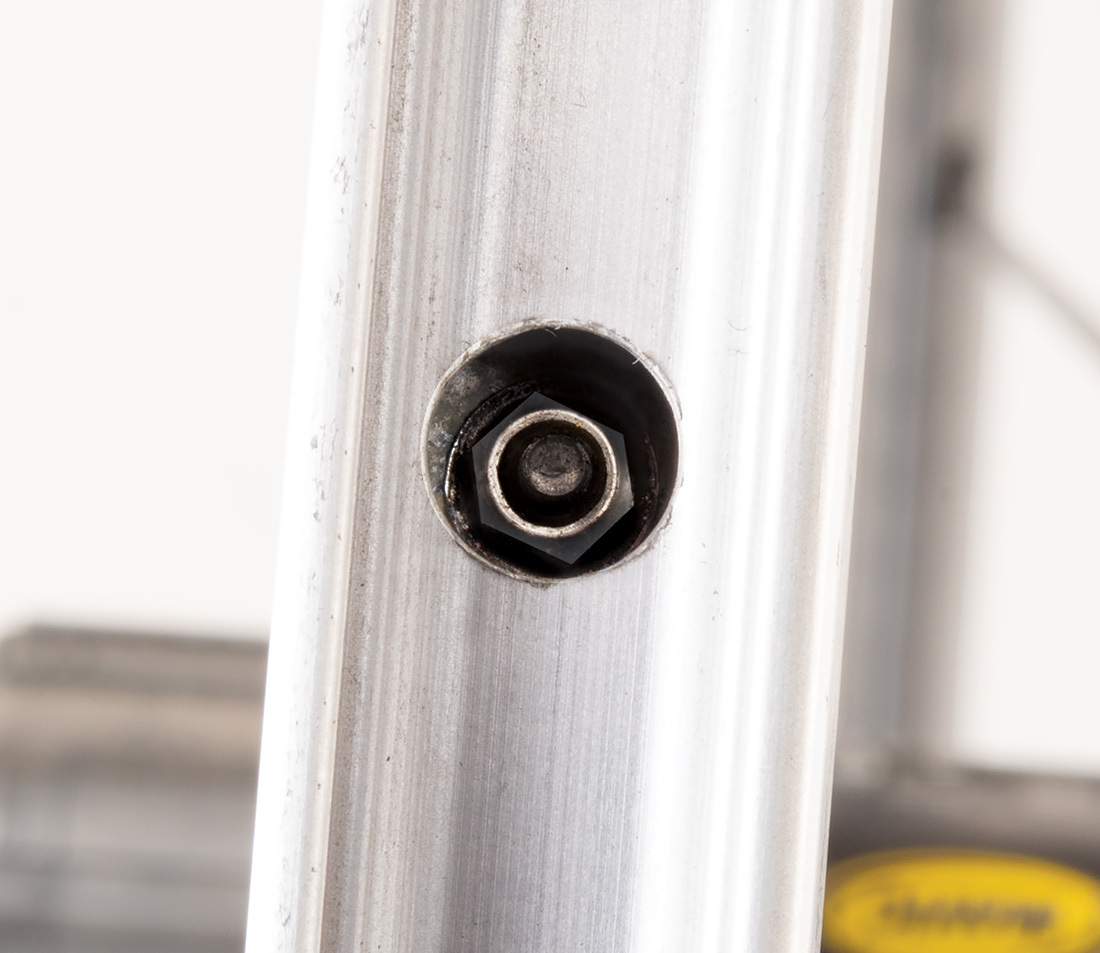
Closeup of internal nipple inside rim
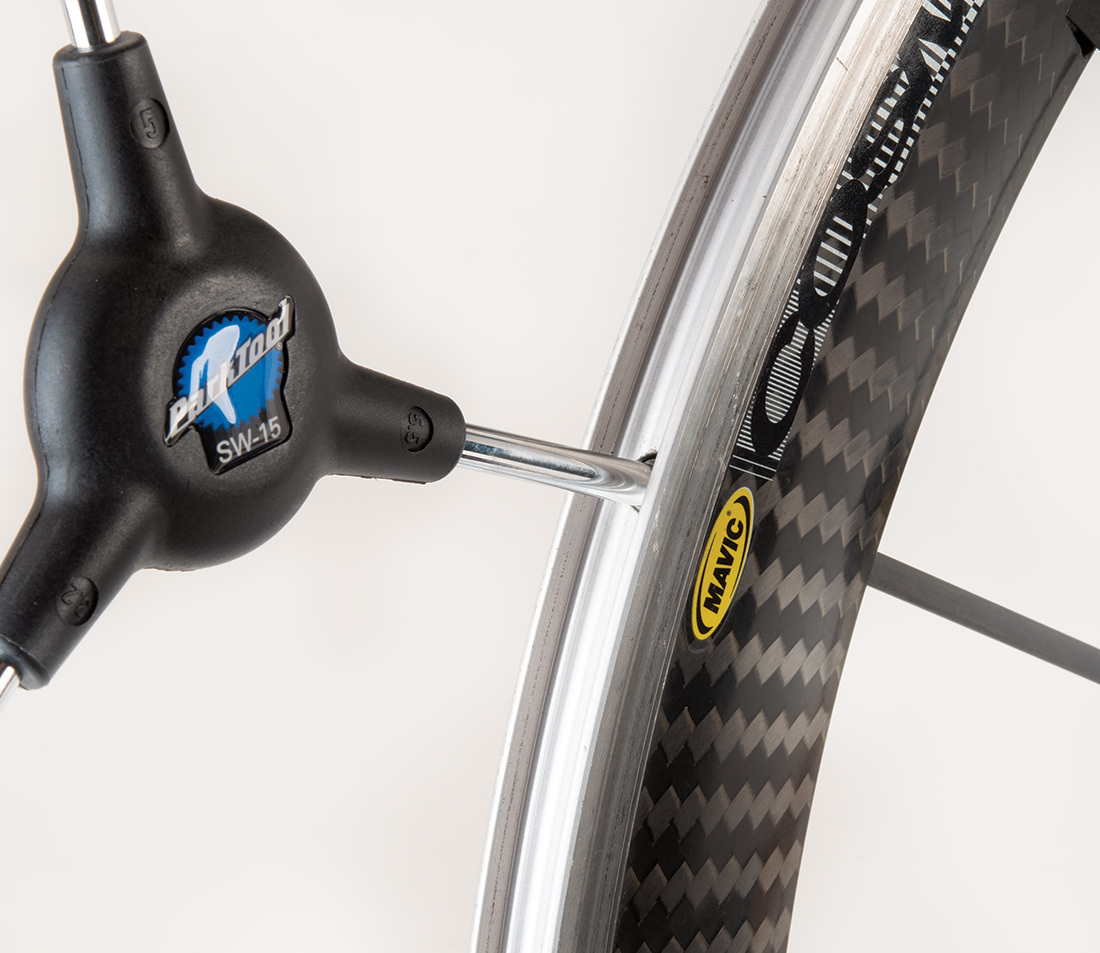
SW-15 spoke wrench used on an internal nipple wheel
Lateral Truing
The truing process itself is not terribly complicated:
- Locate the deviation
- Isolate the spokes responsible for the deviation
- Correct the the tension of these spokes to reduce the deviation
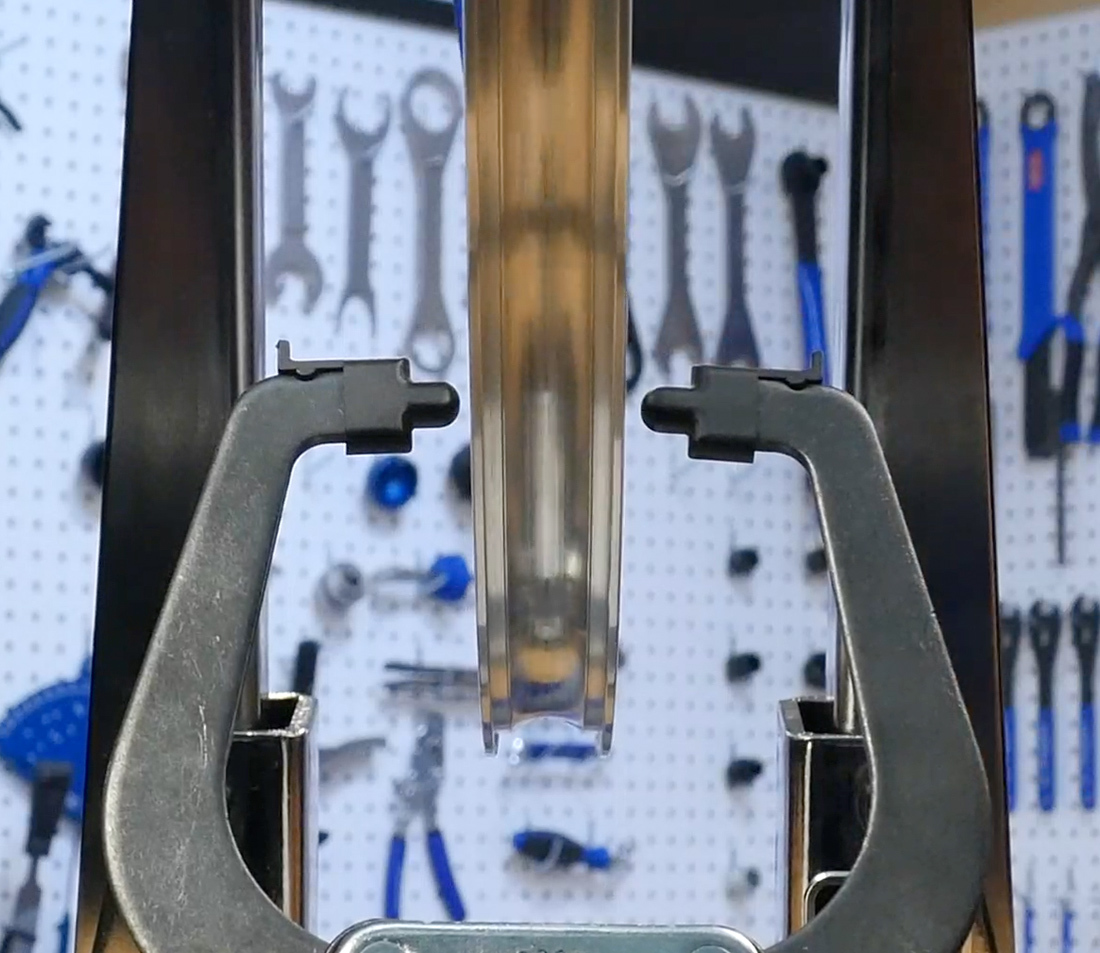
Install the wheel in a truing stand (or bicycle frame). Adjust your indicators so they are near the outer edge of the rim, but not touching it.
Locate the Deviation
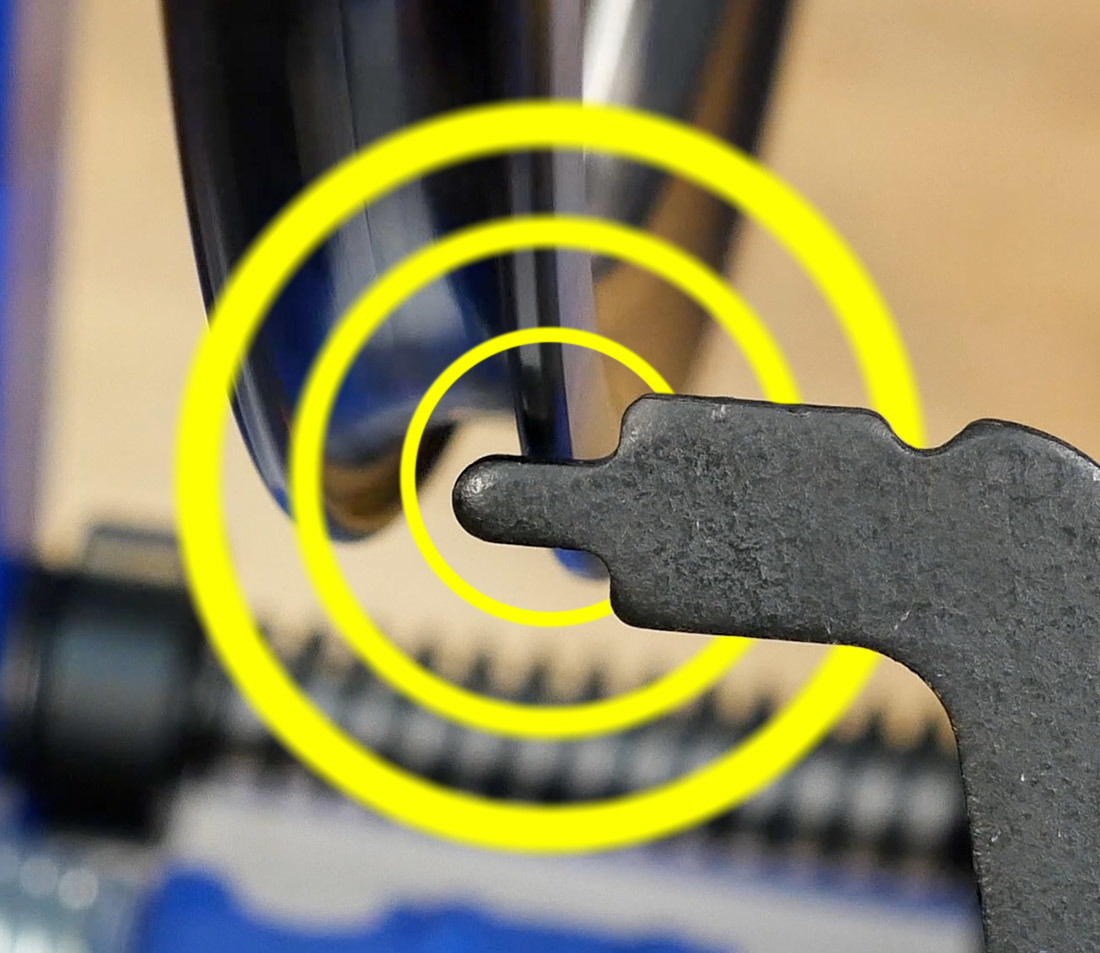
Spin the wheel and slowly move the indicator towards the rim, watching for where the rim gets close to the indicator. Slowly continue moving the indicator closer until you see it lightly contact the spinning rim. Slow the rim and stop it where the rim is touching the indicator. This area of contact is the most severe lateral deviation on this side of the rim.
For now, it doesn’t matter if the rim deviation is on the left or right. In fact, we will intentionally find and correct deviations from both sides. This will help maintain the current centering of the wheel.
Isolate the Deviation
Now we will determine where to make the first spoke tension corrections. If the indicator seems to touch over a long area, find the spoke nearest to the center of the deviation. Generally it is preferable to tighten spokes rather than loosening them – spokes may loosen themselves over time if they are run too loose, but they will not tighten up on their own. With this in mind, choose a spoke originating from the flange on the opposite side of the indicator.
To simulate what tightening a set of spokes will do, give them a squeeze and watch the rim’s position at the indicator. This will give you an idea of how the rim will move when the tension of these spokes is increased.
Correct the Deviation
Tighten the nipple of the selected spoke. The amount of turning will vary, but 1/4 turn (90 degrees) at a time is a good general guideline. If it is a relatively large lateral deviation it may need up to 1/2 turn (180 degrees). If it appears to be a minor deviation, start with a smaller turn – maybe 1/8 (45 degrees). The important thing is just to make a correction and see what happens.
Move the wheel back and forth through the area to see if your adjustment made any progress. Spin the wheel and move the indicator closer in very small increments until you find the next-largest deviation on this side, and repeat the process of finding the spoke to adjust and making a correction.
Once you have made three corrections on one side, switch to the opposite indicator. For truing stands like the Park Tool TS-2.3, you can pull one indicator out of the way using a small hex wrench.
Repeat the process of finding and correcting the three largest deviations on each side. As the wheel gets more and more laterally true, you can make smaller corrections.
Knowing When to Move On
As you work, the wheel will become more and more true. But how true is true enough? The answer to this question is highly subjective, and depends on several factors, including:
- How the wheel has been ridden and cared for in the past
- The type of bike, frame, brakes, etc the wheel will be used with
- What the mechanic or rider wants!
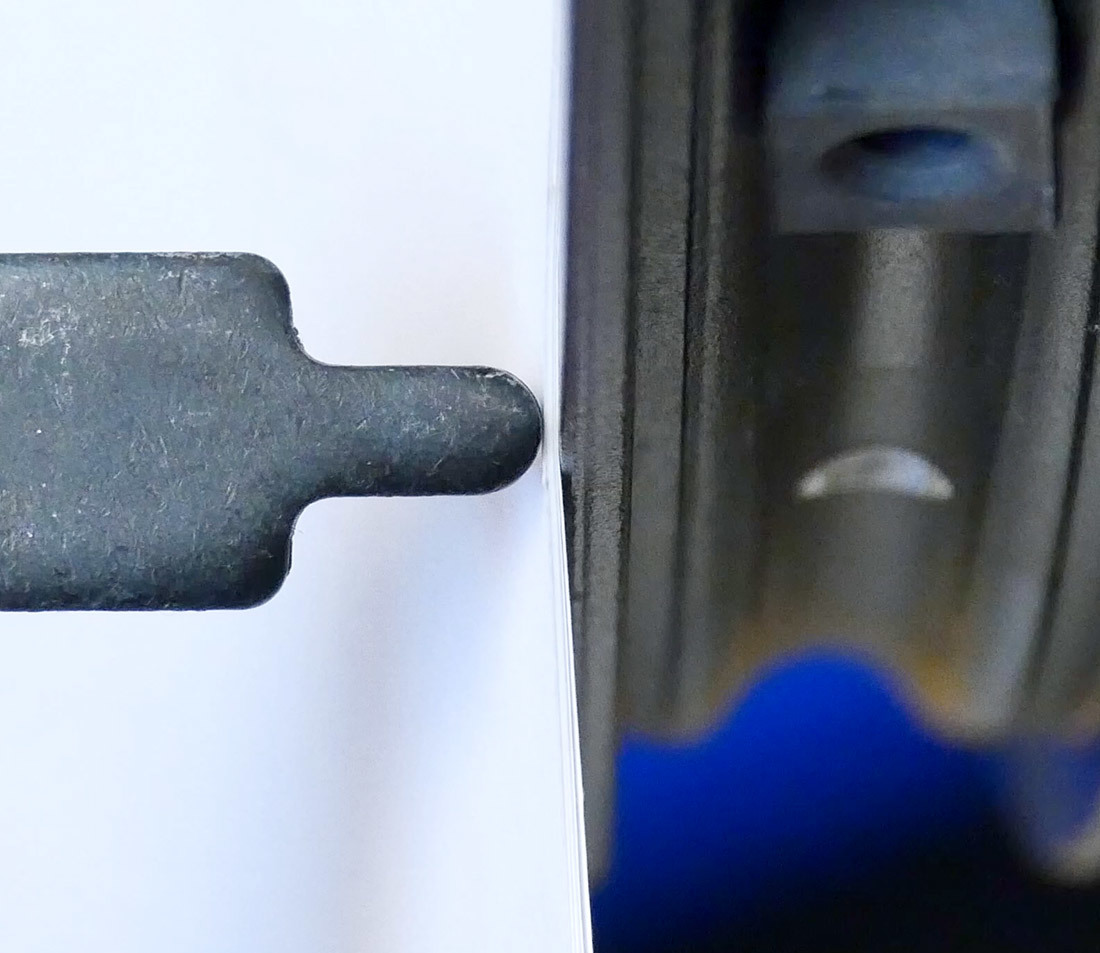
As a general guideline, try for 0.5 millimeters or less of lateral deviation. 0.5mm is about 5 sheets of typical printing paper. Use this as a feeler gauge to help you visualize what 0.5mm looks like.
Spin the wheel and adjust the indicator so it just barely touches the rim. At the point of contact, the distance between rim and indicator is zero. Search for the largest lateral deviation and compare it to your paper feeler gauge. Make further adjustments if necessary, and repeat the process of finding the largest deviation.
If it gives you satisfaction to continue and make the wheel spin straighter and straighter, continue to isolate and correct deviations until you are personally satisfied with the state of your wheel. Know that at a certain point, you are dealing in diminishing returns, and if you plan to radially true the wheel, you may need to go back and make further lateral truing adjustments, so don’t spend too much time trying to get it perfect.
Radial Truing
Once your wheel is sufficiently laterally true, it should also be checked for radial trueness. Radial truing can be tricky, especially for a novice. In correcting radial errors you can inadvertently create lateral errors. Expect to go back and forth between radial and lateral corrections.
Let’s define the two basic radial deviations we are looking to correct:
As the wheel spins, there is a radial deviation where a section of rim seems to move inward, or toward the hub. We call this area a low spot. These can be as short as two spokes long, or longer, spanning 6 or more spokes.
The other type of radial deviation is called a high spot, where the section of rim moves away from the hub. Just like low spots, these high spots can span a short or long section of the wheel.
The wheel can of course be a mix of both low and high spots. Because the rim is somewhat flexible, we tend to correct both high and low spots to average out the rim for adequate roundness.
For radial truing, it does not matter if you are paying attention to the left or right edge of the rim sidewall. In fact, for beginners we recommend using one indicator at a time as with lateral truing.
We will follow the same methodology as we did with lateral truing:
- Locate the deviation
- Isolate the spokes responsible for the deviation
- Correct the tension of these spokes to reduce the deviation
Spin the wheel and adjust your indicator so it is sitting below the outer edge of the rim, but not close to touching the rim. Sight along the gap between your indicator and the rim to get a sense of the radial deviations. Slowly move the indicator towards the rim, watching for where the rim gets close to the indicator.
Locate the Deviation
Begin by locating a high spot – slowly move the caliper arm upward until you see or hear it lightly contact the spinning rim. Back the indicator away if necessary until you are sure it is a light rub at the highest spot.
Isolate the Deviation
Isolate this high spot by slowly moving the rim back and forth though this area to see where it begins and ends.
Correct the Deviation
Correct this radial deviation by moving this section of rim toward the hub. To do this, we are going to tighten an even number of spokes from both flanges. This is because the spokes not only pull the rim left to right, they also pull the rim toward the hub
A way to simulate and visualize what tightening does is to squeeze both a left and right side spoke at the same time.
For now, give each of the spokes associated with the high spot area a half-turn. Spin the wheel to verify that the high spot was reduced and the rim is no longer rubbing.
Now repeat the process: locate, isolate, and correct.
As you correct radial deviations, tighten spokes evenly in pairs of two to avoid introducing lateral deviations. It is, however, inevitable that you will create some new lateral deviations. Every 3 or 4 radial corrections, check that lateral true is still acceptable and adjust as necessary.
Typically it is best to begin radial truing by addressing high spots. After reducing these, the low spots may not look so low. Once you’re confident you’ve done what you can to reduce high spots, move the indicator to be just below the rim but not touching it.
Spin the rim and locate the areas where gap between rim and indicator is the largest.
Move the rim back and forth in this zone and isolate the spokes that should be adjusted to correct this deviation, just like you did for the high spots. This time, though, loosen the sets of spokes instead of tightening them.
Move the rim back and forth through the low area to see if the radial deviation has gotten smaller. It may take a few attempts to see progress. Continue the process of locating, isolating, and correcting, and again, check again for lateral errors after every few radial corrections.
Knowing When to Stop
“How radially true is true enough” is equally as subjective as lateral truing, and is subject to a few additional factors. Most significantly: the wheel will have a tire on it, and tires are not often made to such tight tolerances.
As a general guideline, 1 millimeter or less of radial deviation is an acceptable measurement. 1mm is about 10 sheets of typical printing paper. Use this as a feeler gauge to help you visualize what 1mm looks like.
Spin the wheel and adjust the indicator so it just barely touches the rim. At the point of contact, the distance between rim and indicator is zero. Search for the largest lateral deviation and compare it to your paper feeler gauge. Make further adjustments if necessary, and repeat the process of finding the largest deviation.

If it gives you satisfaction to continue and make the wheel spin rounder and rounder, then continue with locating, isolating and correcting yet smaller and smaller deviations.
De-Stressing
After have adjusted quite a few spoke nipples, it is common that the wheel might need “de-stressing”. Destressing a wheel allows spokes that were wound up from turning the nipple to unwind. There are a few different ways to do this, but the safest is to simply install it in the bike and take it out for a ride. Expect to hear some pinging and popping for the first few pedal strokes. That is common and not a concern.
Limitations - Wheel Damage
Not every wheel can be made sufficiently true. Sometimes damage to components of the wheel can prevent a wheel from being made reliably true:
Rim Damage
Rims may become damaged from impacts, such as hitting a rock, pothole or curb. Impacts to the side of the rim from falling down or crashing can also cause damage. It may be possible, in some cases, to repair the wheel with adjustments to spoke tension. Begin by checking relative tension in the damaged area. For example, if a wheel deviates in one section to the right, check left and right side spoke tension in that area.
Adjusting spoke tension on a wheel with a badly bent rim is unlikely to help, except possibly to get the rider home. In the above example, if a wheel deviates in one section to the right, but the spokes on the right side appear relatively loose and the spokes on the left side of the wheel appear tight, the rim metal is bent. Normally, to correct this wobble, it is necessary to tighten left side spokes, but the check showed the left side is already tight. The option of loosening right side spokes is not very effective because the right side spokes at that section are already loose. This indicates the rim has been deformed beyond the point where spoke tension can repair it.
If the wheel is not repairable by adjusting spoke tension, the rim has been bent and will need replacement. If the old hub is in good condition, the rim can be replaced and new spokes and a new rim laced around the old hub. This process is best left to professional mechanics.
Corroded Nipples
The lubrication of nipple threads should be done routinely because corrosion and rust in these threads will make the wheel un-true-able. Even if the wheel appears not to need any truing, lubricate at the threads regularly, and then clean the rims of any excess lubrication. Excess lubrication on the rim can affect the braking surfaces.
Spoke Damage
It can happen that a spoke becomes bent or mangled. Typically, this is just a cosmetic flaw. When spokes are manufactured, they begin as stainless steel wire on huge spools. A piece of wire is cut, and a head is stamped on one end. The other end is rolled in a die to form threads. The end with the head is then bent 90 degrees. That’s it, it’s just a cold-set bend. This bend is the most severe bend the spoke is likely to see. So, if your spoke gets mangled during a crash, it is unlikely to be as severe a bend as the original factory bend. Keep riding the wheel, and one day the bent spoke may break, but it will most likely break at the weakest point, either the factory bend, or the threads.
A single broken spoke can simply be replaced and the wheel re-trued. However, if a wheel begins consistently breaking spokes, it should be rebuilt or replaced. A good rule is 3 broken spokes = 1 new wheel.
Next article in this series
Wheel Dishing (Centering) View Article
Related articles
Spoke Tension Measurement and Adjustment View Article
Wheel Tension App Instructions View Article
TS-2Di Dial Indicator Use in Wheel Truing View Article