U-Brake Service
This article will discuss brake mounting and adjustment for U-brake rim caliper systems.
Preliminary Info
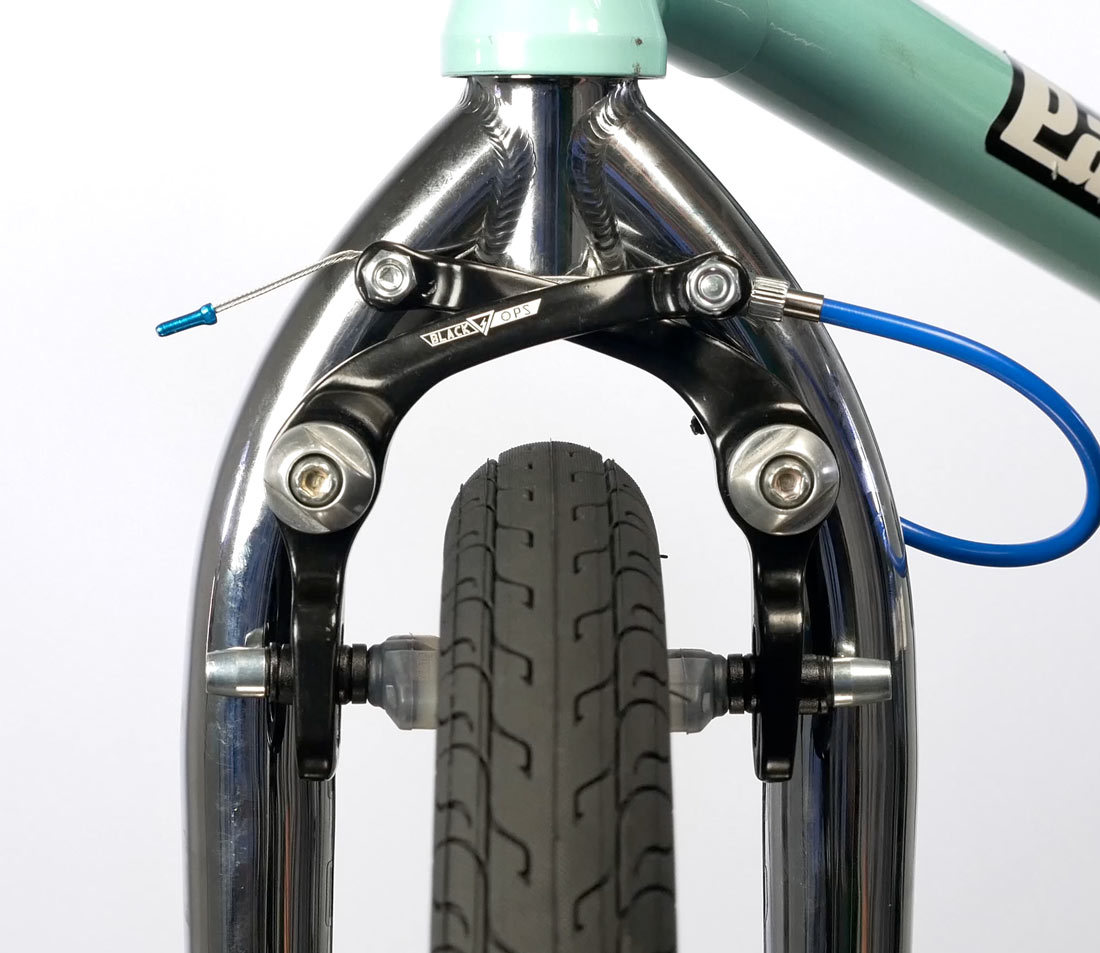
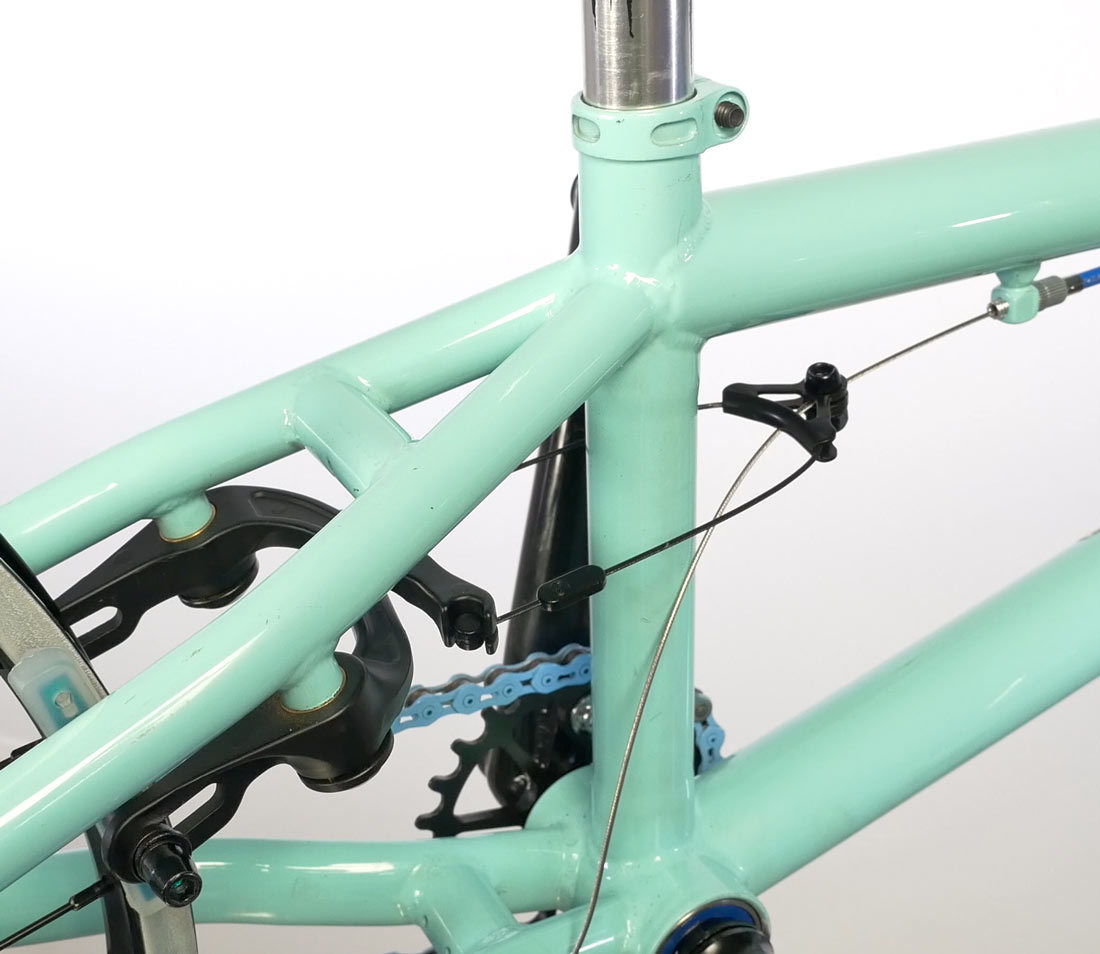
The U-brake is a rim caliper brake found on BMX freestyle and some vintage mountain bikes. The U-brake fits to the frame above the rim. Both sides will have spring tension that pulls the pads from the rim. Arms are brought together either by housing to one arm or from a straddle wire carrier.
Caliper Installation
The U-brakes are mounted to the frame fittings. The brake mount studs are located above the rim braking surface. Grease only the outside of the stud.
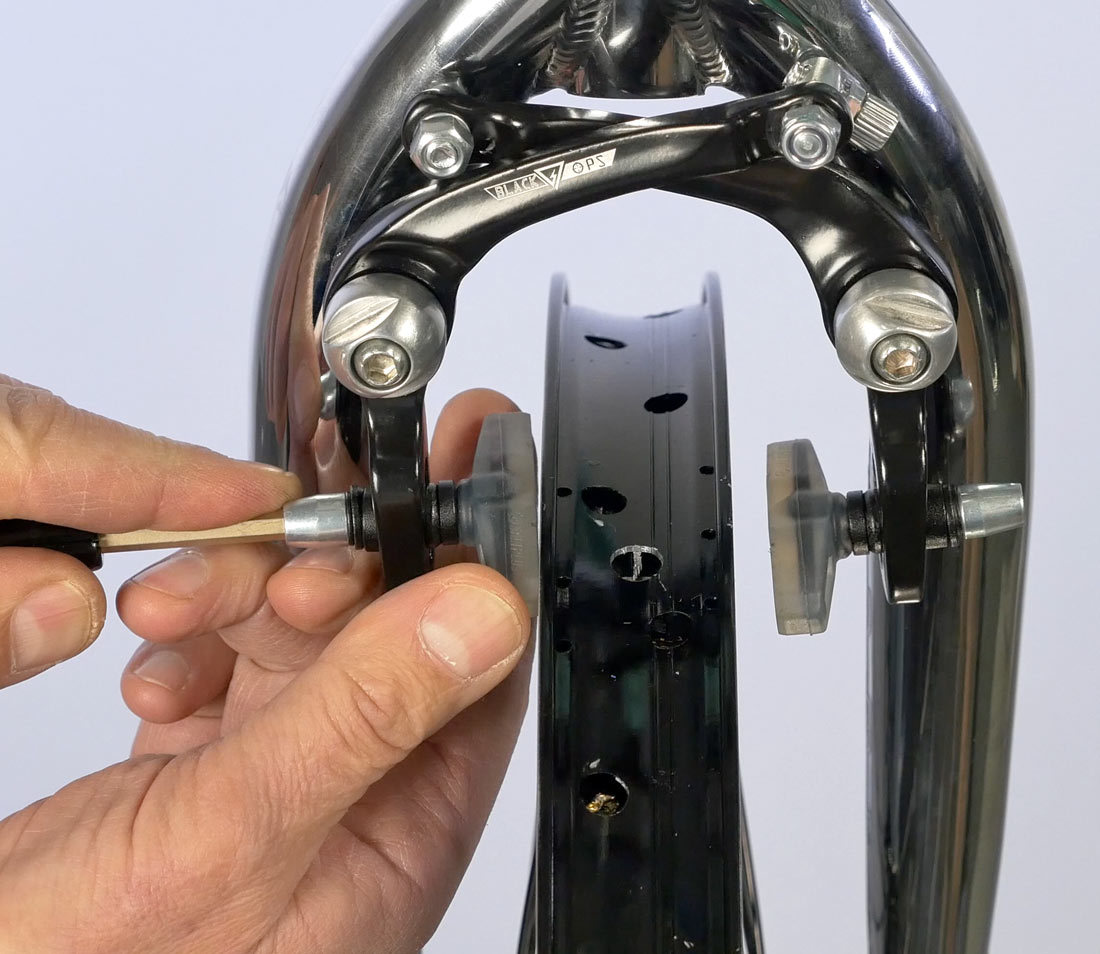
Unlike cantilevers there is no spring hole. The arm springs are held by these outer fittings when the mounting bolts are tight. Install each arm onto the brake studs.
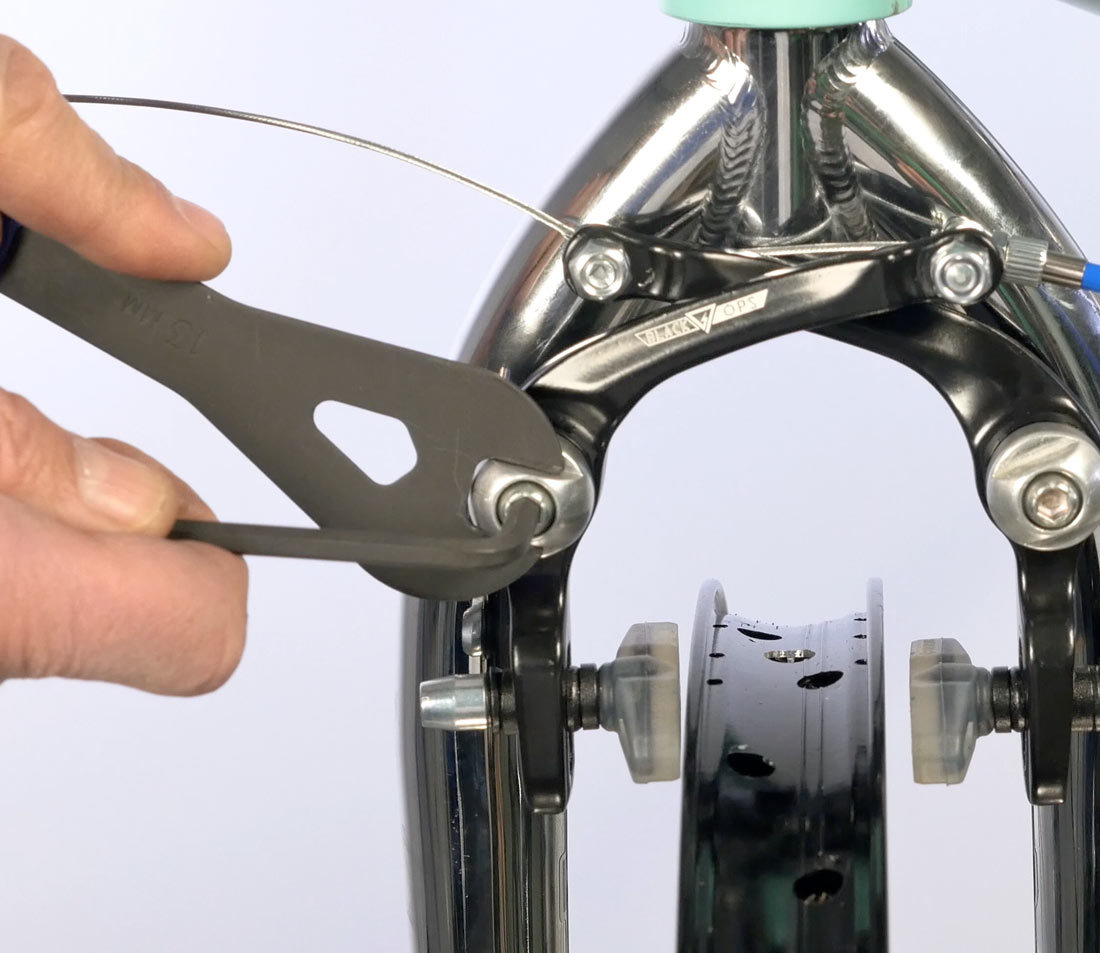
The two fittings outside the brake arms hold and control the arm return springs. A cone wrench will fit the outside of
the spacer. Install a mounting bolt in each arm, run the bolts down, and secure. A common torque for the U-brake mounting bolt is 6 Nm.
Pad Adjustment
Like any rim brake, begin by moving the arms and pads toward the rim and see how the pads are moving. The U-brake moves on an arc. The pads are moving up as they travel to the rim. That means the pads should be set at the lower edge of the braking surface.
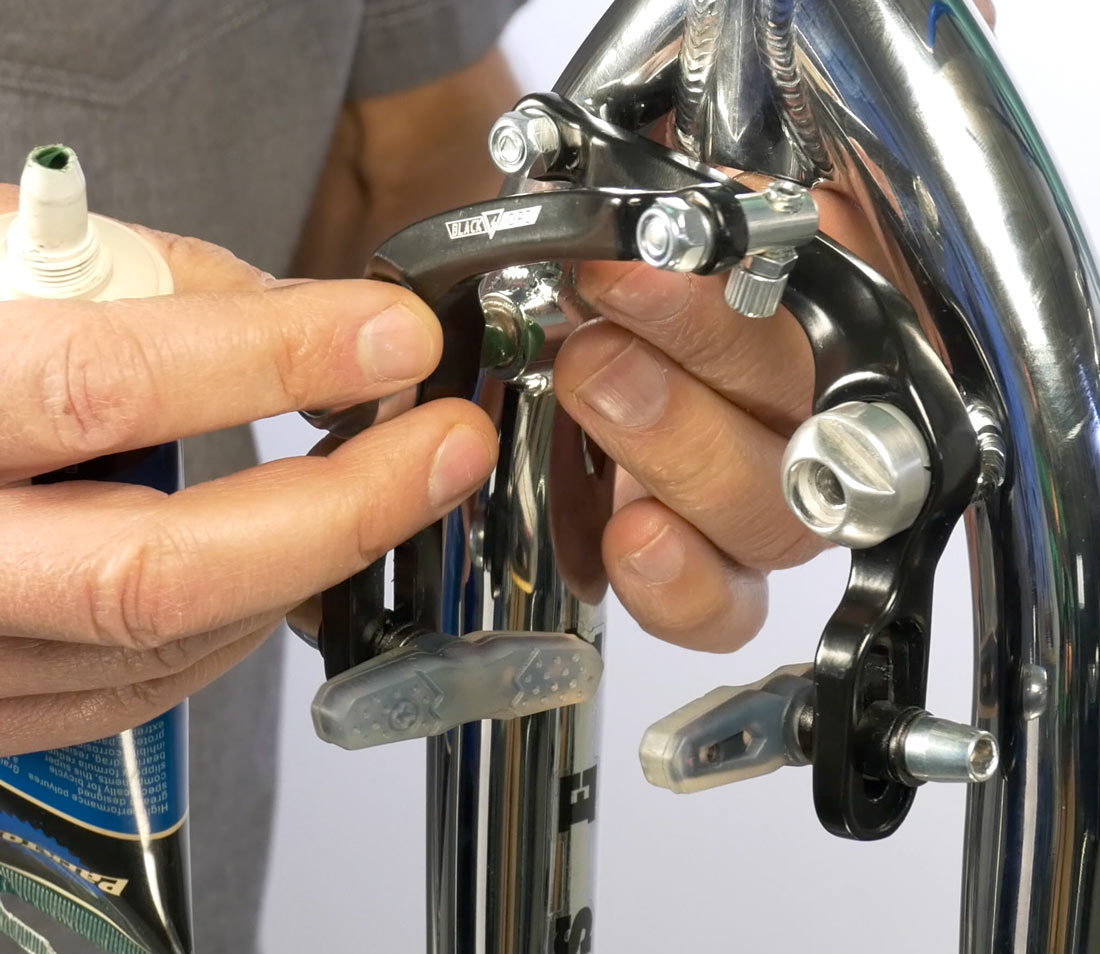
A common U-brake uses a ball and socket or convex-concave washer system. This washer system allows motion of the pad in several planes before it is locked tight with the nut. This will let us set toe, and also the vertical face square to the rim.
NOTE: A useful technique on most U-brakes is to back off the mounting bolts 1/4-turn to remove spring tension. This allows the arms to move to the rim for pad adjustment without fighting spring tension.
Begin by loosening the brake pad mounting nut. When pushed to the rim, the washers will tend to self-align and makes setting the pad easy. The lower edge of the pad and U-brake on the lower edge of the braking surface. As the pad gets thinner it wears and moves up. The front and back edge square to the rim. The face of the pad and the face of the rim to be square.
Toe is a setting where there is a gap at the back of the brake pad and contact in front. Toe helps reduce the tendency for the arm to pull back and forth quickly, causing squeal. A way to get toe is to loosen the mounting nut, hold the pad slightly at an angle in the back, secure the mounting nut, and then check for a slight gap. The process is repeated on the other side.
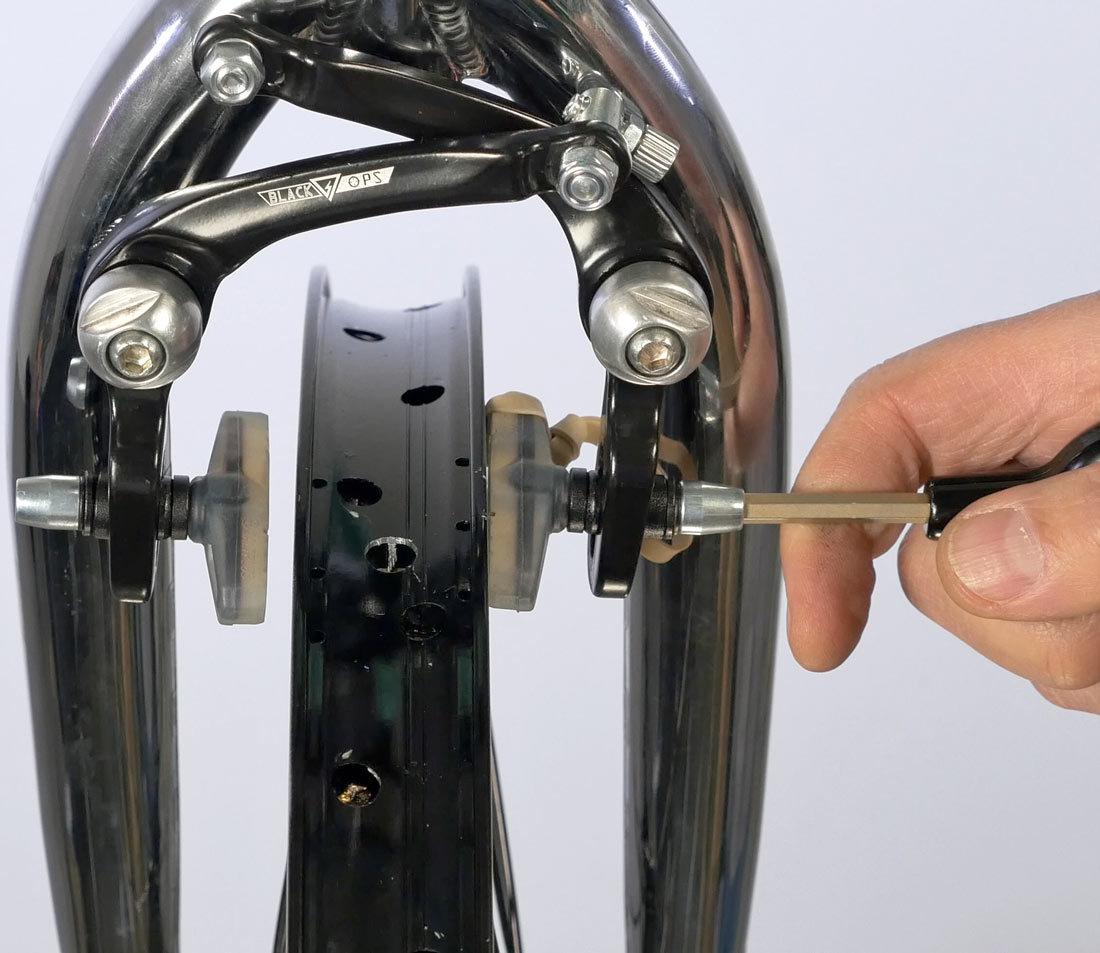
An additional technique to set toe is to use a simple shim behind the pad, such as a rubber band. The rubber band will create a gap as the pad is adjusted. The rubber band is going to be removed and there should be with a slight gap the thickness of the rubber band.
Hold pad when doing final tightening on bolt or nut to prevent pad from rotating. A common torque is 4–5 Nm.
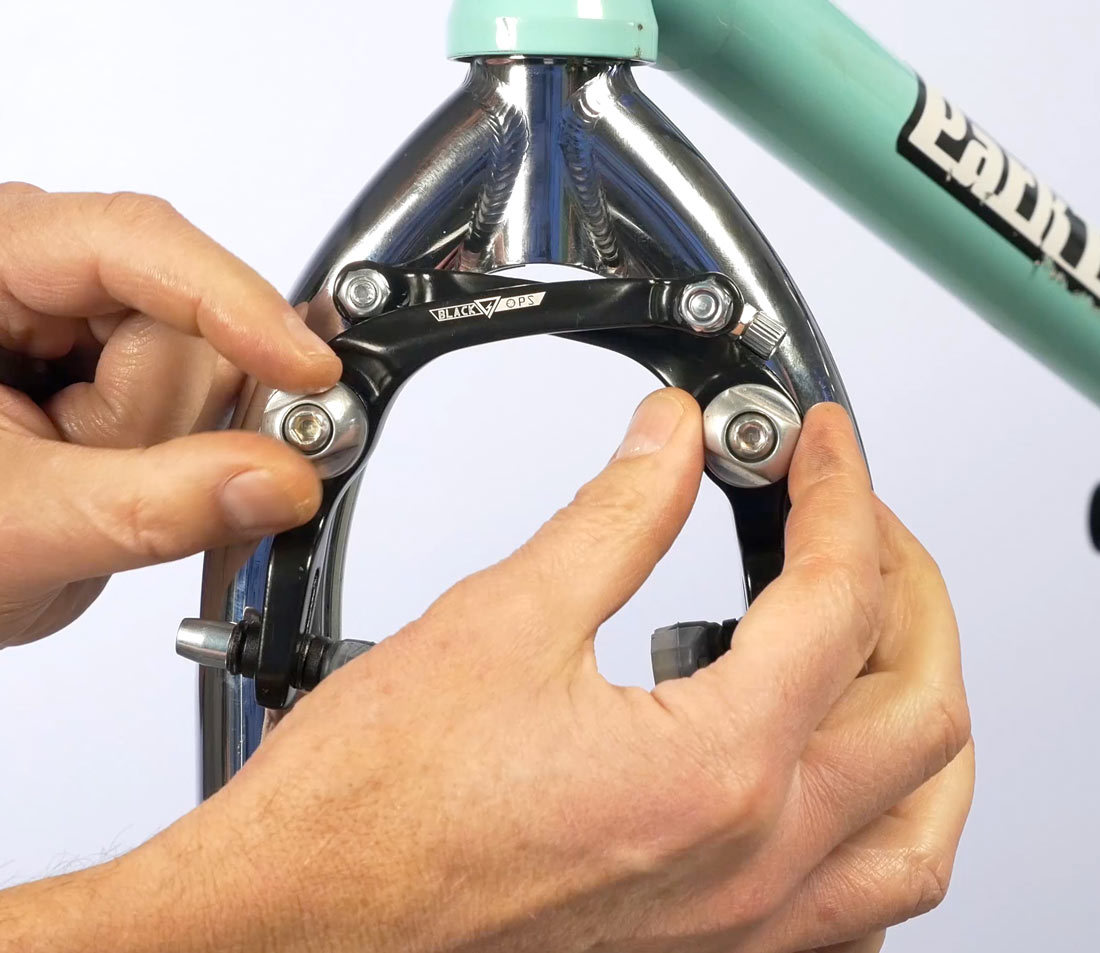
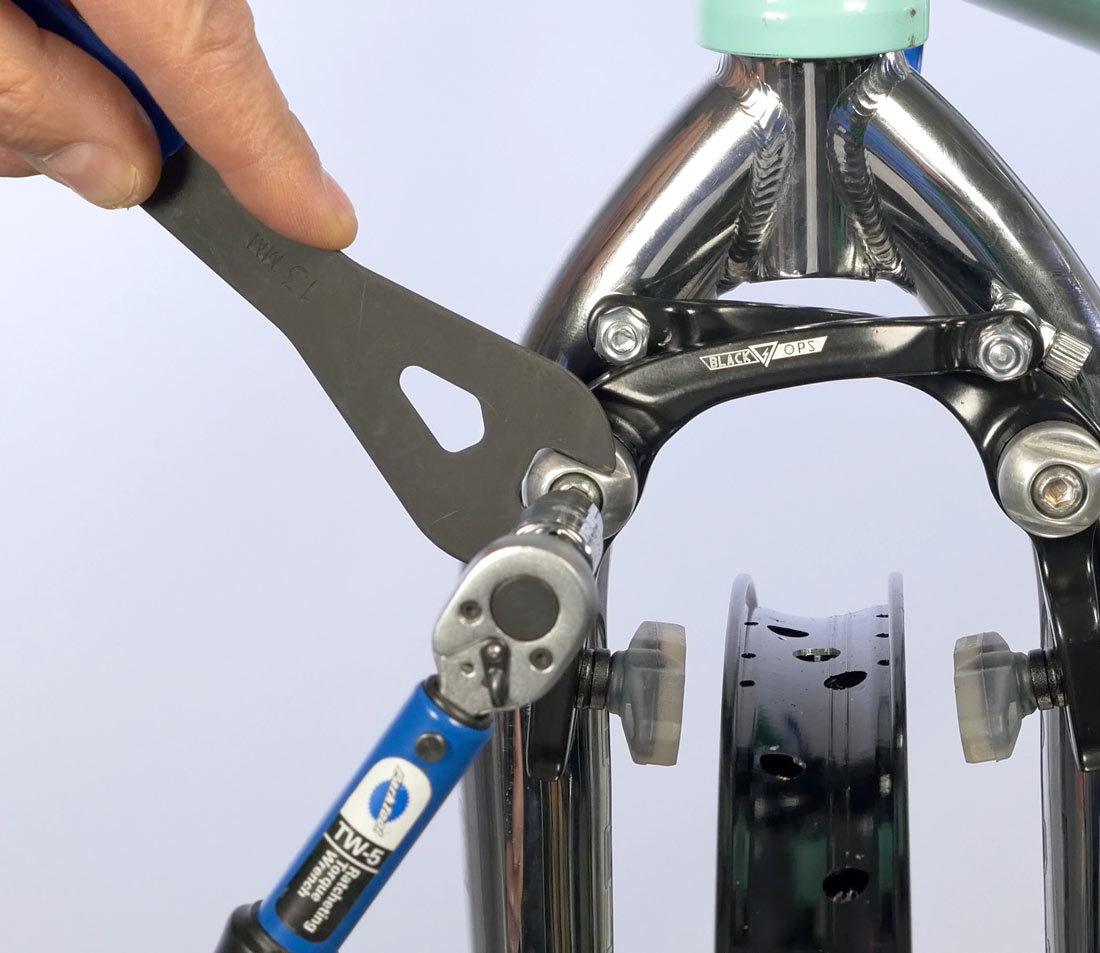
After the pads are set, restore spring tension. Hold the outer fitting using a cone wrench, and rotate it slightly inward. This creates spring tension. Move the wrench a slight amount and secure the mounting bolt to approximately 6 Nm. Repeat the process on the other side, moving the wrench approximately the same amount. Fine-tuning spring tension will be done during centering.
Cable Attachment
Cable attachment will vary with the design of the brake. One design uses a housing stop on one arm, with the brake cable connecting to the other arm and a cable pinch mechanism. Feed the cable through the barrel adjuster, which acts as a housing stop. Guide the cable to the head of the the pinch bolt and through the hole. Draw the cable through until the housing is in the barrel adjuster, and now back out the barrel adjuster two or three turns to allow some fine-tuning of our pad clearance.
Draw the pads to the rim using a fourth hand tool such as the BT-2. Engage the cable, lift one arm and it pulls the pads to the rim. Do not squeeze tightly or the brake will end up too tight. The pads barely touching the braking surface is adequate. Secure the pinch bolt nut to about five Newton meters. This should be enough torque to flatten and pinch the cable.
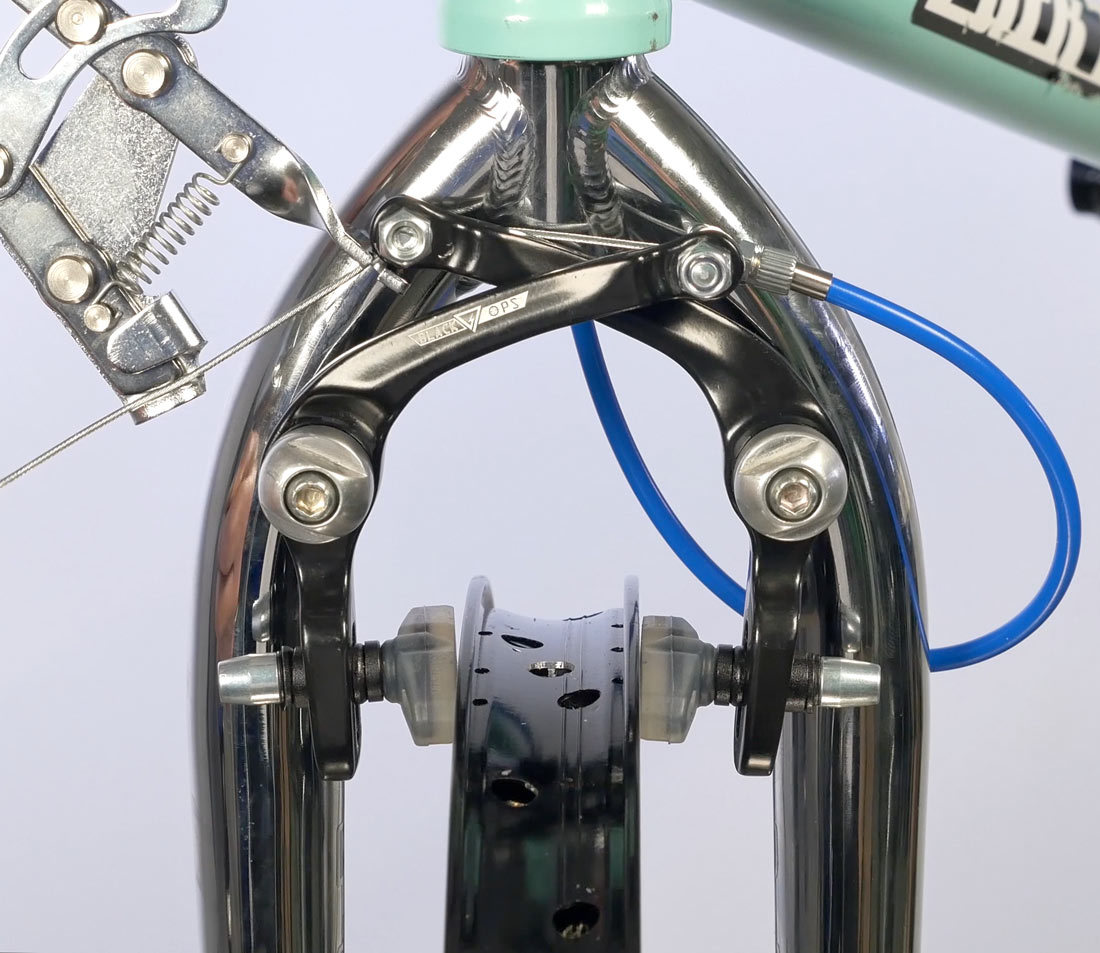
Another system use a straddle wire carrier pulled by the primary cable from the brake lever. Begin by engaging the primary wire through the pinch bolt. Engage the straddle wire in the caliper arms. Next, draw the pads to the rim.
An alternative to the fourth hand is to use a toe strap. Engage the strap around both pads and draw them together to the rim. Next engage the straddle wire ends one into each arm. Pull on the primary wire by hand and push the straddle wire carrier forward. Hold and secure the pinch nut, tightening to approximately five Newton meters. Release the strap and pull the lever with force, this will test the security of the pinch mechanism and settle the cable into the system.
Set Pad Clearance
Pull the lever with force to settle in the cable system and to test the security of the pinch bolts. Set the pad clearance by feel at the lever. Too tight of a lever is going to engage instantly. Too tight will make it difficult to align without any rubbing. Too loose a lever will not provide adequate stopping power.
To make changes to the pad clearance, use the barrel adjuster. Bringing the barrel adjuster out effectively lengthens the housing, draws out slack, and brings the pads closer to the rim.
Centering
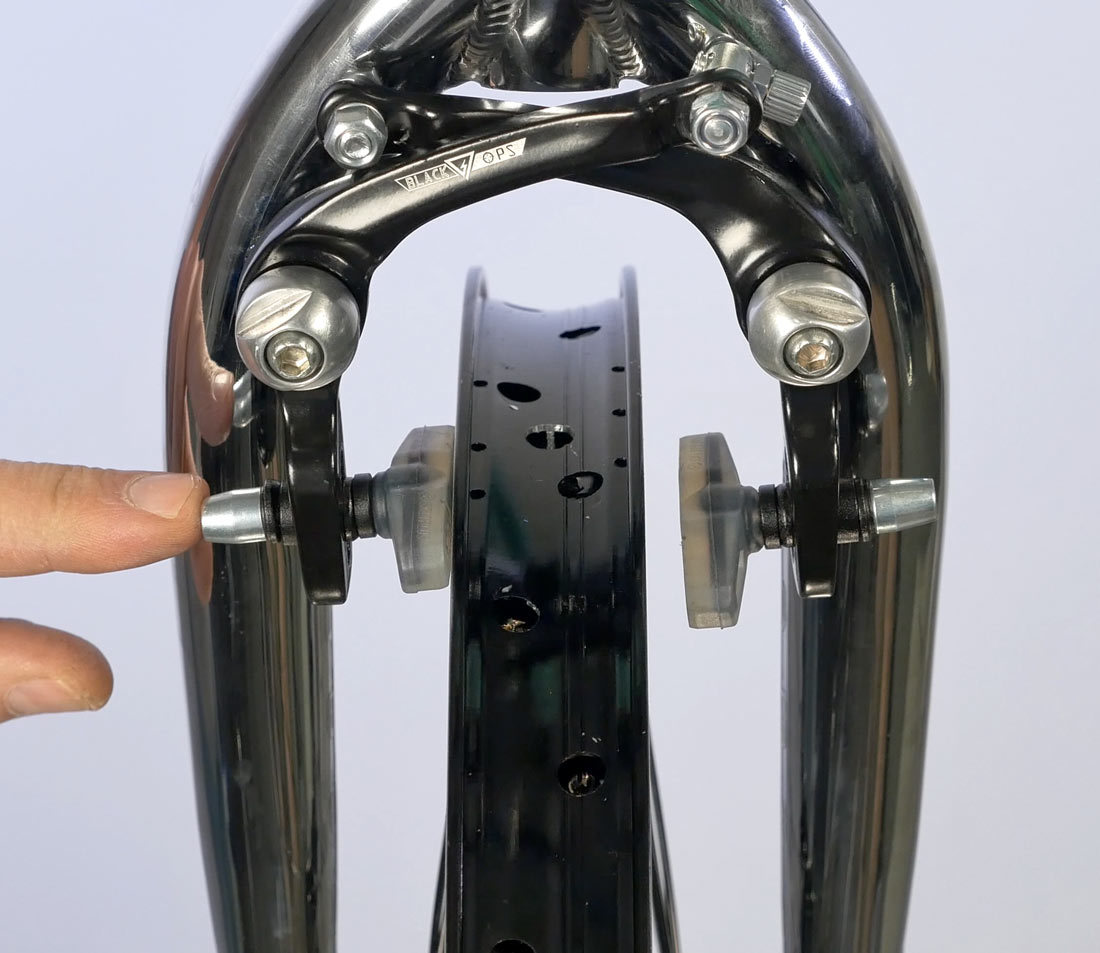
Pad clearance is set by changes to spring tension at the fitting of either arm. Move a pad further from the rim by increasing spring tension on that side. Using a cone wrench, hold the spring tension fitting, and loosen the mounting nut. Move the cone wrench inward and note when the rim to pad gap increase. Hold this position, secure the bolt, and test it again. Repeat this process until there is an equal gap on both sides. On U-brake systems, spring tension can be changed at either side.
Finishing Touches
Next trim the cable and install an end cap. Bend the end so it is out of the way.

Related articles
Brake Pad Replacement: Rim Brakes View Article
Brake Housing & Cable Installation: Upright Bars View Article
Brake Lever Mounting & Positioning: Upright Bars View Article
Side Pull Brake Service View Article