Tubeless Tire Removal and Installation
This article will discuss removal and installation of tubeless tires.
Preliminary Info
- Tire levers
- Air compressor and inflator head
- Tire sealant and measuring cup
- Rags to remove old sealant
- Soapy water to lubricate tight beads
- Valve core remover
- Syringe such as TSI-1
First, verify that your components are tubeless compatible. See Tubeless Tire Compatibility for more information on tubeless tire standards.
Tire Removal
- Deflate the tire fully, squeezing to remove any pressure on the bead. Assume there is tire sealant inside & keep the valve away from the downward position.
- Push both sides of the tire toward the center of the rim to loosen the bead from against the rim sidewall.
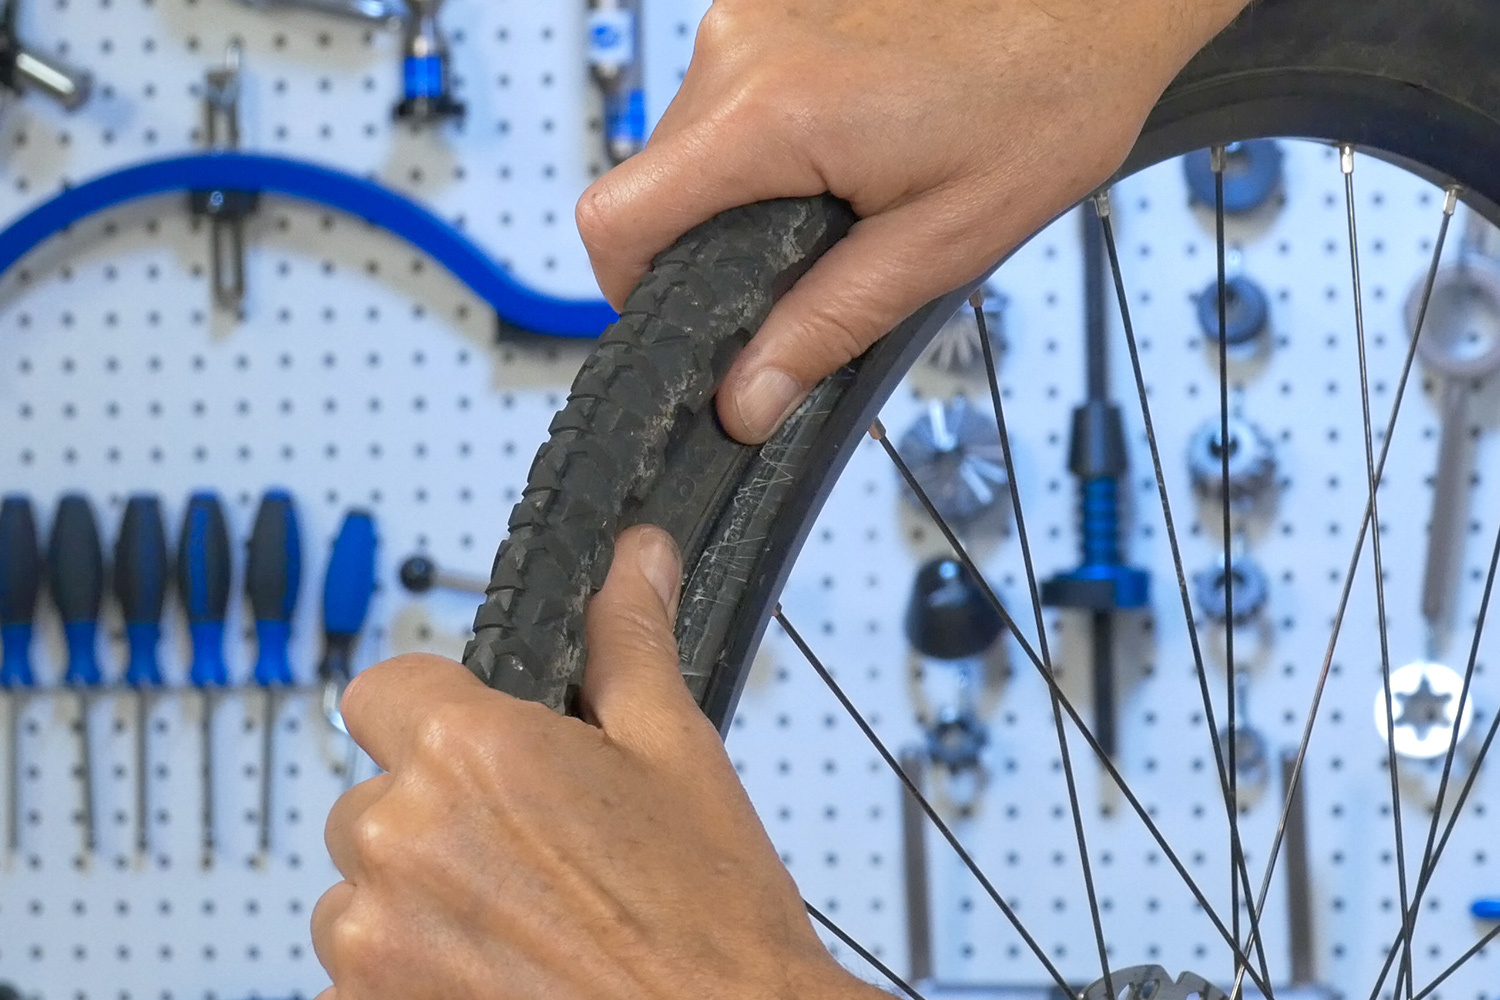
- Use tire levers to remove the tire from the rim.
- Watch for fluid at the bottom of the tire carcass, and dispose of it per manufacturer’s recommendations.
- Wipe clean the bead seat area of the rim. If you’re going to re-use the tire, clean up the up the bead as well.
Tire Installation
- Check that the valve is secure in the rim.
- Check for any arrows printed on the sidewalls that indicate direction of wheel rotation. Align the tire with the rim accordingly. It can also be useful to place the recommended tire pressure label on the tire next to the valve stem.
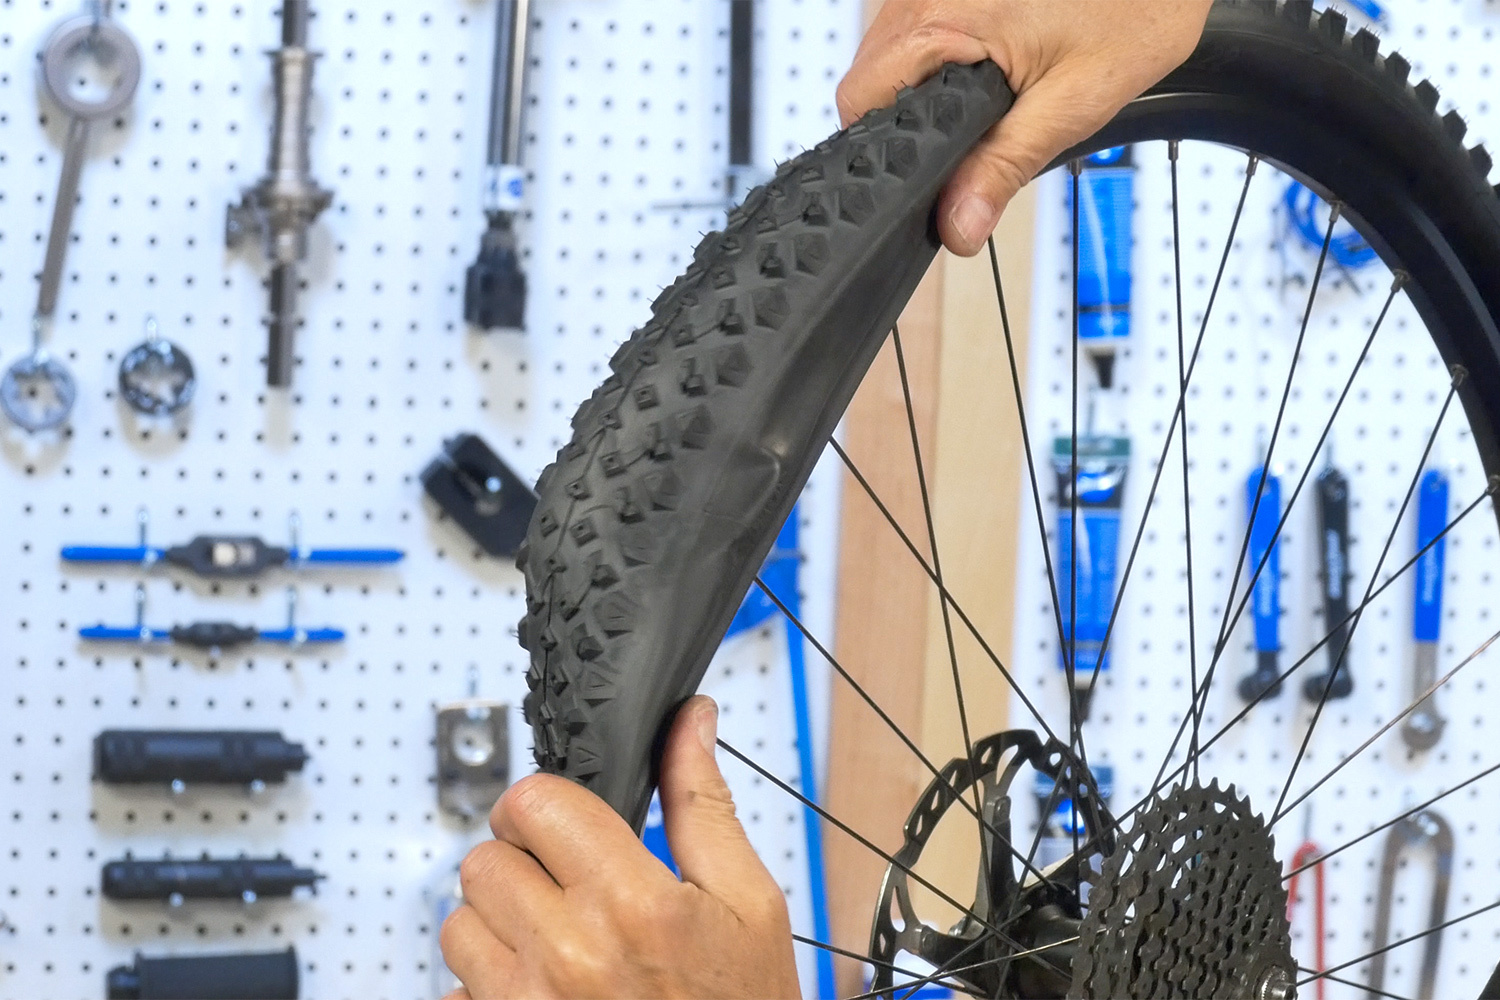
- Install one bead on the rim.
- Install the second bead beginning at the valve. Leave a portion of the bead uninstalled.
- Add sealant.
There are two main methods for adding sealant to the tire:
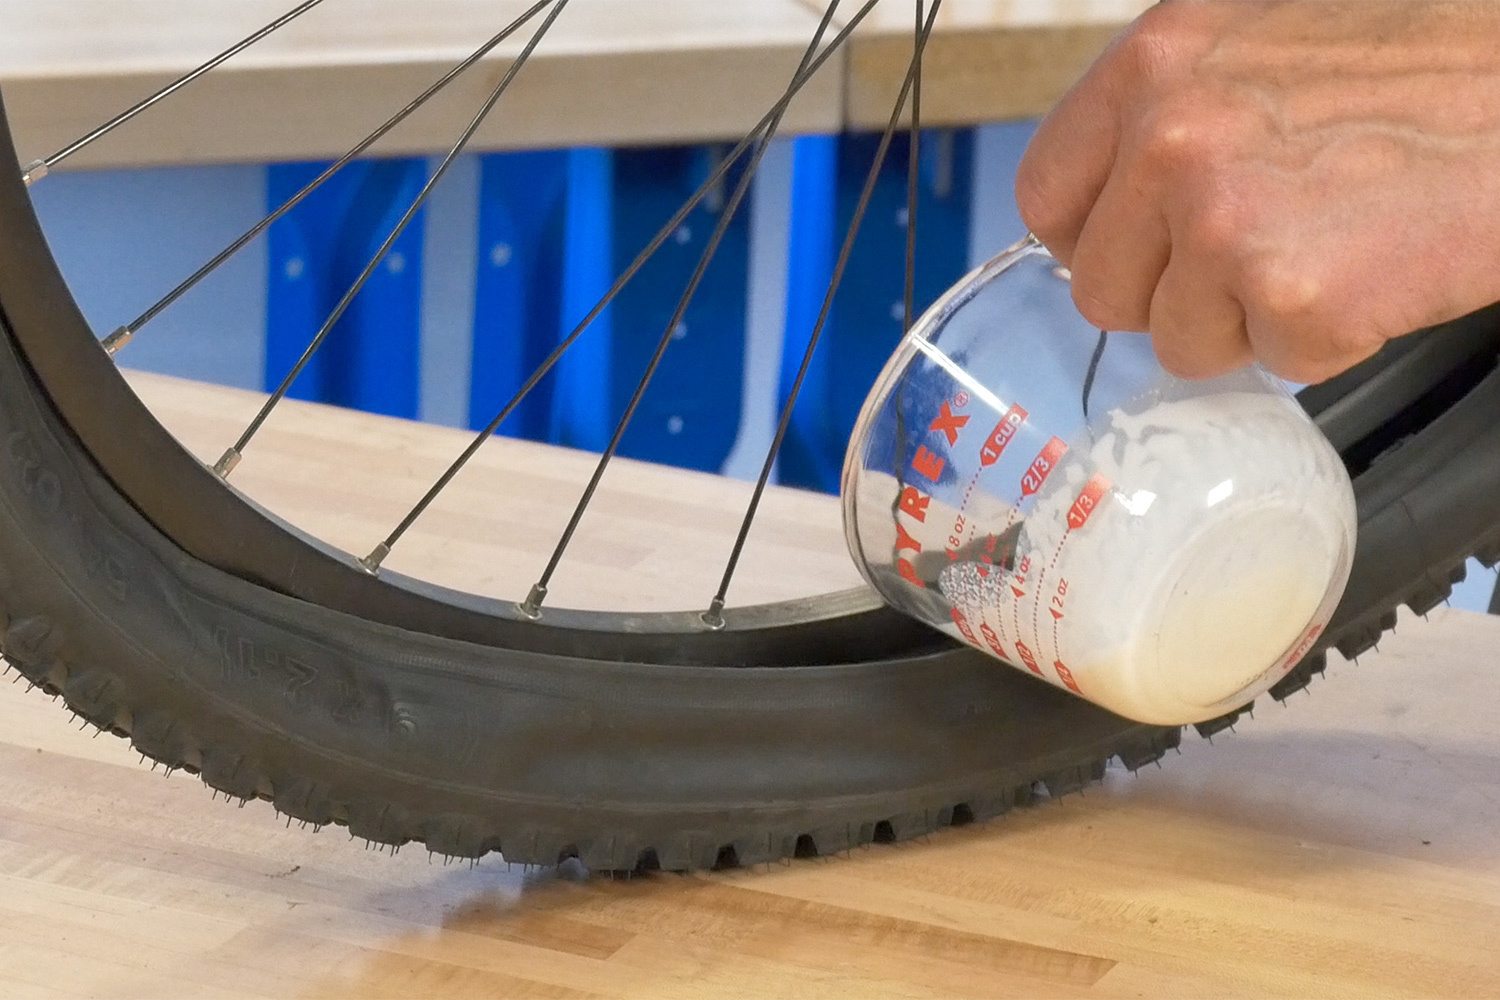
Method 1 — Pour Method
This method requires a measuring cup. An air compressor is highly recommended.
- Check the label for the recommended amount of tire sealant and pour in the sealant.
- Slowly rotate the wheel to keep the fluid at the bottom while your unmounted bead comes to the top. Finish installing the bead.
- If it’s a tight bead, it can help to use soapy water and lubricate the bead. Use a tire lever when necessary.
- Inflate the tire to at least the maximum pressure on the label. If the tire bead and rim are well designed and compatible, this can also work with a floor pump.
Method 2 — Injection Method
This method requires a valve with a removable valve core, a syringe, and an air compressor.
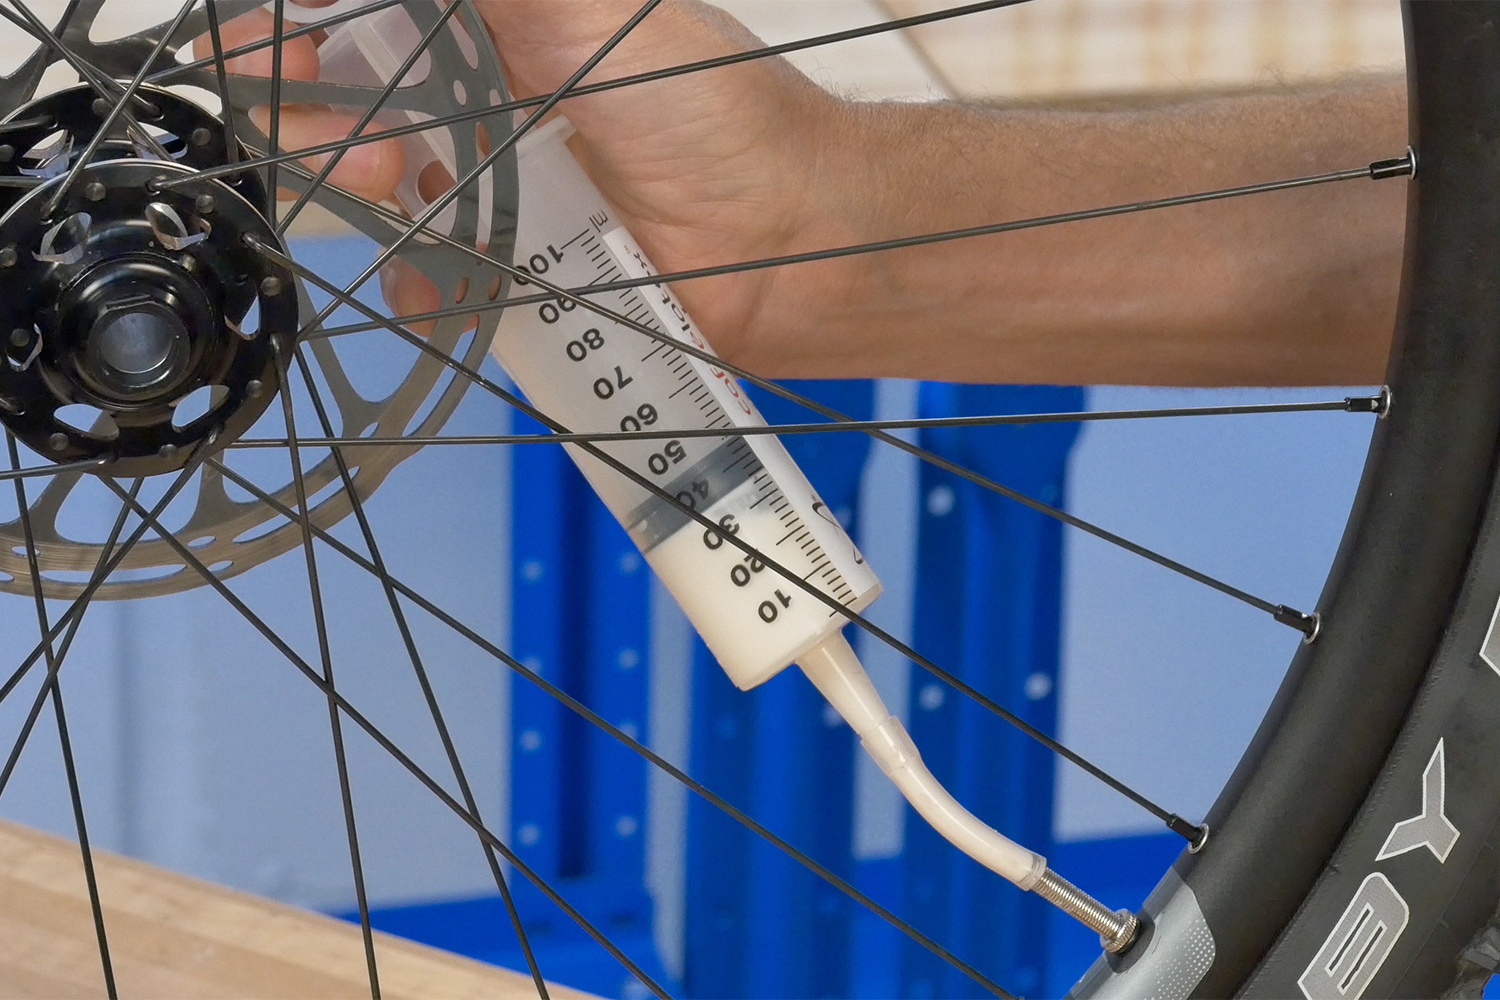
- Check the label for the recommended amount of tire sealant and fill the syringe.
- Mount both tire beads to the rim before adding any sealant.
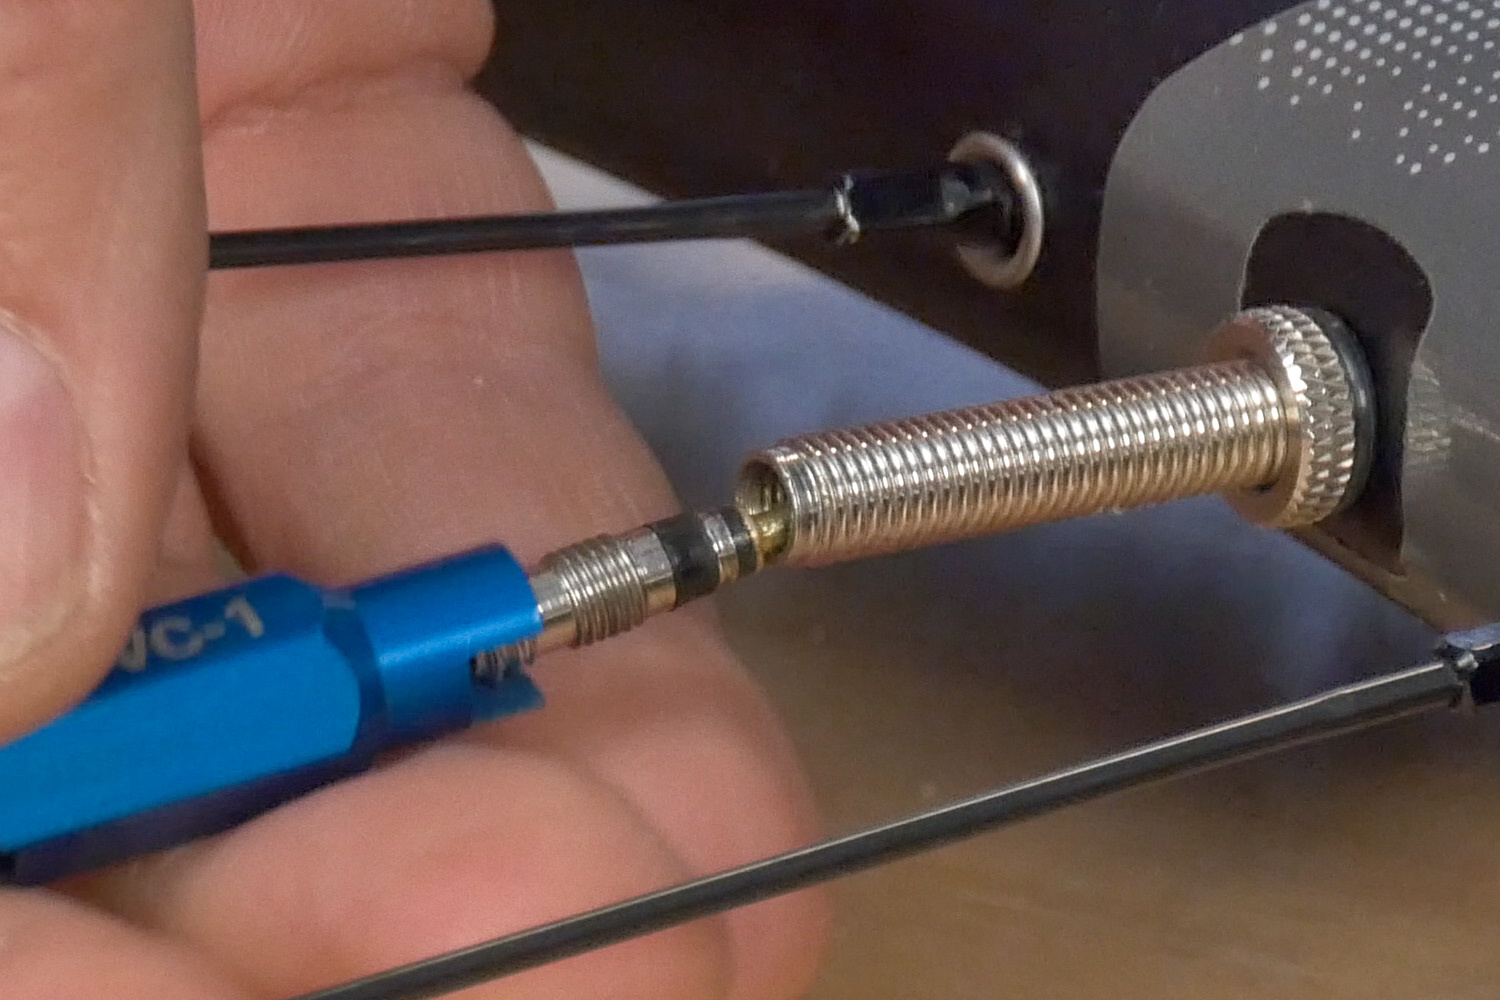
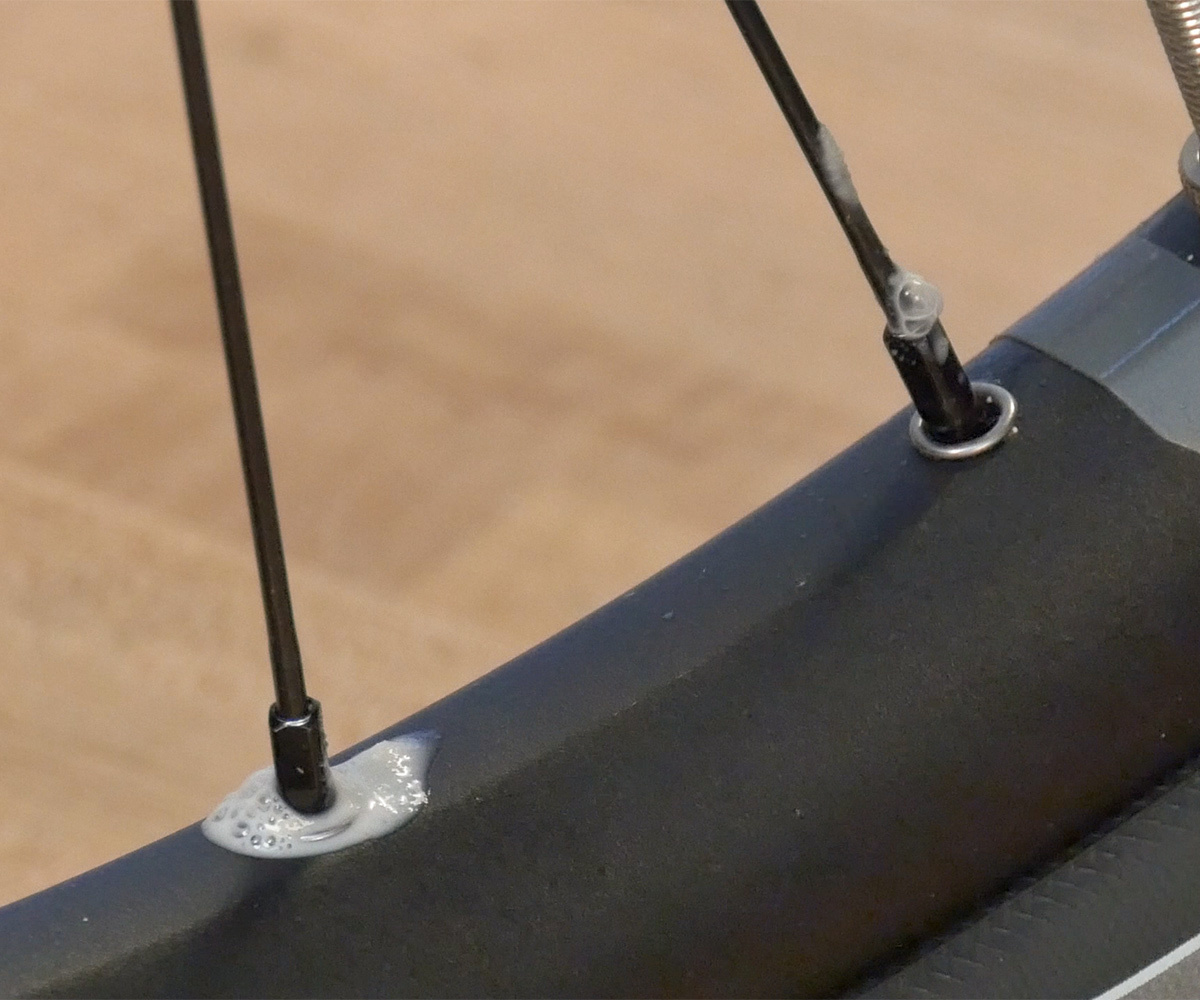
- Verify that the valve is secure in the rim, and then remove the core using a valve core remover such as the Park Tool VC-1.
- Inflate the tire fully with an air compressor, allowing the bead to fully seat. If the tire bead and rim are well designed and compatible such as the UST system, this can also work with a floor pump.
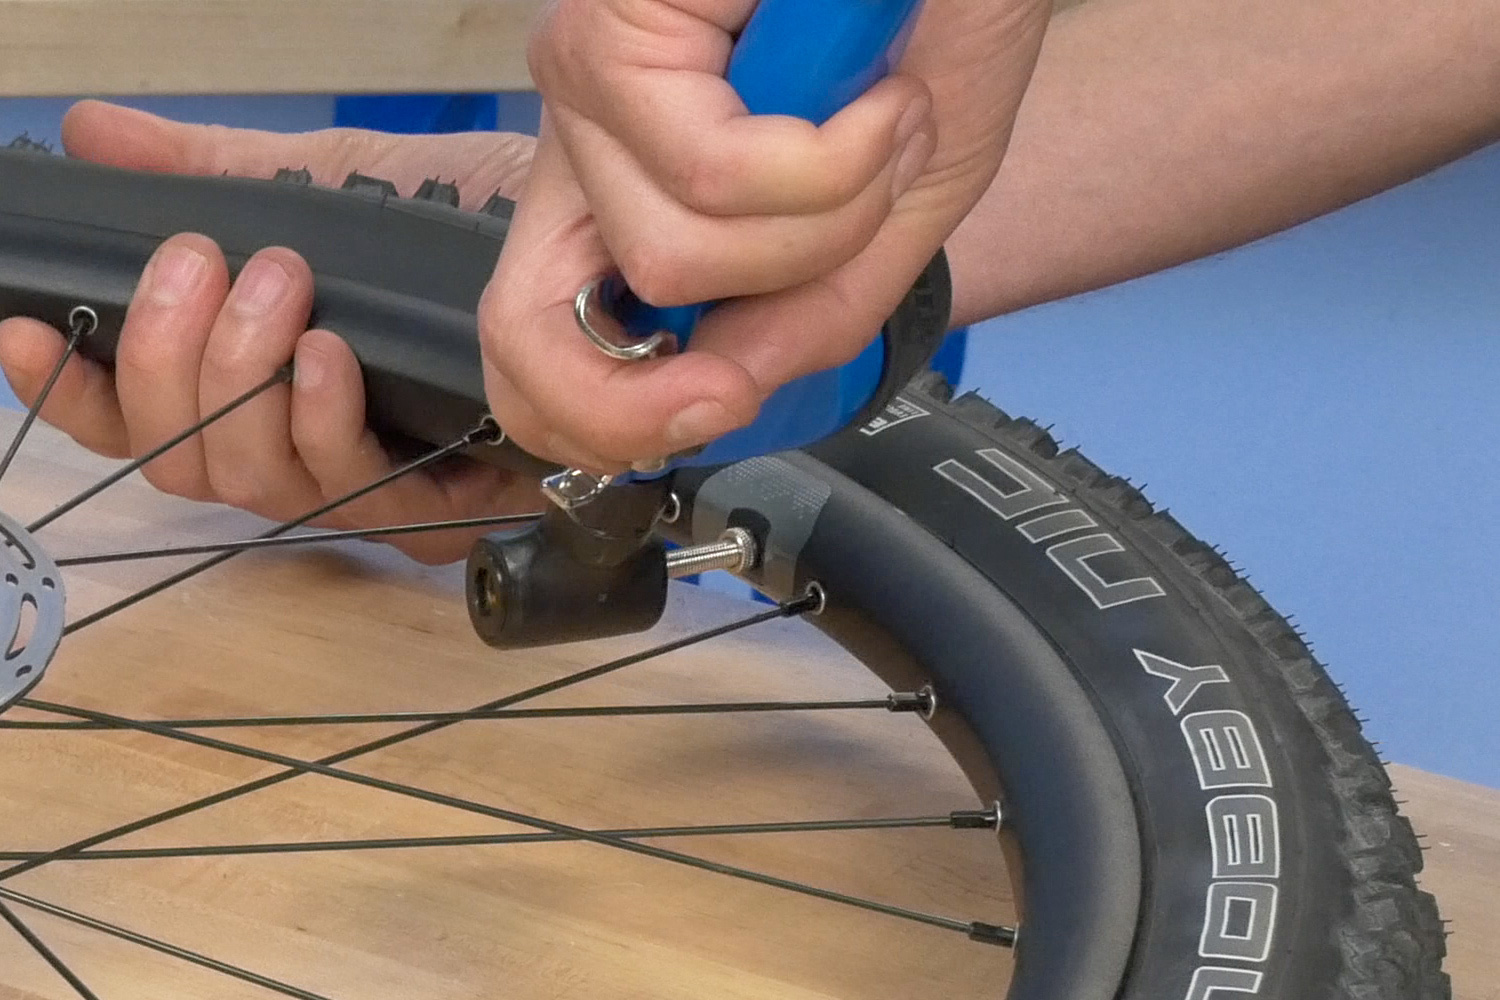
- Pull off the air head. For the most part, the bead will still stay seated to the rim.
- Inject the fluid.
- Install the valve core and secure.
- Check that the tire bead is correctly seated. In some cases, the bead will be too low. Deflate the tire, break the bead at the low point, and lubricate with soapy water. Reinflate.
- Spin the wheel to move sealant around inside the tire.
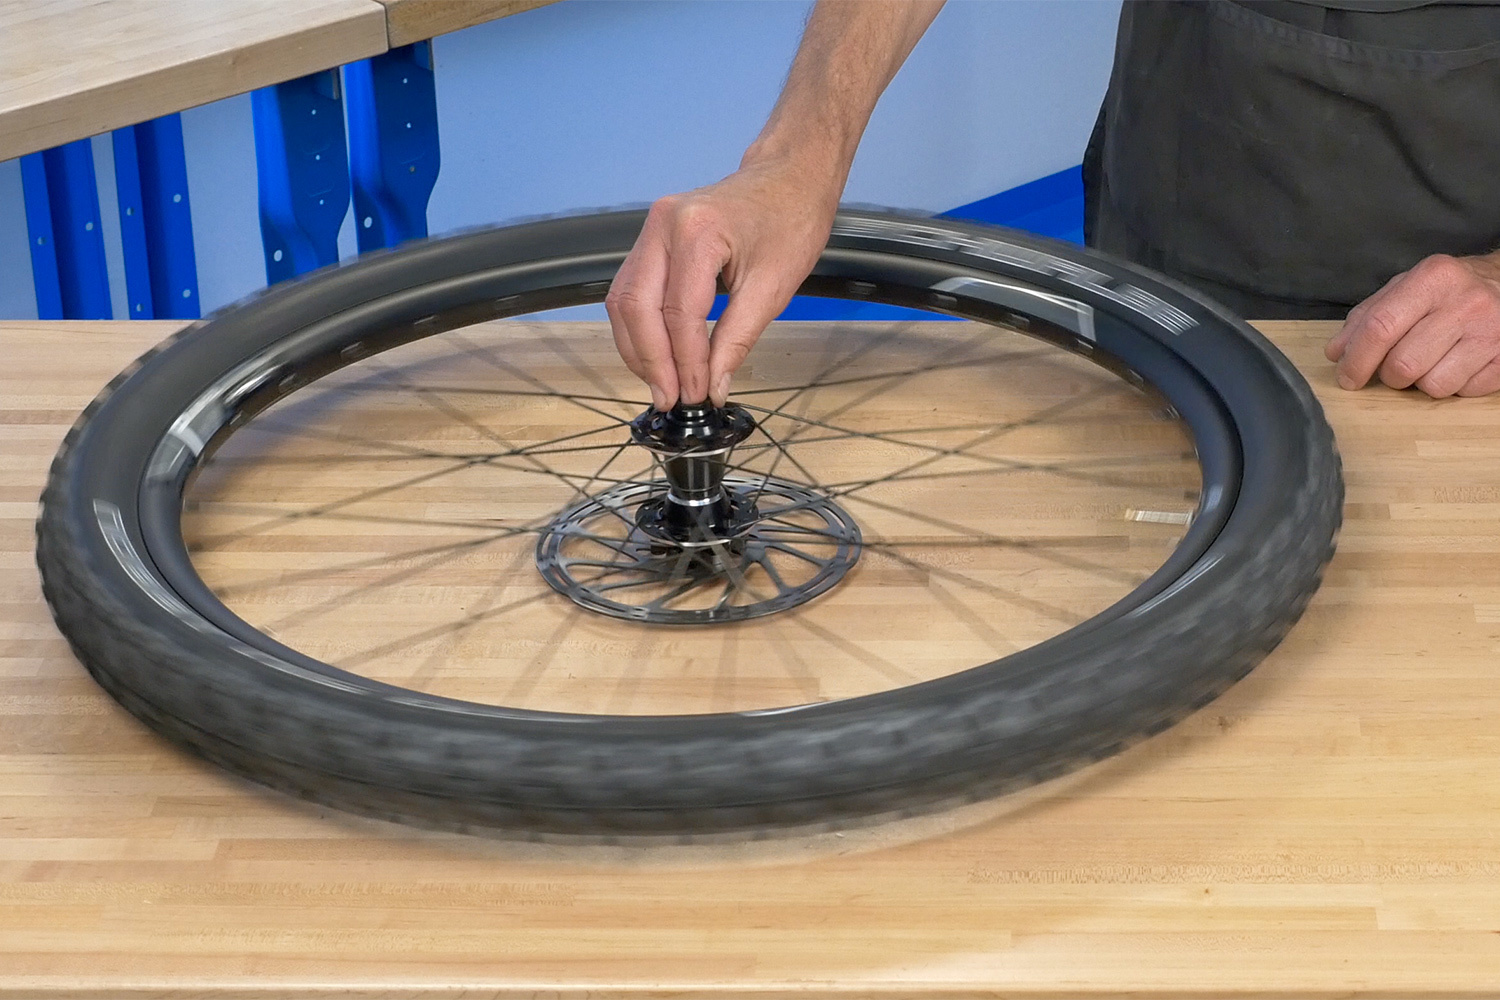
- Hold the wheel horizontally and oscillate the wheel to help spread the fluid to the bead. Flip the wheel and repeat.
- Now we wait. The sealant needs to fully set and block any leaks. On UST systems, this may happen immediately. For other systems, it may take hours, and in some cases, days. This is because the sealant has to find and plug the leaks.
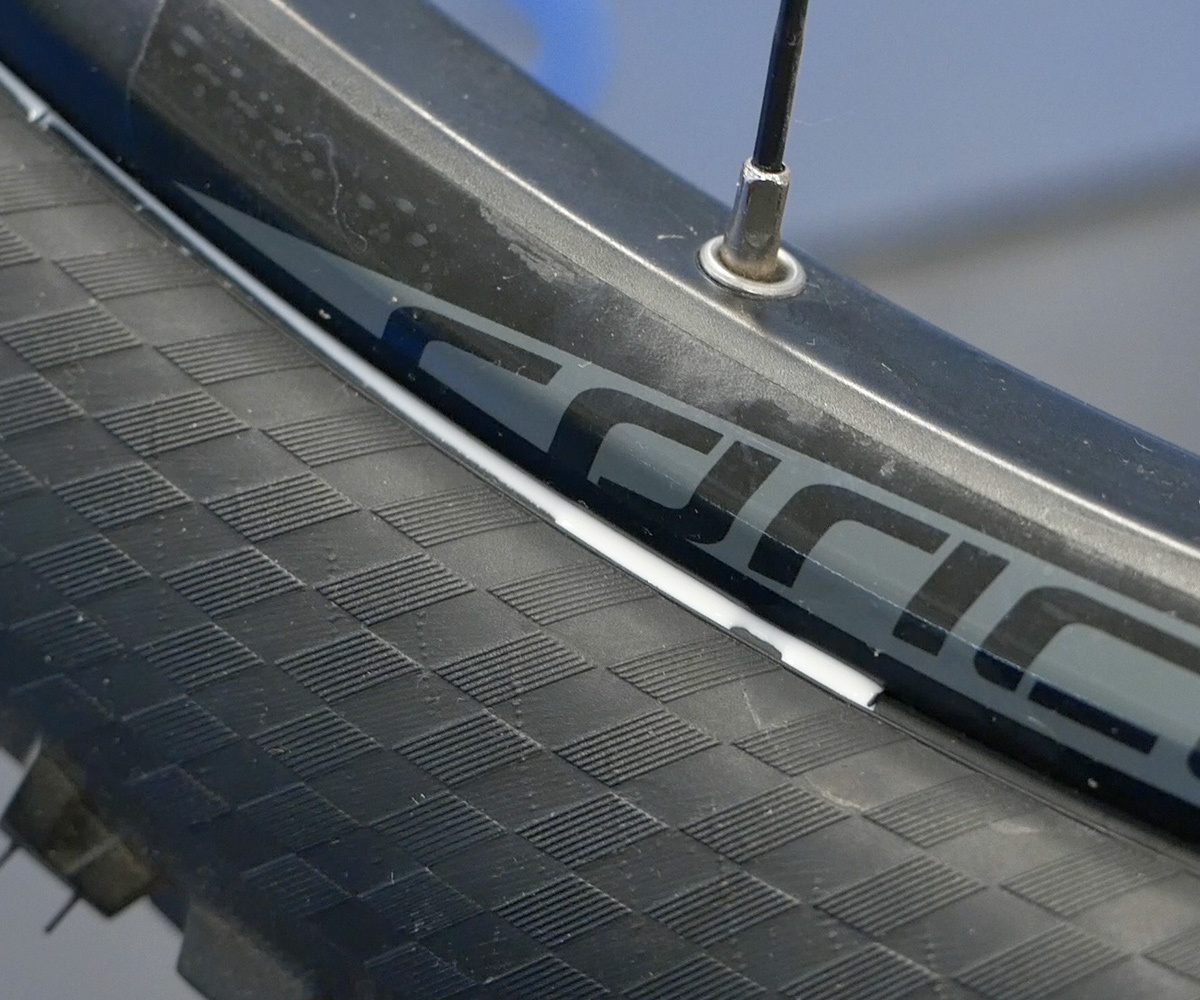
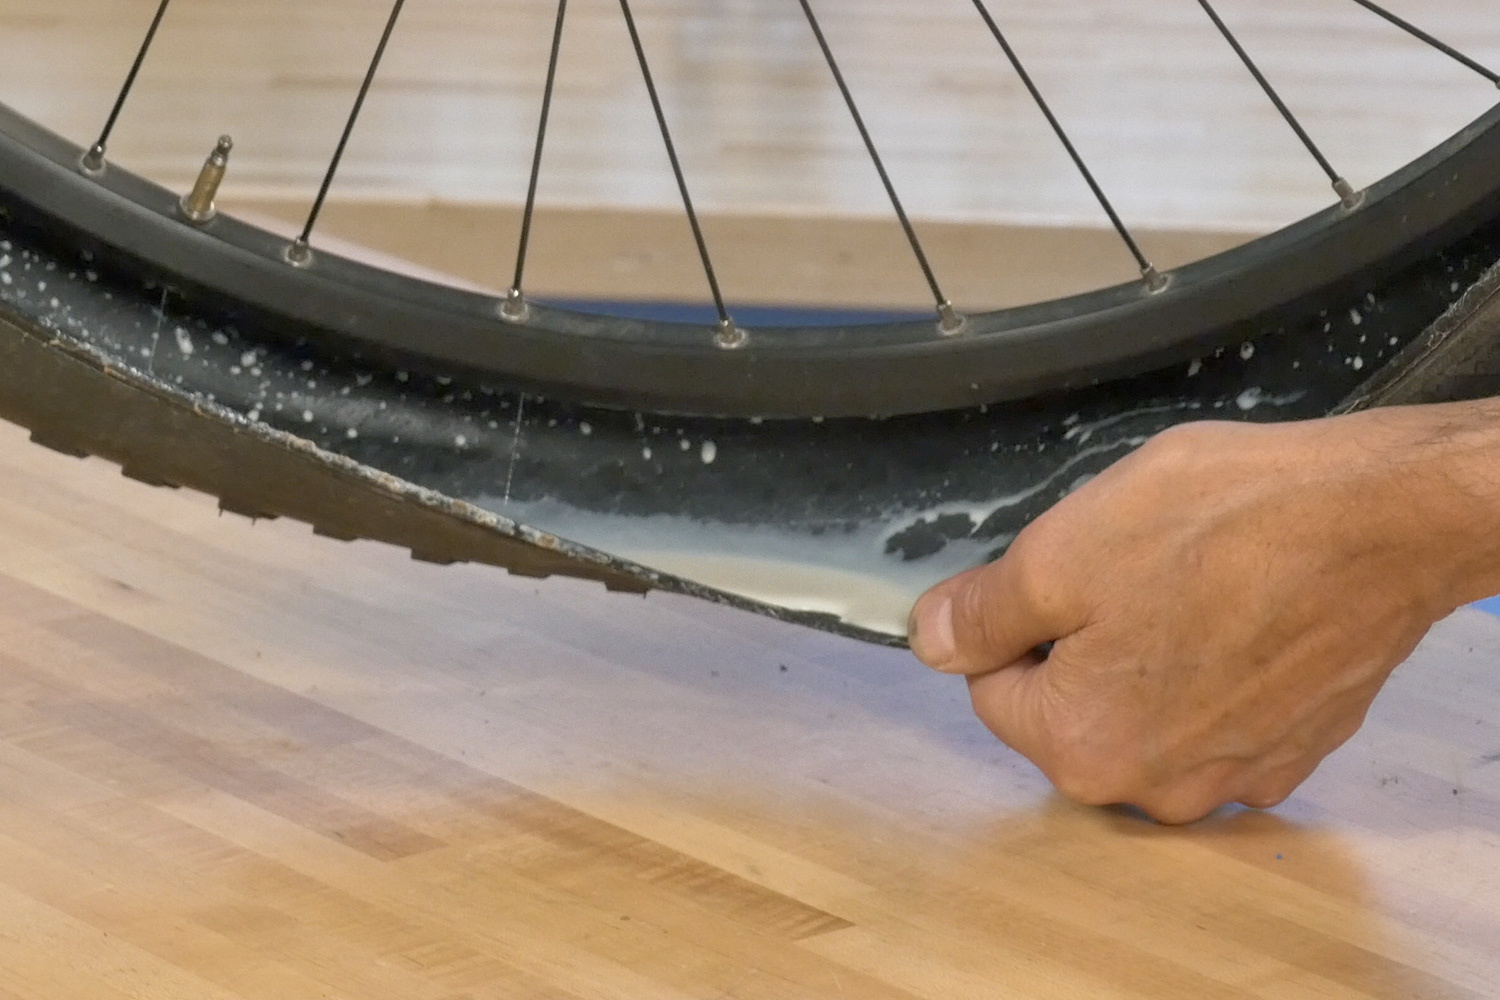
Sealant seeping through the tire bead
The rim strip on this wheel was not adequately sealed. Sealant may, in time, create a seal
- Every few hours, maintain air pressure and spin the wheel to spread the sealant.
- When the wheel is holding air consistently, set the tire to the rider’s desired pressure. This wheel is ready to use.
Tubeless Tire Repair
In general, punctures in tubeless tires cannot be repaired. Punctures in UST tubeless tires, and other tubeless tires with a butyl inner lining, can potentially be repaired using a vulcanizing patch kit such as the VP-1. It is not recommended that you attempt to use other types of patches, or attempt to repair other types of tubeless tires.
See Inner Tube Repair for instructions on using a vulcanizing patch kit.
Related articles
Tubeless Tire Compatibility View Article
Tubeless Tire Conversion View Article
Tire and Tube Removal and Installation View Article