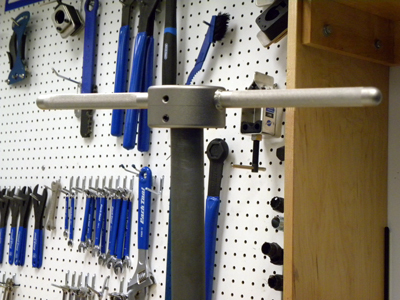
Threading Fork Steering Columns with FTS-1
This article will discuss the FTS-1 Fork Threader and how to properly use it to thread forks.
Getting Started
- FTS-1 and appropriate dies
- Hex wrench to adjust set screw
- Cutting fluid such as Park Tool CF-2
- Rags
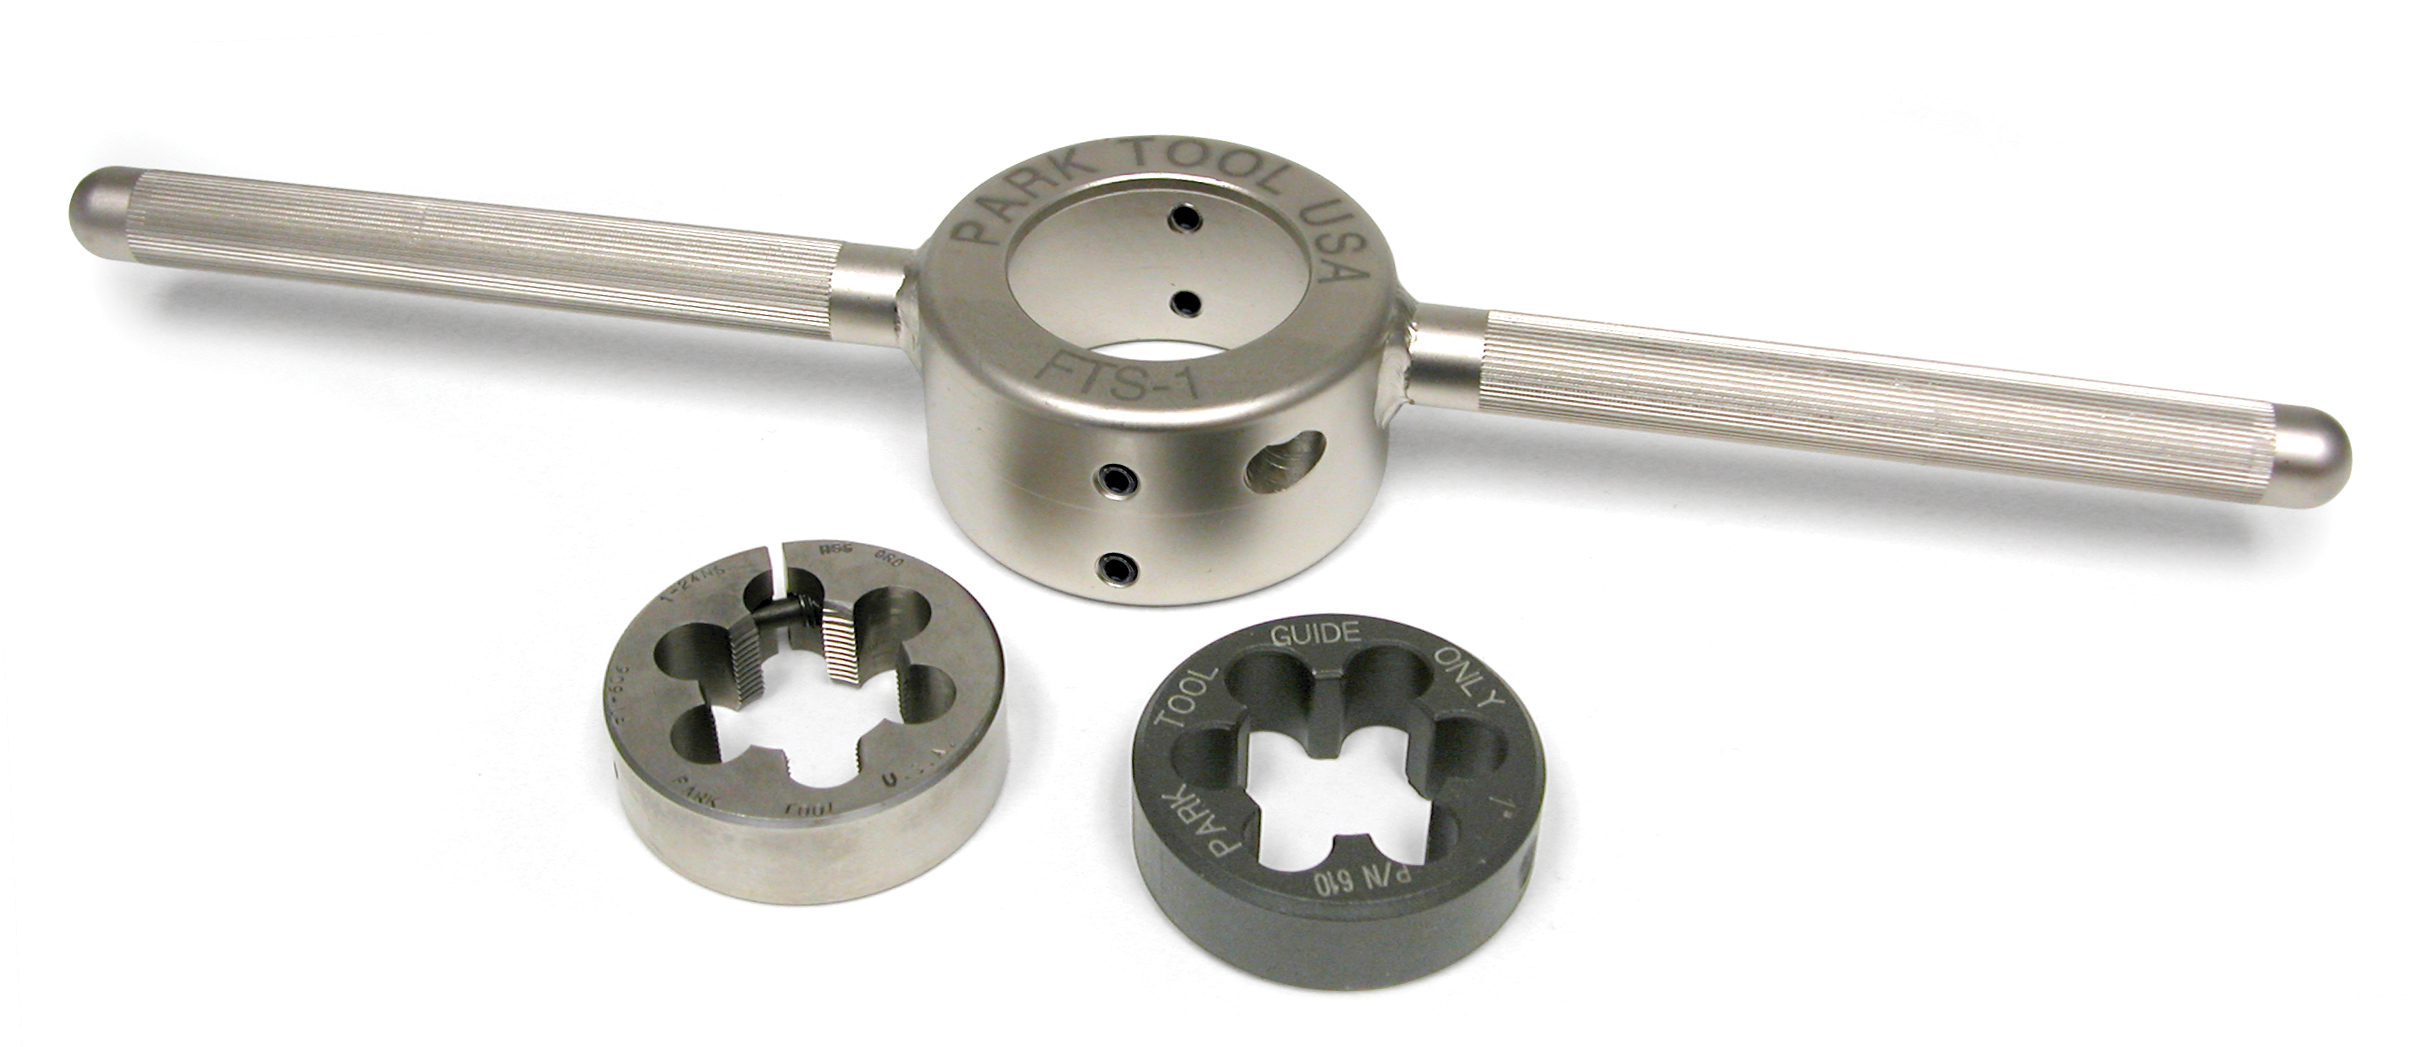
The FTS-1 is a fork threading set. The FTS-1 included a cutting die in the 1″ x 24 TPI standard, and one cutting guide. Optional dies and guides are available. Cutting die #607 is for 1-1/8″ threading, and uses the #611 cutting guide. Cutting die #608 is for 1-1/4″ thread and uses the #612 cutting guide. The FTS-1 is a sophisticated cutting tool and should be used by experienced mechanics only. Always apply copious amounts of cutting fluid such a Park Tool CF-2 when using the FTS-1 or any cutting tool.
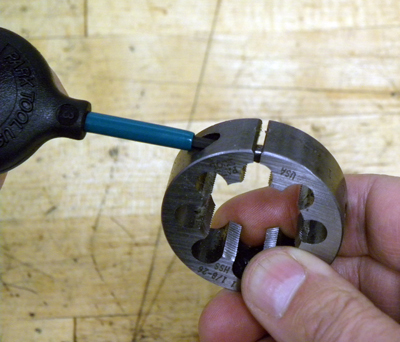
The FTS-1 dies are “split-ring” dies (figure 1). The split in the die can be opened or closed using a setscrew to increase or decreases the cutting diameter.
Threading Procedure
When adding new threads to uncut column, it is important the die be fully opened. This will take a minimal cut of material. The die must be adjusted and again used to cut more thread depth. The process is repeated three to four times until the diameter is reduced enough to thread on the headset.
Dies are made with a taper at one end. This taper allows the cutting teeth to better engage the outside of the material that is being cut. The die should be oriented so the taper faces the fork column (figure 2).
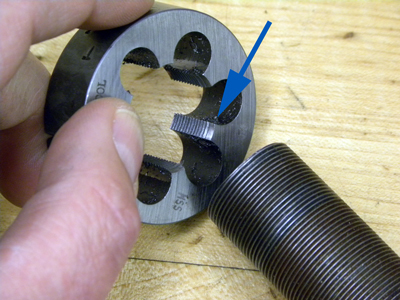
Figure 2. Tapered end of die faces thread or fork
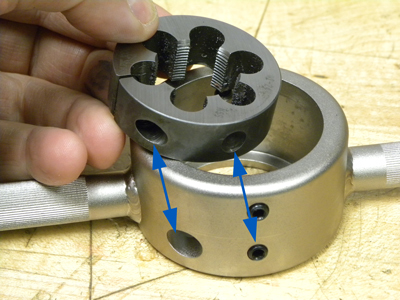
Figure 3. Align die and insert into handle
Begin by installing the die into the handle. Loosen die adjusting setscrew to reduce diameter of die and insert the die into the handle. The split setscrew should be aligned with the access hole in the handle (figure 3). The die has two indentations that will be held by the two outer setscrews on the handle. These are located on either side of the handle.
After inserting and aligning die in handle, tighten die adjustment setscrew and expand the die in the handle (figure 4).
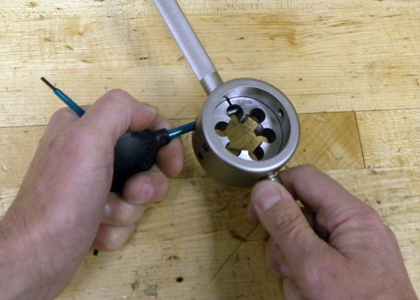
Figure 4. Insert die and expand die as much as possible
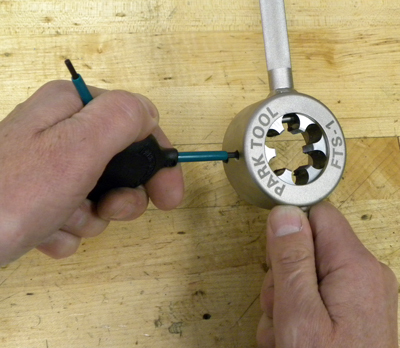
Figure 5. Tighten handle setscrews
Tighten handle setscrews to hold die and prevent the die from turning in the handle (figure 5).
Insert the cutting guide and secure with handle setscrews. Guide will help keep the cutting die square and straight to the steering column.
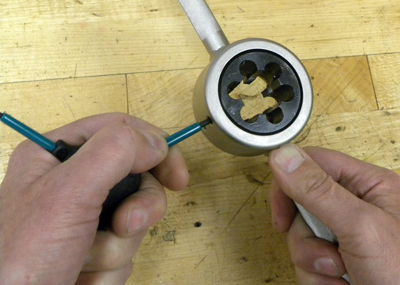
Figure 6. Install guide into handle
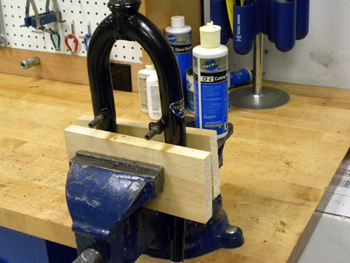
Figure 7. Use padding to hold fork firmly
The fork should be held firmly in a bench vise. Use rubber padded jaws or fabricate wooden blocks to hold the fork (figure 7). Hold as close to the fork crown as practical.
Place FTS-1 onto fork column (figure 8). Guide will align die and handle square to steering column.
Extending Pre-Threaded Steering Columns
If the fork has threads, the threading can be extended. Determine the amount of extra thread necessary. Begin with the die in a fully open setting and turn die down until die meets resistance at bottom of pre-cut threads. Measure with caliper the amount of column extending above die. Add amount needed to this figure and as necessary until the extra amount is reached.
Add cutting fluid to the die teeth and begin the cut slowly. Stop every 1/2 turn to add more cutting fluid to the cutting teeth (figure 9).
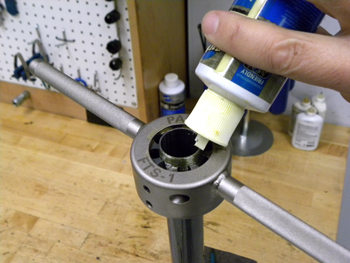
Figure 9. Add cutting fluid often
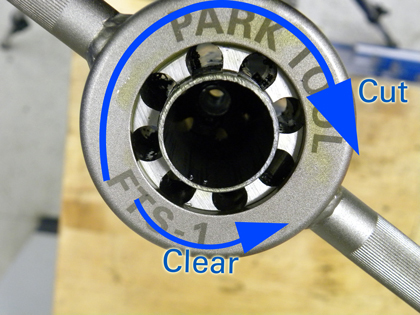
Figure 10. Cut clockwise and then back up to clear
The cutting die will rotate and pull material from the fork. It is important to turn the die slowly. After making a cut of 1/2 turn, back the die slightly counter-clockwise to break the chip (figure 10). Advance the die again, pausing to add more cutting fluid.
After making the first pass with the die, back die upward to original threads. Loosen the die adjustment setscrew a small amount. Tighten the handle setscrew to close the die slightly. Turn the handle and test the cutting of die. Die teeth should be cutting a small amount of material. Use this setting and again repeat cutting to bottom of needed thread.
Repeat the process of cutting the thread, backing up to the top, and cutting again by closing the die slightly. This should be done three or four times, each time cutting a little more from the steering column.
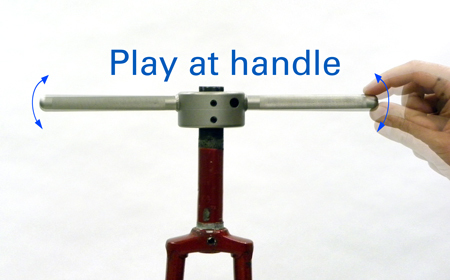
For the last pass, use the die adjustment setscrew to match the diameter of the original thread depth. Die should turn on threads without cutting and will little play. Test the thread depth by screwing on the threaded race from the headset. Remove the FTS-1 and attempt to install threaded race. If race will screws on to cut threads, the thread depth is adequate and fork can be used.
To cut excess threads of a threaded column use the SG-1 or SG-2.
Unthreaded Steering Columns
When cutting an unthreaded steering column, begin with the cutting die fully open inside handle. Install handle over column and press downward. Rotate handle clockwise. Die will bite into steel and begin to cut.
After cutting the depth of threads required, back the die up to the top of the threads. Loosen the die adjustment setscrew a small amount. Tighten the handle setscrew to close the die slightly. Turn the handle and test the cutting of die. Die teeth should be cutting a small amount of material. Use this setting and again repeat cutting to bottom of needed thread.
Repeat the process of cutting the thread, backing up to the top, and cutting again by closing the die slightly. It is common to need at least thread cuts to make a useable thread. Test the thread depth by screwing on the threaded race from the headset. If threaded race screws on, the thread depth is adequate and fork can be used.
Related articles
Fork Steering Column Length and Sizing View Article
Fork Crown Race Cutting and Facing View Article
Threaded Headset Service View Article
Basic Thread Concepts View Article