Side Pull Brake Service
This article will discuss side pull caliper arm adjustment, pad adjustment to the rim, pad centering, and pad clearance. For purposes of this article, the terms "left" and "right" will be from the "mechanic's point of view," not from sitting on the bike.
Getting Started
The side pull caliper rim brakes were once the common road bike brake. Both caliper arms share a single pivot, which is centered over the wheel. The image above shows modern dual pivot, and center pull brake calipers, and side pull. Side pull calipers are also found on some BMX, Freestyle, and some recreational bikes.
Install Calipers
The side pull brakes mount with the center pivot or center stud to the frame or fork. Hold the brake approximately centered as best you can and secure the mounting nut. It is common to have concave washers that match the radius of the fork. Tighten pad-fixing bolt or nut to approximately 6–8Nm.
Adjust Brake Pads
Inspect the wheel for adequate centering in the frame/fork. Correct as necessary.
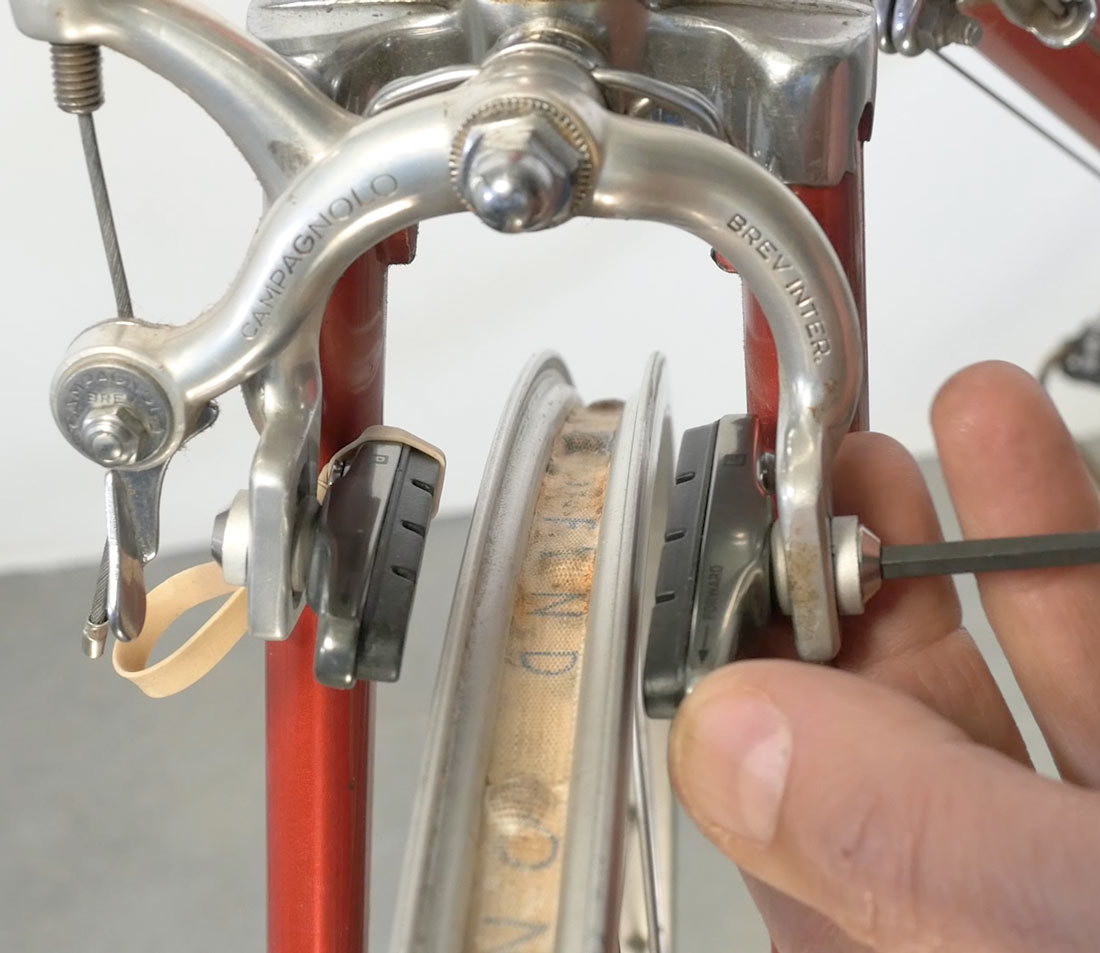
Both the left and right brake pads move downward on an arc as they approach the rim. As the pads wear thinner, they will travel downward even more.
Generally for side pull, adjust pads to the top of the rim braking surface, but not so high they would strike the tire. The front end and back end of the pad should be square so that the pad is tangent to the rim.

Figure 2. Pad placement for a sidepull caliper
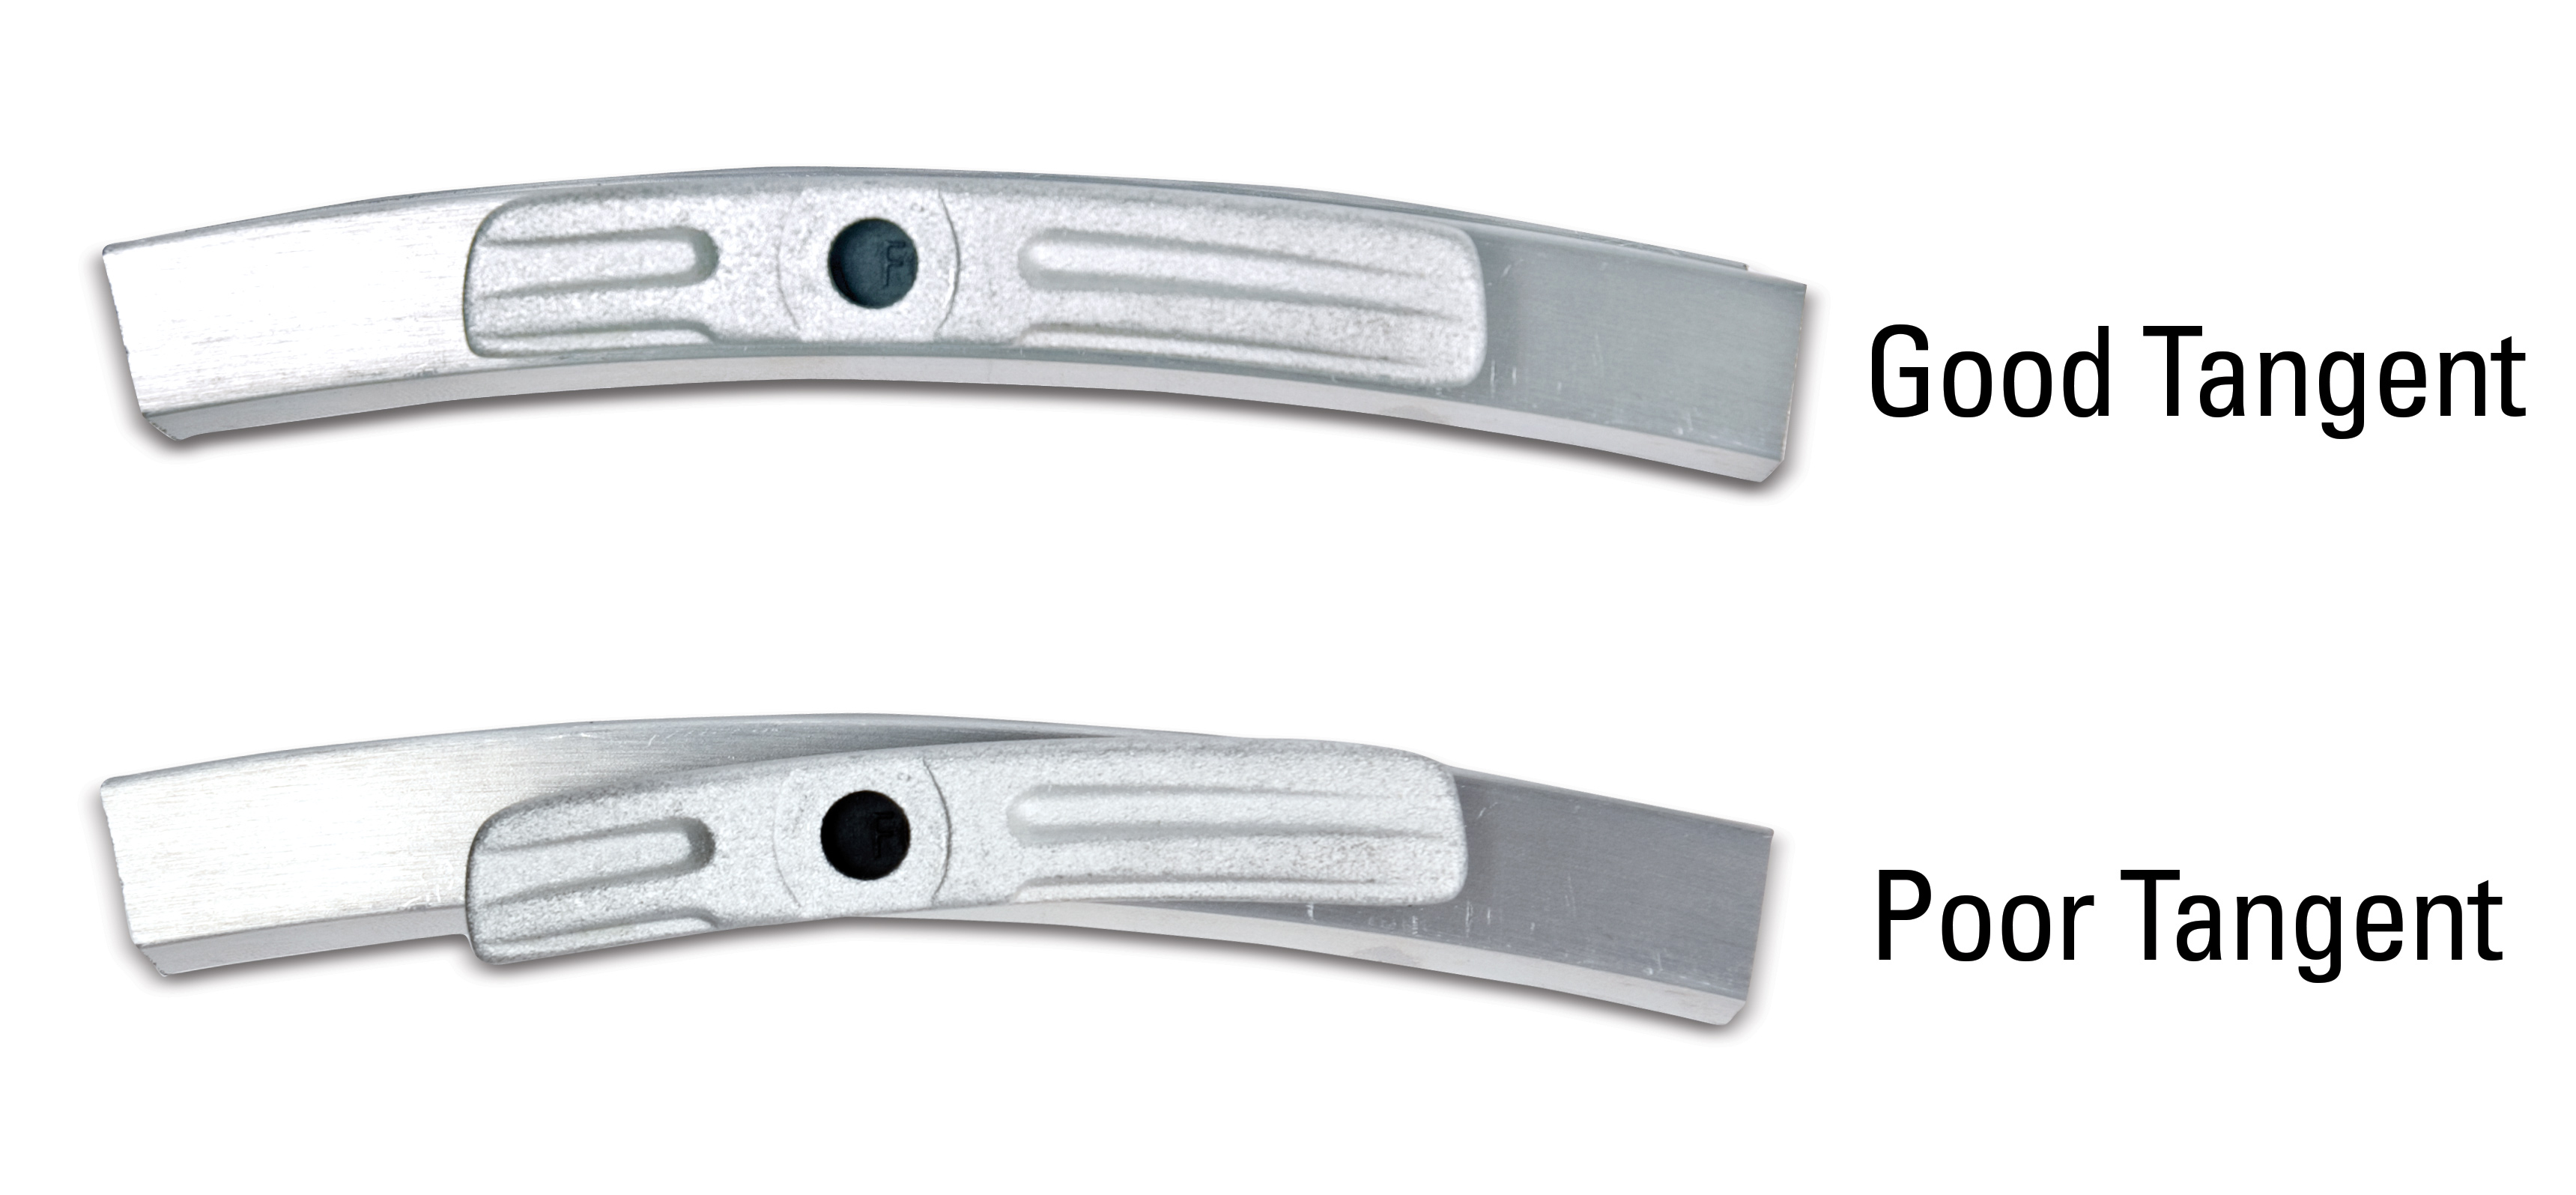
Figure 3. Tangent setting to the rim curve
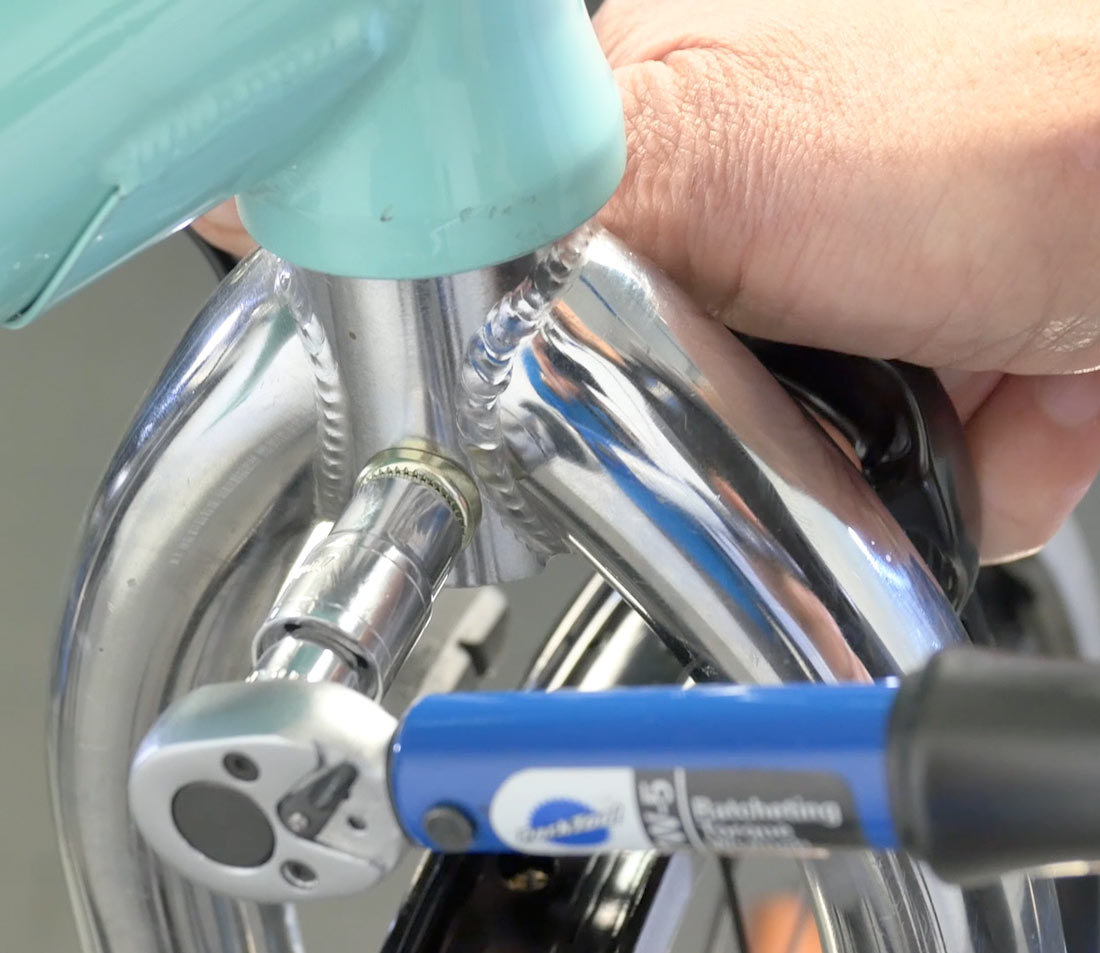
Loosen and lubricate threads of pad fixing bolt/nut. Adjust pads to correct height and tangent. Secure pad bolt or nut.
Attach Cable
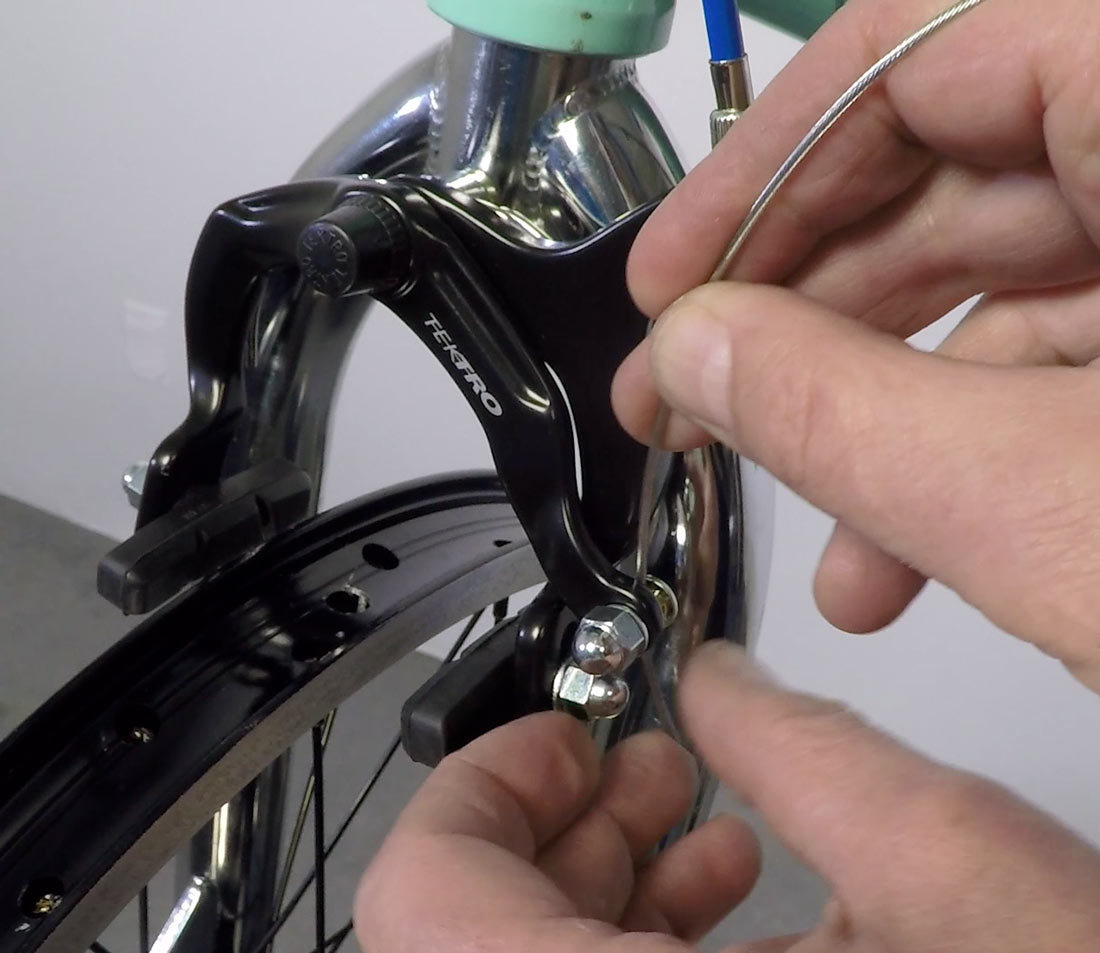
Attach the cable from the brake lever, feeding cable through the barrel adjuster. Check that the barrel adjuster is backed out two or three turns.
Feed the cable through the pinch bolt. Draw the pads to the rim and pull slack out of the cable. This is a good use of a fourth hand tool such as the BT-2 from Park Tool. Secure the pinch bolt — typically 4–5 Nm torque.
Squeeze lever with force to settle housing and to test pinch bolt security.
Set Toe
With the pads closer to the rim, it is now easier to see and set “toe.” This adjustment sets the pad so that the front or leading edge of the pad contacts the braking surface before the back edge. This reduces the tendency of the caliper to move back and forth quickly when the rim is contacted. Before doing this, a simple solution is to test ride the bike and see if it squeals. If there’s no squealing, then toe is not needed.
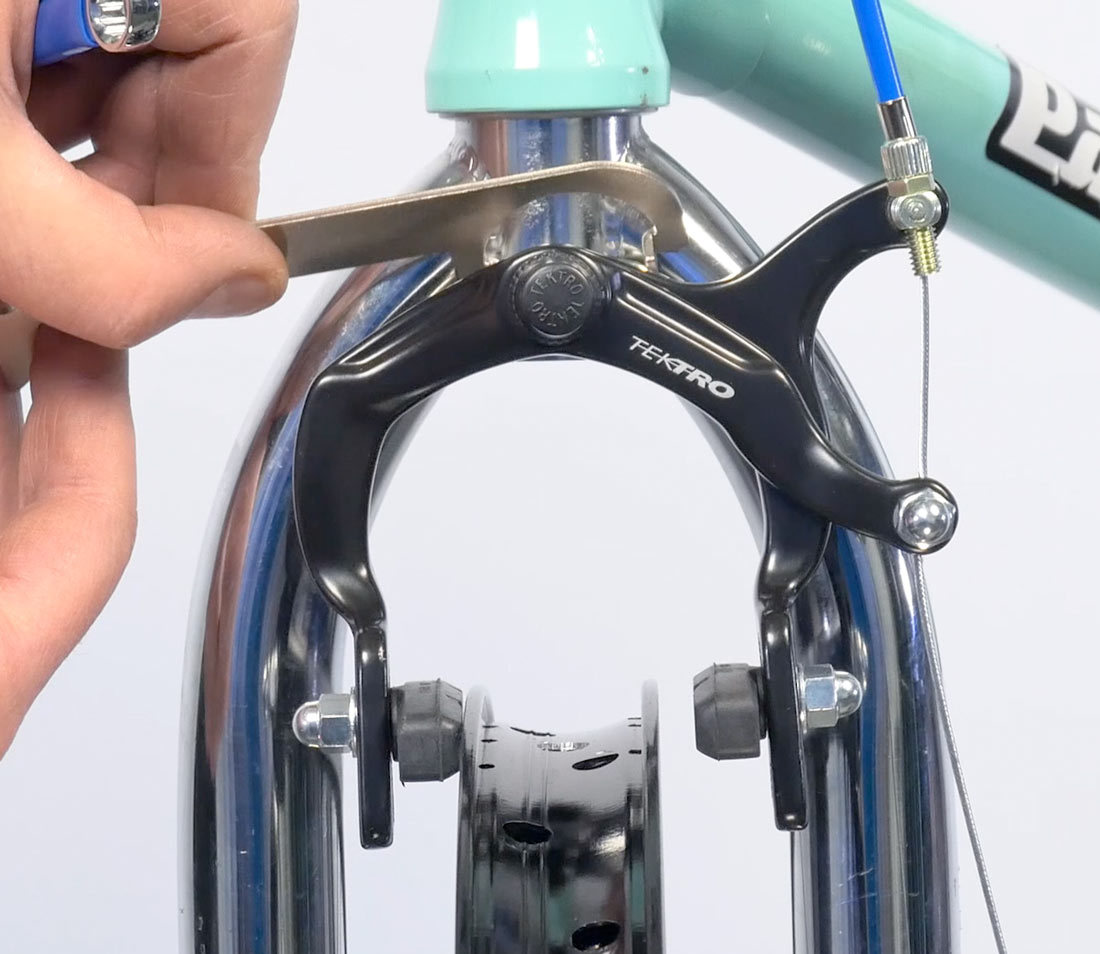
On the simple flat washer, flat-mount pad system, one way to get toe is to slightly bend each caliper arm. Use two small, adjustable wrenches, and engage under each side. It is important to bend the same amount. Just a little bit is needed. Try to be symmetrical, and test in between. Typically only a slight gap is needed for toe.

Some pad models use a convex and concave washer system. These curved surfaces allow the pad to rotate relative to the mounting bolt for an independent toe setting.
Set Pad Clearance
The lever is set to rider preference. Generally, there should be over an inch between the handlebar and the lever when the pads contact the rim. If the brake is too tight, the pads contact just as the lever is pulled. Adjust for more slack in the system by bringing the barrel adjuster in to the brake arm. If the setting is too loose, take the slack out with the barrel adjuster by turning it out or away from the arm.
Centering
Pads can now be centered to the rim. Depending on the design of the brake, there are different techniques. All centering techniques involve moving the pivot stud to re-position the pads to the rim.
For side pull brake calipers, it is not critical or even important that brake pads strike the rim at the same time. The rim will not be pushed to the side because the pivot of the brake arms is above the wheel. The other pad will eventually strike the rim and the pads will then squeeze the braking surface to slow the bike.
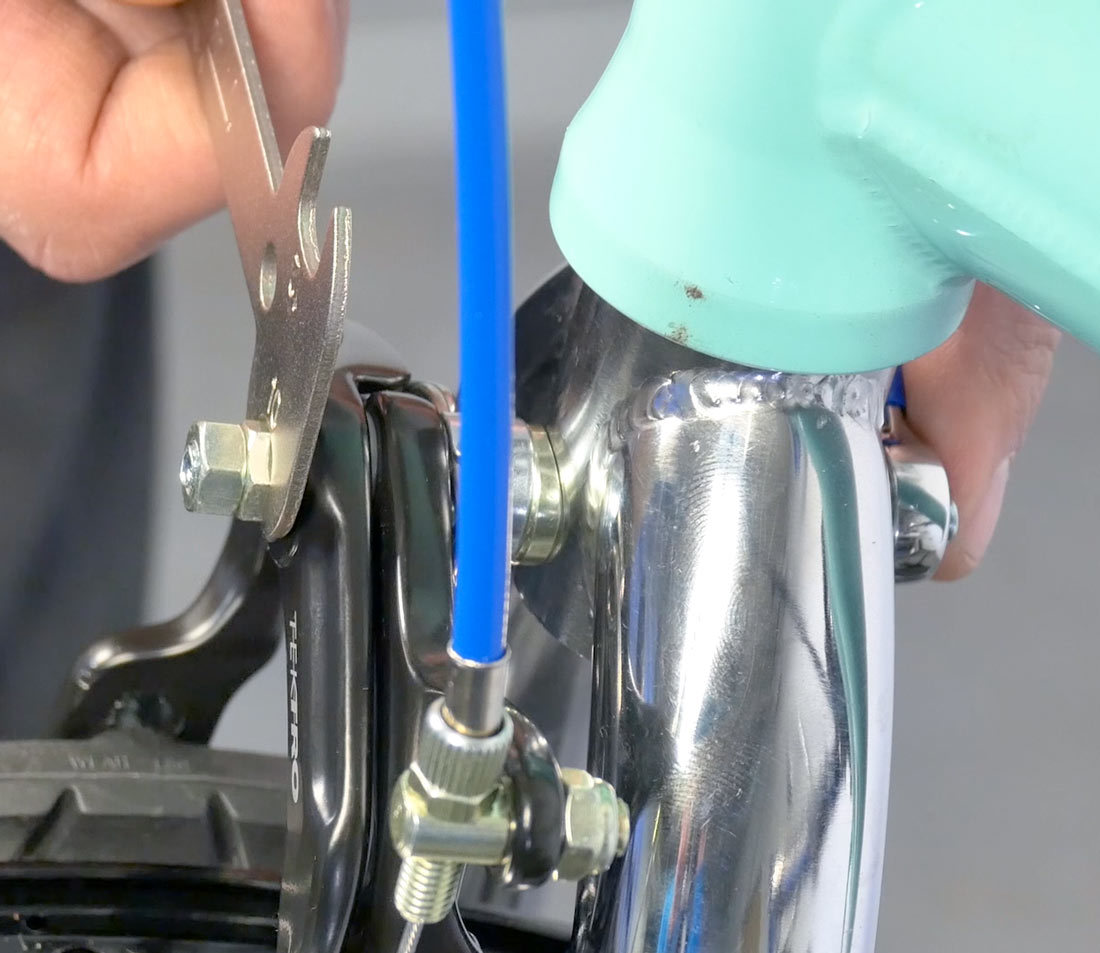
One option for some bike and brake designs is the Park Tool OBW-3. Two prongs on the tool engage in the brake spring behind the caliper arms. A second wrench is then used at the brake mounting nut. Both wrenches move together in the same direction and the same amount to center the brake pads to the rim.
Engage OBW-3 in spring
Move both wrenches together in same direction
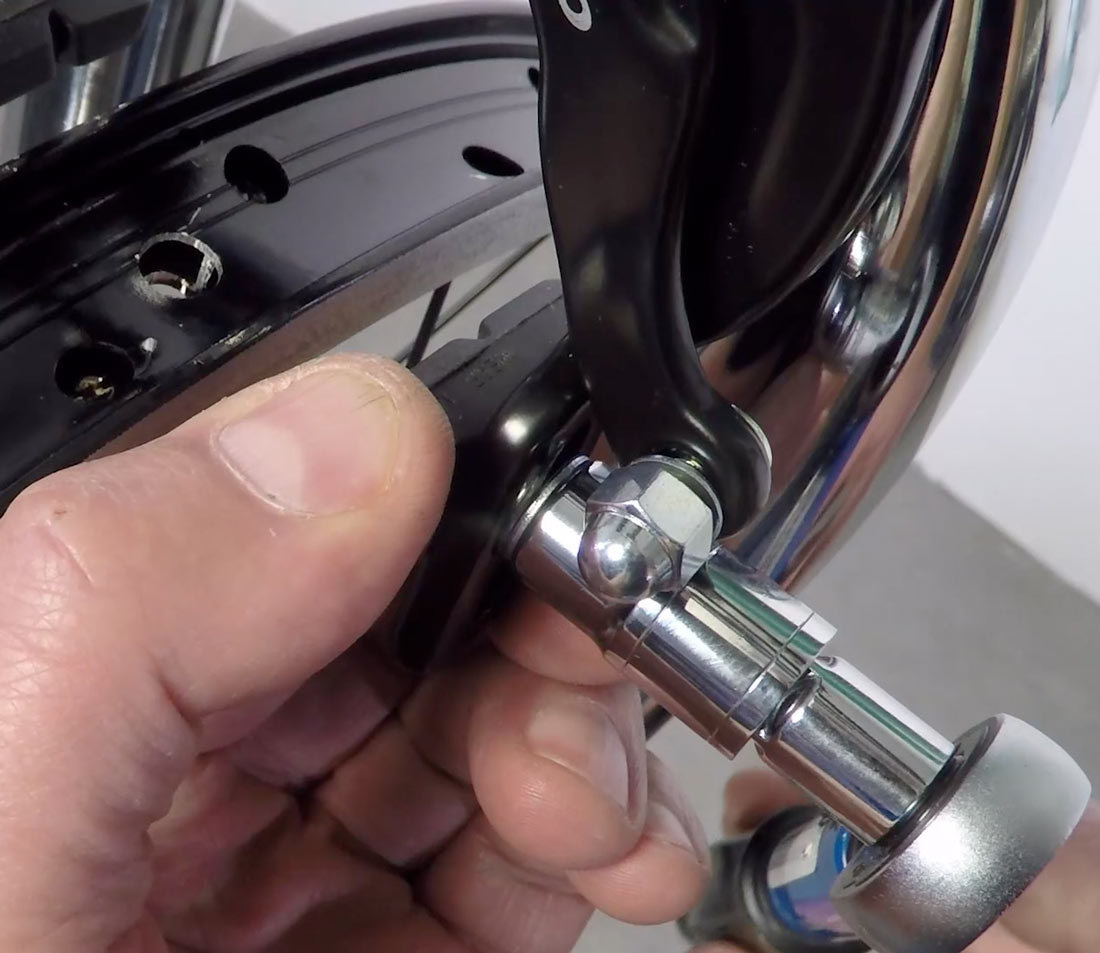
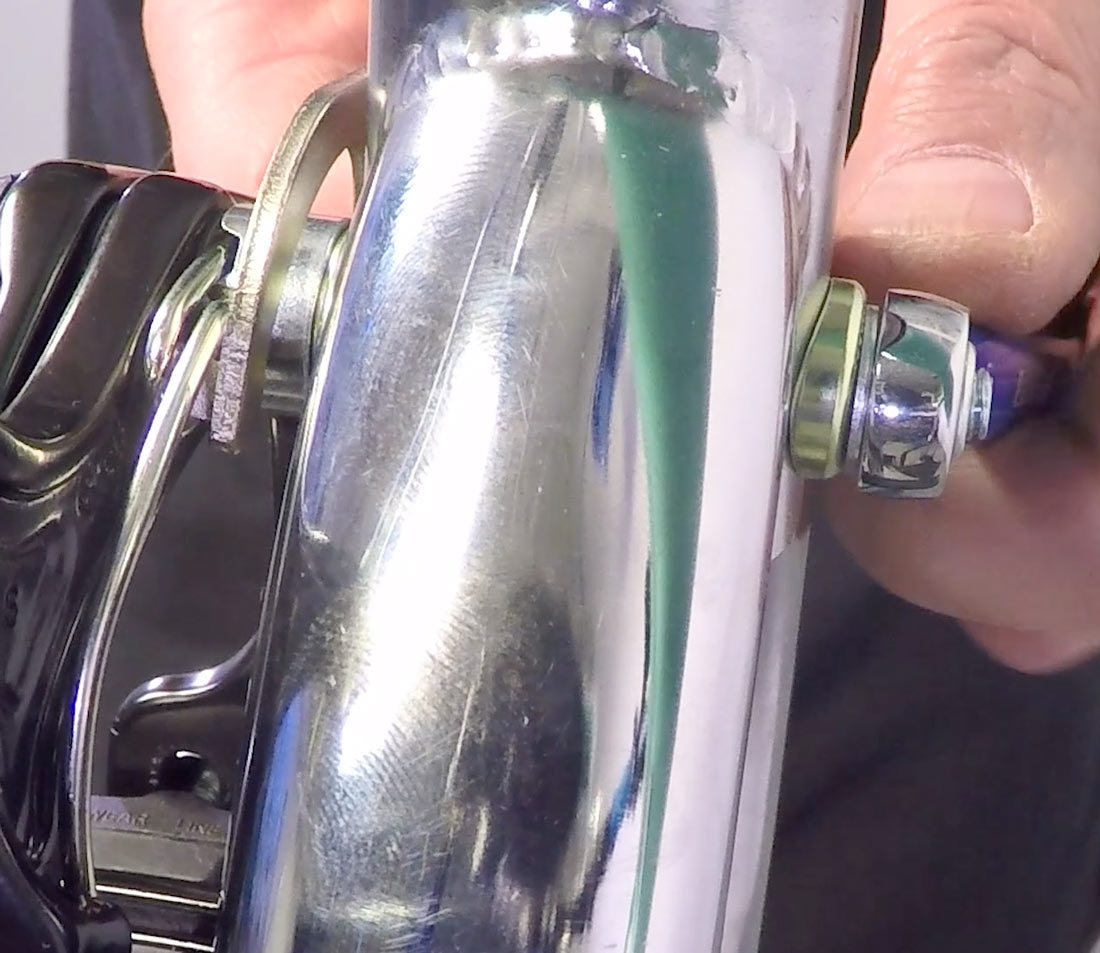
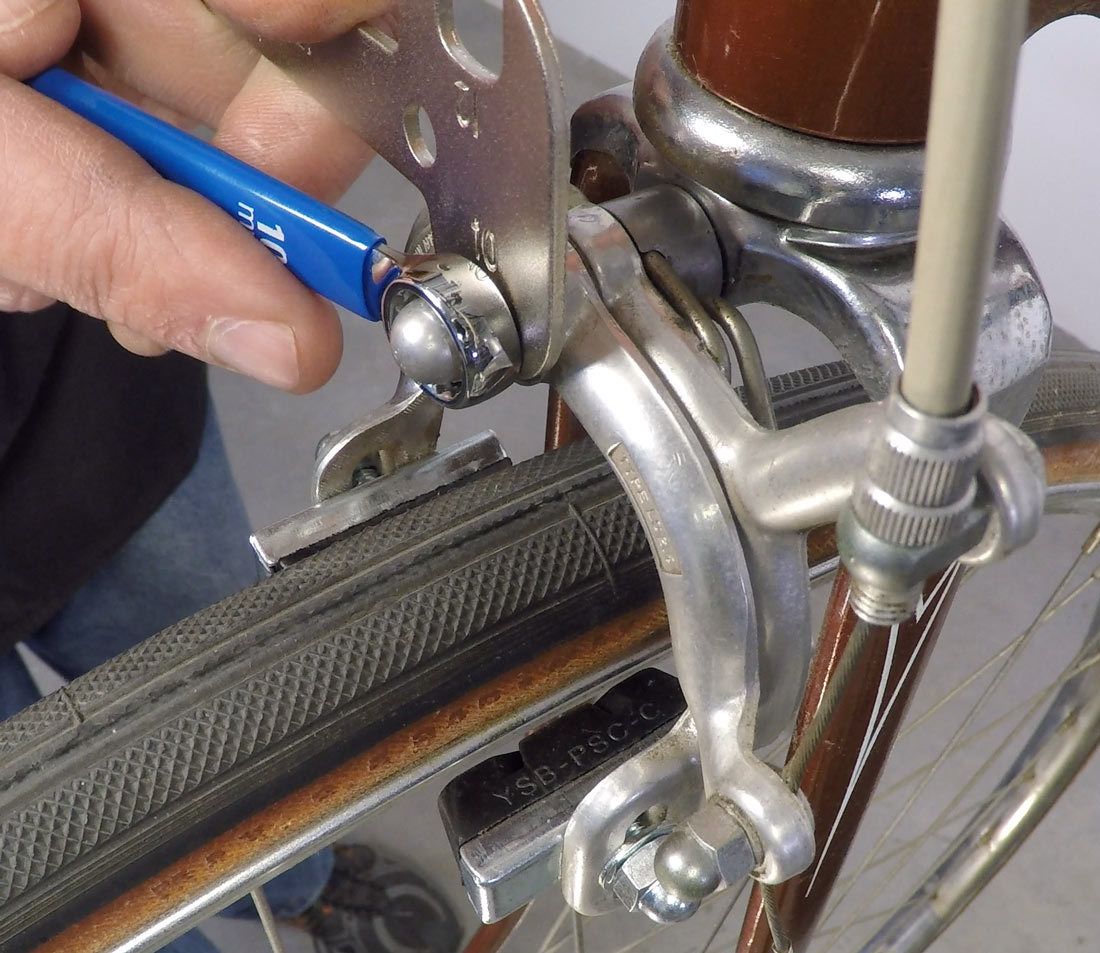
A common side pull brake design uses a double nut in front on the pivot stud. As an alternative to using the tool behind the spring, select one of these two nuts in front in addition to the mounting nut in back. These two nuts in front control the pivot and the play in the arms. They are tightened against one another under tension. So, with the wrench on the mounting nut behind, you can take a thin wrench such as the OBW-4 and select one of these two nuts.
Better models of side pulls have a machined pivot stud designed to accept a thin wrench. The OBW-4 has four sizes to accommodate different models. In this case, you are grabbing the stud directly. Use a wrench behind on the mounting nut and then move both wrenches in the same direction the same amount to move the pivot stud as needed.
Cut Cable
Cut the cable using a cable cutter such as the CN-10, leaving about 1.5 to 2 inches (32–50mm) of exposed cable. Install and crimp an end cap to end cable.
Additional Information
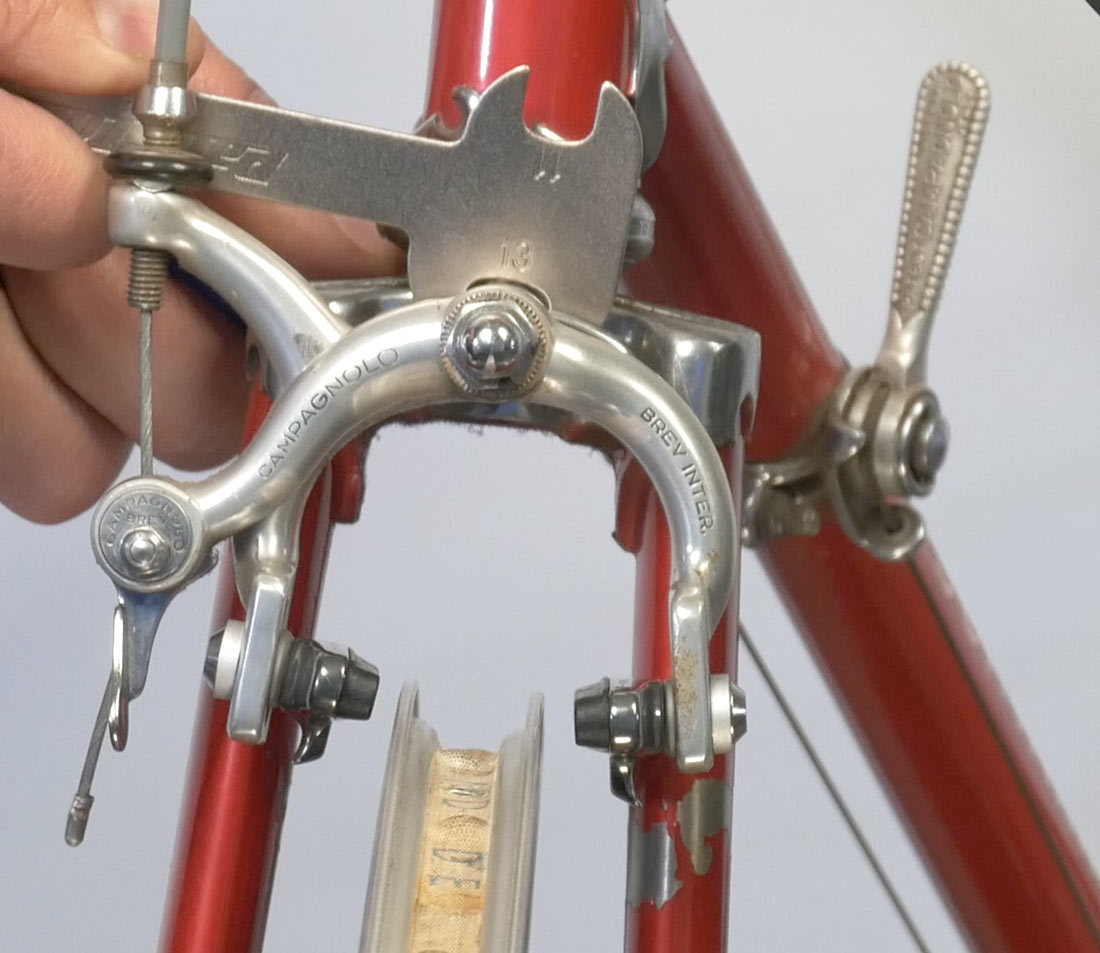
Brake arms can develop play. The double nut caliper types can be adjusted with the caliper mounted to the bike. Check arms for play by grabbing each arm and moving back and forth along the axis of the pivot. If there is no play and the calipers open when gently squeezed, the pivot adjustment is adequate.

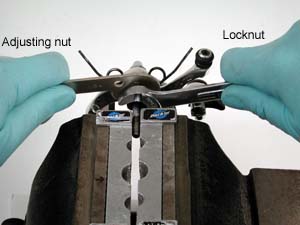
If there is play, the adjustment should be tightened. Hold the adjusting nut secure with a thin wrench. Note the position of wrench. Loosen locknut with a second wrench, and move adjusting nut slightly clockwise. Hold adjusting nut and secure locknut fully.
Repeat check of caliper arms for play. Repeat as necessary until play is gone and brake opens upon gentle squeezing. If arms will not fully open when gently squeezed, the adjustment may be too tight. Try to adjust looser a very slight amount. With much use the spring may become fatigued and a good setting is not possible. Replace spring if necessary.
Safety Pivot
Safety pivot caliper arm mount to a single bolt. Below the caliper arms shown apart on the pivot bolt.
The locknut and adjusting nuts for the safety-pivot types is located behind the caliper arms. The brake must be removed from the bike to access these nuts. The spring must also be disengaged and flipped back out of the way. Use care not to damage plastic spring carriers, if any.
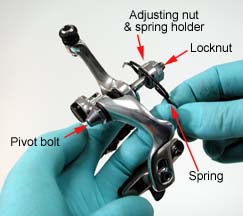
The parts of the safety pivot caliper
Release spring from caliper arm
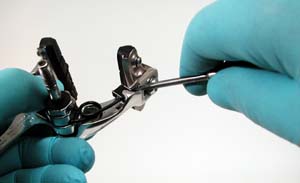
It is easiest to work with the brake in a vise using soft jaws such as the AV-5. If the brake has a 12-point locknut, place the box end of a wrench over the nut, and then grab with the vise. The adjusting nut also holds the spring, which can make the adjustment awkward. Hold the adjusting nut with a thin wrench such as the OBW wrench, and loosen the locknut.
Tighten adjusting nut, turning it toward bolt head, only slightly. Hold adjusting nut and secure locknut fully. Test for play, and repeat adjustment if play if felt.
To test final adjustment, flip spring back into place and attach spring to arms. Squeeze gently and release. Readjust as necessary.
Adjusting play in the Safety Pivot brake
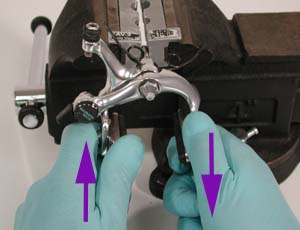
Check arms for play