Shift Cable Installation: Drop Bars
Shift cables can with time and use become worn, frayed, rusty or dirty, causing drag and resistance as it moves through the housing. This article will outline the process of installing and routing new shift cable into drop bar systems.
Preliminary Information
Tools
- CN-10 Cable & Housing Cutter
- Hex wrenches
- Small flat blade screwdriver
- Crimping tool
- Flashlight
Supplies
- Appropriate housing
- Light lubricant such as CL-1.2
- Cable end cap
In mechanical shifting systems, the cable pulls or releases a set amount of cable to cause the derailleur to move a set amount. If the cable or housing has become kinked, worn, frayed or corroded, you may experience slow shifting, inconsistent shifting, hard shifting or no shifting at all. Replacing your cables and/or housing can improve shifting performance.
The process outlined in this article concerns cable replacement on systems that use drop bars — see the derailleur systems article category for articles on cable replacement for other systems.
When replacing shift cables, it can a good idea to also replace the housing. However, for drop bars levers, that process can be a bit more involved as housing is often routed underneath bar tape and taped to the handlebars. See How to Size and Install Shift Cable Housing for replacement of housing, otherwise this article will cover only the cable replacement process.
Cable Removal
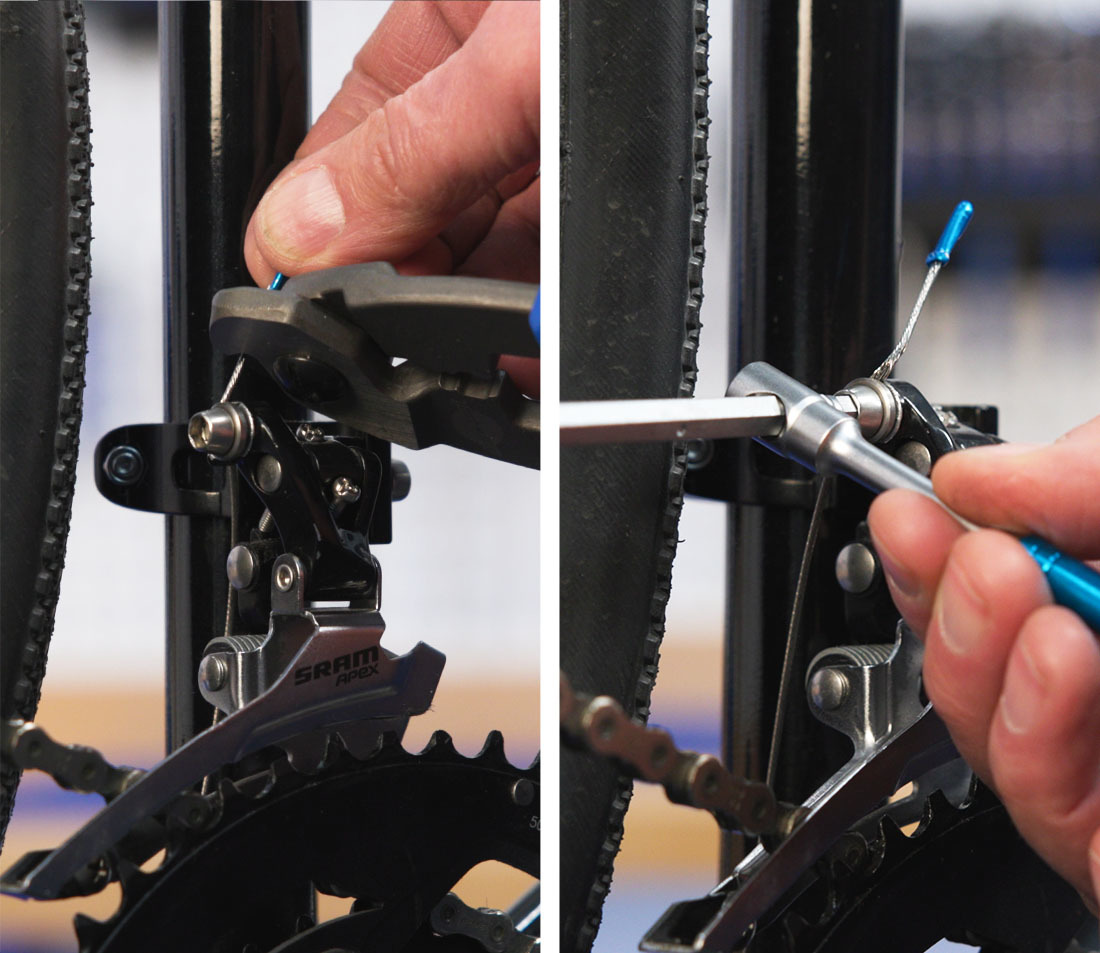
Regardless of the make and model, begin by shifting to the smallest rear or front sprocket. This releases the pull on the cable and puts the cable head in the position needed to remove the old cable and install a new one.
Disconnect the cable from the derailleur pinch bolt. Cut off or remove the cable end cap. If the cable is badly frayed, kinked, or mangled, cut above to make it easier to get out.
The removal process varies from model to model in terms of the location of the cable routing. This is a general walkthrough — some levers have idiosyncratic qualities that require extra considerations. For specific visual examples, see the video at the top of the page.
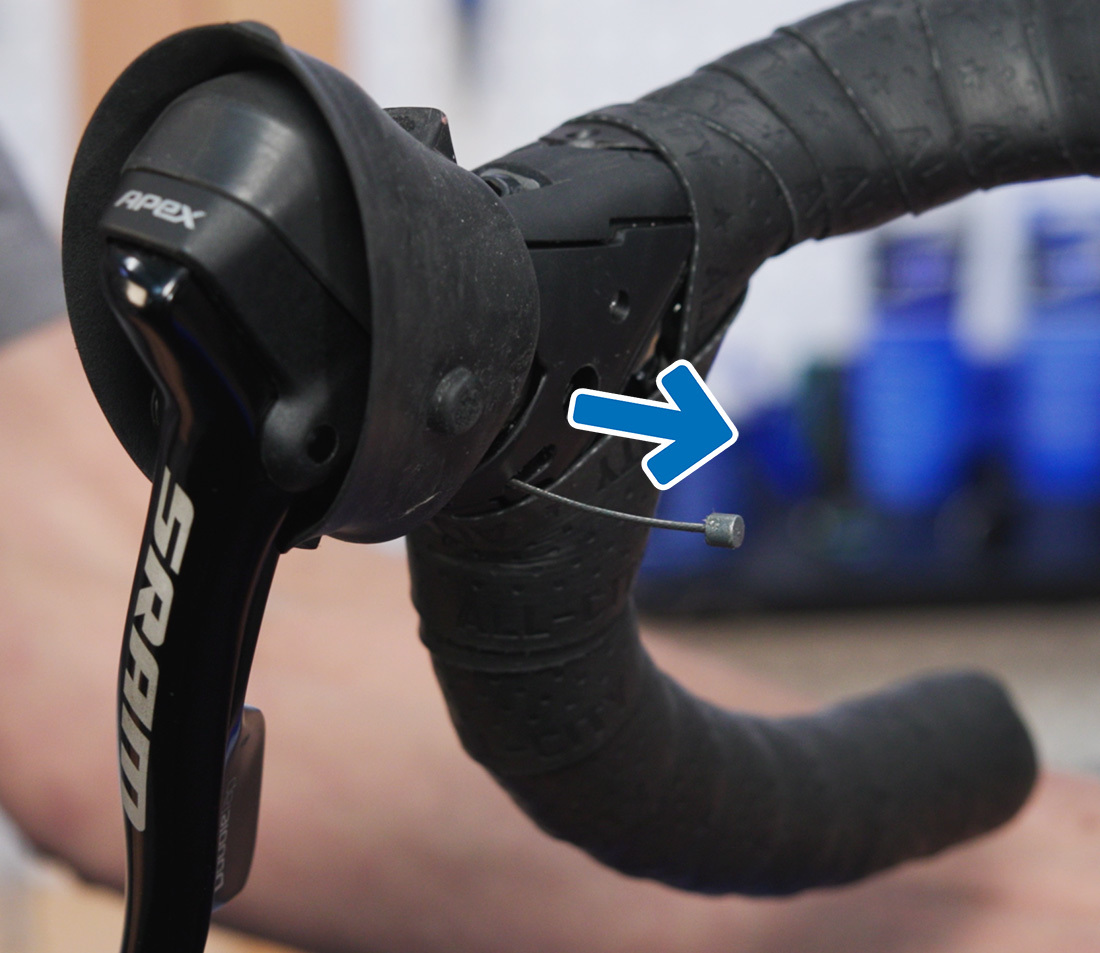
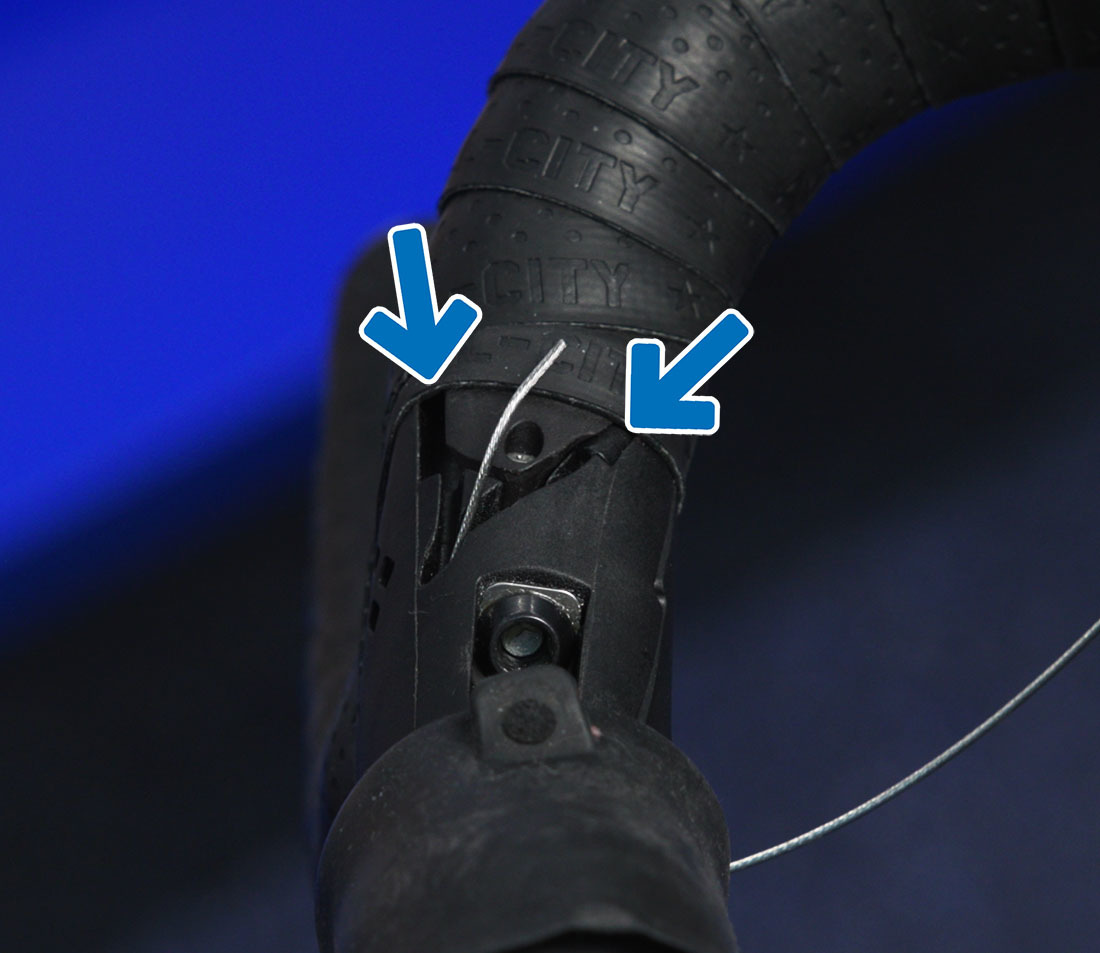
The shift cable access hole is commonly located in the lever under the rubber hood. Pull it forward to expose the lever body.
Push the cable forward at the closest point to the lever — the cable head will be pushed out of the lever body at the cable access hole.
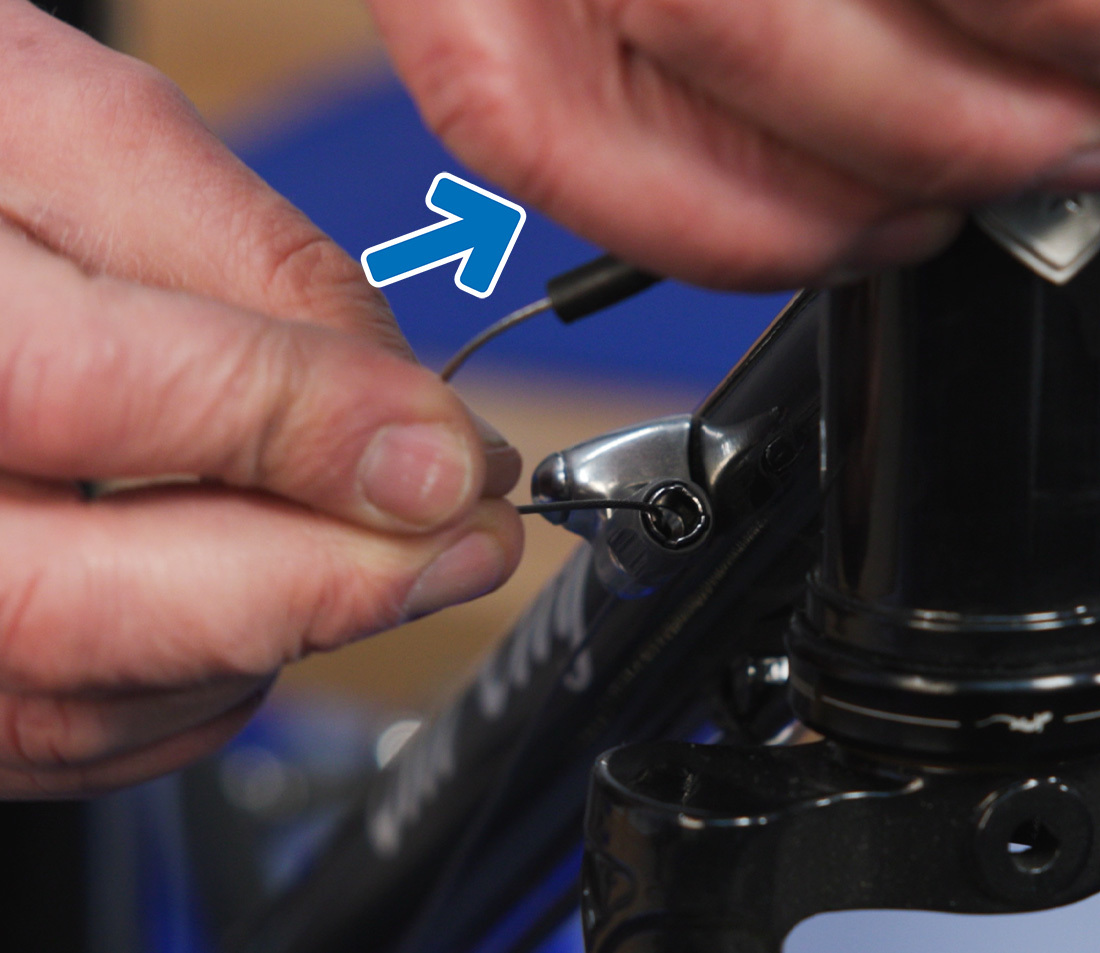
Pull the housing out of the nearest stop and push the cable...
...and it should come out of the lever body
If the cable does not appear, or you are unable to push it through, inspect for any cover or removable cowl that may be covering the cable access hole, as found on some Shimano levers. Pry this cover open with a pick or small screwdriver so the cable can exit.
Grab the old cable and remove it. As you do so, note the routing of the cable and the location of the cable access hole — you will need to know it for installation.
If you are replacing housing, this would be the time to do it.
Cable Installation
Installation is more or less the reverse of removal with some additional considerations. Feed the new cable into the access hole.
Some levers have multiple options for routing the housing. Inspect to see where the housing is installed to determine where in the lever to route the cable.
Continue to feed the cable into the lever until it pops out the other end of the housing. Pull the cable and be sure the cable head is seated inside the lever.
Replace any covers removed during the cable removal process. Return the rubber hood to its normal position.
Cable Check & Routing
It is useful at this point to test that the cable head is correctly installed in the lever. Pull on the cable with one hand while articulating the shift lever with the other. You should feel the cable being pulled, indicating the cable head is correctly seated. If you don’t feel any cable movement, the cable is incorrectly installed in the shifter. In that case remove the cable and start over.
Route the cable through the housing all the way back to the derailleur. Feed the cable through the groove of the pinch mechanism and pull the slack from the cable. Secure the pinch bolt screw (typically a torque spec of about 5 Nm). Cut the cable approximately 30 mm long and install an end cap. Finally, adjust limit settings and indexing.
Next article in this series
Rear Derailleur Adjustment View Article
Related articles
How to Size and Install Shift Cable Housing View Article
Brake Housing & Cable Installation: Upright Bars View Article
Brake Housing & Cable Installation: Drop Bars View Article