PRS-33 & PRS-33.2 Annual Maintenance
This article will review some typical yearly maintenance procedures for your PRS-33 or PRS-33.2. These procedures should keep your stand in optimal shape during peak season and prevent larger problems down the road.
Introduction
- Hex wrenches
- T20 Torx®-compatible wrench
- Medium-strength threadlocker
- 10 mm combination wrench
- Cross-tip screwdriver
- Rags
- Grease
The PRS-33.2 is Park Tool’s most versatile repair stand. With a powered motor and plenty of moving parts, it’s a good idea to inspect and service your PRS-33.2 yearly. This article will go through some typical yearly maintenance procedures for your PRS-33.2. These procedures should keep your stand in optimal shape during peak season and prevent larger problems down the road. If you are having any issues with your PRS-33.2 or PRS-33 that are not solved by the procedures below, check out PRS-33 & PRS-33.2 Troubleshooting or contact us.
The basic steps outlined in this article can be found in checklist form as a printable PDF below:
Download Printable Checklist
Clamp Service
We’ll begin with the clamp. Inspect the jaw covers — Check for damage and missing clips and repair or replace as needed. If new jaw covers are needed, it can help to clamp the new covers around a pedal wrench during install to ensure they seat properly. Also check the blue saddle pad for wear and replace as needed.
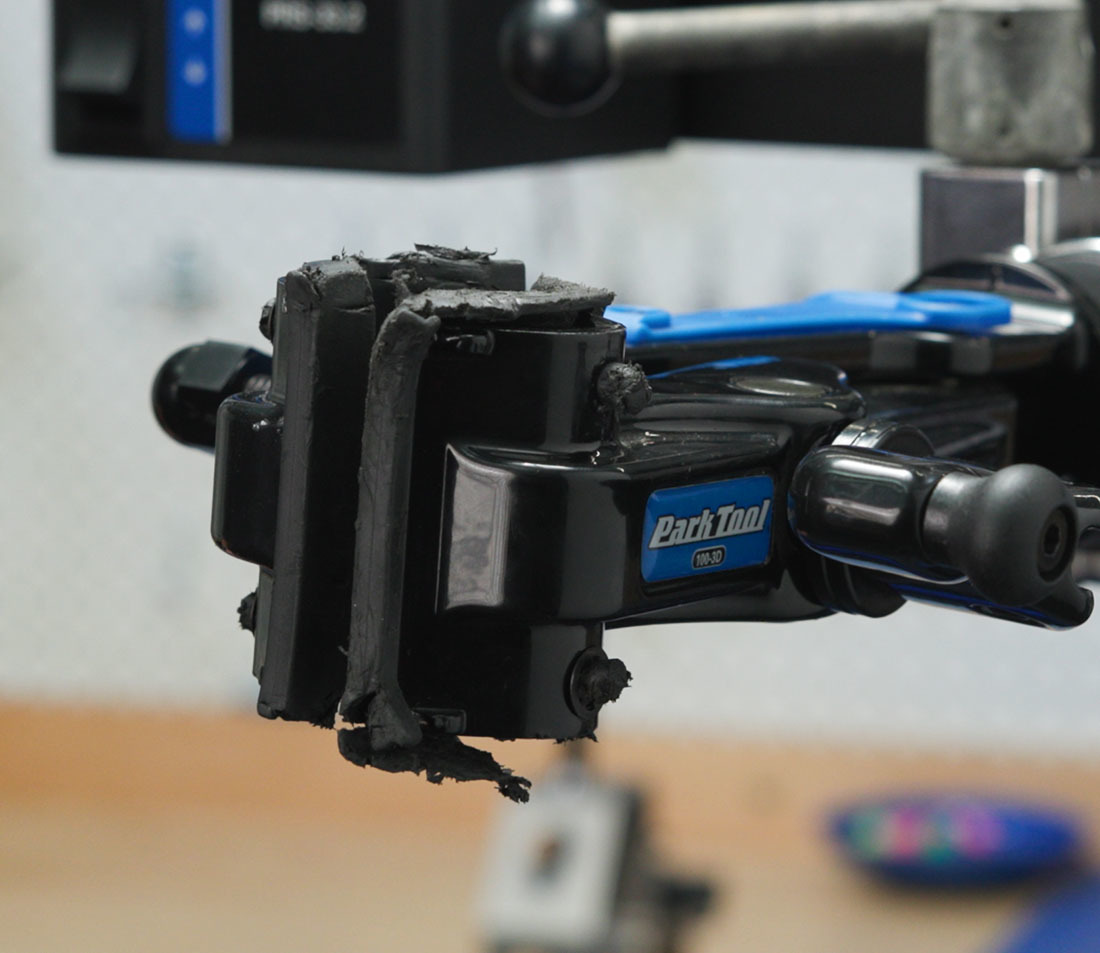
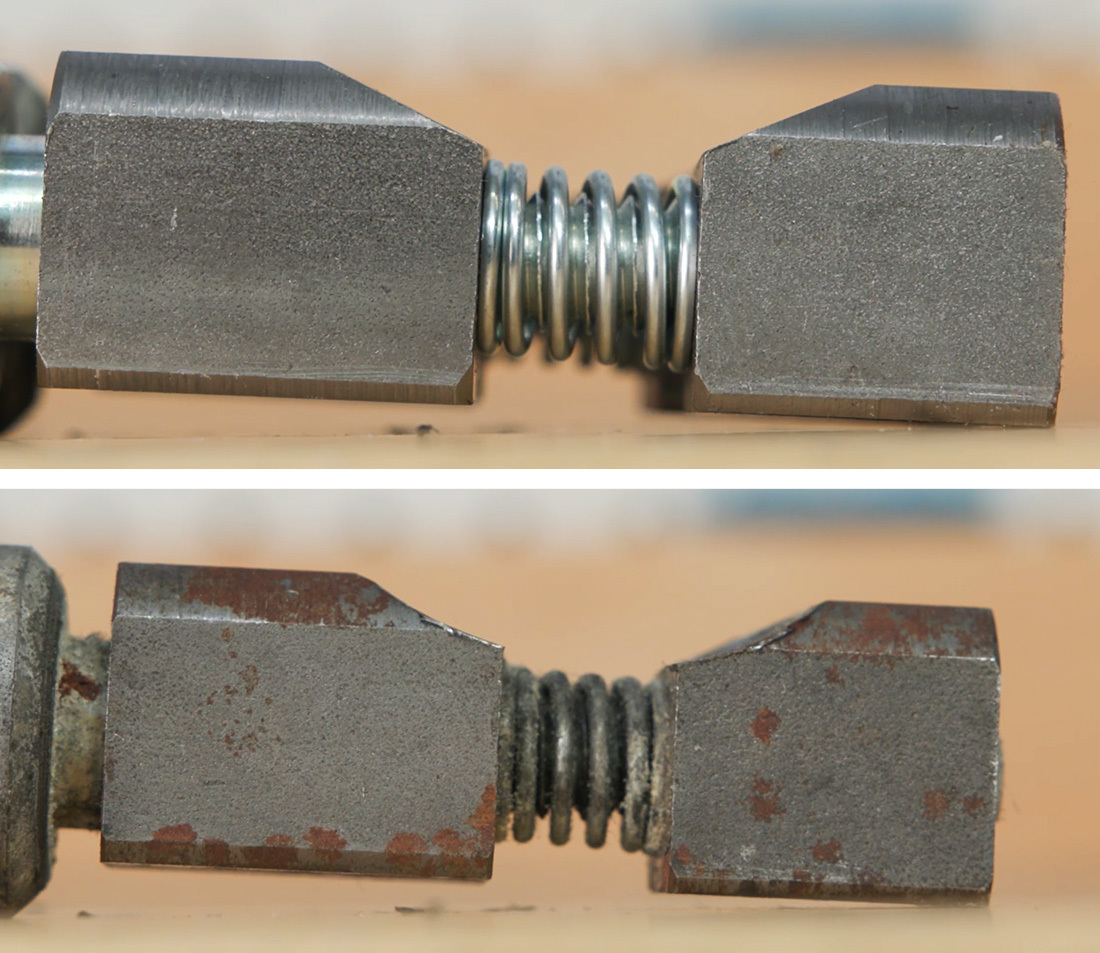
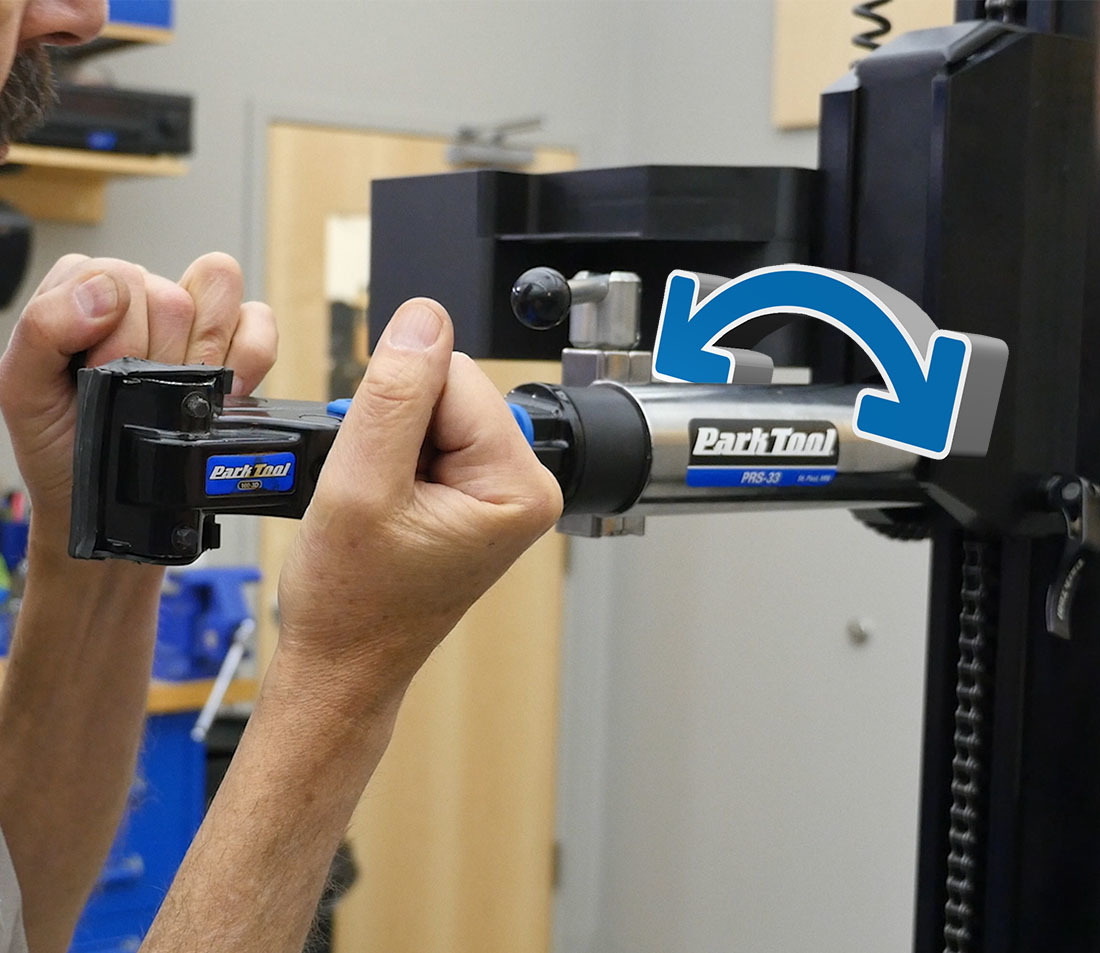
Pull the clamp out of the top tube. This will give you a view of the contact surfaces of the lock block. The lock blocks of the clamp are considered a wear item. When new, the contact surfaces of the lock blocks are cut straight. As they wear, a curve develops. If too much wear develops, the blocks will bottom out on the spring and prevent the clamp from fully engaging. If this happens you will need new lock blocks.
If the wear is acceptable, grease the threads of the lock block, but do not apply grease to the contact surfaces.
While the clamp is removed, wipe out the inside of the top tube. Re-install the lock blocks and clamp.
Top Tube Service
The top tube of the repair stand may become loose over time due to vibrations introduced by the motor. This is typically due to the clamp bolt not being tightened properly during inital setup. Be aware that checking and adjusting this can take some time.
The entire process is outlined in-depth in the video below:
Begin by driving the carriage nearly to the top of the stand.
Tip the stand on its side and onto a sturdy item like a shop stool. It is recommended to have someone help you with this step.
Loosen the cross bar mounting screws and remove the crossbar.
Loosen and remove the bolts holding the upper chain retainer to the upright. Remove the upper chain retention bolt and unthread the chain from the carriage.
You can now slide the carriage off of the upright.
Inspect the carriage and top tube for any wear that may have been caused by being loose. If excessive wear is found one or both may need to be replaced.
With the carriage off, apply threadlocker to the bolt. Re-install and torque to 60 Nm.
Reverse the process for reinstallation.
Internal Service
It is possible for vibrations from the motor of the stand to cause certain screws and bolts to work loose over time. For this reason, it is a good idea to periodically check these for tightness.
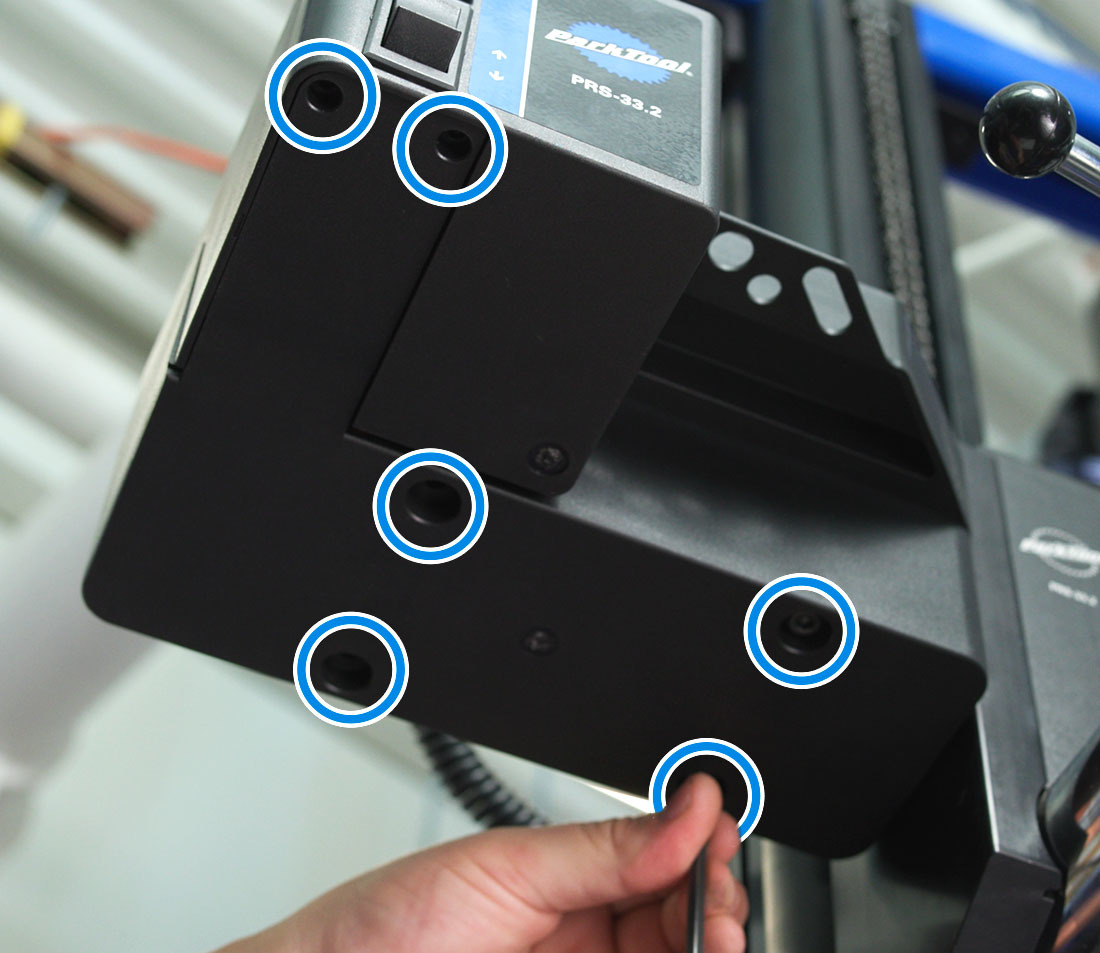
To access these screws, you will need to remove the motor shroud/work tray. To do this, first unplug the stand. Next, remove the two T15 screws and four M5 bolts and from the bottom of the tray. This will allow you to split the tray/shroud.
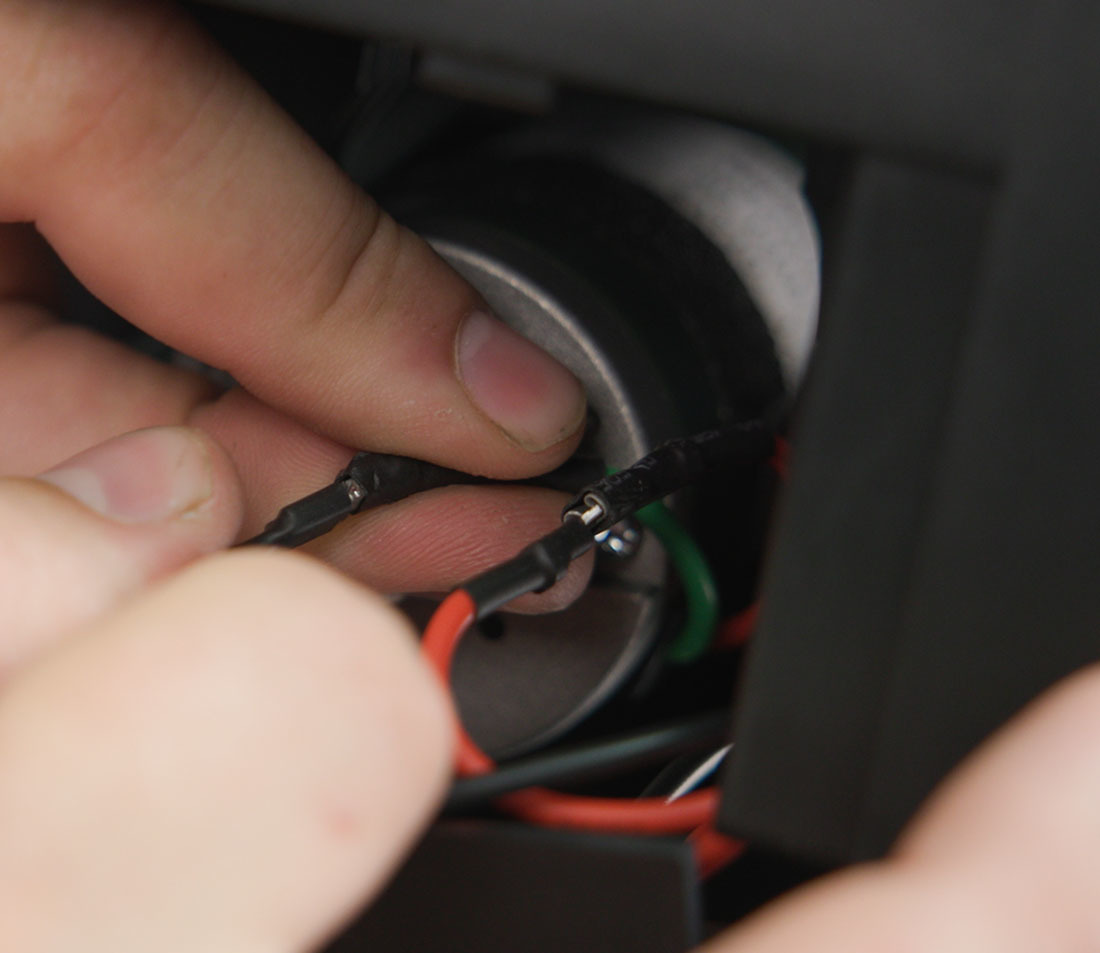
Next, unhook the wiring harness from the motor. With the wires unhooked, you can slide the tray/shroud off of the motor.
Perform a quick visual inspection of the motor and internal components. There should be a set of four bolts holding the motor to the motor mount, and another set of four bolts holding the mount to the carriage as seen here. All eight of these bolts should be tightened to five Newton meters.
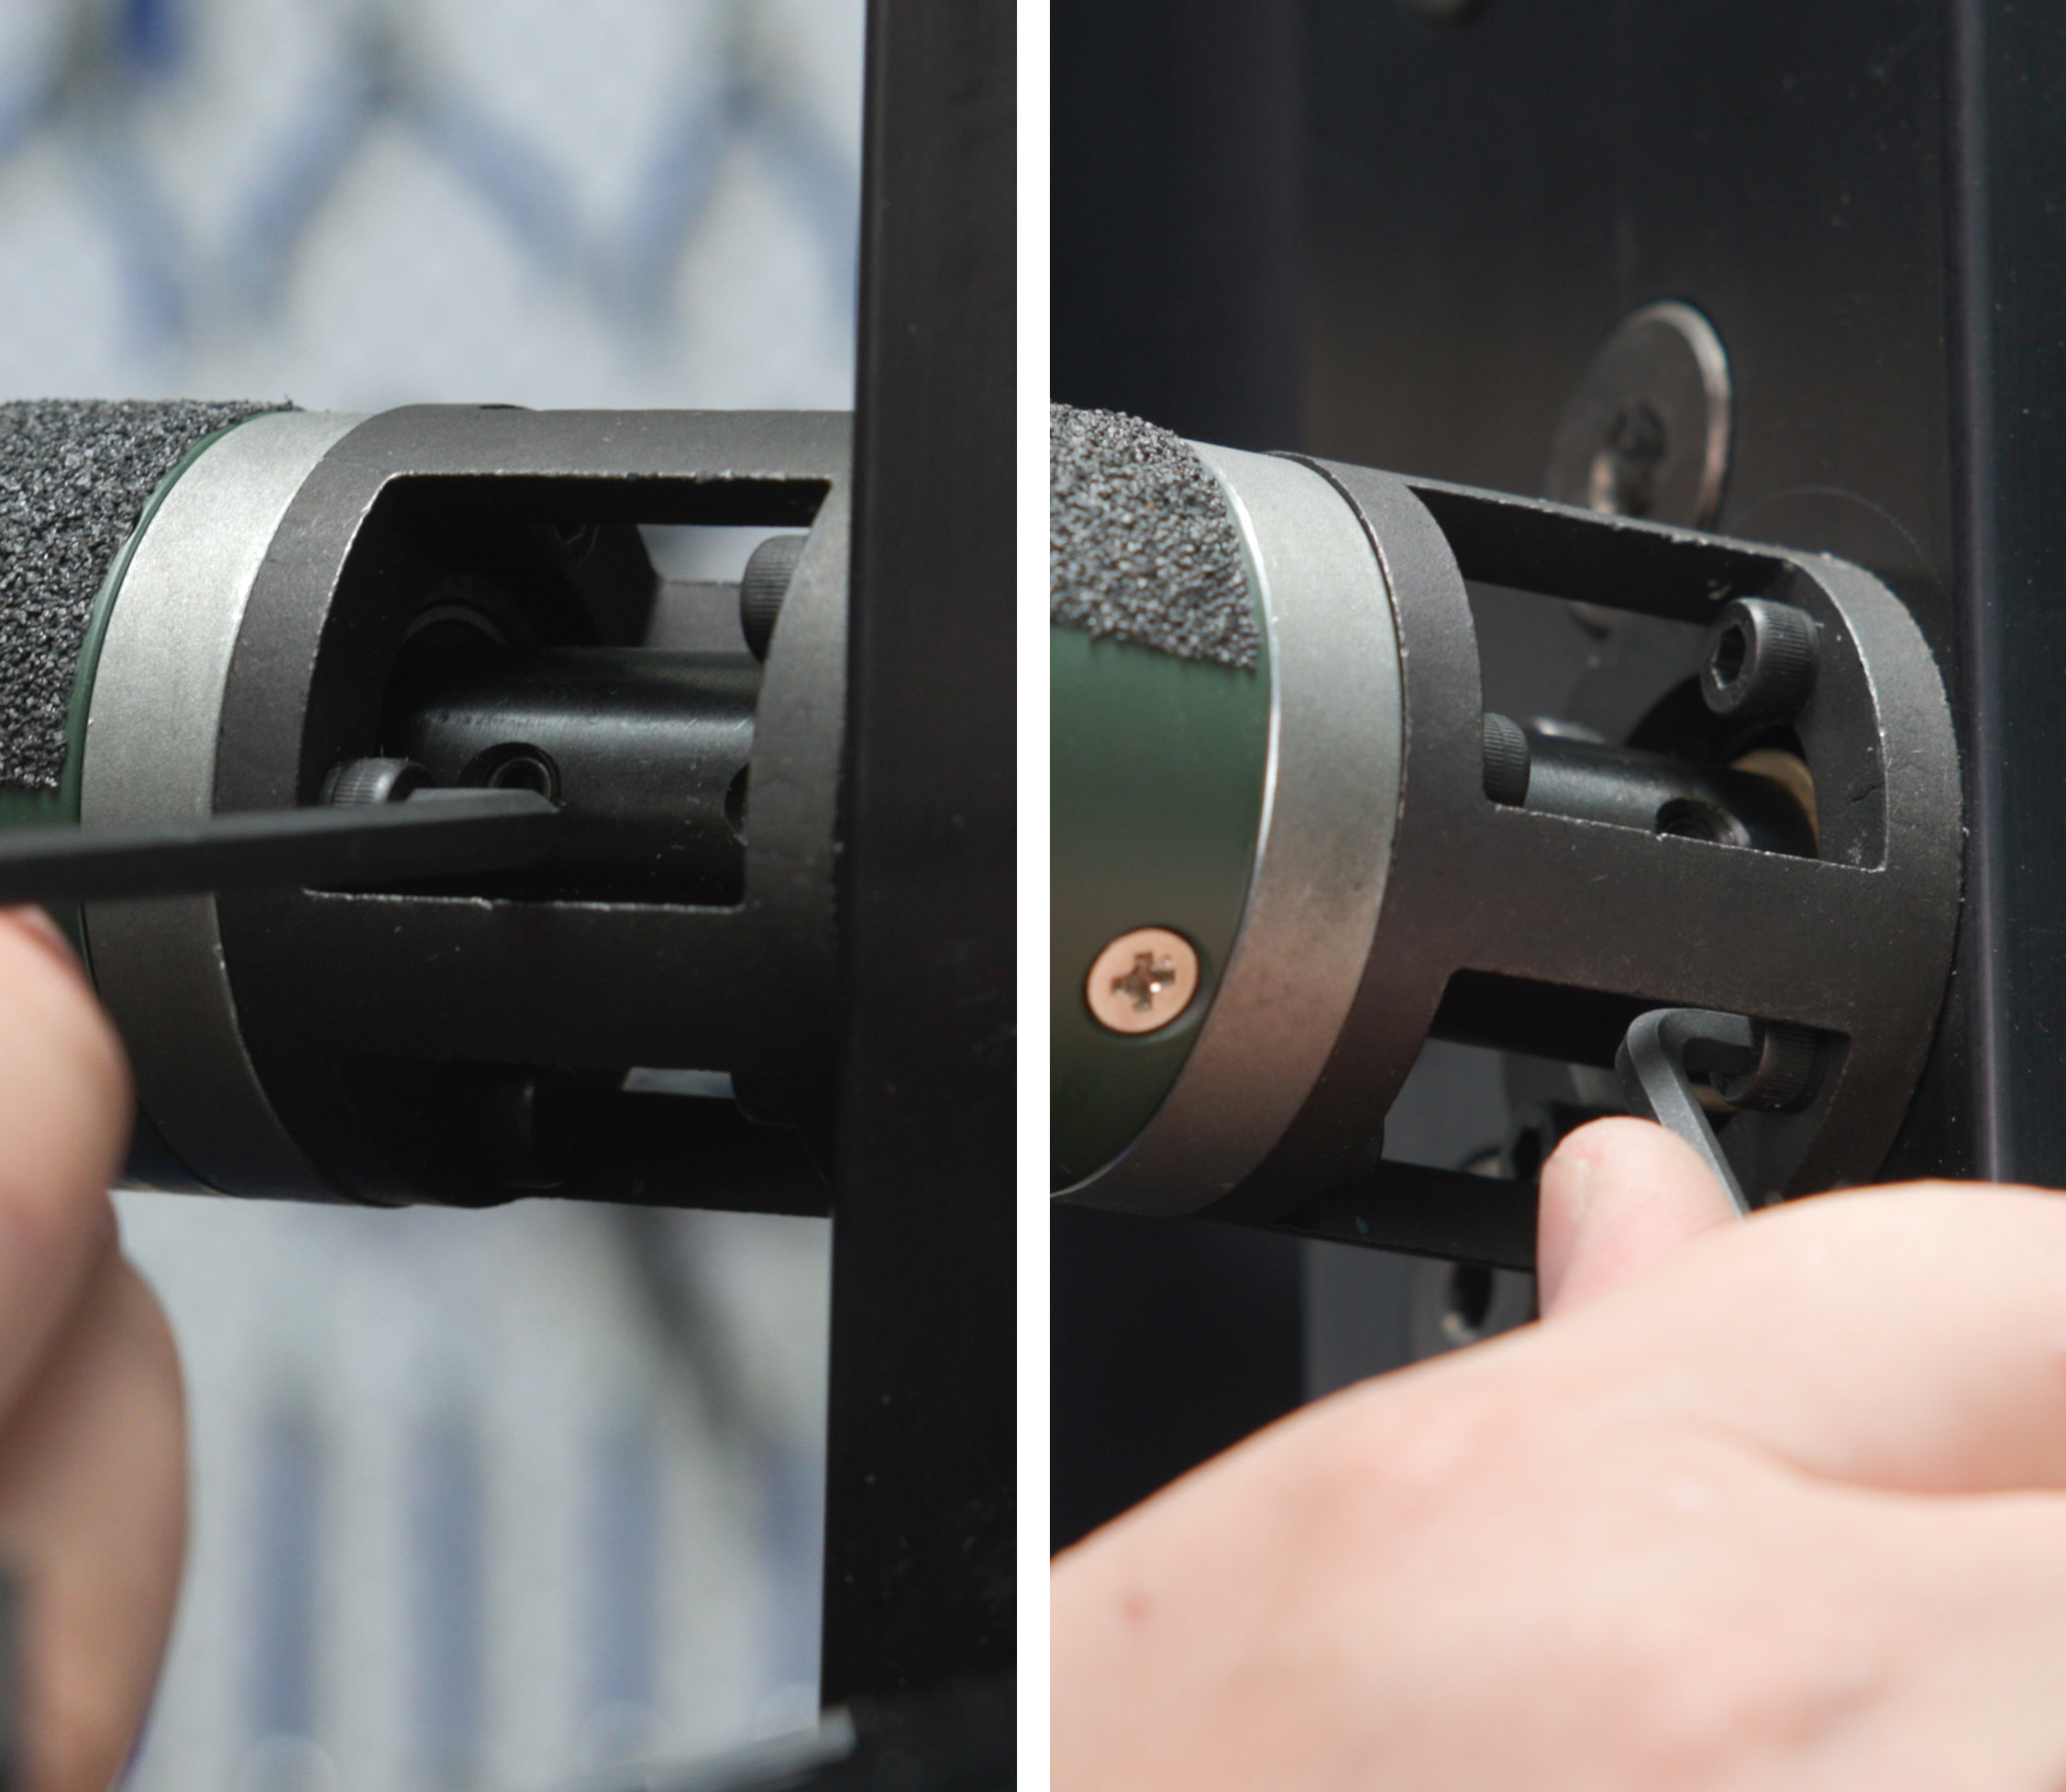
Next, check the set screws in the coupler that couples the motor to the drive shaft of the carriage. These set screws are in charge of transmitting power and can come loose over time. Remove the set screws one at a time, apply medium-strength threadlocker to the threads, and reinstall. Be sure that the set screws are tightened against the flat part of the shaft. Tighten to five Newton meters.

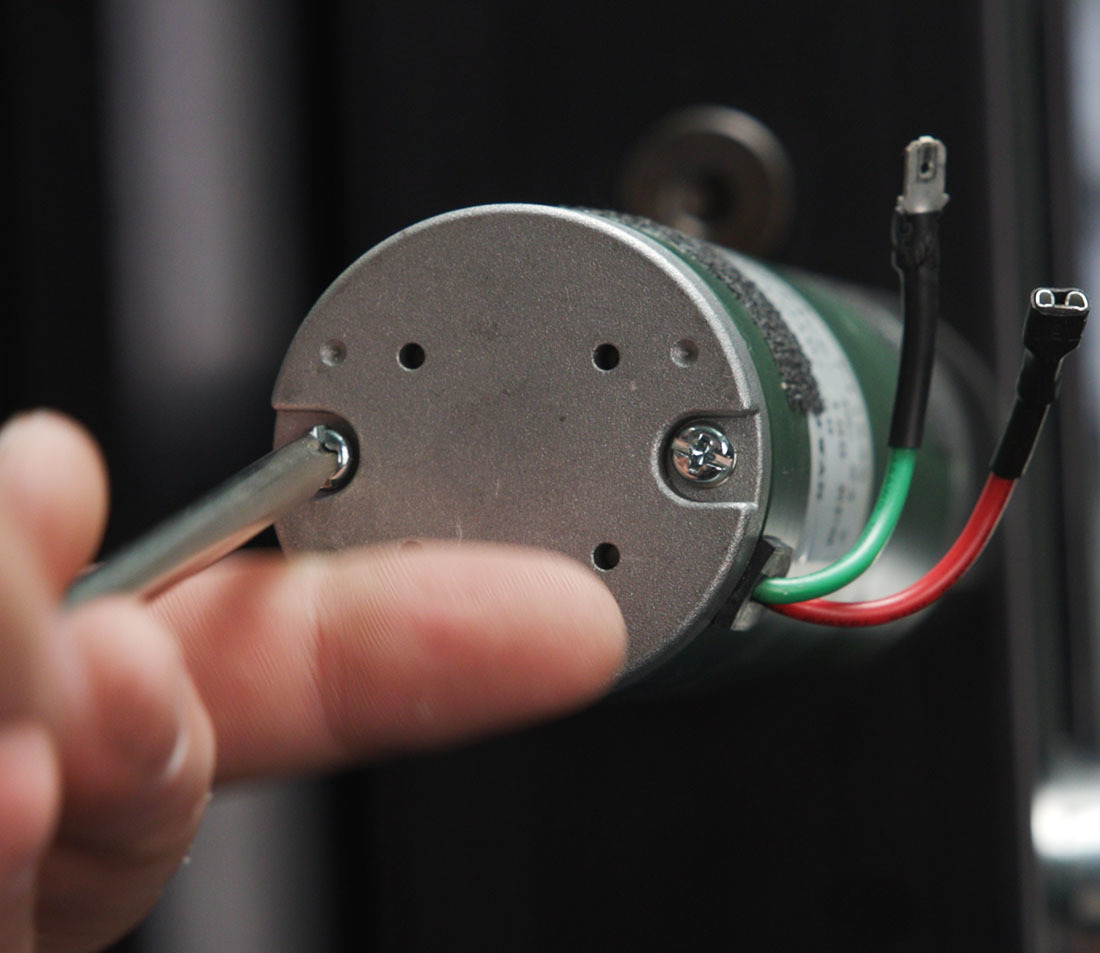
Next, take a look at the back side of the motor. There are two screws with Phillips heads. Do not remove these, but do verify that they are tight.
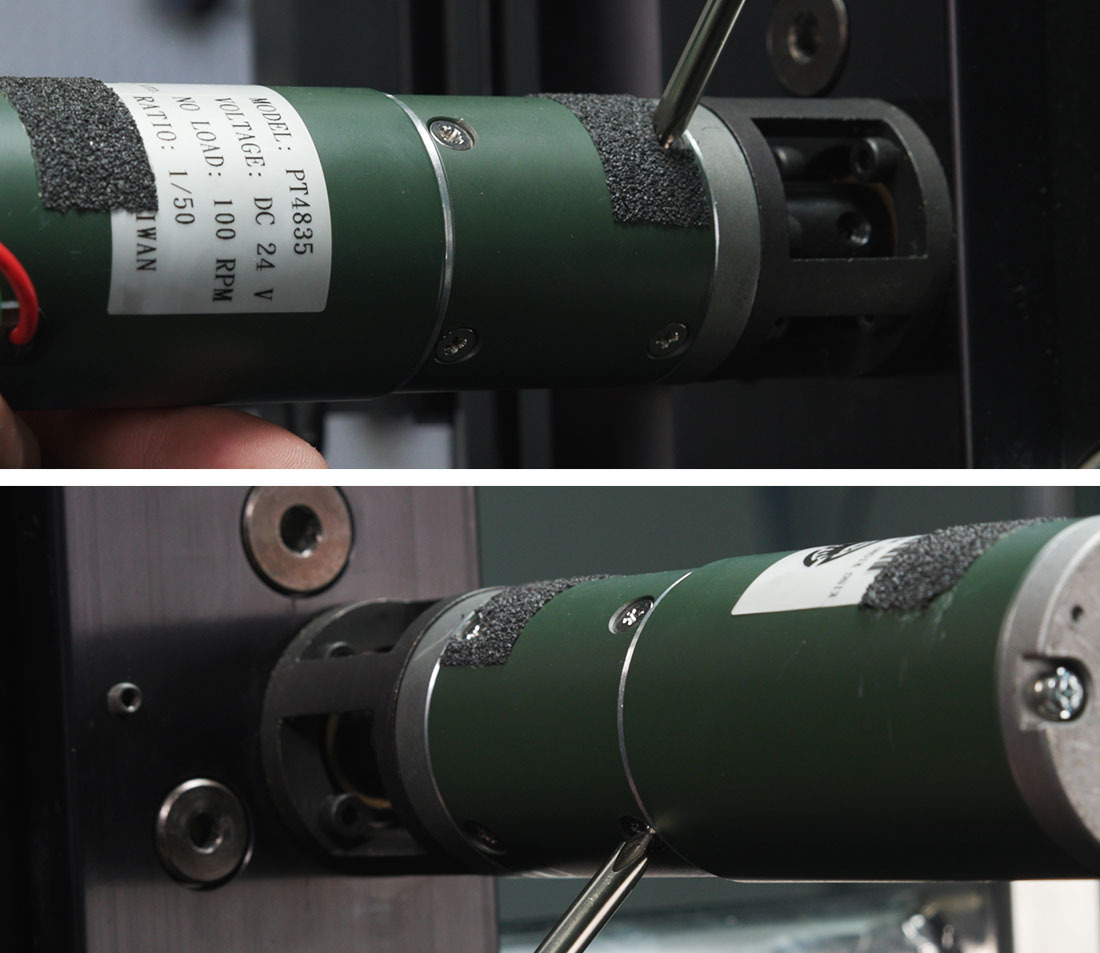
Check all eight of the other Phillips head screws that are on the motor body. Again, do not remove these, but do verify that they are tight.
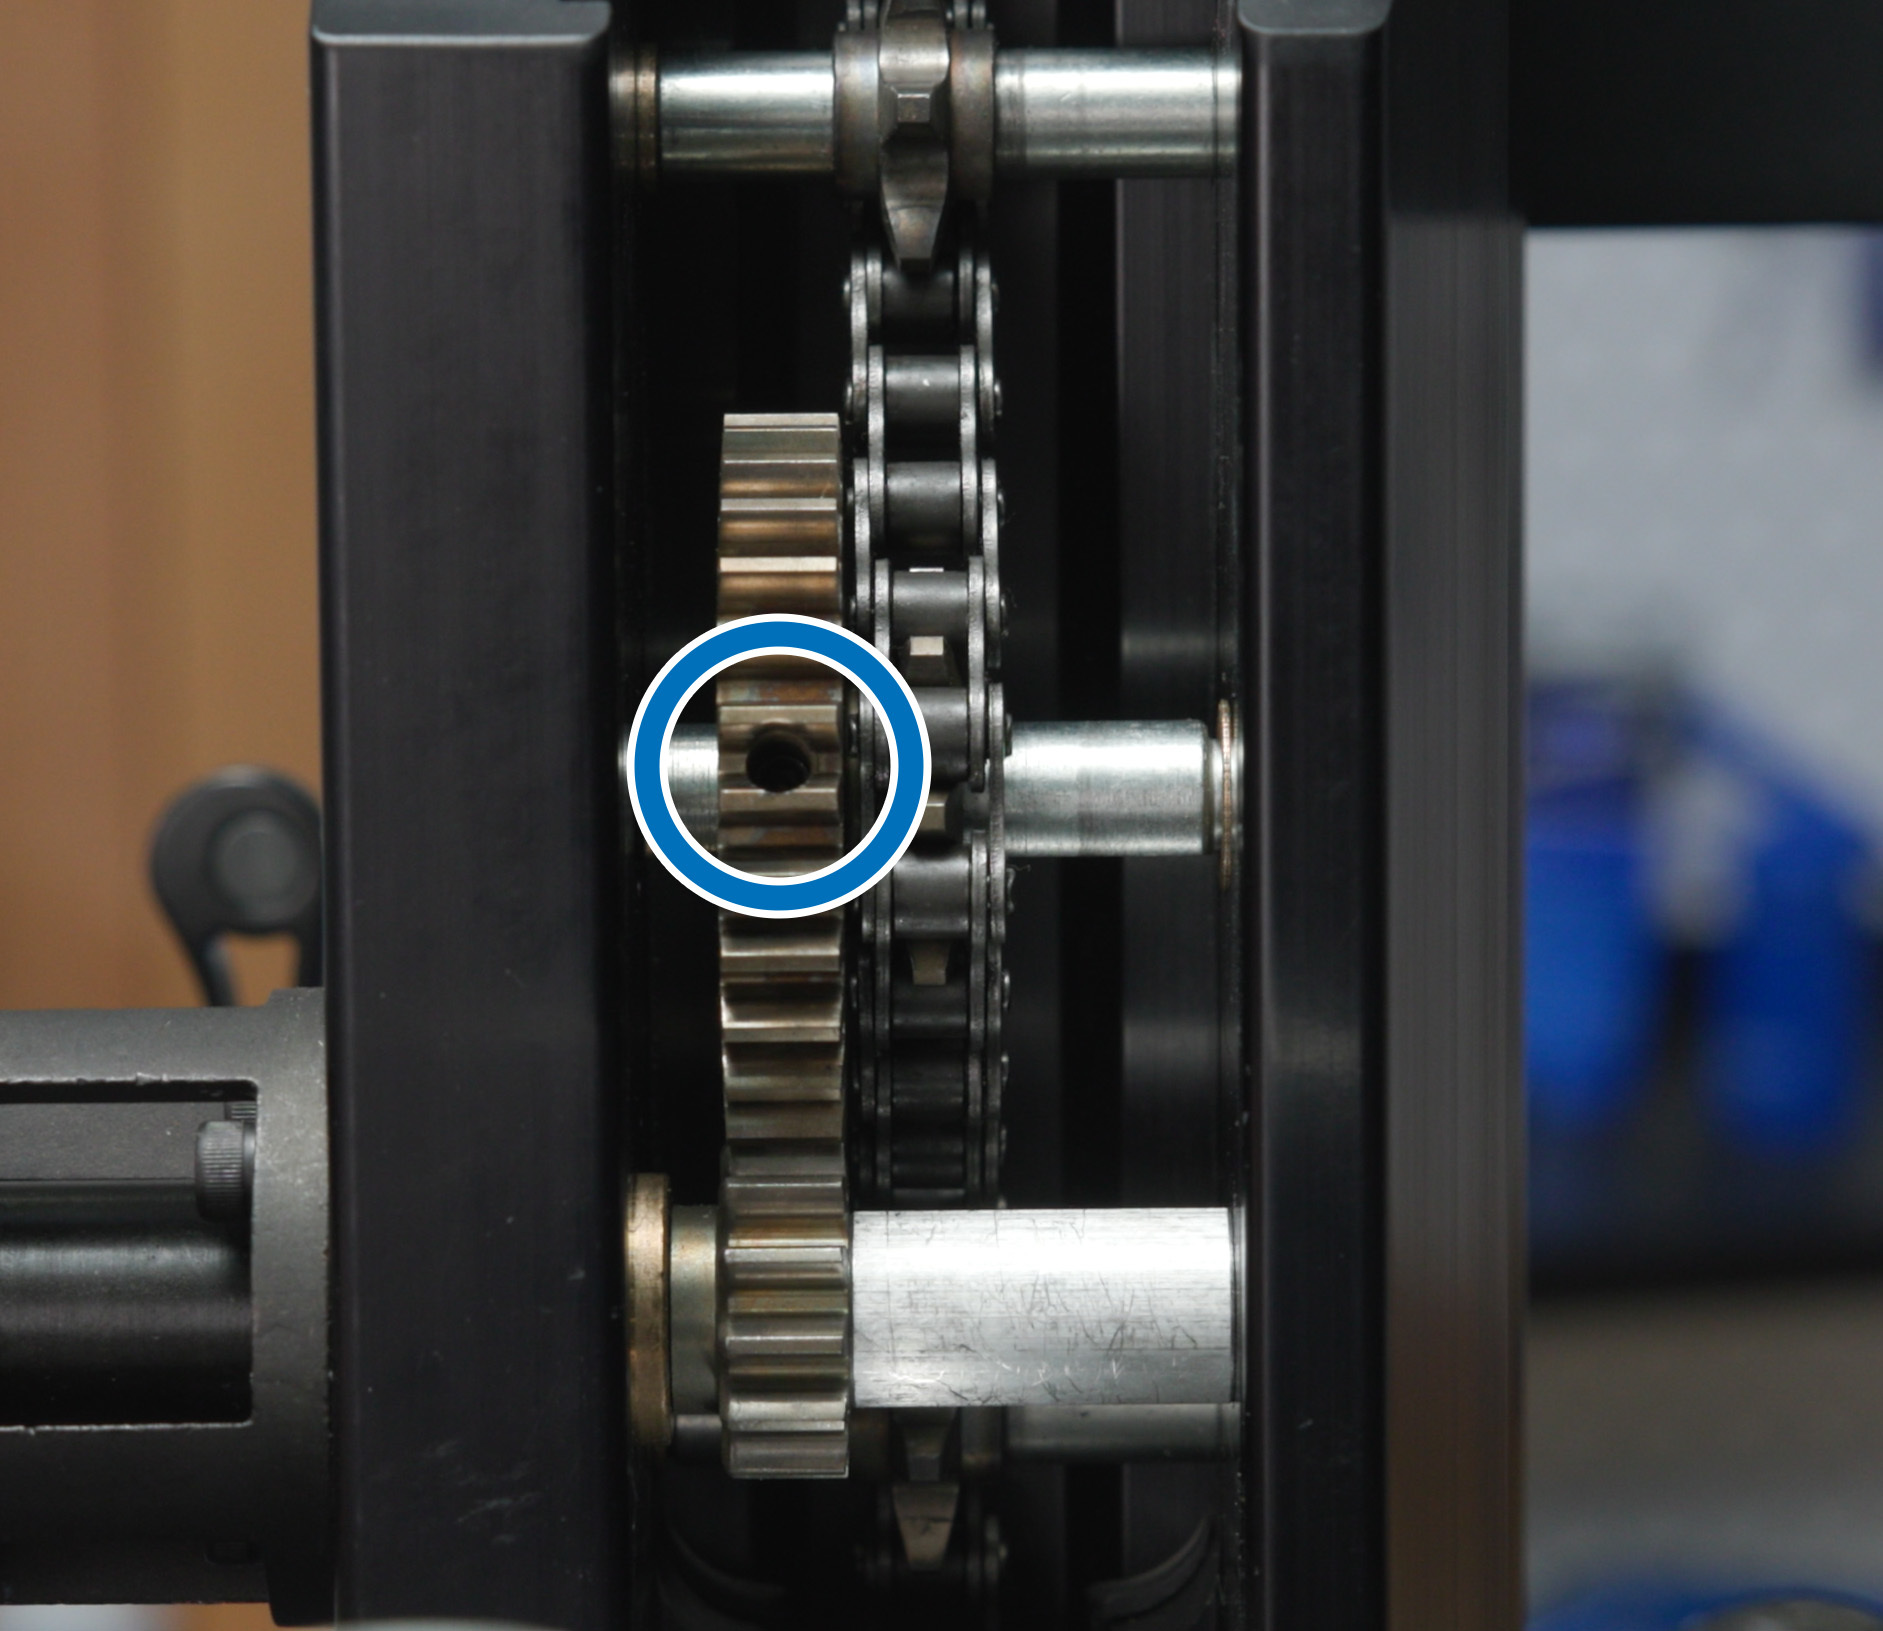
The drive shaft in the carriage goes to a small gear that does not have a set screw. But the larger gear that is driven has two set screws. You may need to adjust the position of the motor unit to locate these set screws. Before tightening, be sure that the driven gear is perfectly in line with the drive gear. Then tighten the set screws.
Reconnect the wiring harness to the motor and reinstall the shroud.
Chain Maintenance
The chain inside the carriage of the stand should not wear with time, however it can become too loose or too tight. Symptoms of this may include chain slap, or the skipping of cogs.
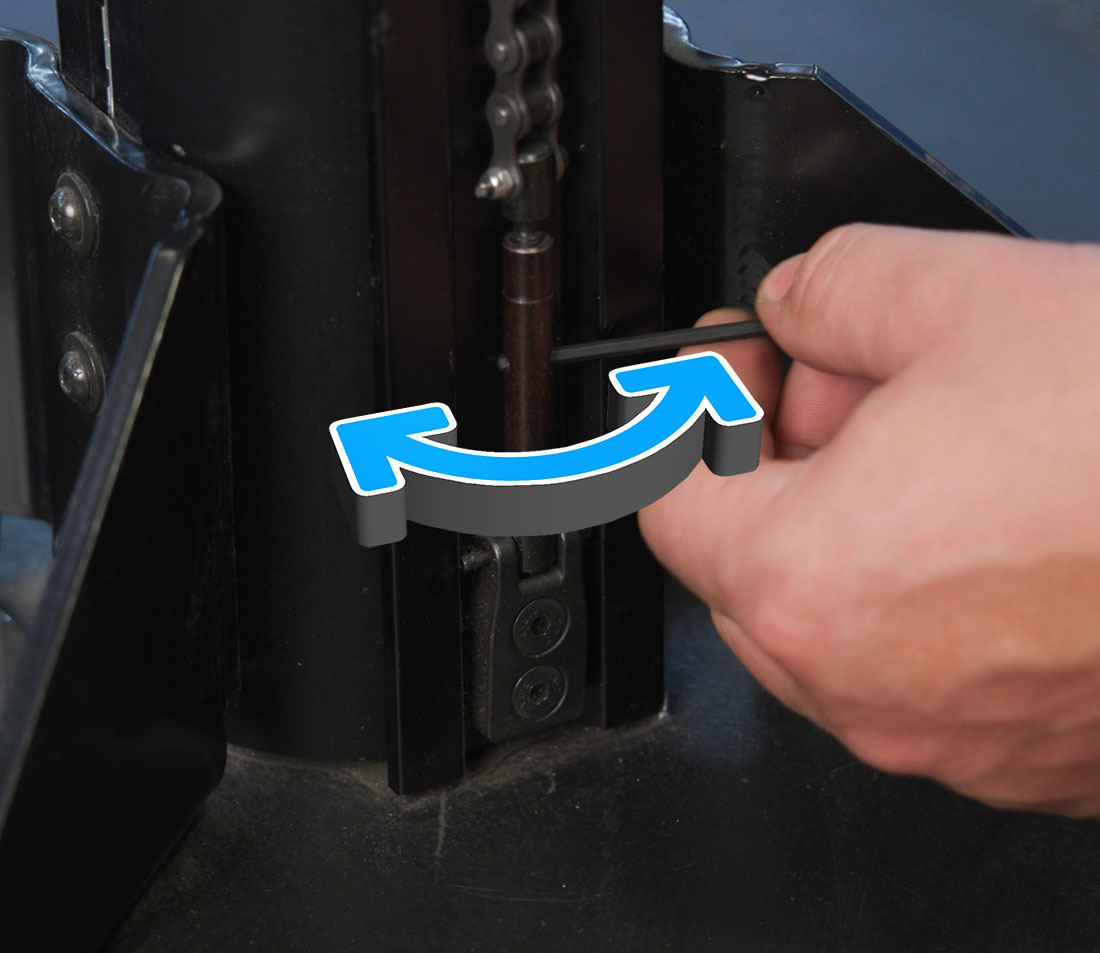
To address this, locate the turnbuckle at the base of the stand. Use a small hex wrench to tighten or loosen the turnbuckle as needed. The tension on the chain should be set so you can pull it about 1″ away from the upright when the carriage is around 5 feet off the ground.
Tighten each of the bolts that hold the chain anchors on the top and bottom to 5 Newton meters.
Structure Maintenance
The main upright, base and cross bar make up the main structure of the stand. It’s important that this is as sturdy, level, and aligned as possible, and it is good practice to check all the fasteners that hold this structure together.
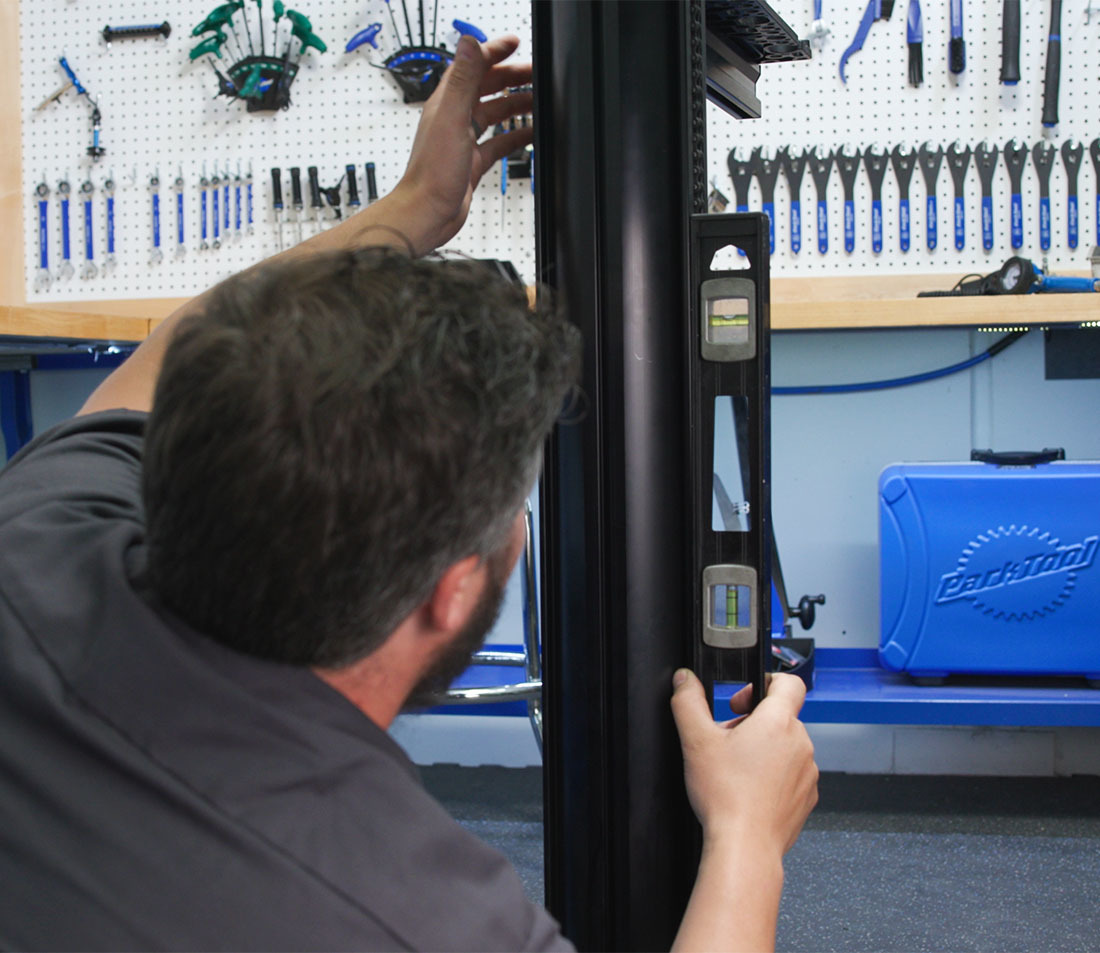
Start at the base. To do this properly, use a spirit level. Your phone’s level will get you in the ballpark but will not give you the accuracy that you desire.
Verify that your upright is currently level. If it is level in both directions, simply check the tightness of the four bolts at the base and then check the six bolts holding the upright.
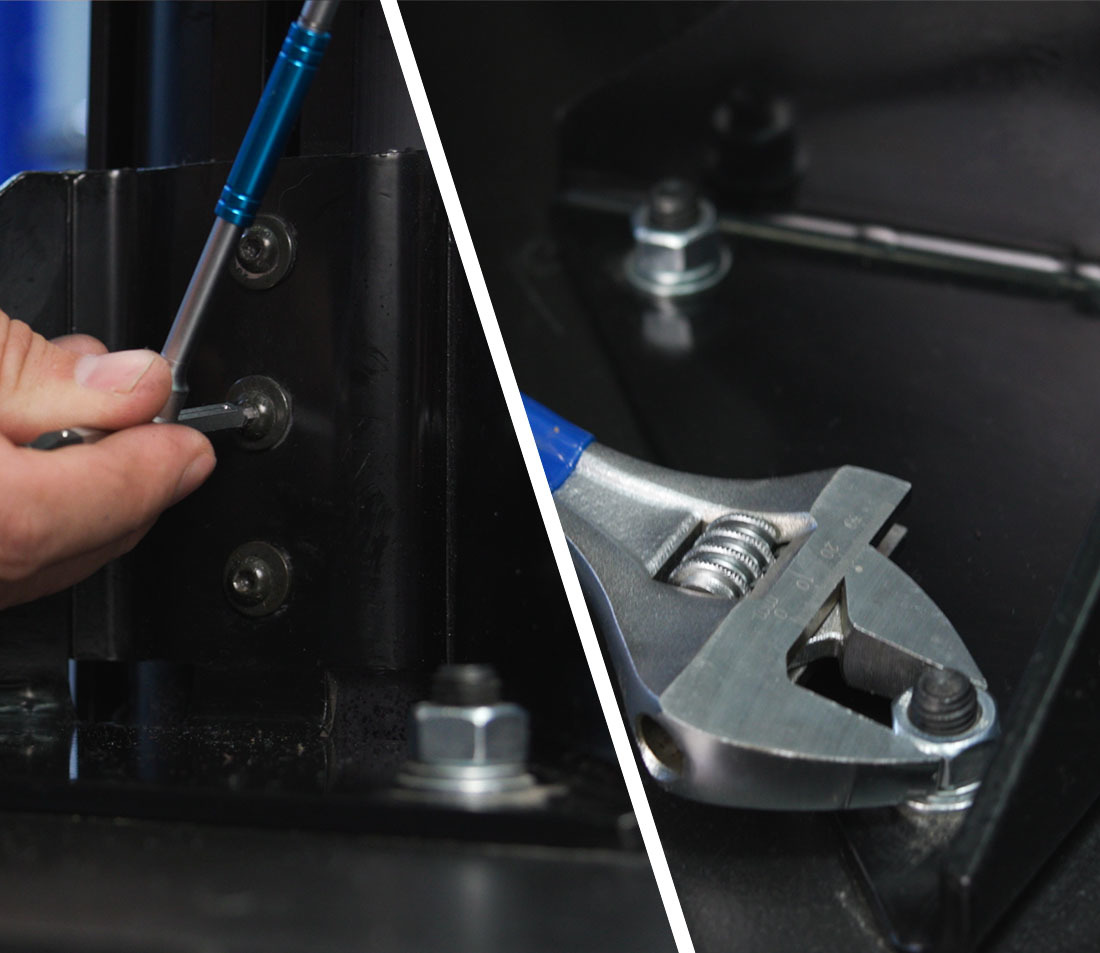
If you need to adjust, start by loosening the six bolts for the upright to the point where they are just barely loose.
Then loosen the four bolts holding the base to the upright — Just enough so that the head can move if needed.
Level the stand out.
Once level, snug the six bolts holding the upright, then fully tighten the four nuts holding the base on. Then go back and fully tighten all ten fasteners. Tighten the upright bolts to 10 Newton meters and the nuts to 90 Newton meters. The reason for this process is to allow the bottom of the upright to rest against the base and let the brackets have full contact with both the upright and the base.
Tighten the bolts on the tool tray, the T-bracket for the crossbar to 10 Newton meters, and finally, make sure the hooks are snug.
Carriage Bearing Maintenance
The carriage of the PRS-33/33.2 drives up and down on the chain. The bearings/ bushings that the carriage slides on can wear over time.
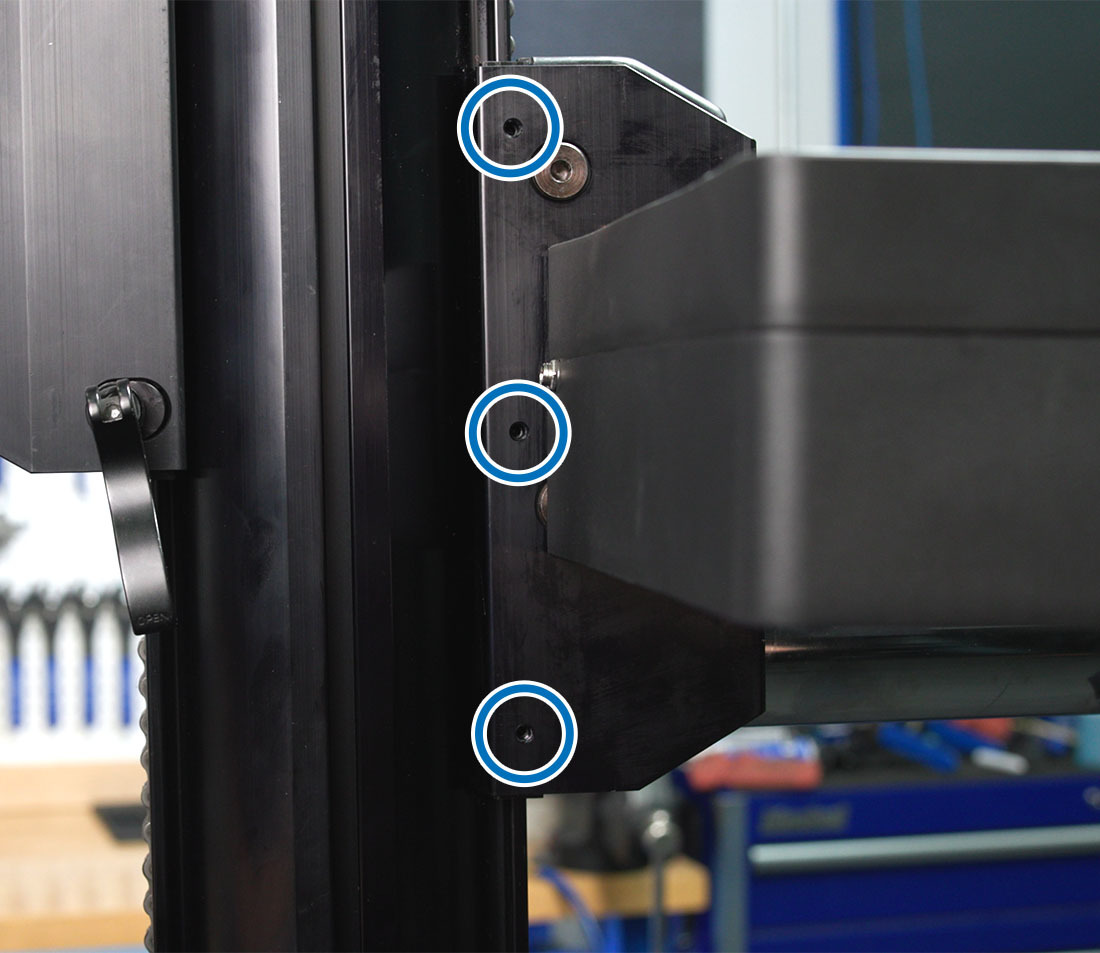
There are 3 adjustment screws on the left hand side of the carriage. If you are getting shuddering or the carriage is loose, these can be snugged to take up that play. Simply tighten then until they have a minimal amount of pressure on them.
Too much pressure will act as a brake and will put unneeded stress on the drivetrain of the stand. Loosen as necessary.
There is also a quick-release “brake” on the right hand side of the stand. This brake should be loose while in use and closed once the stand is stopped and you want as firm a hold as possible.
Related articles
PRS-33 & PRS-33.2 Troubleshooting View Article