Handlebar Removal & Installation: Drop Bars
This article will walk through the process of how to remove and install drop handlebars, also commonly known as road bars.
Getting Started
- Ruler and angle gauge or other method of measuring lever position
- Scissors or knife
- Appropriately sized hex or Torx®-compatible wrenches
- Torque wrench or torque driver with appropriate bits
- Grease or threadlocker for stem bolts
- Assembly compound for carbon bars
- Rags
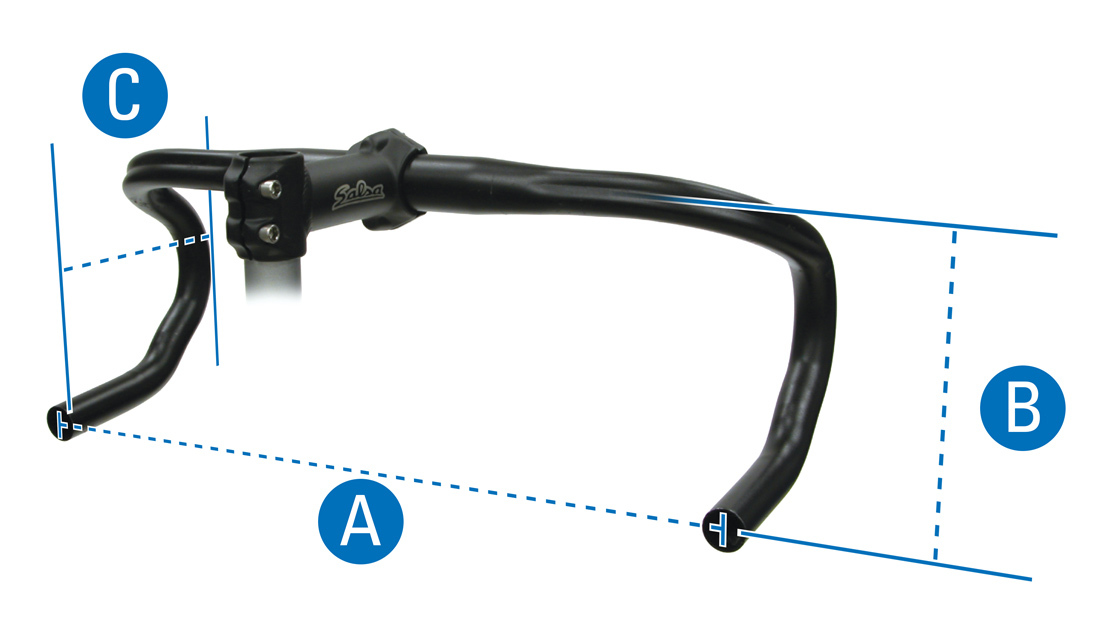
Handlebars may be replaced to get different dimensions such as such as WIDTH (A), DROP (B),and REACH (C).
Bars also come in different materials including carbon, aluminum, steel, and titanium. Each material has its own unique properties.
When selecting a new bar it is also important that the bar diameter and the stem clamp diameter are the same. The most commonly found sizes for road bars are 25.4, 26.0, 26.4, 31.8, and 35mm.
To determine bar diameter, measure right where the stem will clamp using a metric caliper. Be sure to be accurate as some clamp diameters are within fractions of a millimeter of each other and are not cross-compatible.
It is difficult to determine the clamp diameter of the stem by measuring it. The clamp diameter is typically engraved or labeled on the stem, but sometimes it is not. Contact the stem manufacturer for more information.

Measure the center of the bar
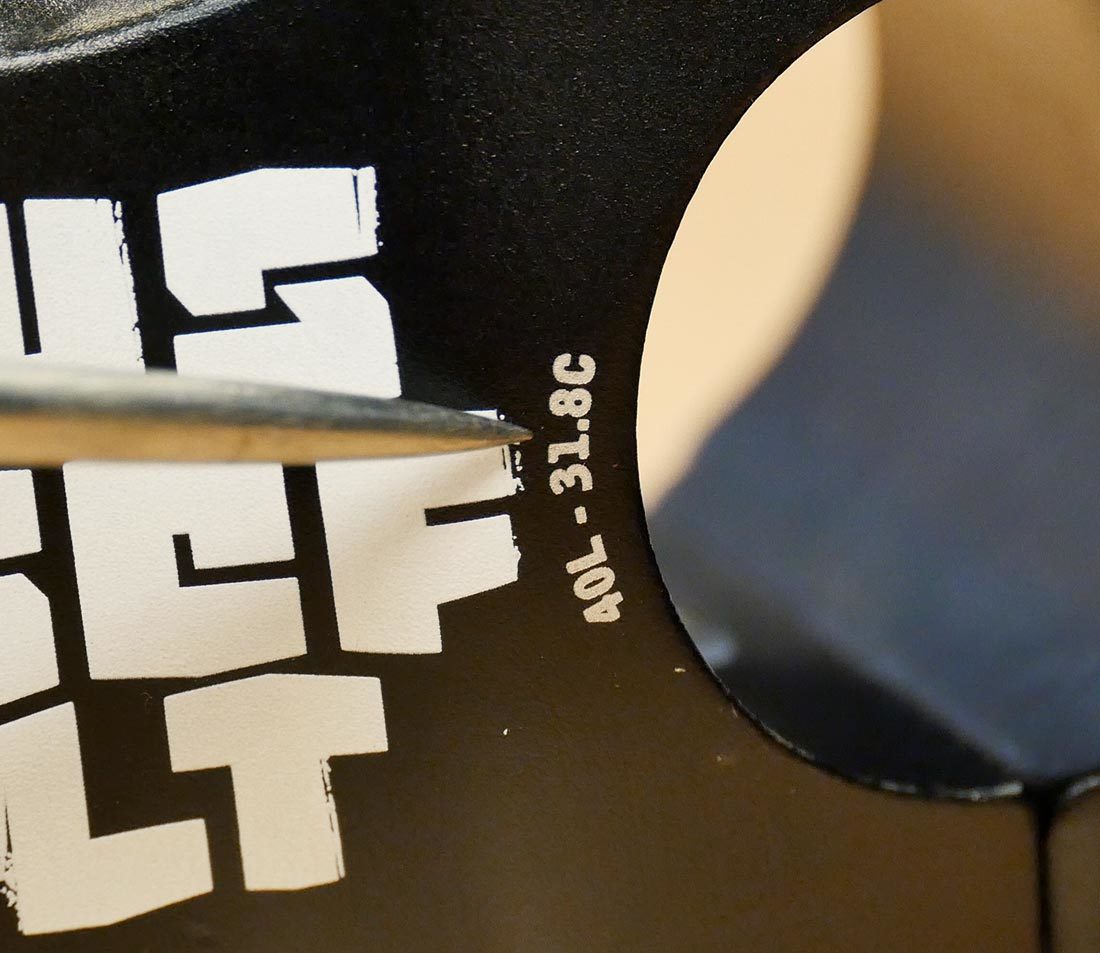
Stem size is often labeled on the stem
Handlebar Removal
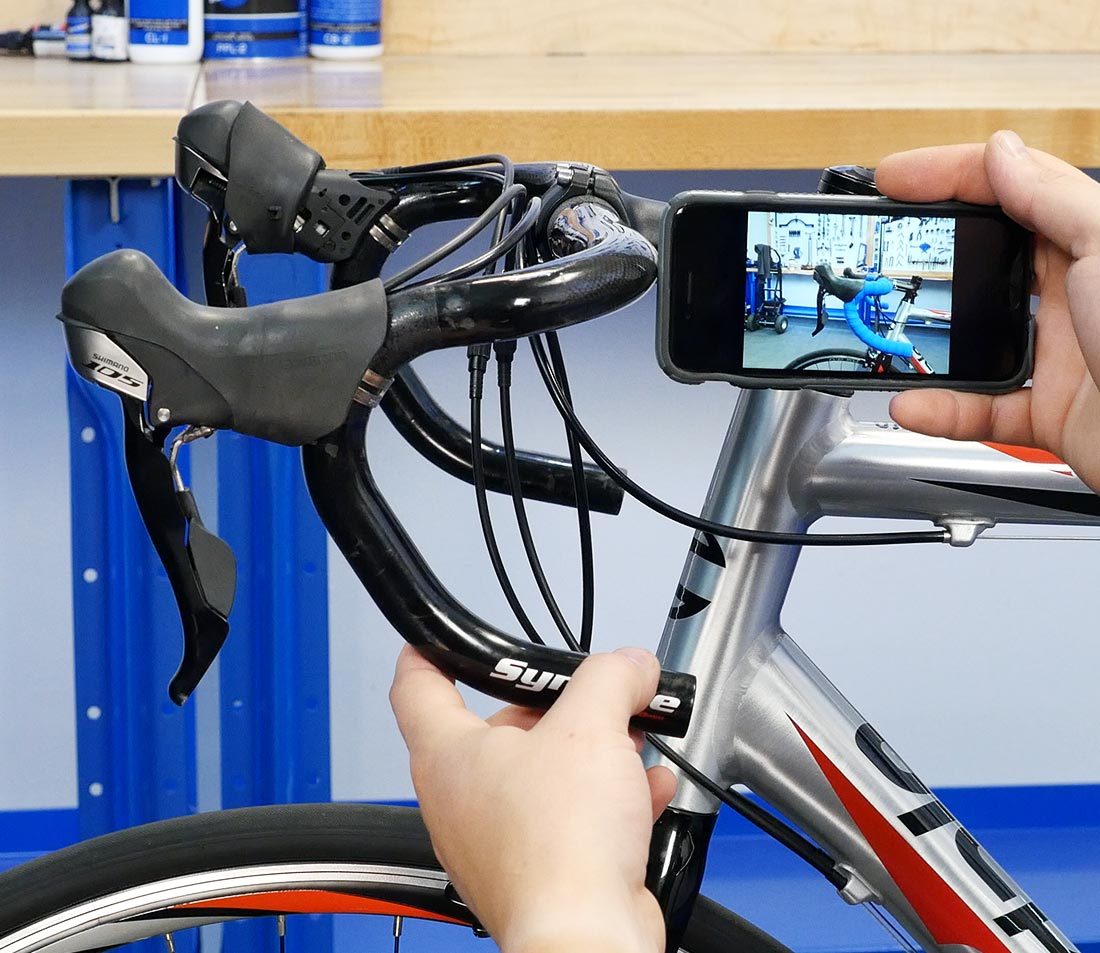
Begin by taking note of the position of your controls. It can help to take pictures for later reference.
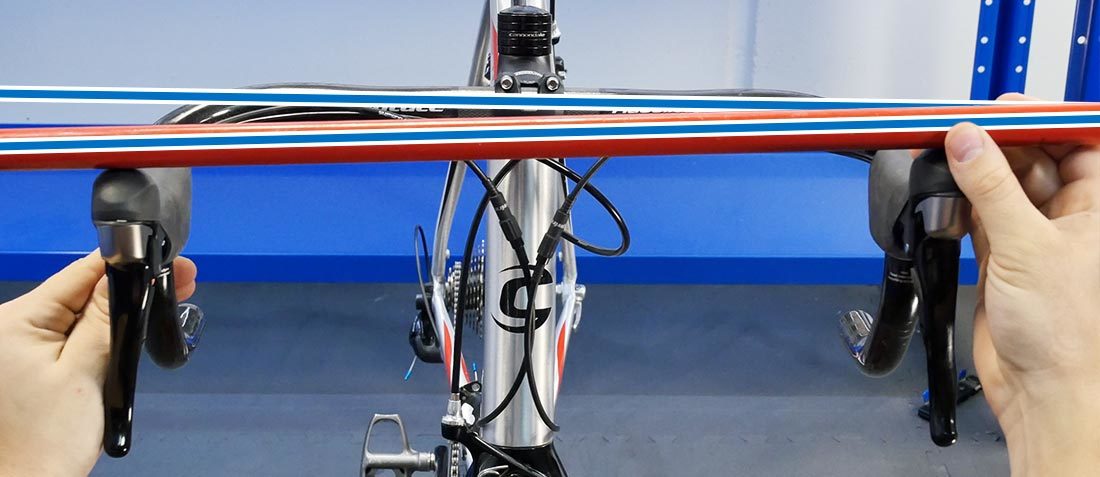
It can also be helpful to use a ruler and angle gauge or other suitable measuring device to note the position of the bars and levers.
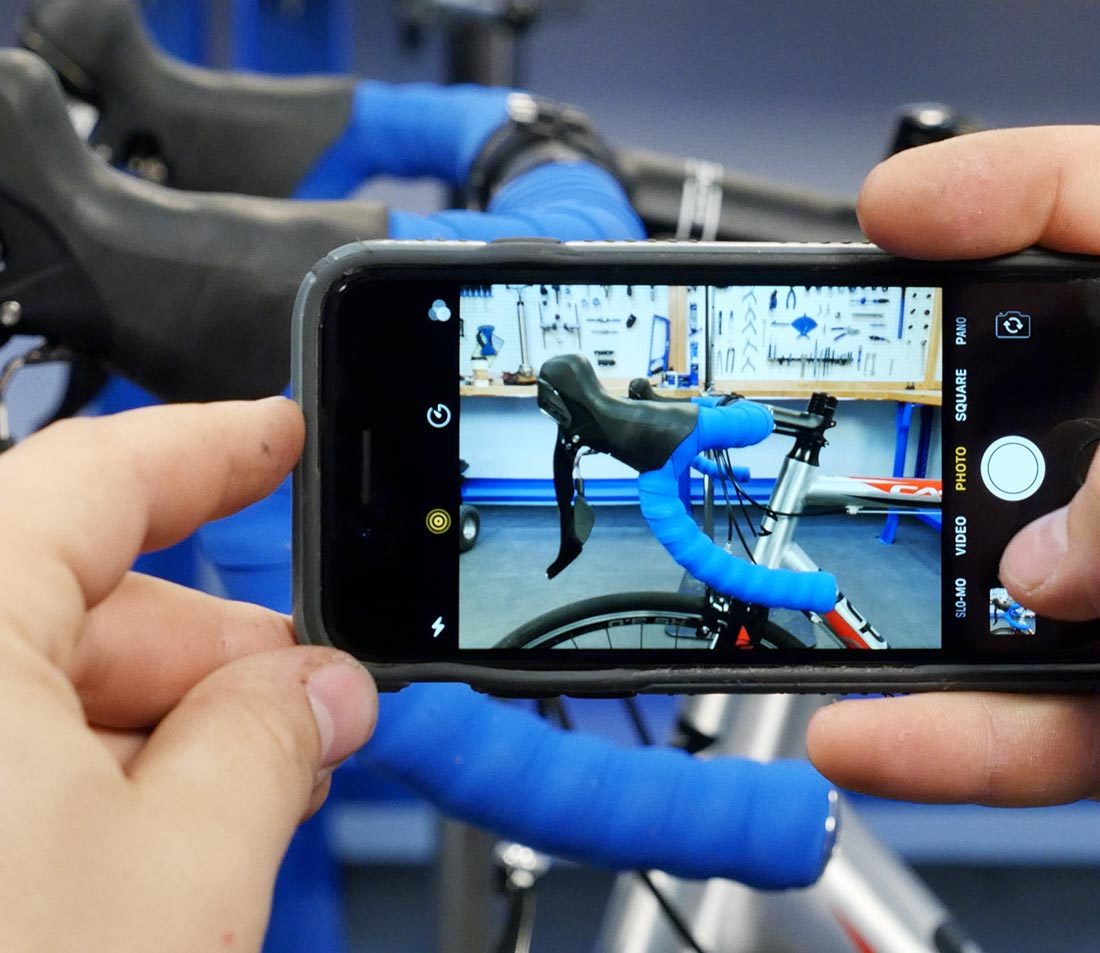
Take photos from multiple angles for later reference

Measure and note the angle and position of the bar and components
Pull the lever hoods forward, remove the bar end plugs, and unwrap the tape.
Pulling lever hoods forward will ease in unwrapping bar tape
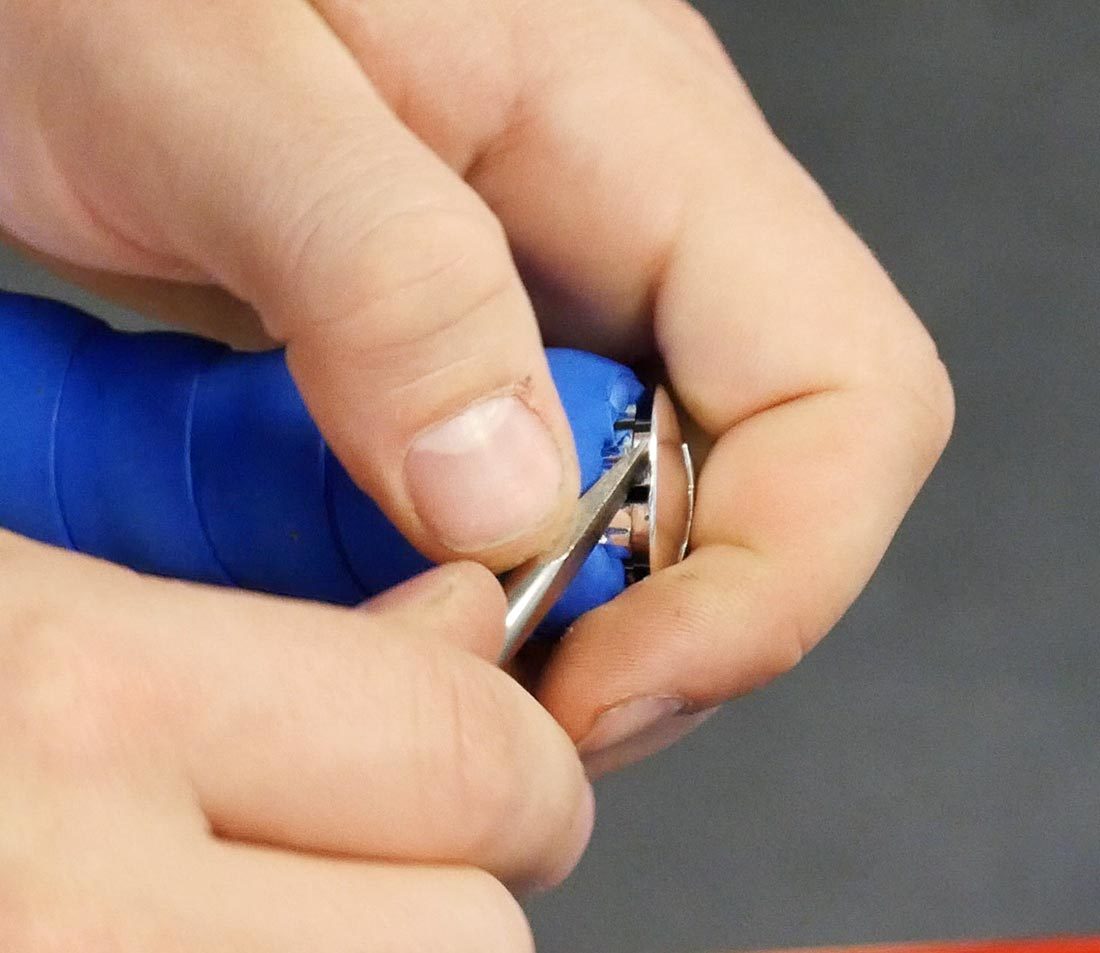
Use screwdriver or similar to pry out bar end plug
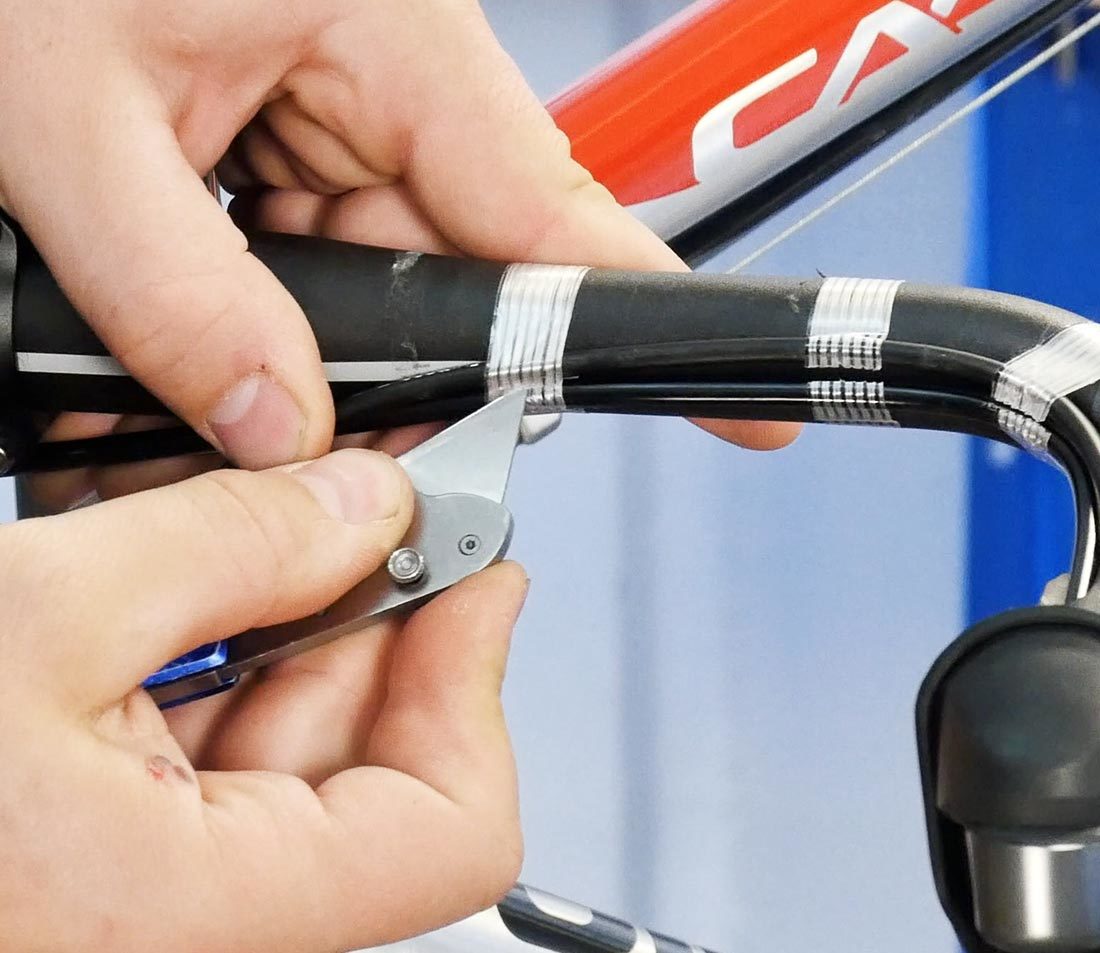
Cut and remove any other tape you may find holding the housing in place. If you have carbon bars, take care not to accidentally cut into them.
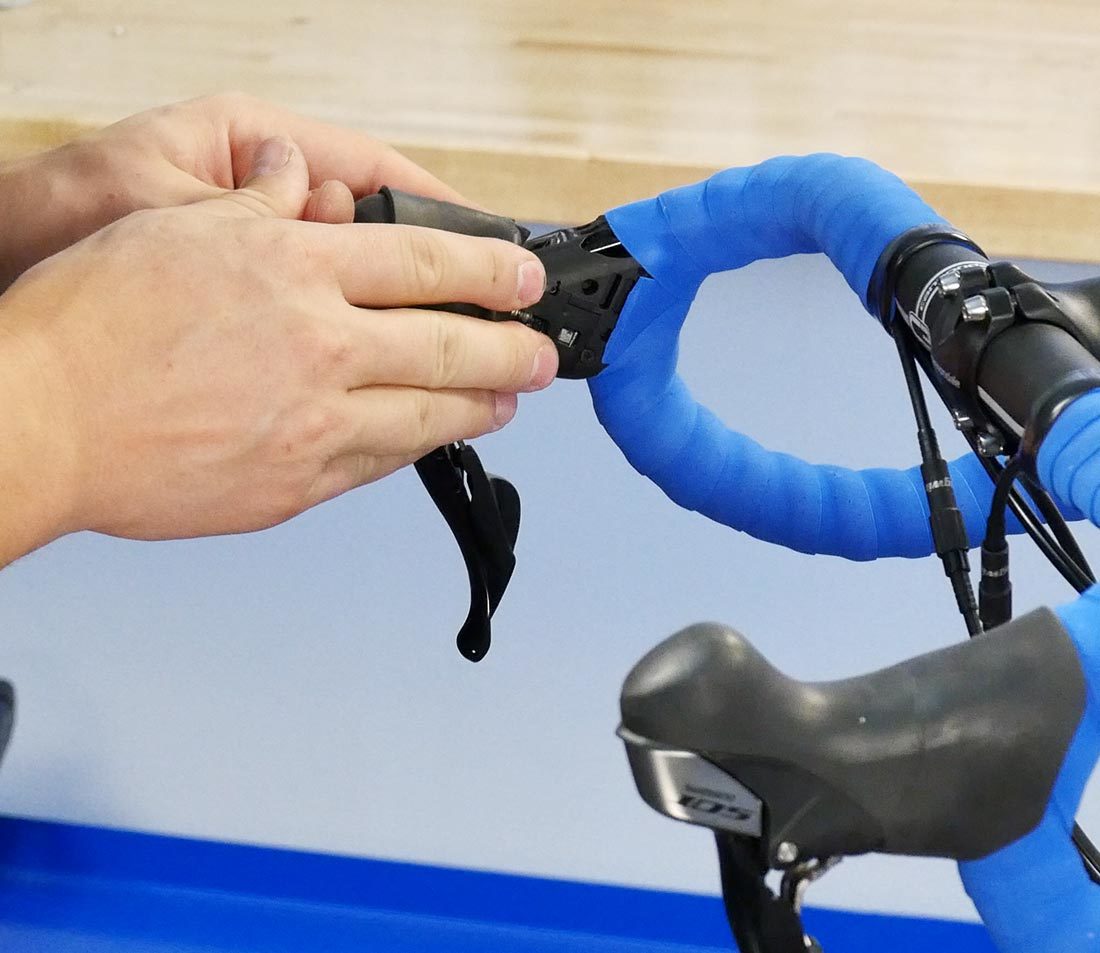
Locate the mounting bolt for the levers. On many models, it can be found directly under the hood. Here are some other common locations:

The lever mounting bolt is commonly found on top of the lever
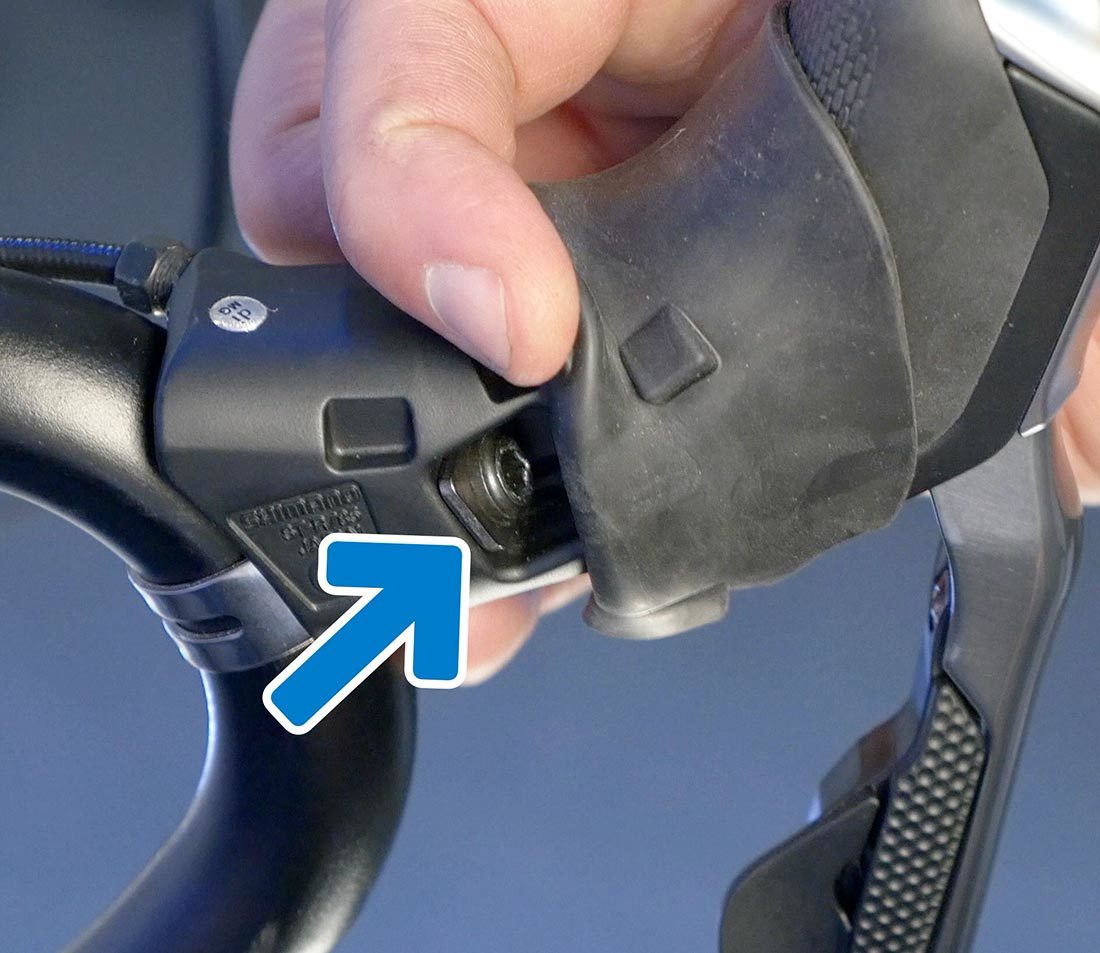
The outside of the lever body is another possibility
On some models the mounting bolt is accessed through the front of the lever body
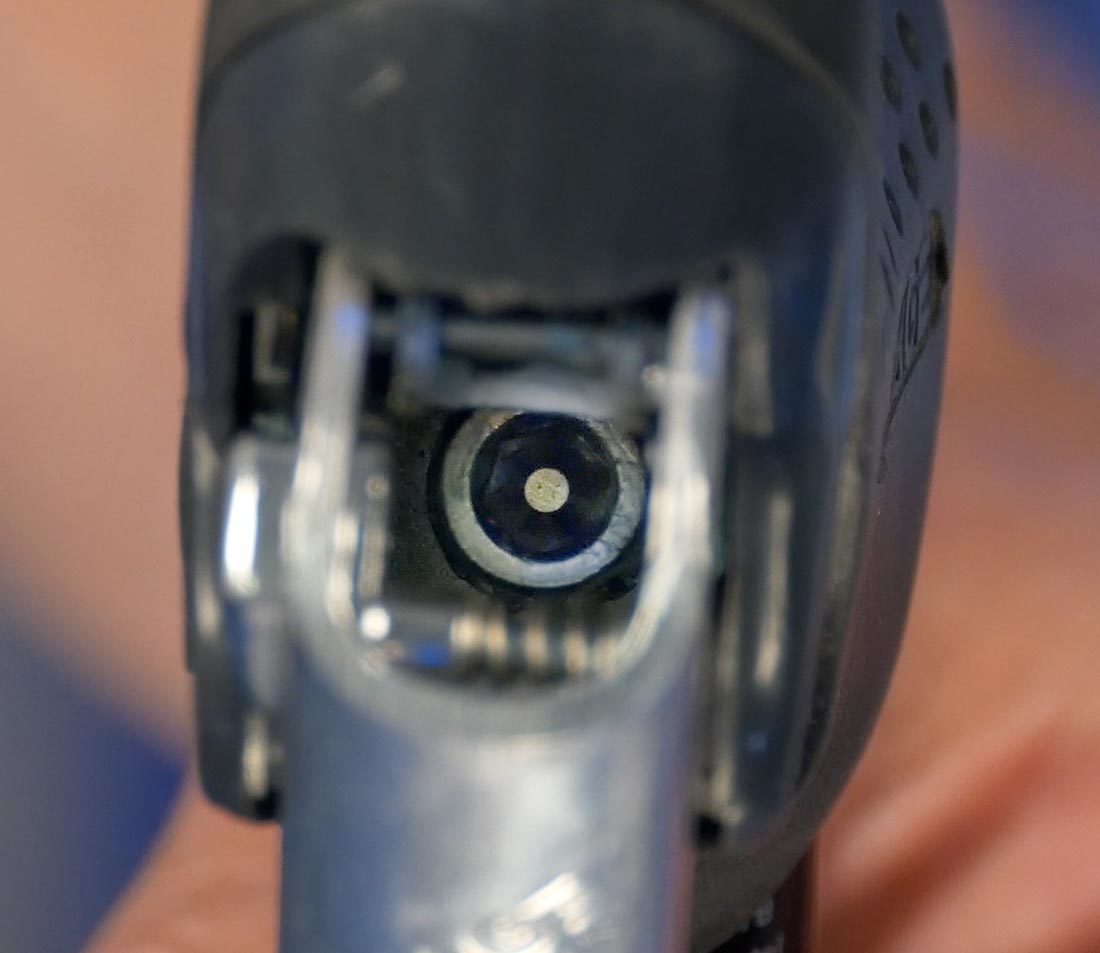
The bolt is sometimes found in the middle of the lever body. Squeeze the lever and reach in with a hex wrench.
Loosen the mounting bolt and remove the lever.
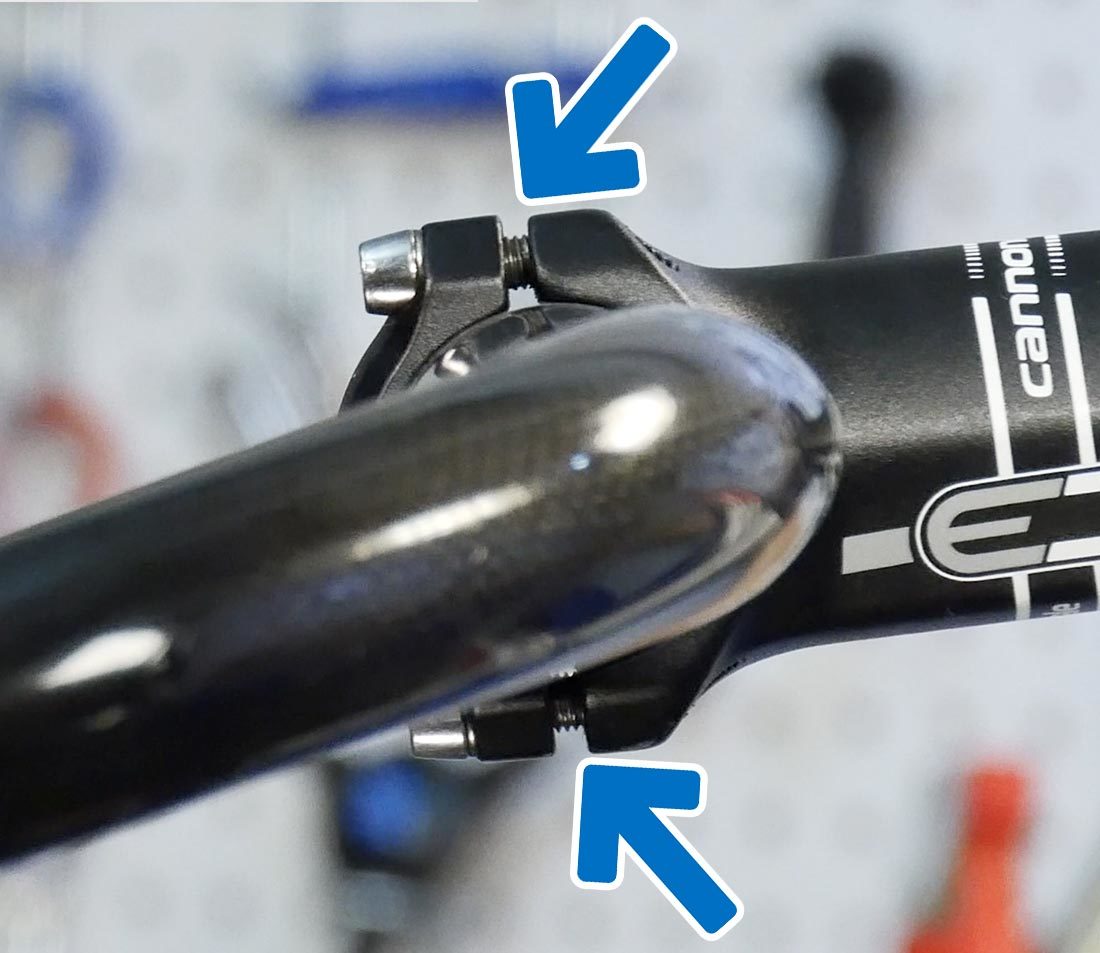
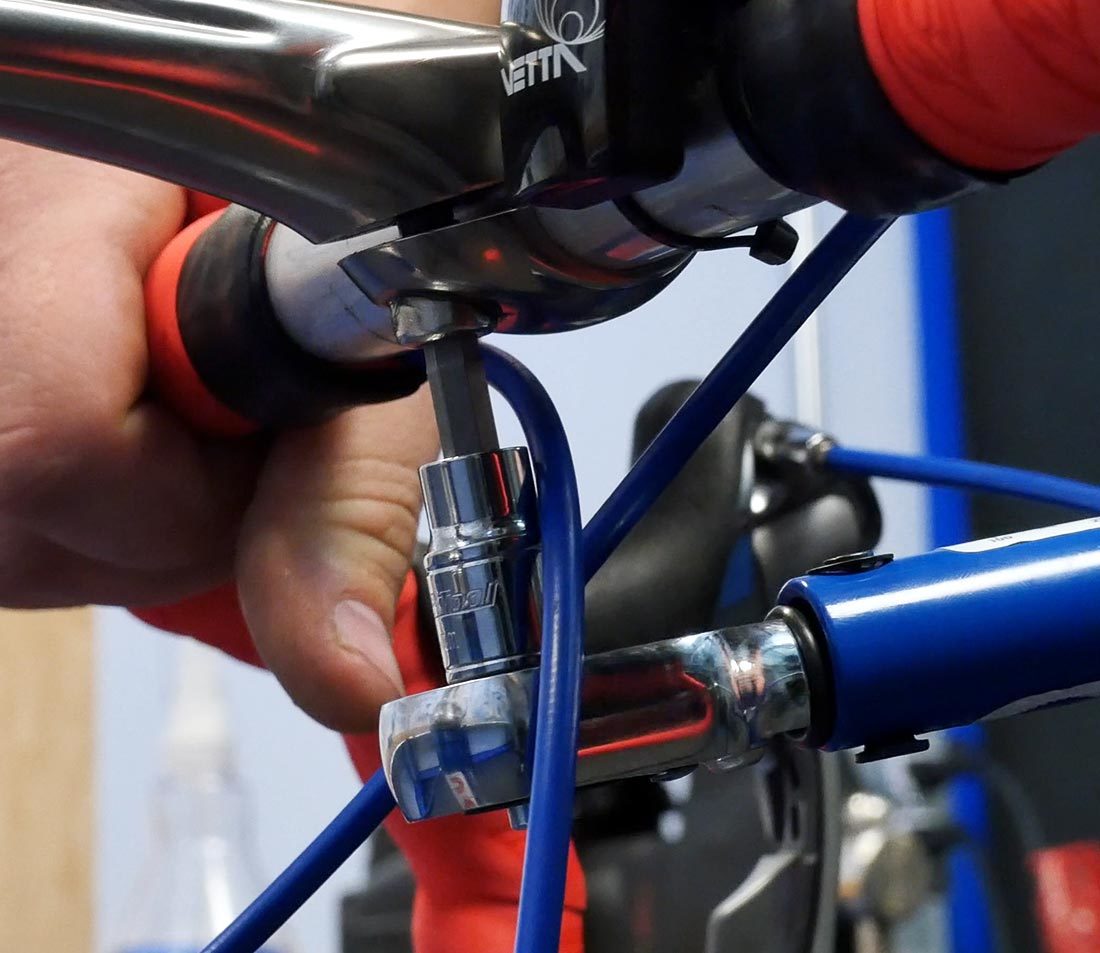
Now, loosen the stem bolts to remove the bar. If you have a removable faceplate, remove the faceplate and bar.
Stems on many older bikes use a compression slot system. Loosen the compression slot bolt at least two full turns, and slide out the bar.
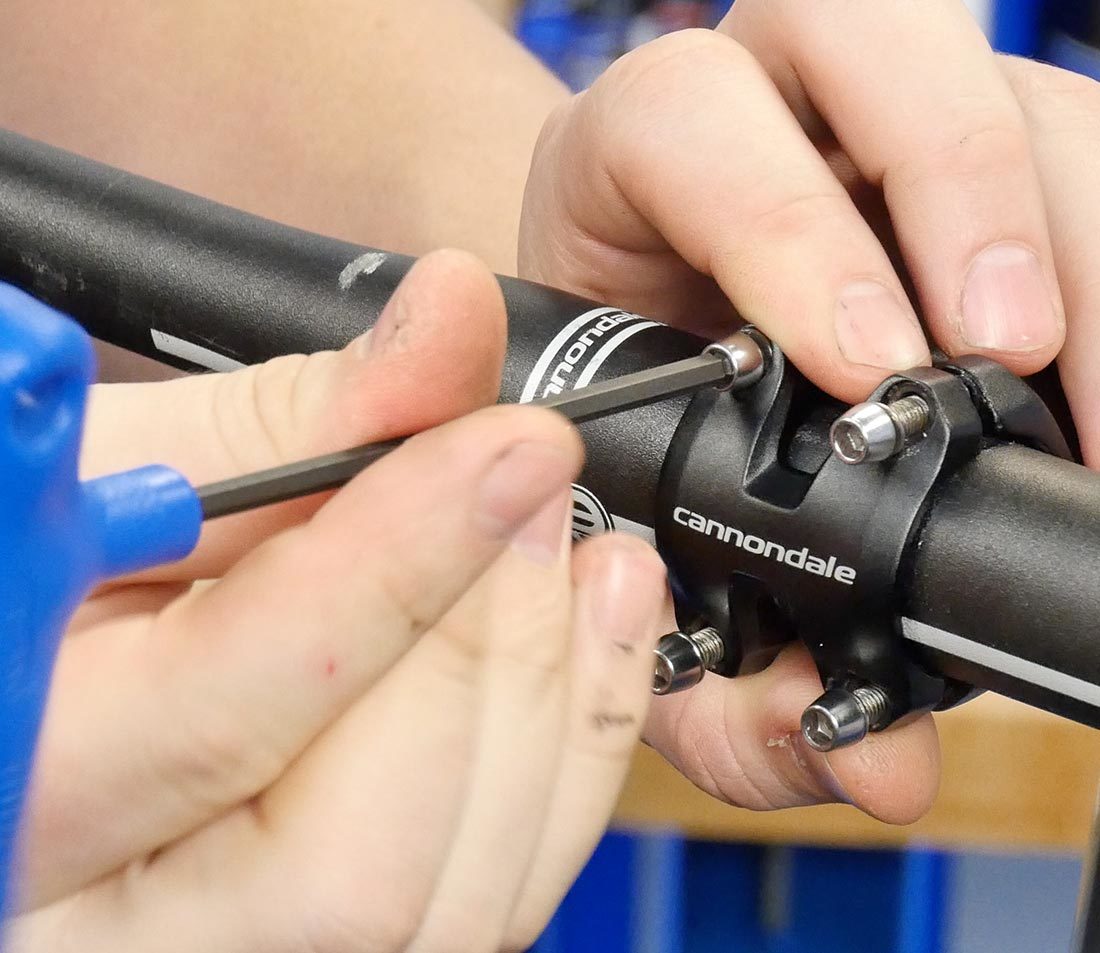
Loosen and remove faceplate bolts
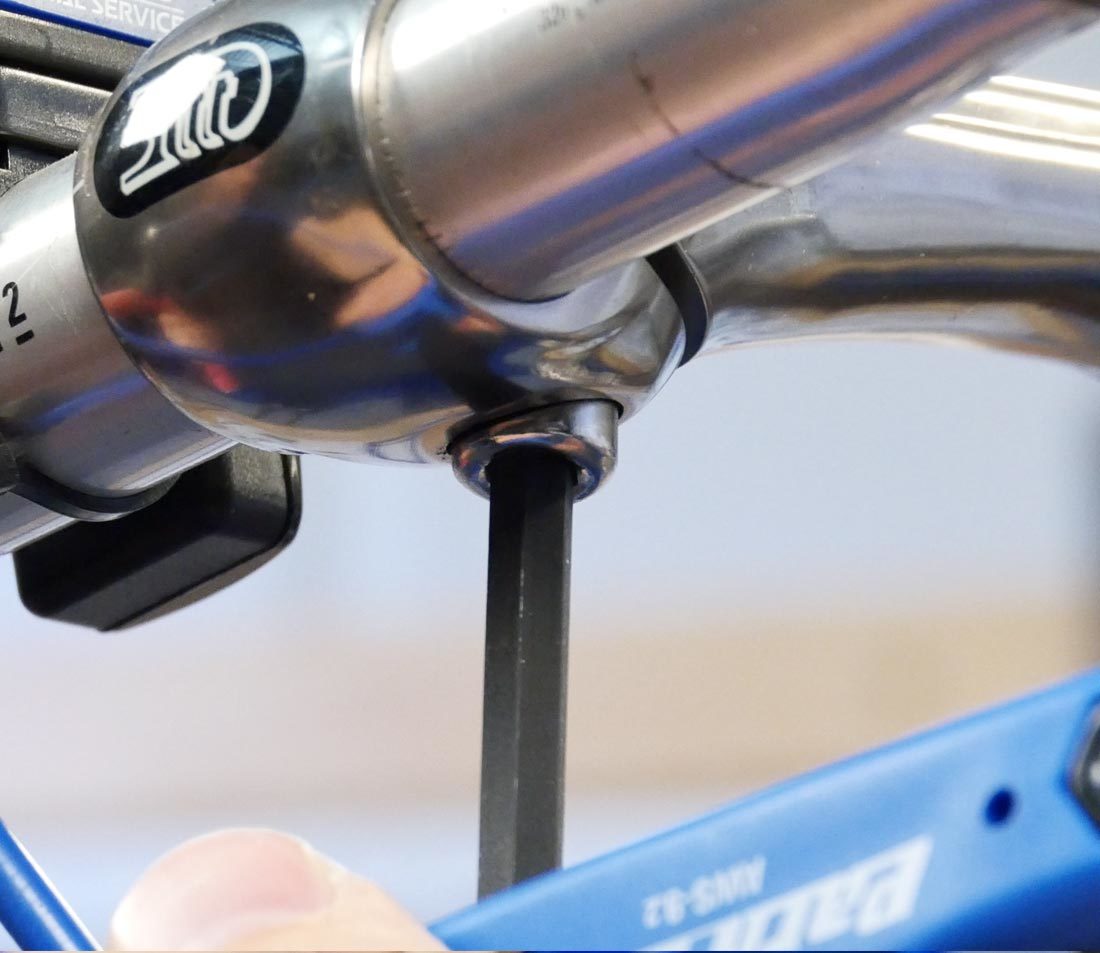
Loosen compression slot bolt enough to remove bar
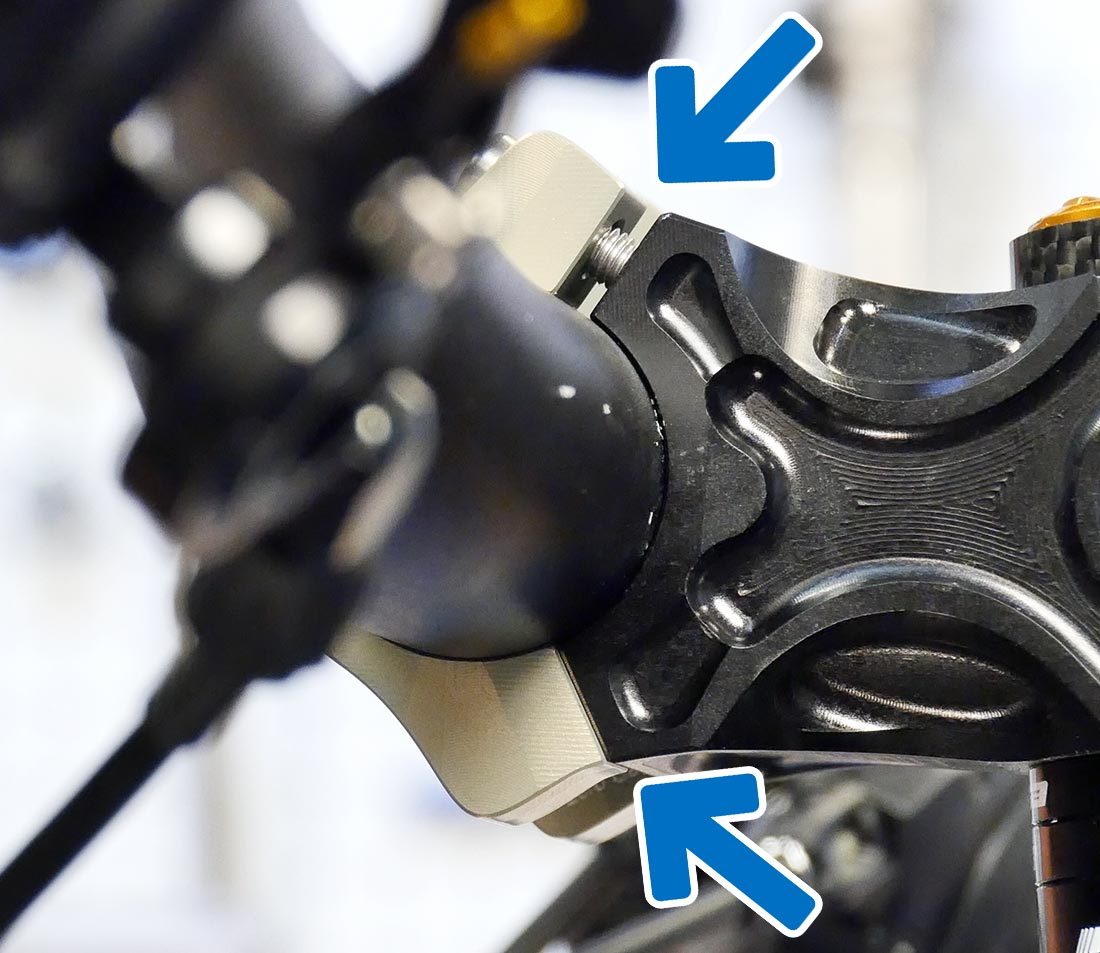
You may experience difficulty getting the bars out of the stem. If so, there are a few methods to open up the compression slot.
- Remove the compression slot bolt. Insert a tire lever, pry bar, or similar tool into the compression slot and use it as a lever, expanding the compression slot. Be very careful to not apply too much force — you can damage or destroy the stem if this is done too forcefully.
- Thread the bolt in backwards, and insert a penny or similar coin in the compression slot. The bolt will seat itself against the coin and push open the compression slot. This may not be possible with all stem designs.
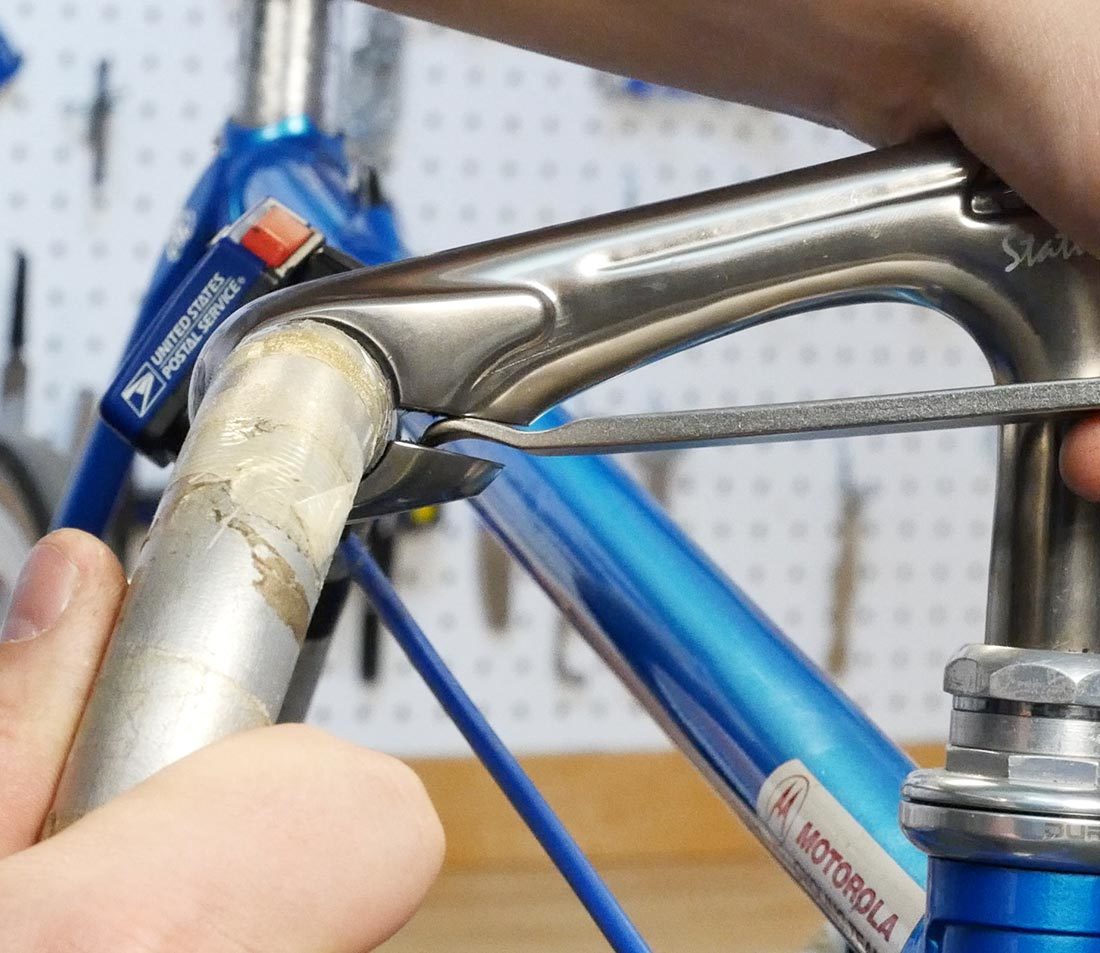
Pry open the compression slot using a lever
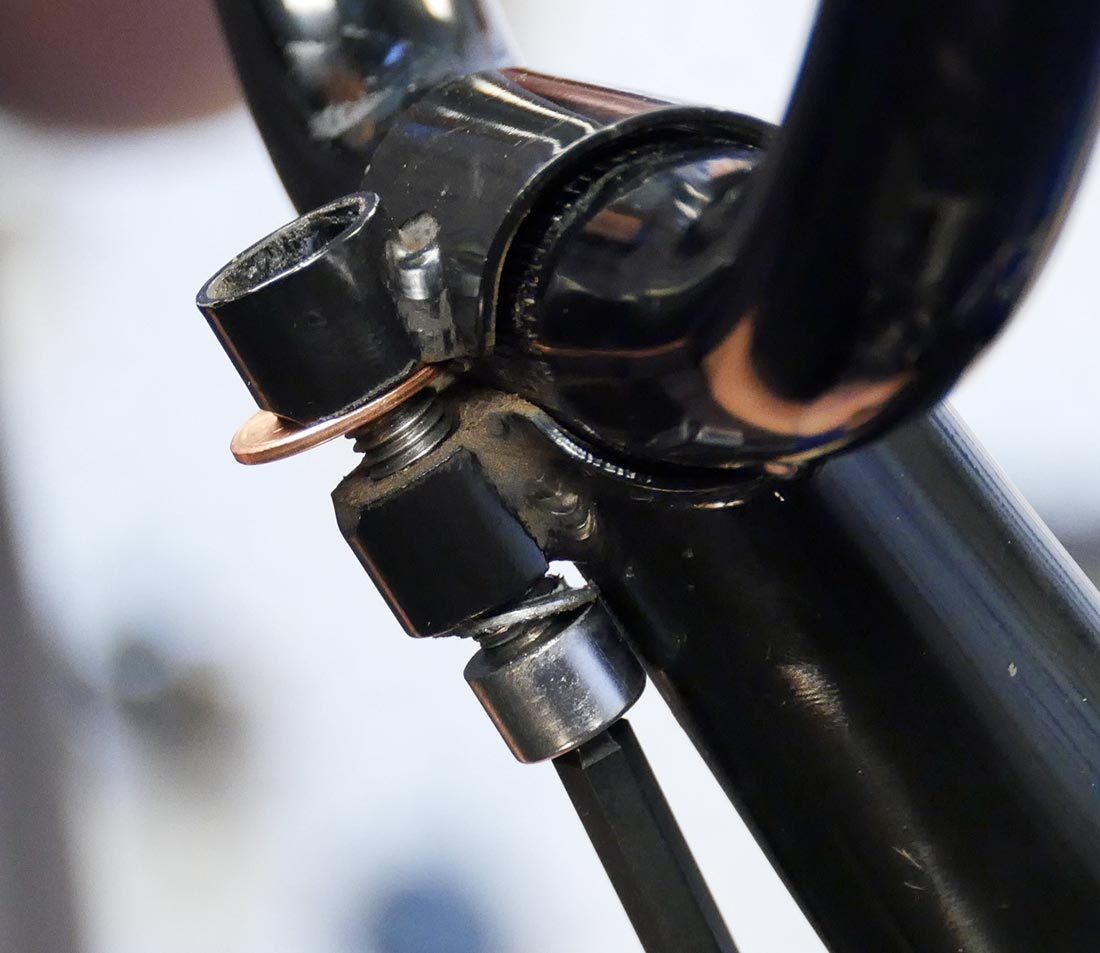
Push open the compression slot using a coin and bolt
Handlebar Installation
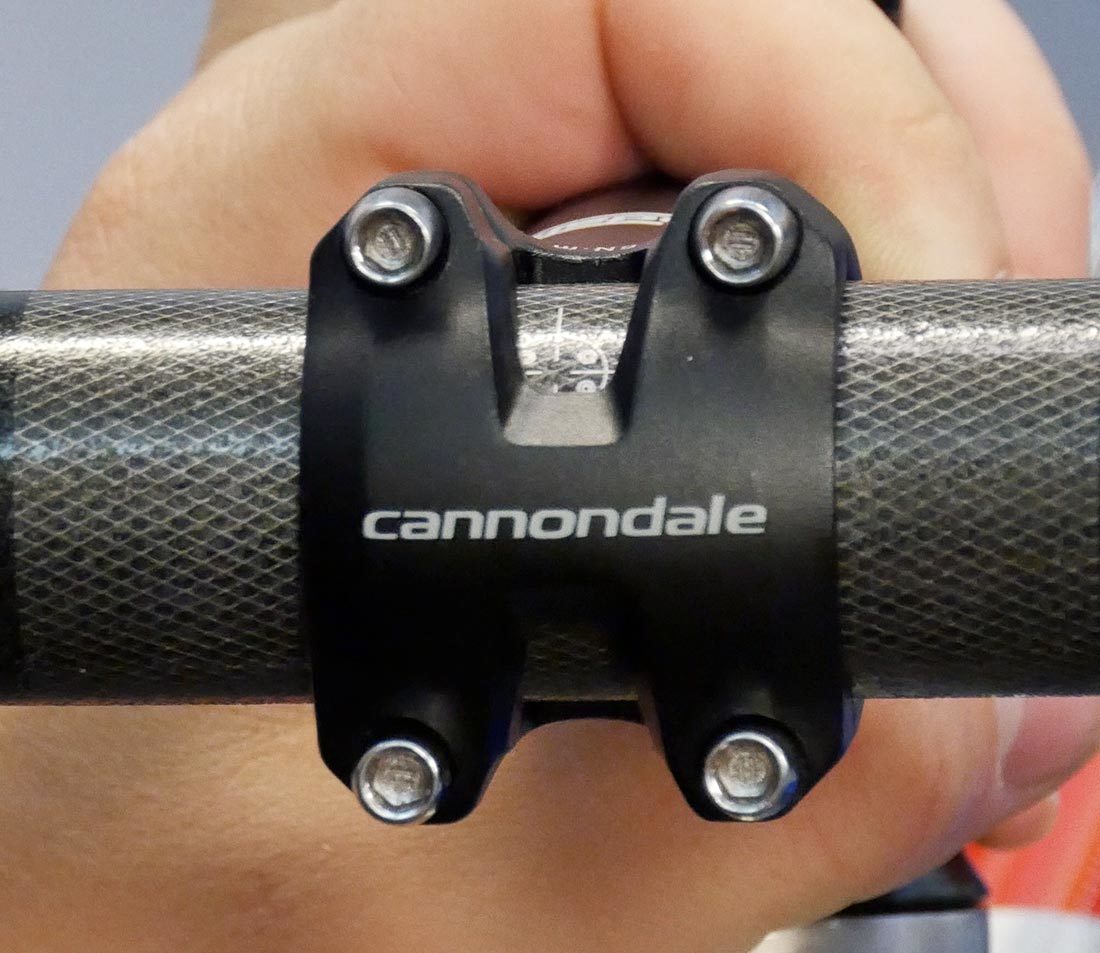
Apply grease or threadlocker to the faceplate bolt threads. Install the new handlebar into the stem. For stems with removable faceplates, partially tighten the faceplate bolts, making sure the gaps are equal on the top and bottom. For compression slotted stems, apply grease to the bolt and install it, but do not tighten it fully.
Typical faceplate designs require even threading of the faceplate bolts
Some designs require the top or bottom to be threaded in completely. These are usually marked accordingly
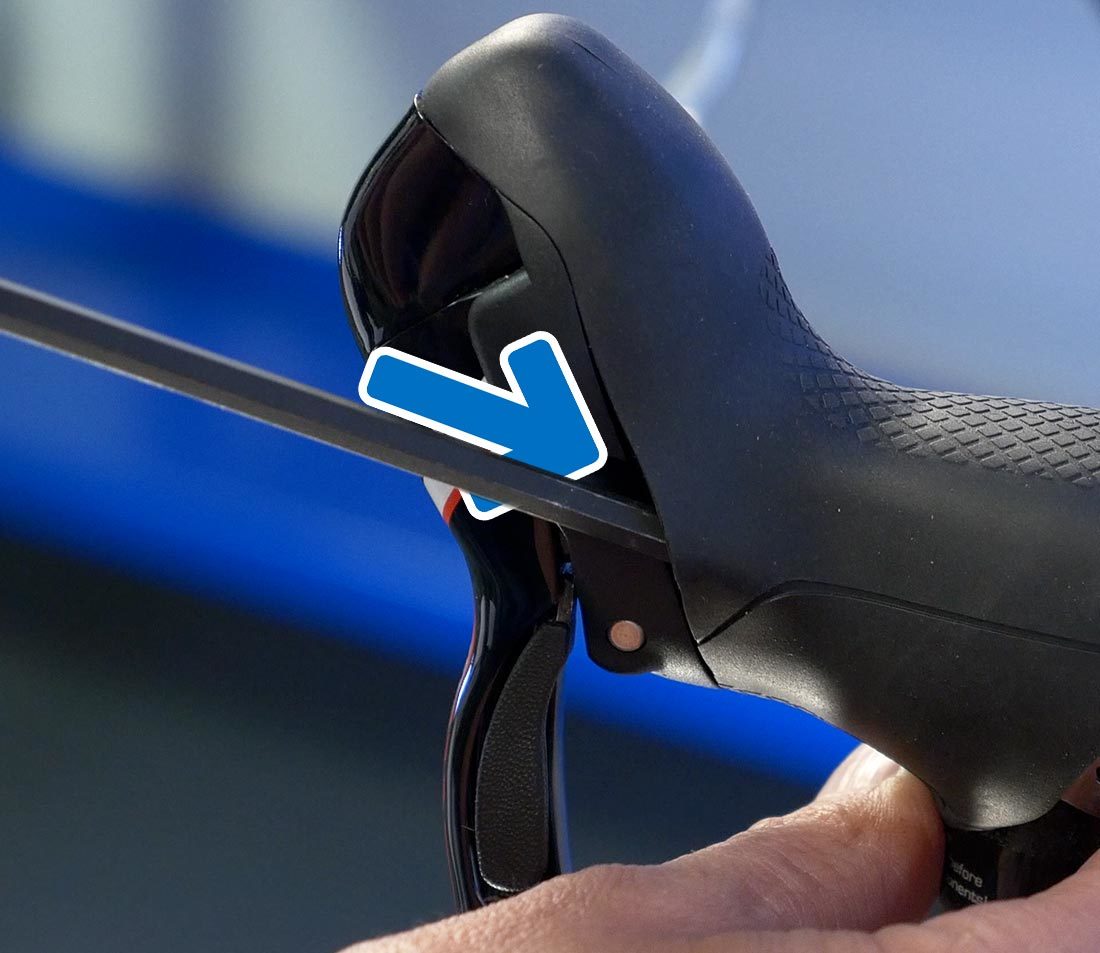
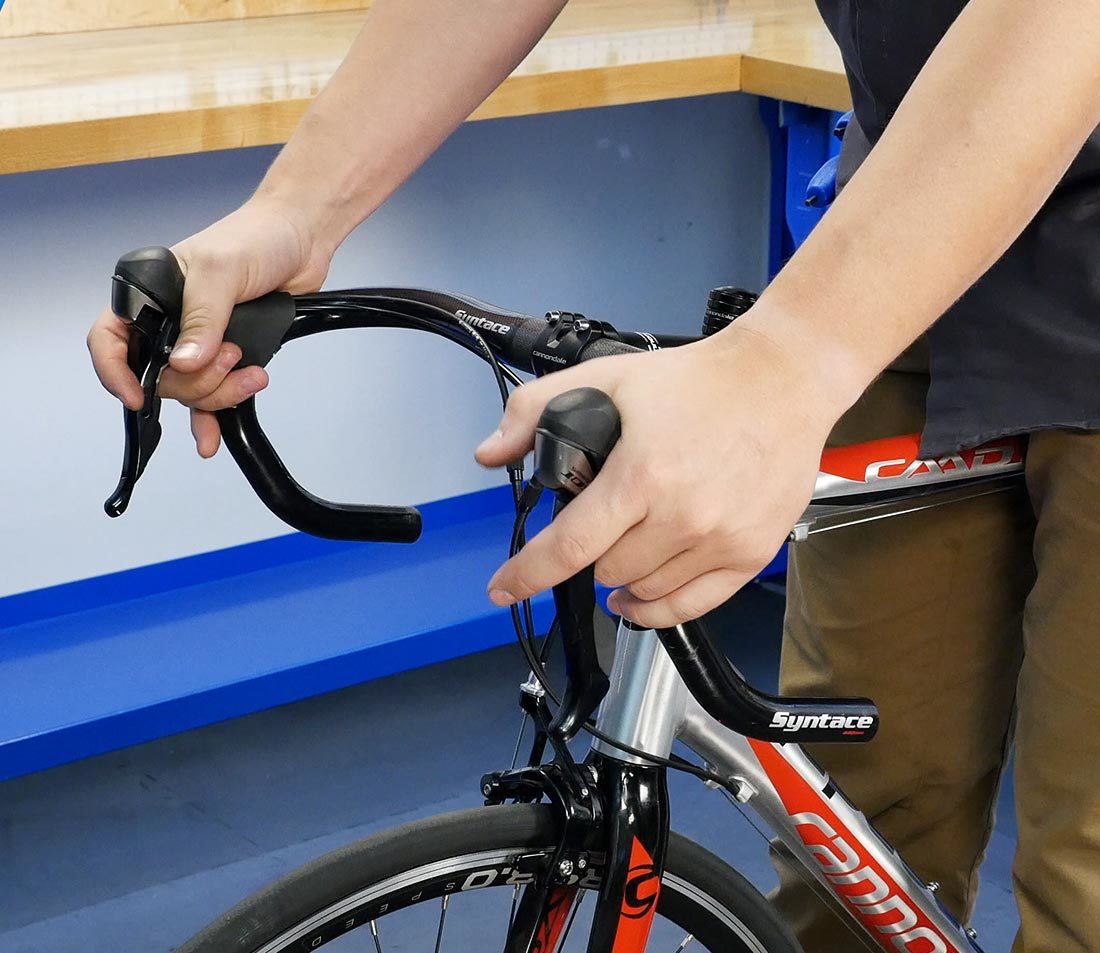
Slide on the levers, but do not fully tighten them. Set the bike on the ground, and make sure the bar is centered in the stem. Then adjust bar roll and lever position. Consult the pictures or measurements taken earlier, if so desired.
Many bars have markings to aid in centering
Set bars to desired amount of roll
Make sure the lever positioning is identical on both sides. Use a long straight object like a broom handle as a reference.
Snug the faceplate and lever bolts in place. Stand over the bike and get a feel for the new set up. Fine tune the lever position, rotation, and bar roll as necessary.
Next, tighten and torque the faceplate bolts to the appropriate specifications. It is advised to tighten incrementally in a cross pattern to distribute the pressure equally.
For stems with a compression slot, simply snug and torque the bolt.
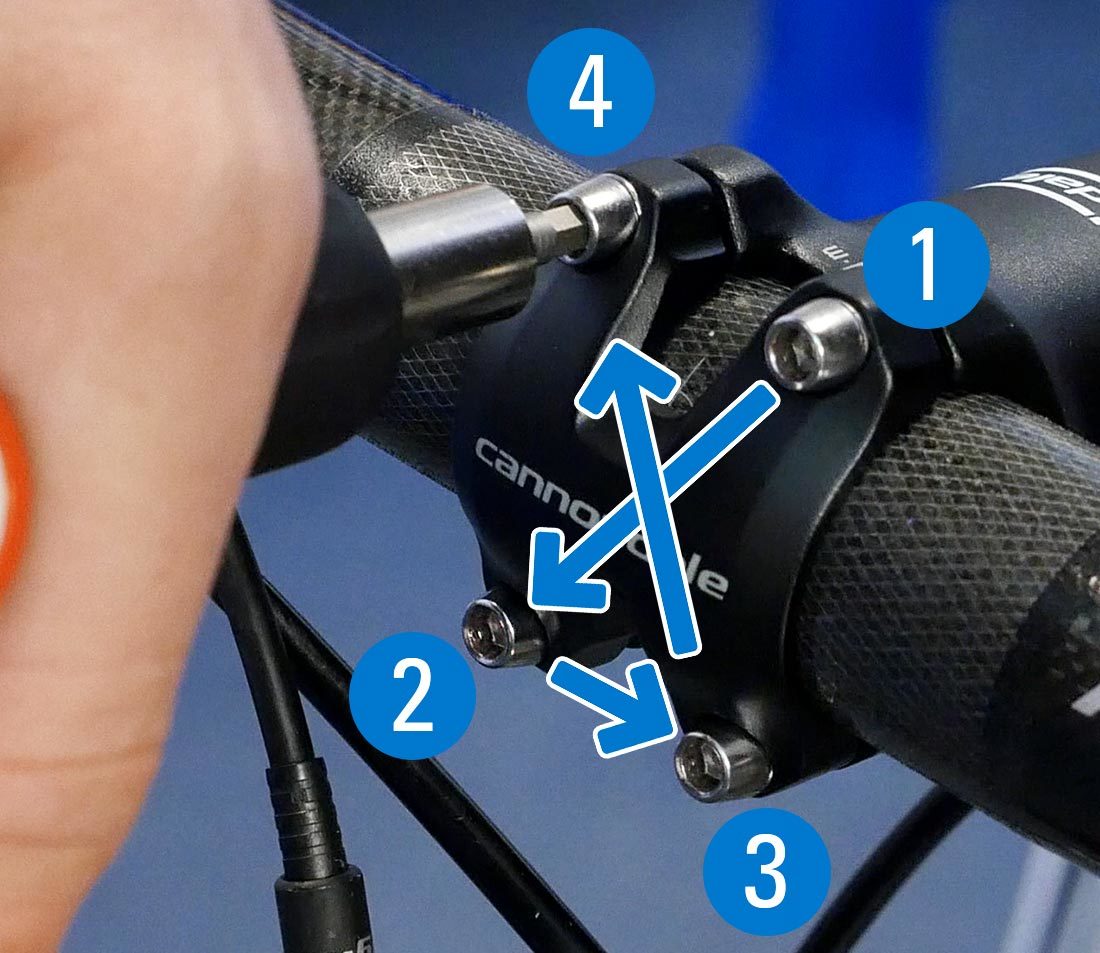
Tighten and torque in an "X" pattern
Torque to appropriate specifications
Tighten the lever bolts to the appropriate spec — typically 6–8 Nm.
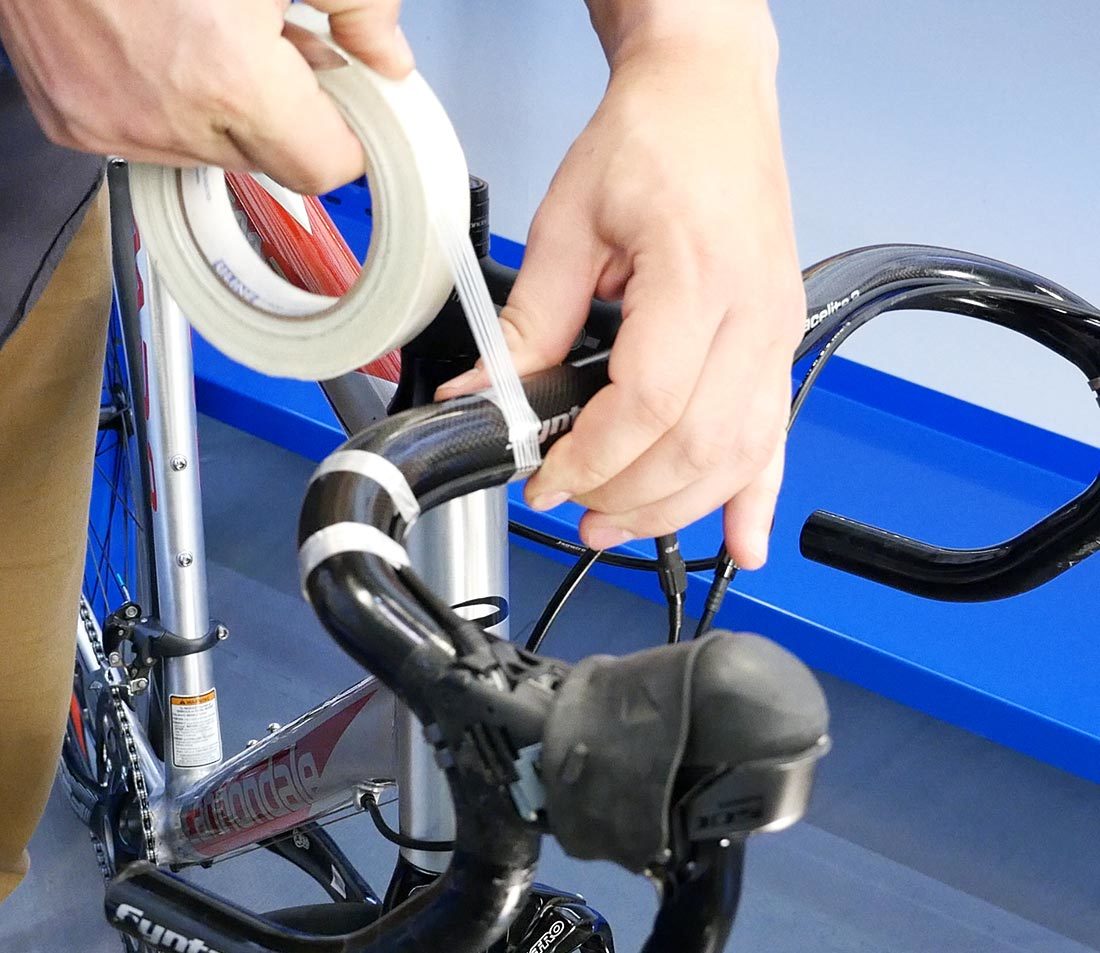
Before wrapping the handlebars, it’s a good idea to secure the housing to the bars with strapping tape or something similar. As you do this, be aware of any channels molded into the bars — laying the housing in these channels will reduce unnecessary bulkiness on the bars.
Finally, you’ll need to re-wrap the handlebars. This is a detail-oriented and often-tricky procedure. For more information, see Handlebar Tape Installation (Drop Bars).
Next article in this series
Handlebar Tape Installation (Drop Bars) View Article
Related articles
Handlebar Removal & Installation: Flat Bars View Article