Disc Brake Rotor Truing
This article will outline the diagnosis and repair of a bent or warped rotor, both when using common hand tools and using a rotor truing gauge such as the Park Tool DT-3.
Preliminary Info
- Rotor Truing Fork: DT-2
- Wheel Truing Stand
- Rotor Truing Gauge: DT-3
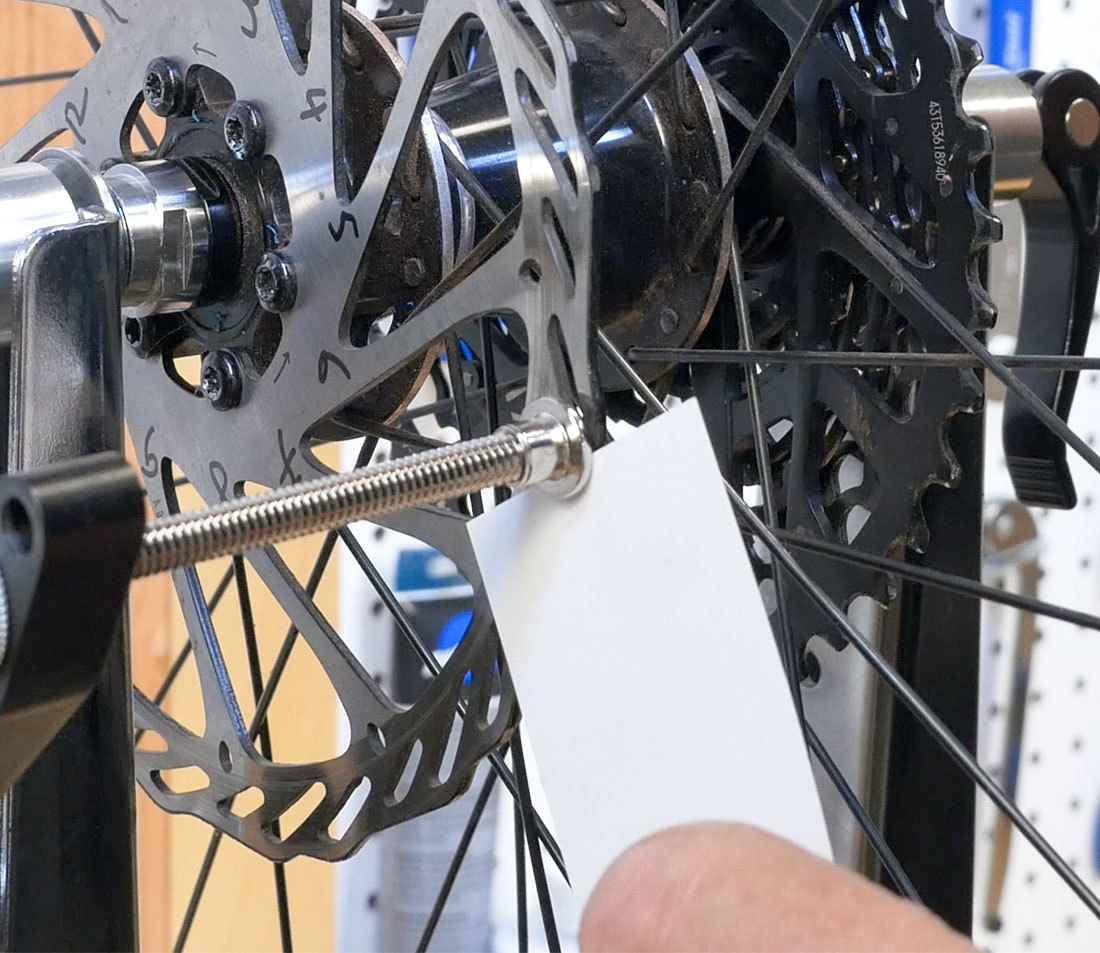
- A flashlight is useful, but even a white sheet of paper held behind the caliper can help make lateral deviations, also called runout, visible as the rotor spins.
- For the highest level of accuracy, a dial indicator: DT-3i.2
Rotors can become warped from use, abuse or simply by getting too hot. One of the most common causes of a bent rotor is from a direct impact when parking or storing the bike. It is even possible for new rotors to have some problems. If a rotor has been badly bent, especially from impact, it’s best to simply replace it.
It can be tricky to determine whether a rotor is repairable. A good rule of thumb: if the rotor does not show improvement within a few minutes of attempting repair, it has probably reached the end of its lifespan. If ever in doubt, replace with a new one. When a rotor is deformed past a certain point, you can push it around, but it will never be straight.
CAUTION: Anytime you are working around rotors, be careful. The edges can be sharp, and when they rotate it can have quite the slicing effect.
Diagnosis
A rotor in need of straightening will likely show up as a rub or noise as it passes through the caliper.
However it’s important to know there are other things that can exacerbate this symptom. There are two quick things to check before getting started:
- Wheel alignment if you have open drop-outs. Seating the wheel properly may solve the issue.
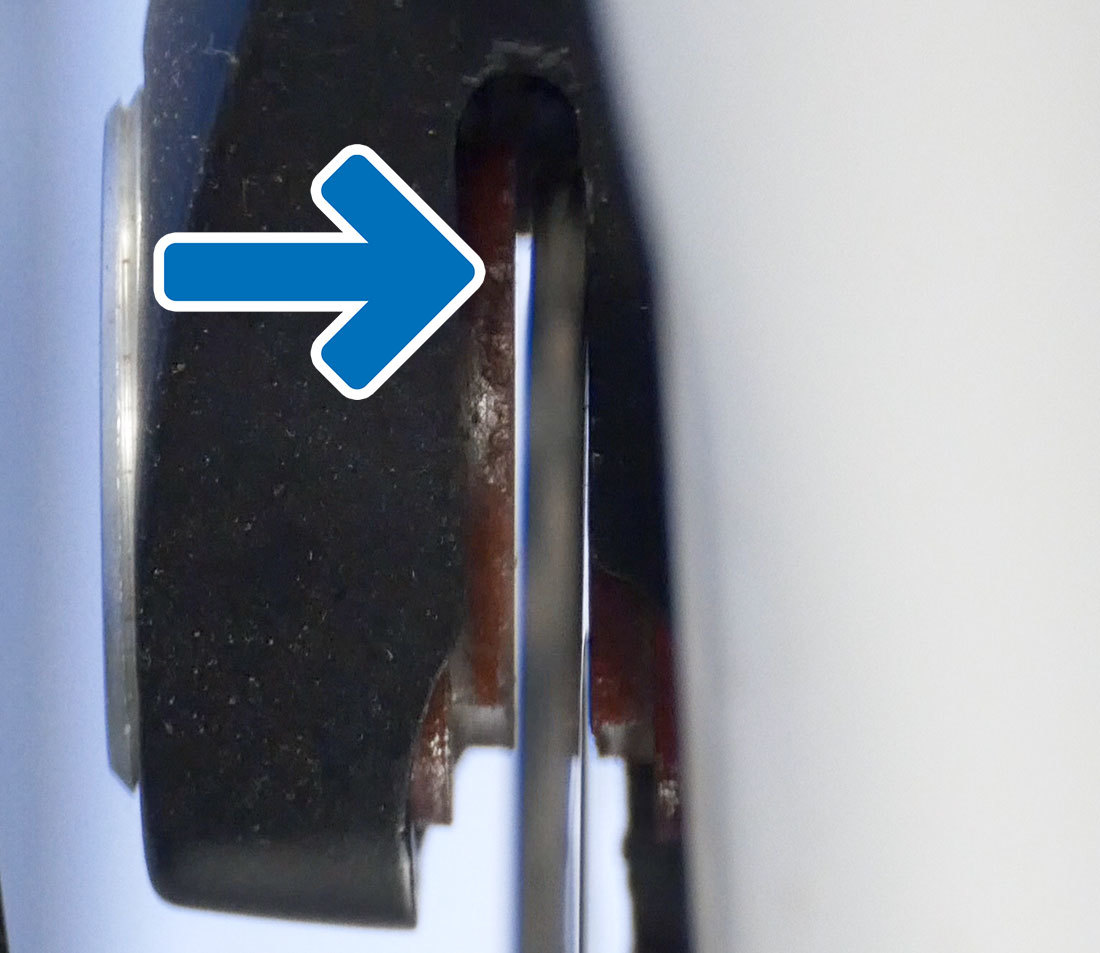
- Bearing play at the hub is also easy to check for by rocking the wheel back and forth as shown. If there’s play, fix it.
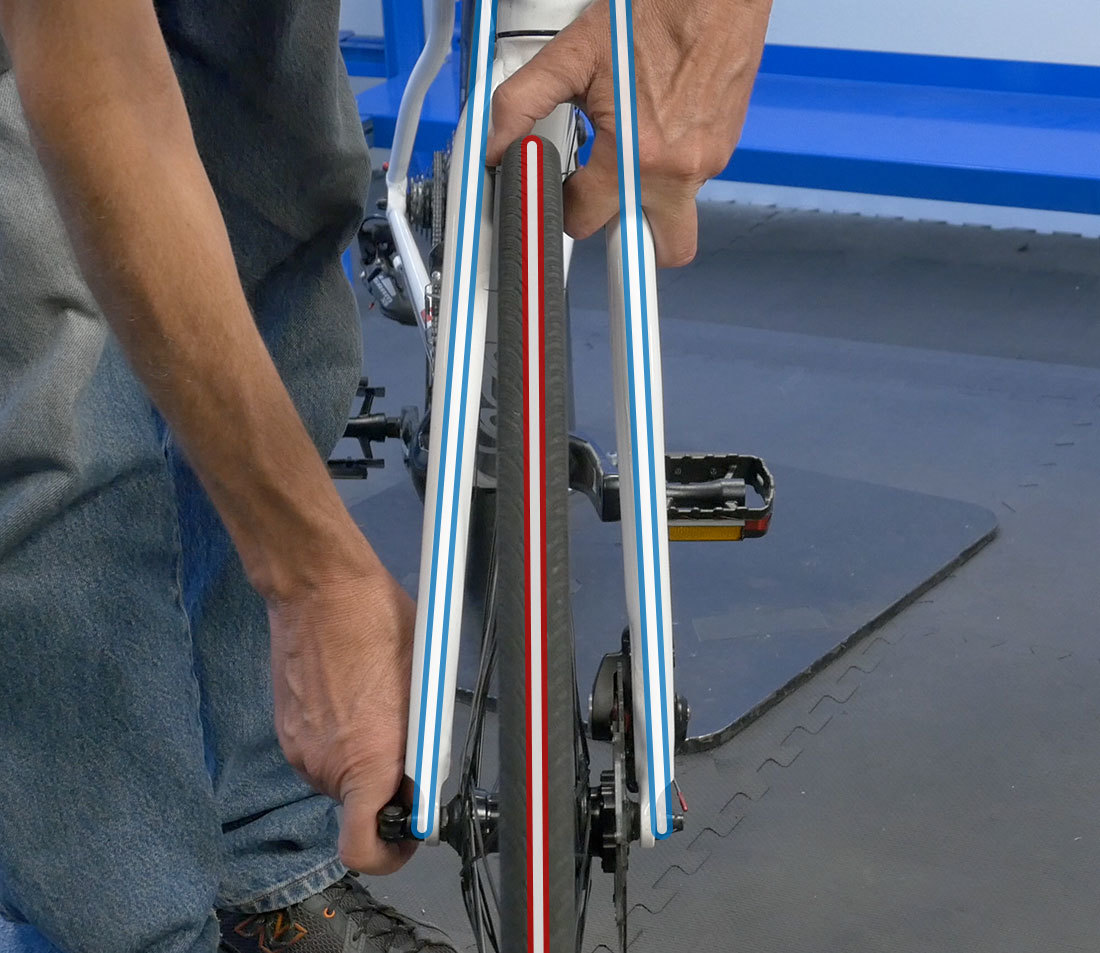
Wheel that is misaligned in the dropout — loosen and re-seat
Visible play at the hub
After verifying that the wheel is properly seated, it’s okay to start truing the rotor, but it’s always good to know other things that lead to rotor rub:
- Misaligned brake calipers due to poor alignment by the installer — see Disc Brake Alignment: Mechanical and Hydraulic.
- For mechanical disc brakes, drag in the cable and housing system can cause the pistons to not fully retract — see Brake Housing & Cable Installation: Upright Bars and Drop Bars.
- Hydraulic brakes can also have sticky pistons caused by dirt and muck — see our video on How to Clean Brake Pistons.
- Brake mounts on the frame may be misaligned, preventing proper pad alignment to the rotor face. Professionals will use a facing tool such as the DT-5.2 to correct the issue.
- Loose mounting bolts or a loose lockring will keep the rotor from fully securing to the hub mounts — see Disc Brake Rotor Removal & Installation for proper tightening procedures.
Truing on a Bike
A basic truing of the rotor can sometimes be done with the wheel on the bike by using the brake pads as a reference point.
- Set the bike in a stand or upside down on the ground in order to get the wheel spinning freely.
- Watch for wobble at the caliper between pads. Look for the opening and closing of the gap. Find a section of the rotor that needs truing, and note which way it needs to be bent to correct the runout.
- Here, a flashlight can be useful. A sheet of paper can also help make the lateral deviations, called runout, more visible as the rotor spins.
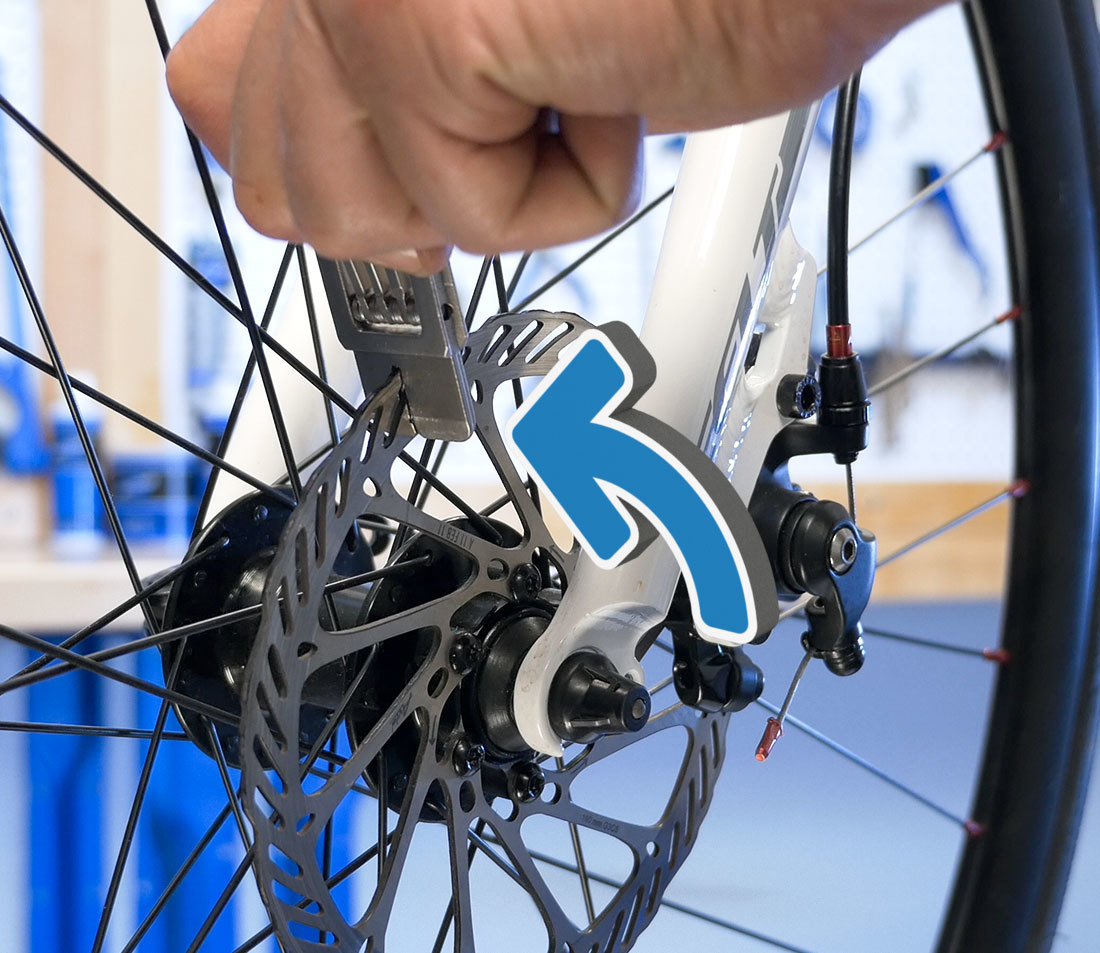
- Rotate this section of the rotor out of the caliper.
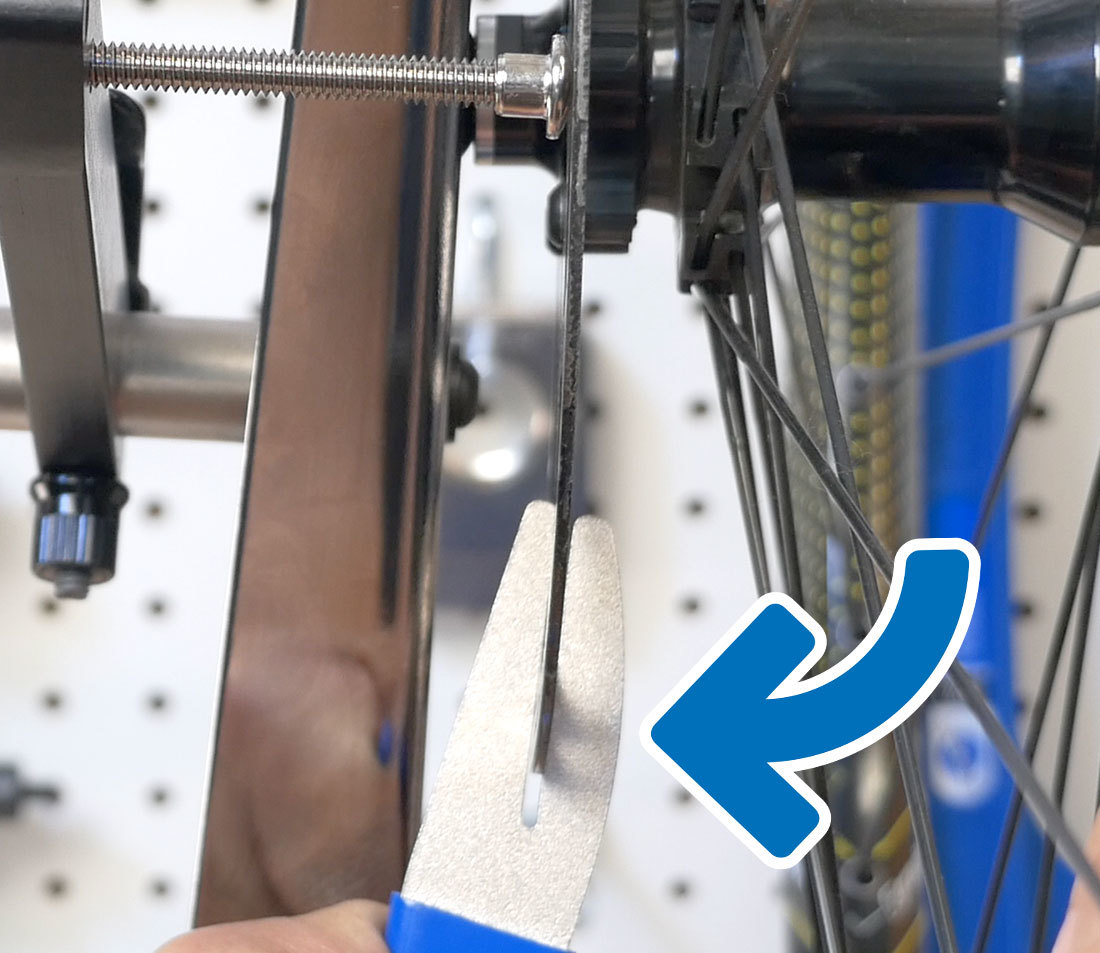
- Use a rotor truing fork tool to flex the rotor in the appropriate direction in order to improve the bend. Always begin with a small amount of effort on the tool, and then apply more effort if no improvement is seen.
- Spin the wheel and sight the rotor again. Repeat as necessary. When the rotor is not rubbing the pads as it spins, it is adequately straight.
Deviation to the outside
Flex the rotor towards the inside
Rotor Truing with Truing Stand and DT-3
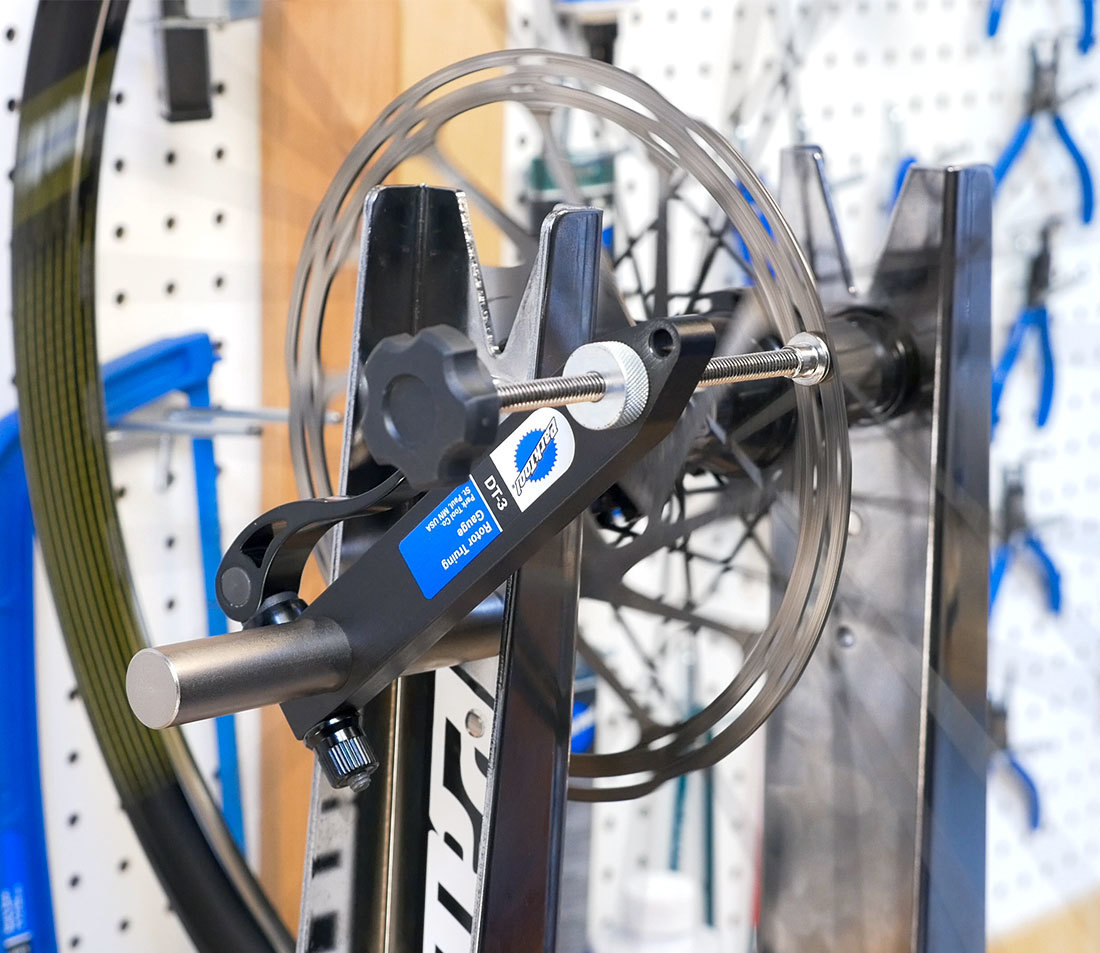
It is often easier and faster to get a more accurate correction by pulling the wheel and putting it in a truing stand equipped with a rotor truing gauge such as the Park Tool DT-3.
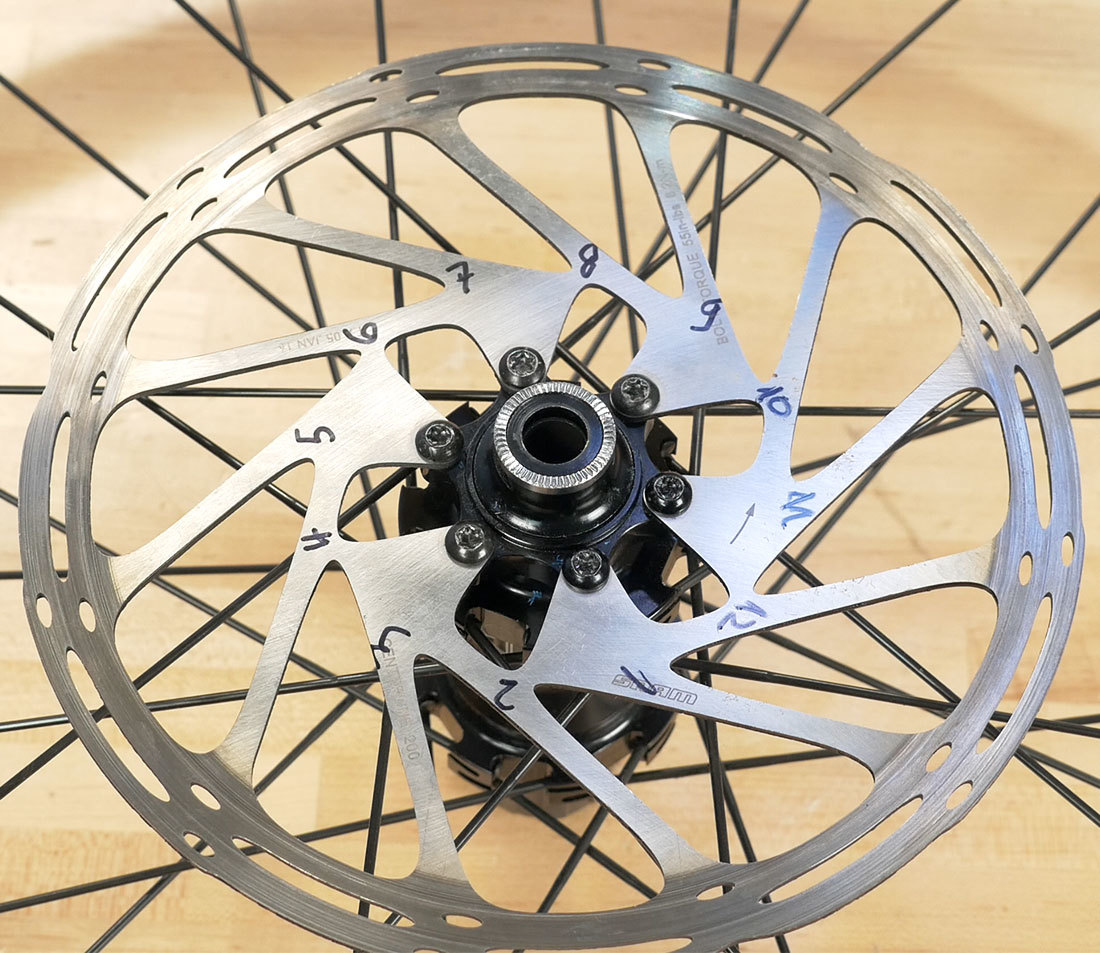
It can be helpful to number the rotor arms using a marker in order to track the progress. These can be easily wiped off later using acetone or alcohol.
- Align the gauge of the DT-3 to the outer perimeter of the rotor and spin the wheel. Slowly move the gauge end until you make light contact with the rotor.
- Stop the wheel at a lateral deviation, and use the DT-2 to flex and then bend the rotor.
Lateral deviation to the inside
Correct this deviation by bending towards the outside
- Use the long slot of the DT-2 as shown for narrower corrections. For wider corrections, use the short slot and engage the tool at the arm.
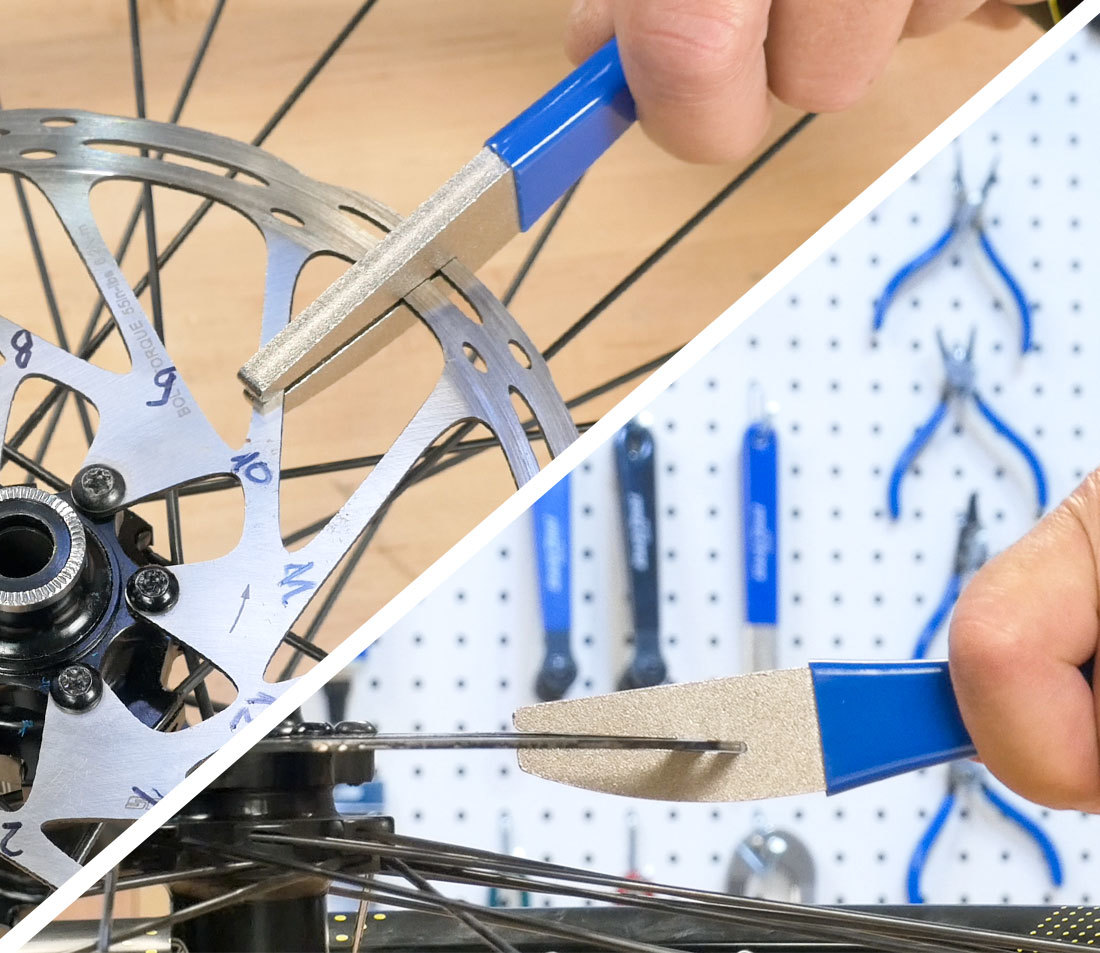
Long slot for narrow corrections
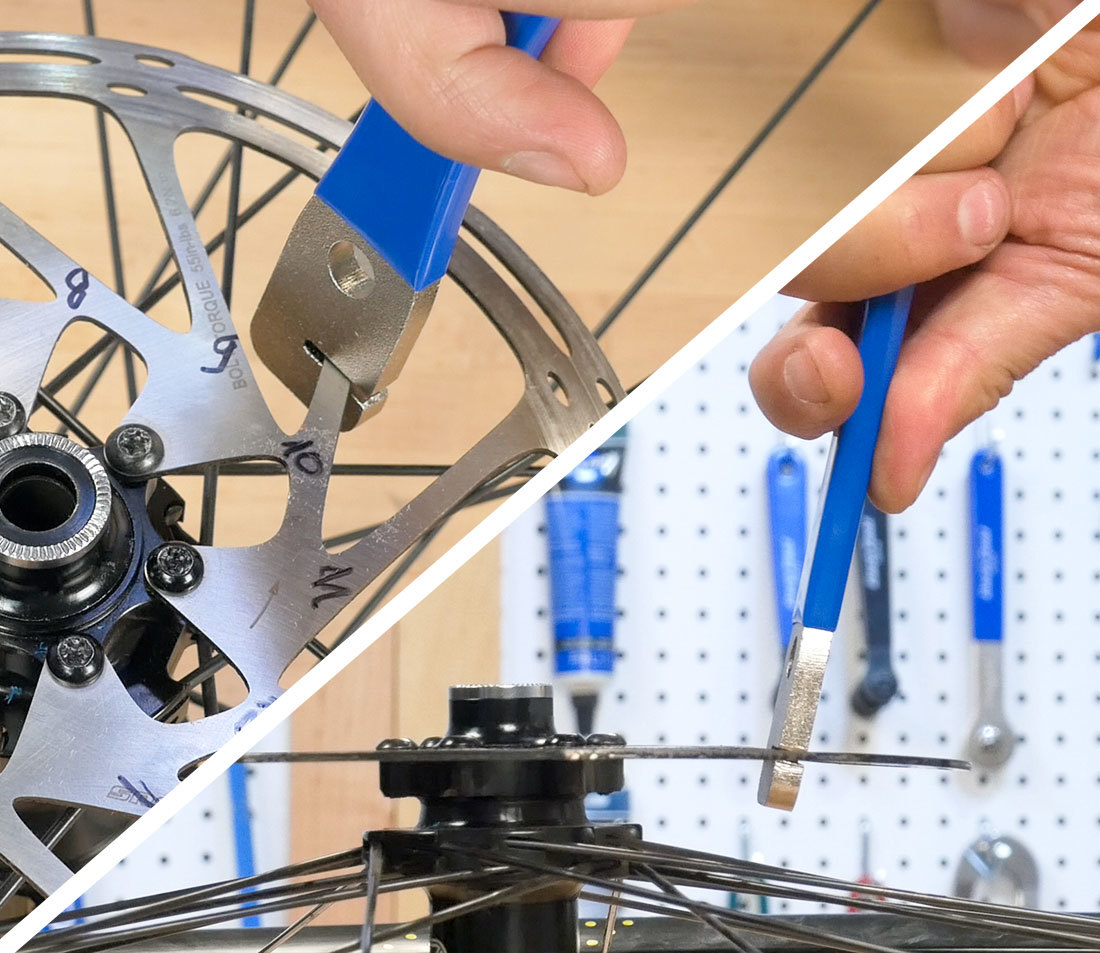
Short slot for wider corrections
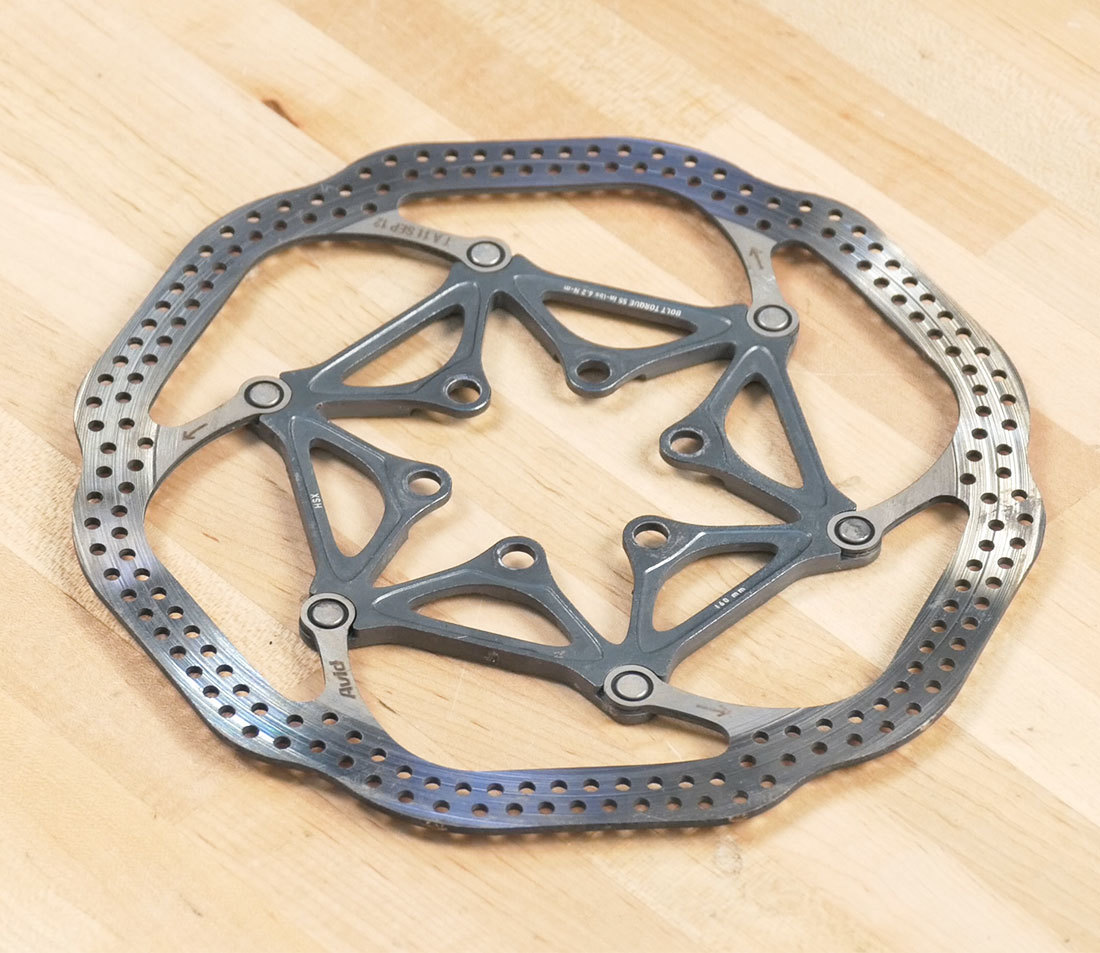
- However, do not attempt to bend two-piece rotors at the arms — bend only at the outer perimeter of the rotor.
- When the size of the deviation is smaller than a business card, then it is adequately true.
Dial Indicator DT-3i.2
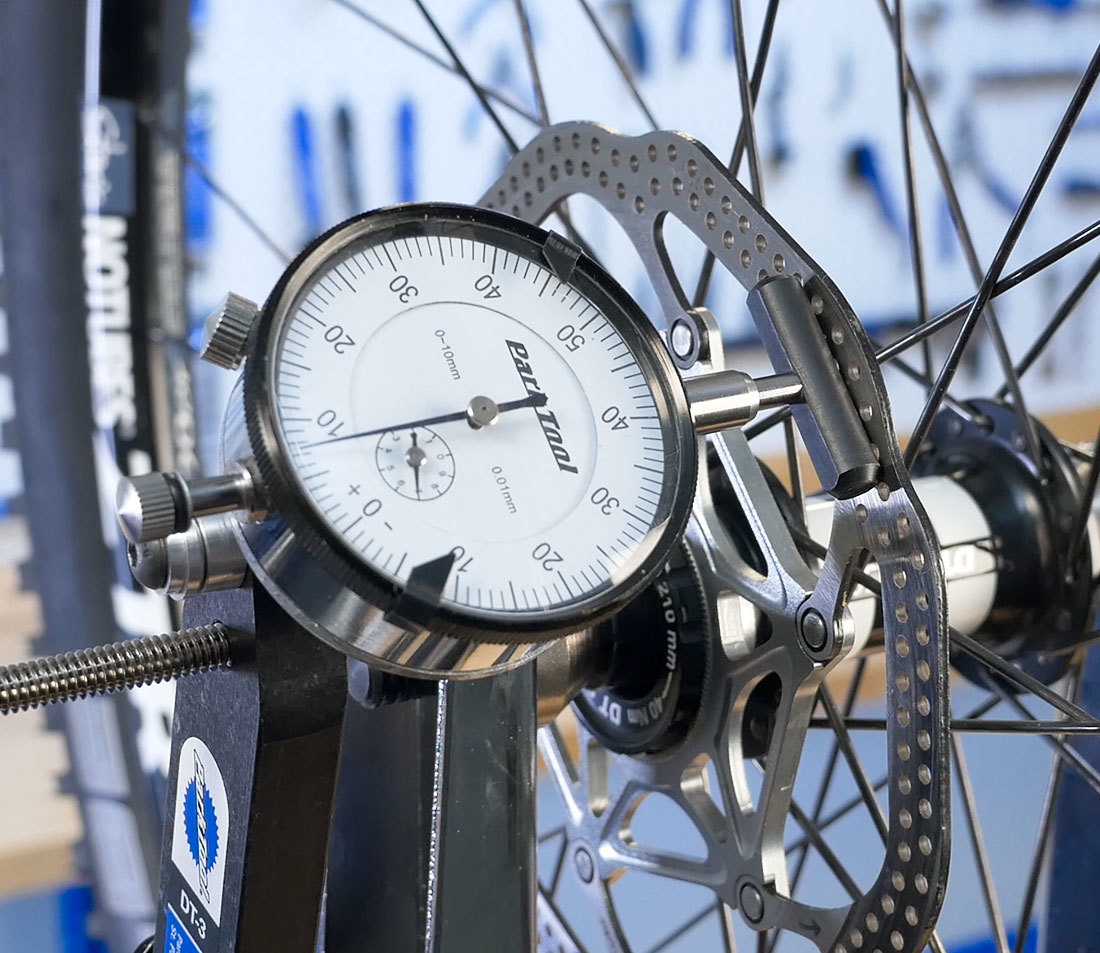
The DT-3 can be fitted the DT-3i.2 Dial Indicator Kit. The plunger end of the DT-3i.2 rides against the rotor and magnifies any deviation, allowing subtle bends to be easily seen using the dial indicator. The DT-3i.2 reads in increments of .01 mm and uses a “balanced face,” reading both clockwise and counterclockwise from “0.”
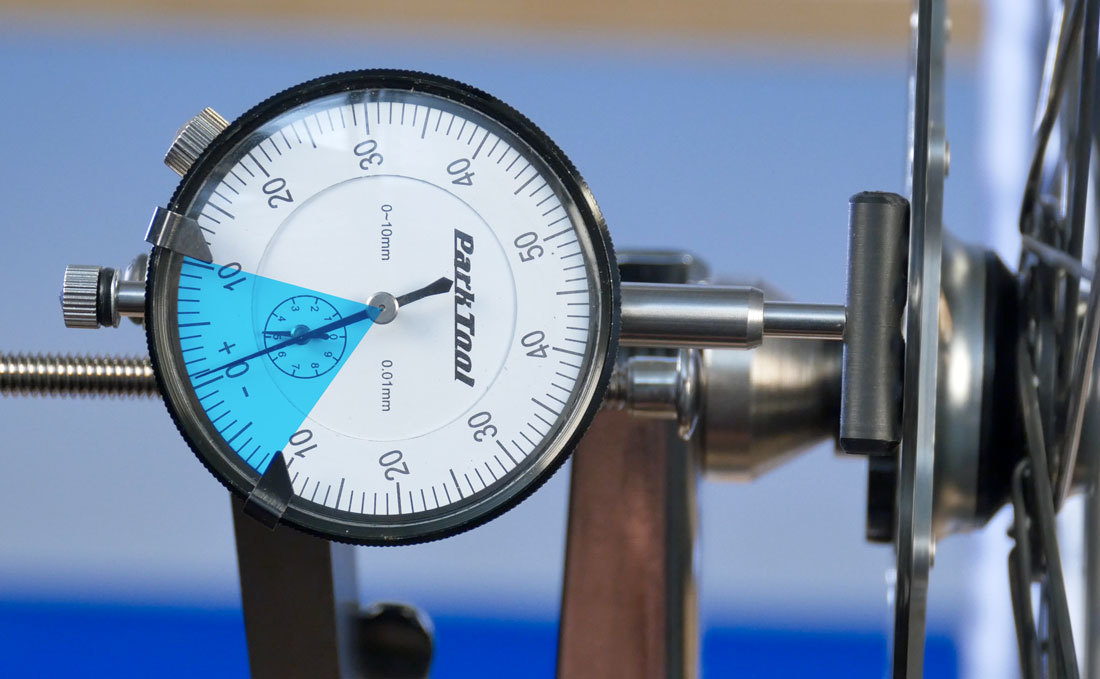
Values outside the target are isolated and adjusted. When the variance falls in the target range, in our example .2mm, the rotor is true.
More detailed instructions are included with the DT-3i.2 and are available in the Park Tool Document Library.
Related articles
Disc Brake Rotor Removal & Installation View Article