Written by Calvin on April 2, 2012/Calvin's Corner
How to Build a Spearfish
It has been 22 years since the Clark-Kent mountain bike was new (seen below, on the left). The time has come for an updated, contemporary machine, which in this case will be a Salsa Spearfish (on the right, still mud-free). At first glance you might think these bikes are for two different customers, but that is not the case, as both are mine. The Clark-Kent has a relatively low bottom bracket height compared to the Salsa. Saddle-to-pedal and saddle-over-bars dimension is nearly the same for both. However the larger 29er wheels and taller bottom bracket height give the illusion of two different fits.
On this page you will find a series of links to the Park Tool YouTube channel. Twelve videos use the Salsa Spearfish as an example of building a new bike from a bare frame to a bike ready to test ride.
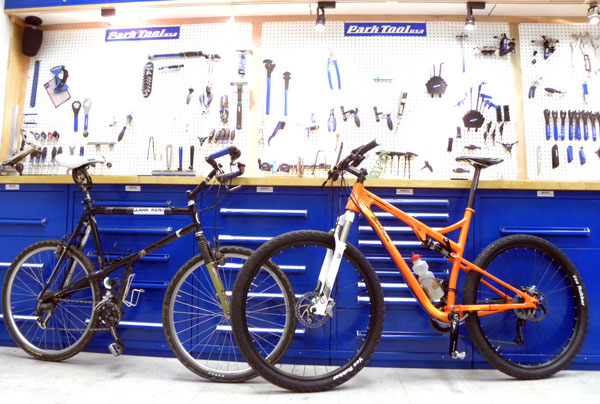 The trail and time tested Clark-Kent eyes the young upstart, the Salsa Spearfish
Part 1 of 12: Before beginning, parts are gathered and inventoried. In a professional build, the first step is frame preparation, which here will be headtube and fork crown facing.
Part 2 of 12: The frame is uncluttered and easy to manipulate and rotate, so it is best to do the bottom bracket installation next, followed by crank and pedal installation.
Part 3 of 12: Next, headset cups and races are pressed, and the fork installed. For this build, we have the advantage of having the older bike as a reference. This permits a best guess on column length. Even with the older bike present, it is always a good idea to add a bit of extra column for fine tuning bar height once the Spearfish hits the dirt.
Part 4 of 12: Next, the cockpit is assembled while working over the workbench, not on the bike. The fork is cut and installed with the stem and spacers as needed.
Part 5 of 12: Still more work off the bike and on the bench. Wheels are prepped and the cassette cogs installed. This bike will have tubeless tires, but the rims are not truly “tubeless”. A “tubeless conversion” system will be used, along with tire sealant, and lots of hope. The best tubeless systems use a UST rim and UST tire, with beads designed to properly lock and seal air tight. The conversion systems can work but are not necessarily as reliable as the UST systems. On the Spearfish, both beads locked up and the tires filled nicely with air. However, the next morning the front tire was flat. Two more inflations attempts after this initial failure, and it seems to be holding....at least at the time of this writing.
Part 6 of 12: Before gear work can be done, it is best to check the rear hanger alignment. It is a brand new bike but it is still a good idea to check the hanger alignment. It is off just a bit, which is not uncommon. This does not mean it is defective, it is simply something that needed a double-check.
Part 7 of 12: Next the derailleurs and installed. Then shift cables and housing are routed and secured to the frame.
Part 8 of 12: Chain sizing and installation comes next. Two different methods are reviewed, and both yield the same length. It is best to set the length to allow shifting to the largest ring in front and the largest rear cog in the back. Bike shop lore states this is a forbidden combination, but it must be assumed the user will ignore these pleas. If the chain is too short to allow a shift to the large-large combination, the result will be bending and breaking of parts, with the possible addition of a sad face and tears.
Part 9 of 12: Here the fun really begins. Time to attach cables to the derailleurs and adjust the gears.
Part 10 of 12: Now it is time to give some attention to the front derailleur shifting.
Part 11 of 12: The bike can now go, which means we must now also make it stop. Brakes are hooked up and adjusted.
Part 12 of 12: All done? No, not quite. There are some double checks and fine tuning left. Handlebar rotation is the rider’s preference. Final brake and shift lever positions are also dialed in. Double check all cockpit fastener tightness. Lastly, the rotors and brake pads are “burned in” while the Spearfish is clean of dust and dirt.
Coming once I get on the trails: DARE-TO-COMPARE—Spearfish vs Clark-Kent