Written by Joel on March 31, 2018/Shop Rag Newsletter
Shop Rag Issue 15 — Workshop Organization and Efficiency

Here’s a question we get quite often: “I want to work efficiently, what’s the best way to store and organize my tools?” A well organized, well planned repair area, whether it be in a pro shop, at home, in a shed, or at a trailhead needs to have tools in logical spots so they’re easy to see, reach and use. Sometimes the location for that tool comes naturally and sometimes not. We see hundreds of shop set ups a year. This article is written not to tell you exactly how to set up your shop but to help you make logical decisions about the most efficient way to be prepared to work efficiently.
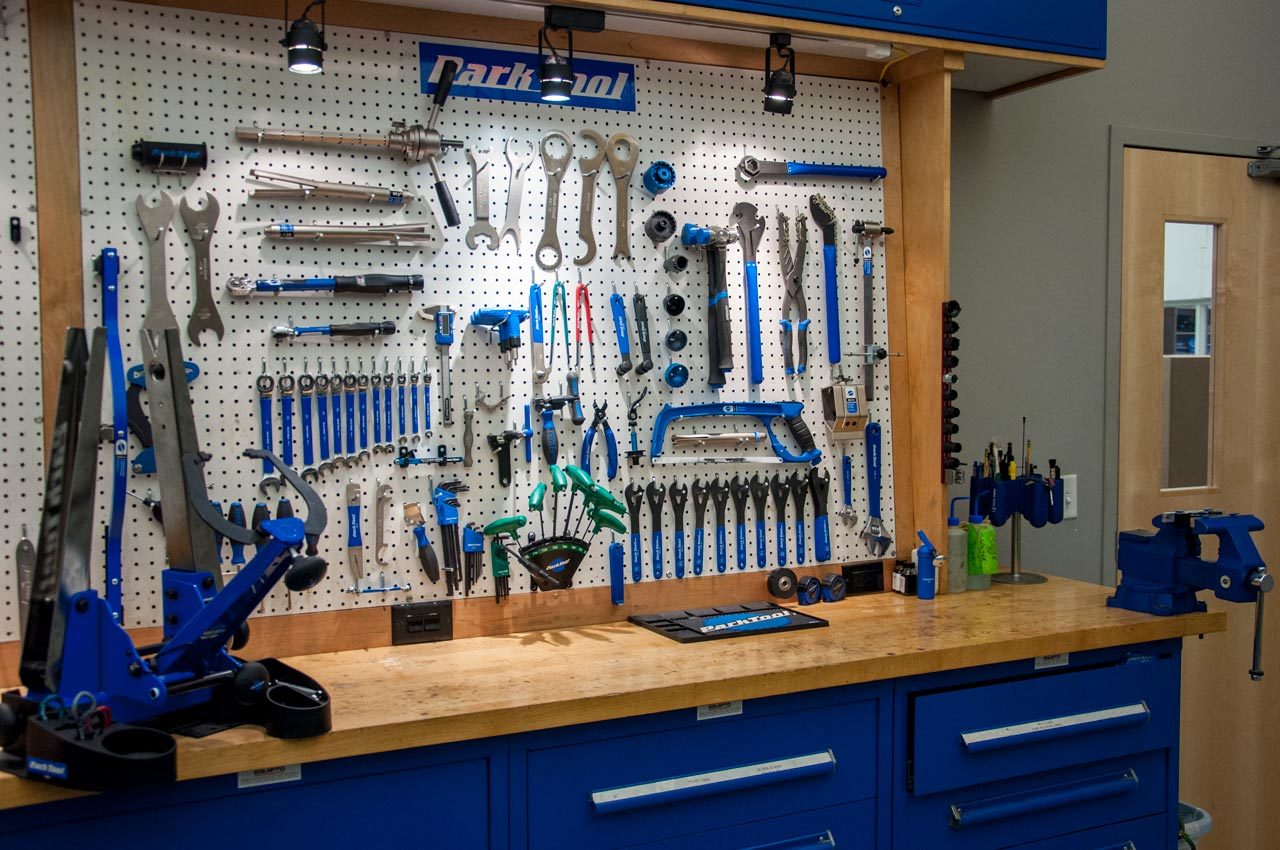
In general there are two main ways to store your tool collection. Some mechanics like to use a “tool wall” usually consisting of a bench and a wall made of pegboard or a similar sheet material. These have been popular in the bike world for decades as the tools are quick to reach and easily seen. A tool wall also shows off your collection of specialty tools, which in a pro shop environment lets your customers (or your friends if this in your home workshop) know you’ve invested in extensive, very specialized equipment to work on their prized possession. Other mechanics like the drawer method, creates a nice clean look, keeps tools clean and orderly and gives you the ability to lock up your tools. There are of course pros and cons to each way of doing it, and people will argue their method till the end of the earth.
In such a hotly debated topic there is not much talk of basic organization. The “where to put your most popular tools,” or “where to put the tools for working on hubs,” and “where to put the tools you use to work on a headset.” This part of organization is arguably more important than how you store the tools.
When setting up a tool wall or a drawer system I like to break down my tools in order of most -used to least-used. Give that some thought then lay your tools out on a piece of cardboard or plywood that is close to the same size of the area where you are mounting the tools to the wall. Creating this visual will help give you an idea of how easy it will be to retrieve each tool. This will also help for drawer systems. You will break things down into similar groups and place the tools together to give you a grouping that will go into a drawer together. Then you can decide which drawer to place them in as well as which side of the drawer to put them on.
I like to organize my tools by a combination of frequency of use and proximity to the correlating location on the bike. Working with tools is all about saving time and efficiency so it’s important to also have the right tool in a convenient spot to save time as well.
The general shop tools will typically fall into the first group. The pliers, hex wrenches, Torx® compatible wrenches, pedal wrench, combination wrenches, screwdriver, picks, scissors, grease, cable cutters, side cutters, a hammer, an adjustable wrench, and a knife—these are the tools I use most. I put them into the middle of the wall or drawer or maybe even on a Tool Kaddie as they are used on nearly every part of the bike. Also, keep similar tools by each other like Hex and Torx® compatible, pliers and side cutters, and whatever else you can think of that makes sense. This makes it easier to locate the one you need when you need it.
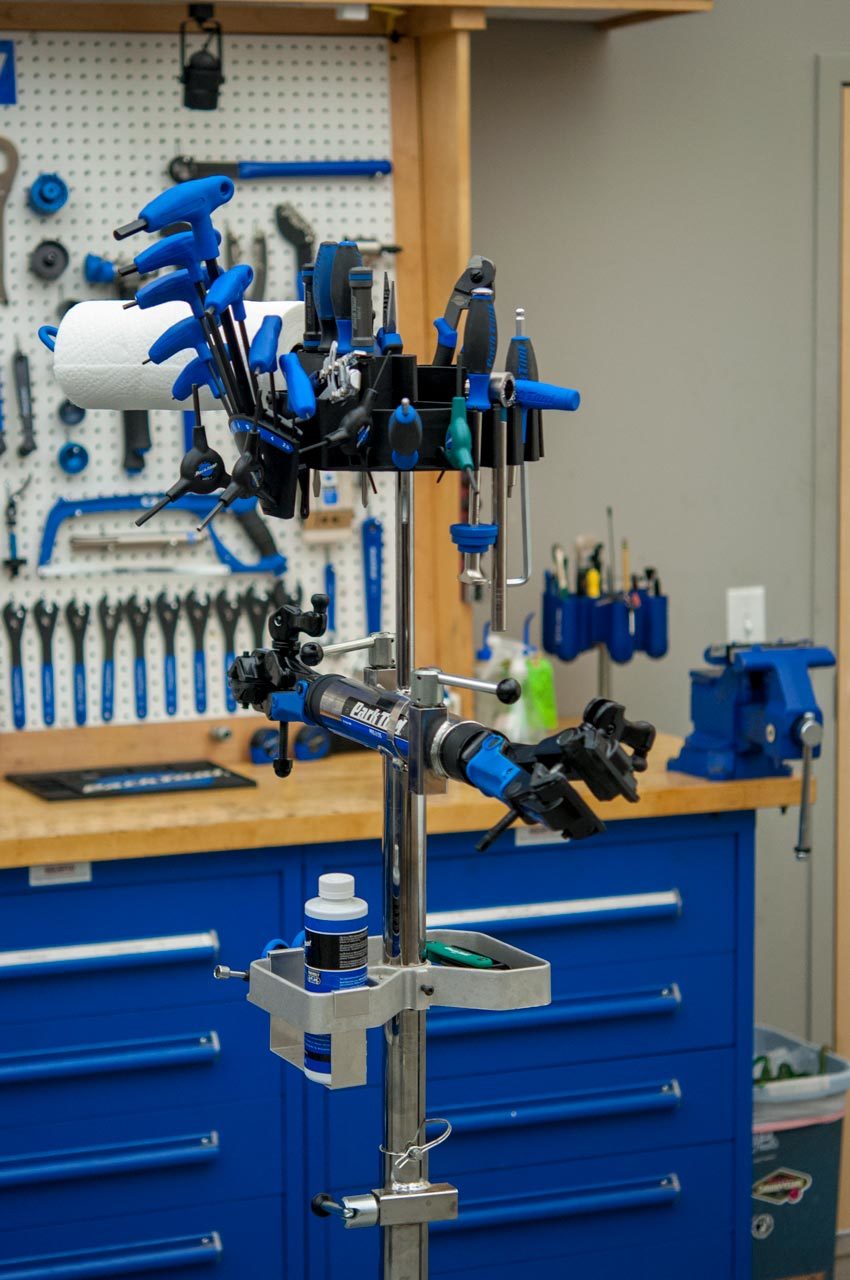
The second order of tools for me are the cone wrenches, sockets, torque wrenches, dummy hub, metal bending tools, cable routing tools, crank pullers, spanners, headset wrenches, freewheel tools, bottom bracket tools, and chain tools. These tools are fairly component specific, which should make the location in your system easy. Chain and crank tools will go close to the center (because those tools are used on the “center” of the bike). The headset tools will go towards the front of the bike. The sockets and torque wrenches I find are nice to have just towards the back of the bike as there are more uses back there. Freewheel/ cassette tools will go near the vise, which I’d try to locate as far back as possible. This allows for a bit more working space with the vise.
Third-order tools would be the tools that do not get used as frequently and are very component specific and usually the more high precision tools. These are the presses, thread cutting tools, alignment gauges, precise measuring tools and other very specific tools that are not used as frequently. These tools can be hung higher up on walls that are harder reach but still easily seen, or they can be put into a lower drawer. Of course, these are the cool tools and you feel bad about not having them right there, but the fact of the matter is that they do not need to be an “in your face” first- order tool. Another reason these can go into a more “remote” location is because when you need to use them, you know what you need and there is usually prep involved. It is not a tool that needs to be reached quickly. In a pro shop the frame prep and machining tools may also be shared by multiple mechanics so having them in a designated, easily accessible location for all to use may make the most sense.
Some lubes and Chemicals find their way onto the wall or bench as well as the tool tray on the stand. I like to think again about frequency of use and when I will be using them. I will not keep specialty chemicals on the bench but will keep the commonly used tubes, tubs and bottles on the bench. Tire sealant, acetone and other chemicals that are sometimes necessary to have around are not as common to use as degreaser or chain lube so they can be kept in a drawer or cupboard. Many times the best place for these items is in a big yellow Flammable cabinet. Just keep in mind what you might need and how often you need it.
I hope this helps you to achieve a calmer state in your repair area, which will let you get repairs done more quickly and more efficiently. In the end it’s all about convenience, minimizing movements and to have your most commonly used tools at your fingertips all while showing off those expensive tools!
Cheers,
Truman Purdy
Park Tool Celebrates 100,000 YouTube Subscribers
Park Tool would like to thank the over 100,000 people who’ve subscribed to their YouTube channel to learn how to tweak, adjust and fix their bikes while being entertained by Park Tool’s Director of Education and Master Mechanic, Calvin Jones. Read more »

Pinkbike Tech Talks: Tools for a Trip
Check out the latest episode of Pinkbike Tech Talks, where Calvin and Truman assemble an essential tool kit ideal for traveling. Watch now »
Park Tool Announces Winners of 3rd Annual Community Tool Grants
Park Tool is proud to announce the winners of their 2018 Community Tool Grants. This is the third year the company has awarded ten non-profits with bicycle tools and repair stands to help them continue to make a difference in their community. Read more »
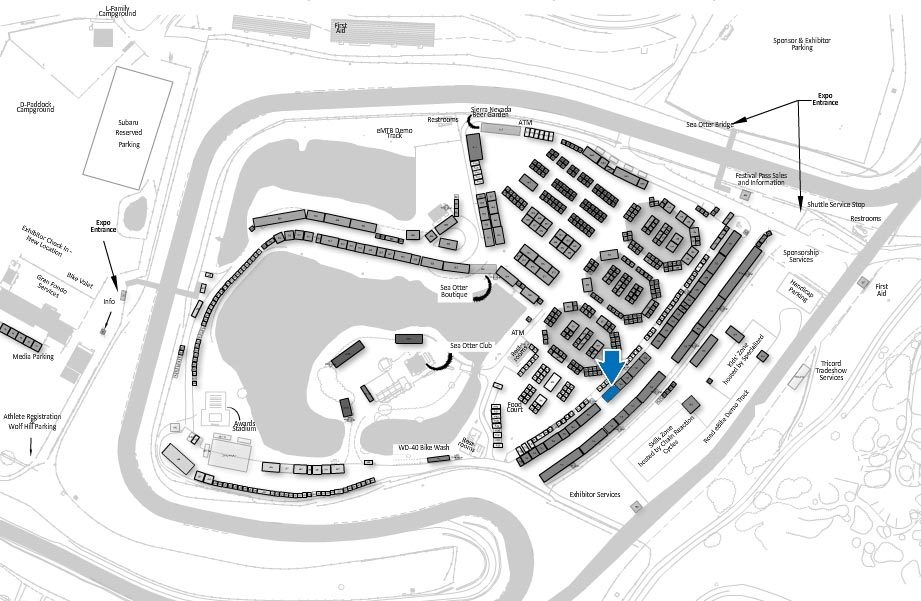
Sea Otter 2018
Park Tool is coming to Sea Otter, April 19–22! Be sure to visit us in our mobile workstation at booth 746, shown in the map below. While you’re there, stick around for tech clinics presented every day by Park Tool’s own Calvin Jones:
- Wheel Truing — 10:00 a.m.
- Shifting Adjustments — 2:00 p.m.