On the Ride Chain Repair
This article will review temporary repairs to address common on-the-ride chain problems, including tight links, broken chains, and twisted chains.
Preliminary Info
- Chain Tool or multi-tool with chain tool (e.g. MT-40 or IB-3)
- Master link or connecting rivet
- Spare chain links (optional)
These repairs will be sufficient to get you back home when you break your chain on a ride but anytime you break a chain it is necessary to replace your chain with a new one when you get home. You’ll need a multi-tool with a chain tool or a small chain tool such as the CT-5 to remove damaged links and to reconnect the chain if you’re not using a master link. You’ll also need a connecting rivet or master link to reconnect the chain. Consult your component manufacturer to ensure you use a compatible connector.
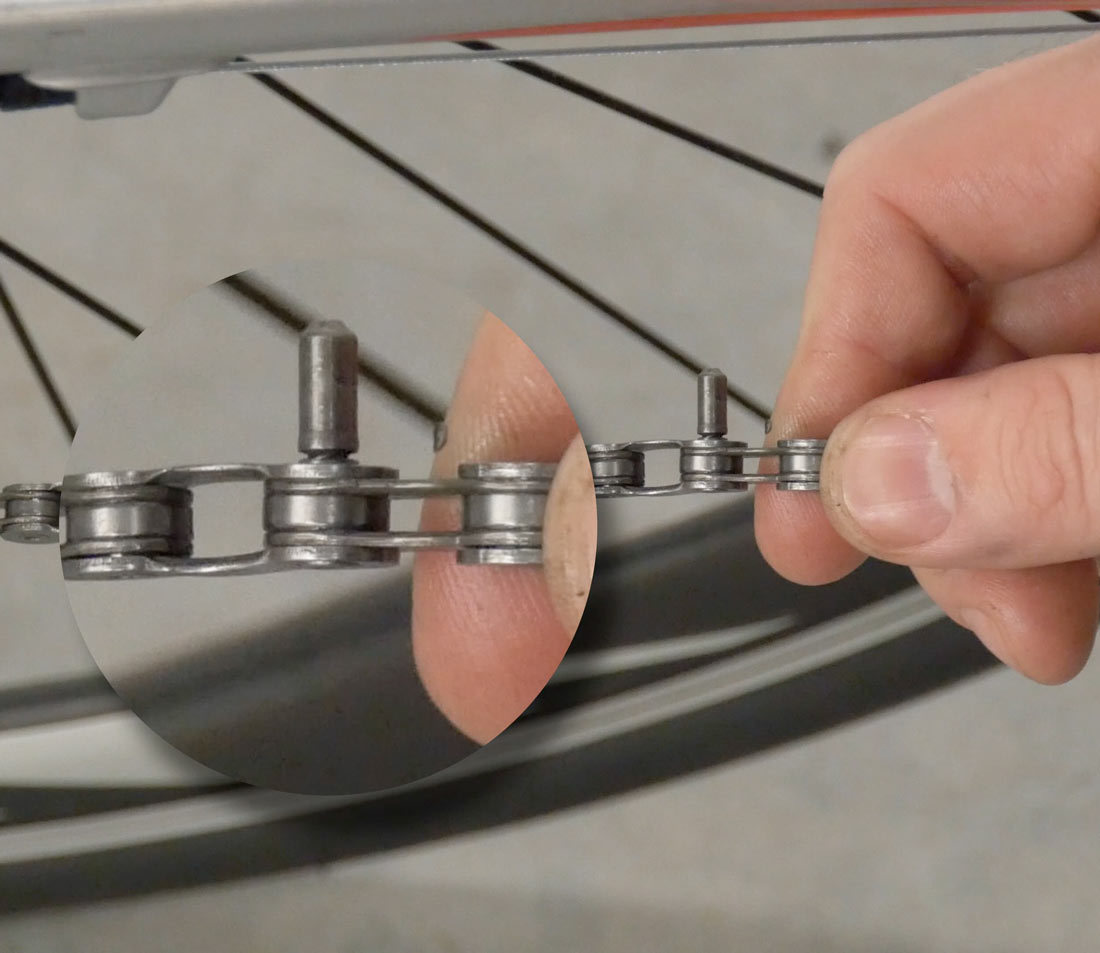
Tight Link
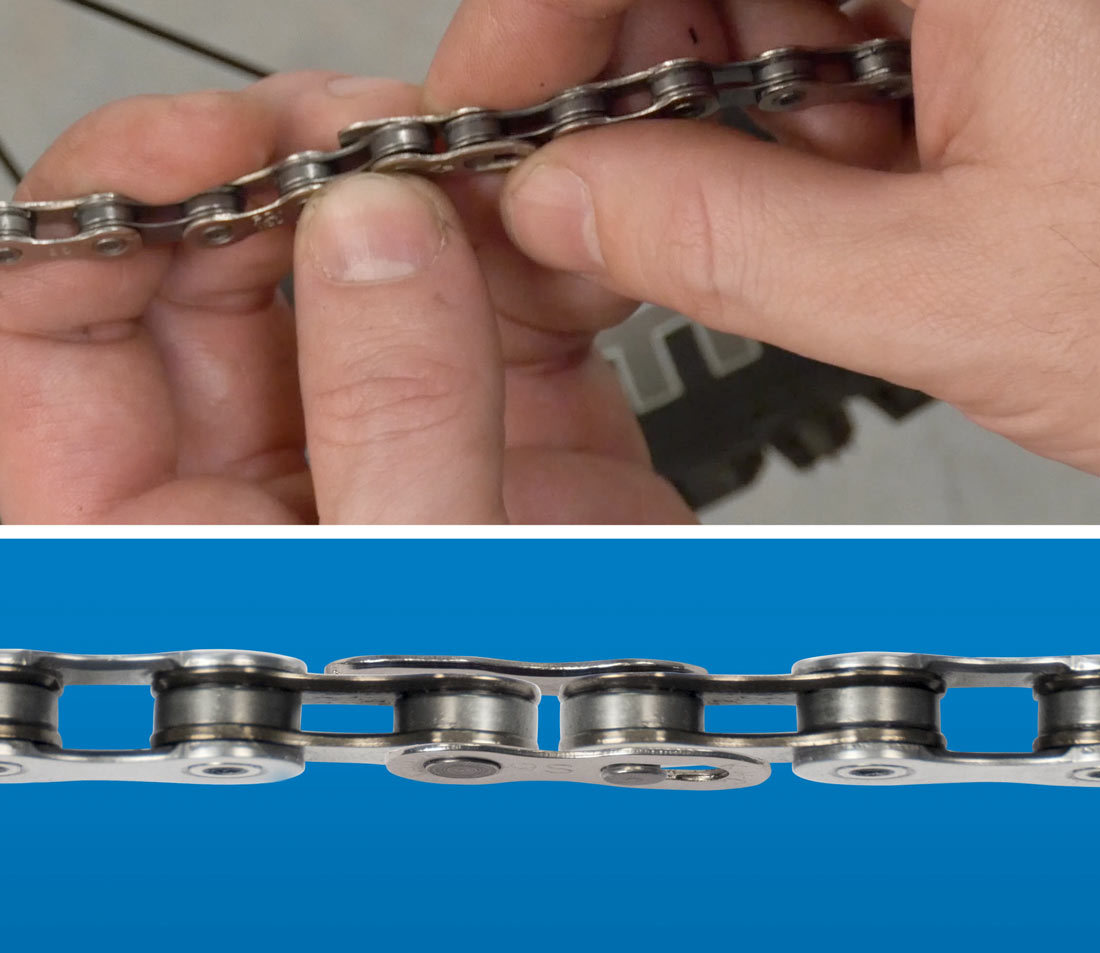
A tight link will not rotate freely through the drivetrain components. Tight links are generally caused by a lack of lubrication, corrosion, or a poorly installed chain. A tight link can easily by identified by backpedaling and watching the chain as it passes over the cog. The tight link will not hinge around the cog as you back pedal. Once you’ve found the tight link, simply grasp the tight link between your hands and flex the chain laterally. This will open up the plates are resolve the tight spot.
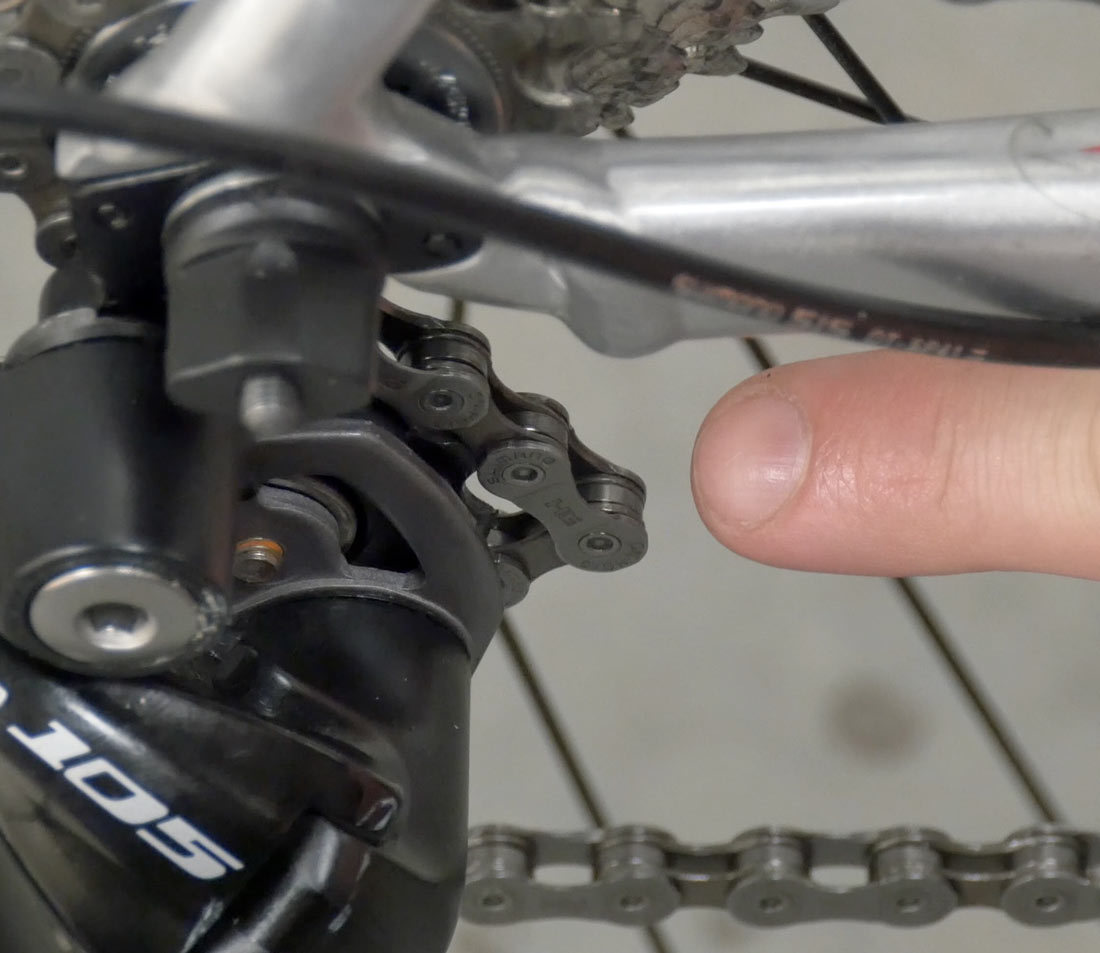
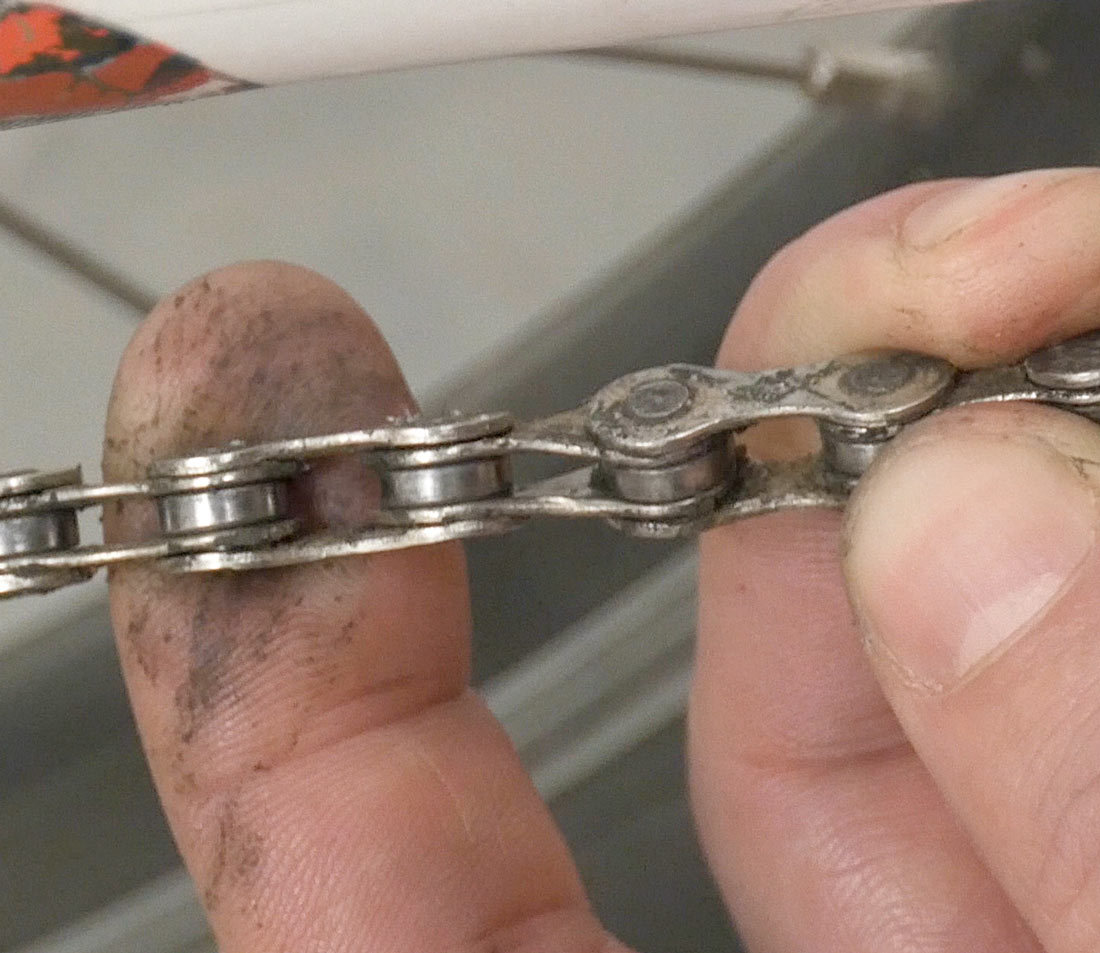
Obvious tight link at derailleur pulley
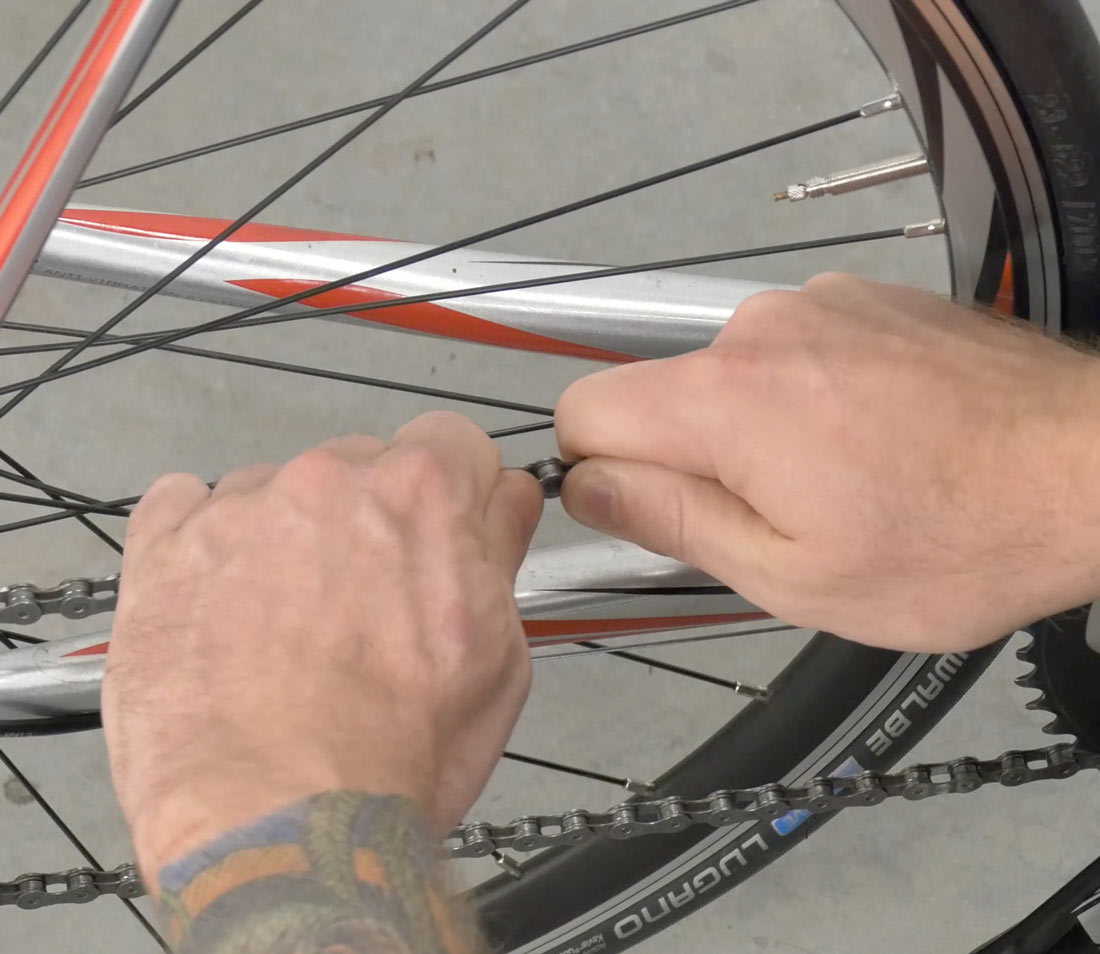
Flex link laterally
Broken Chain
In all cases, start be removing any broken or damaged links so you can reconnect your shortened chain. Ideally you will have a master link or spare connecting rivet with you on your ride. It’s always a good idea to carry small parts like this with you in your repair kit since, if you break your chain out on a ride, you are dead in the water and having these spare parts on hand can make the difference between getting home and calling for a ride. But if you don’t have these parts with you, we’ll show you an alternate method as well.
Master Link
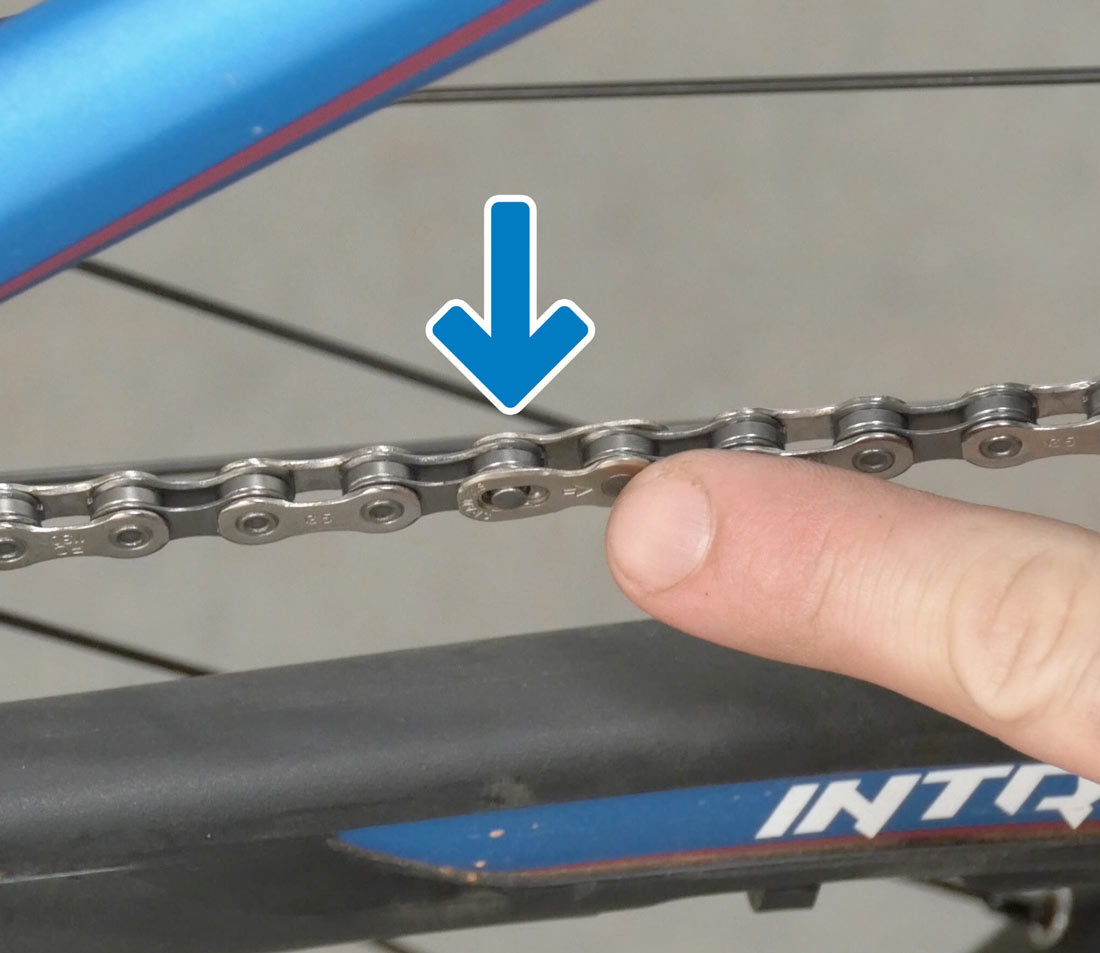
If your chain uses a master link, press out both rivets to remove the damaged plates. Next, reconnect your chain using a master link. Pay attention to any directional arrows on the master link and ensure that they follow the direction of travel.
Remove second rivet at damaged link
Reconnect using master link
To engage the master link, make sure that it’s on the upper row of chain, apply the rear brake, and apply force to the pedals. What’s nice about a master link chain is that the length remains the same even after the fix so you’ll have all of your gears for the ride back. But remember, if you do end up having to remove some links, your chain is shorter and you should avoid shifting into your largest cogs and chainrings.
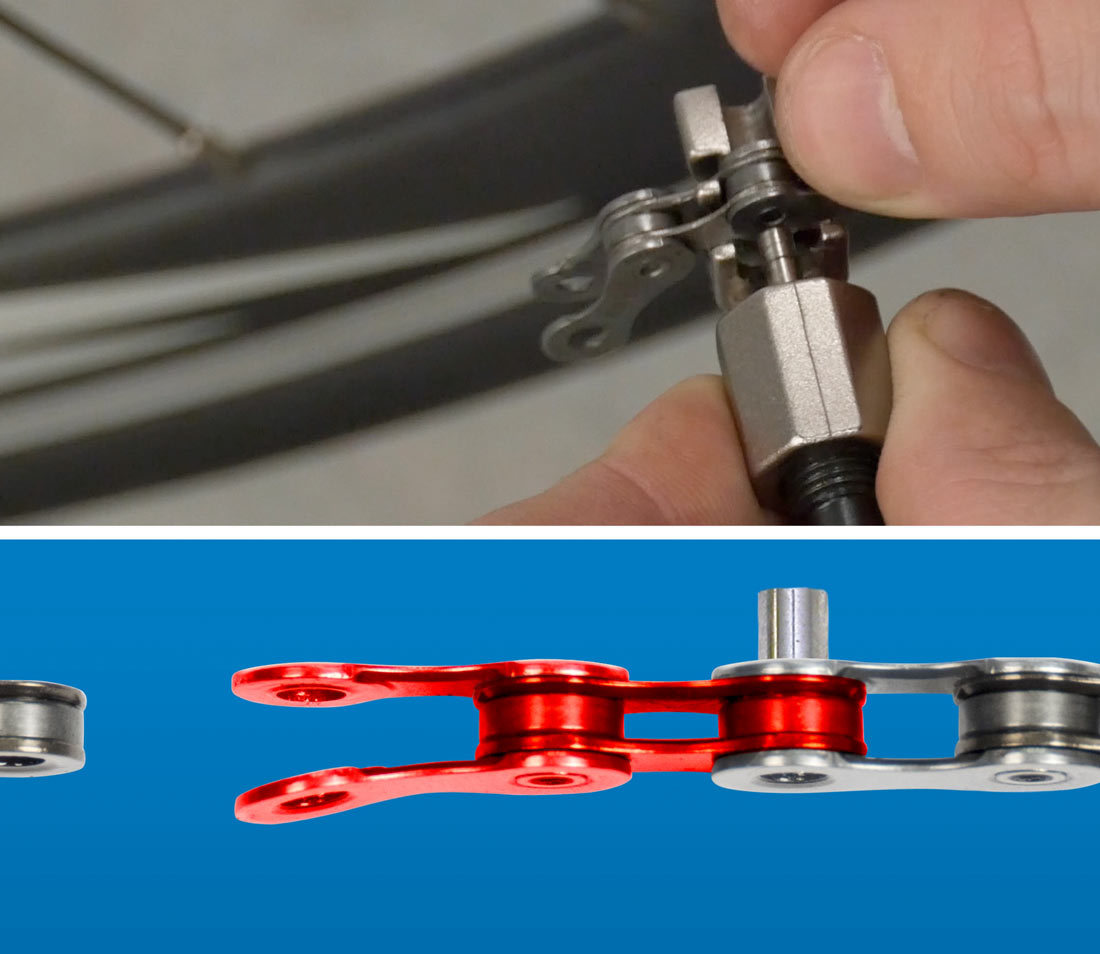
Connecting Rivet
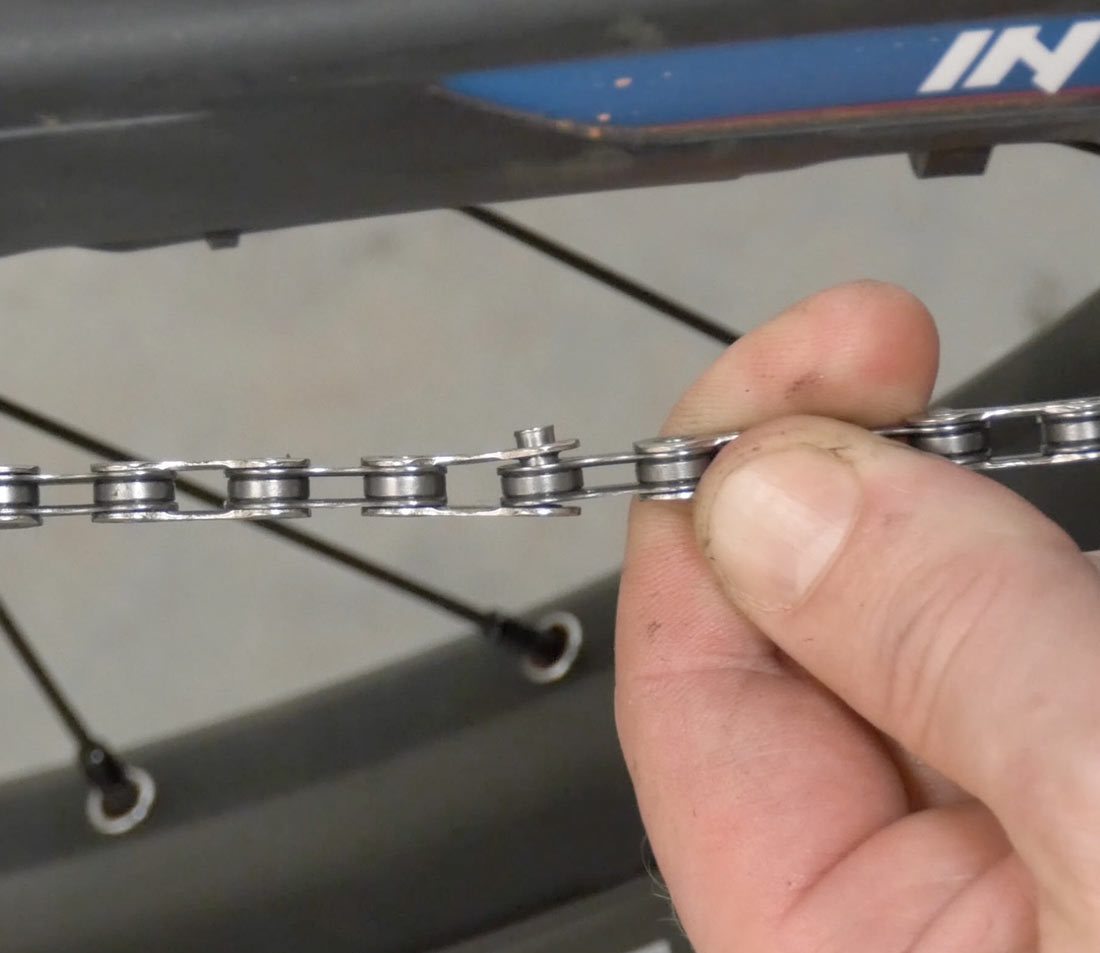
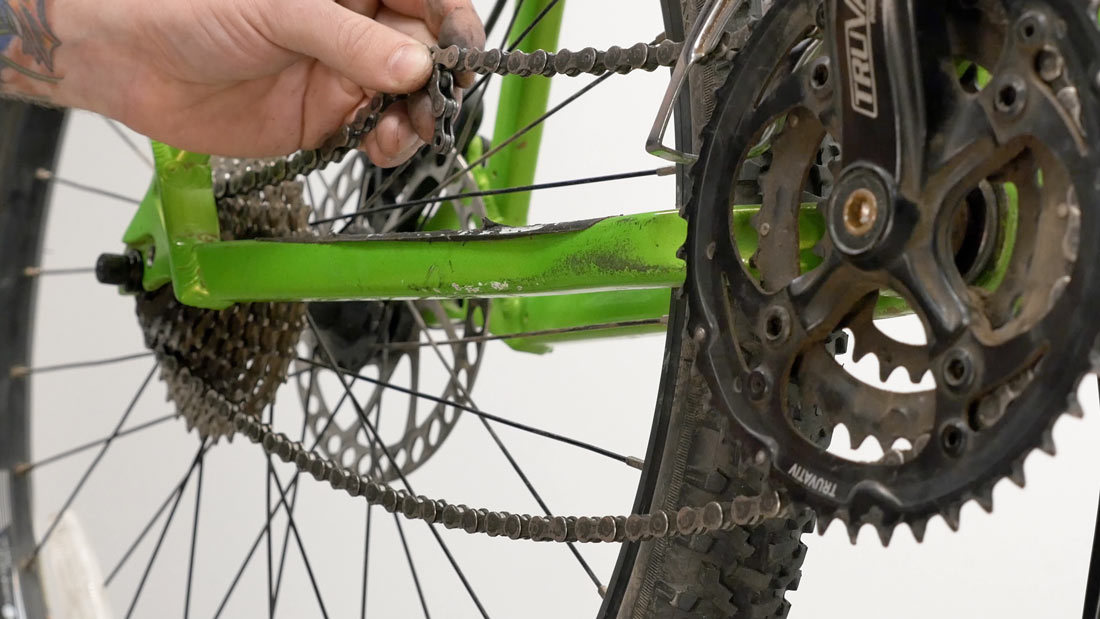
If you’re using a chain with a connecting rivet, we’ll first break the chain at the damaged link. We need to remove the damaged link along with an adjacent set of inner plates. Drive the appropriate rivet all the way out of the chain and remove the damaged segment. This allows us to reattach the ends of the chain using a connecting rivet.
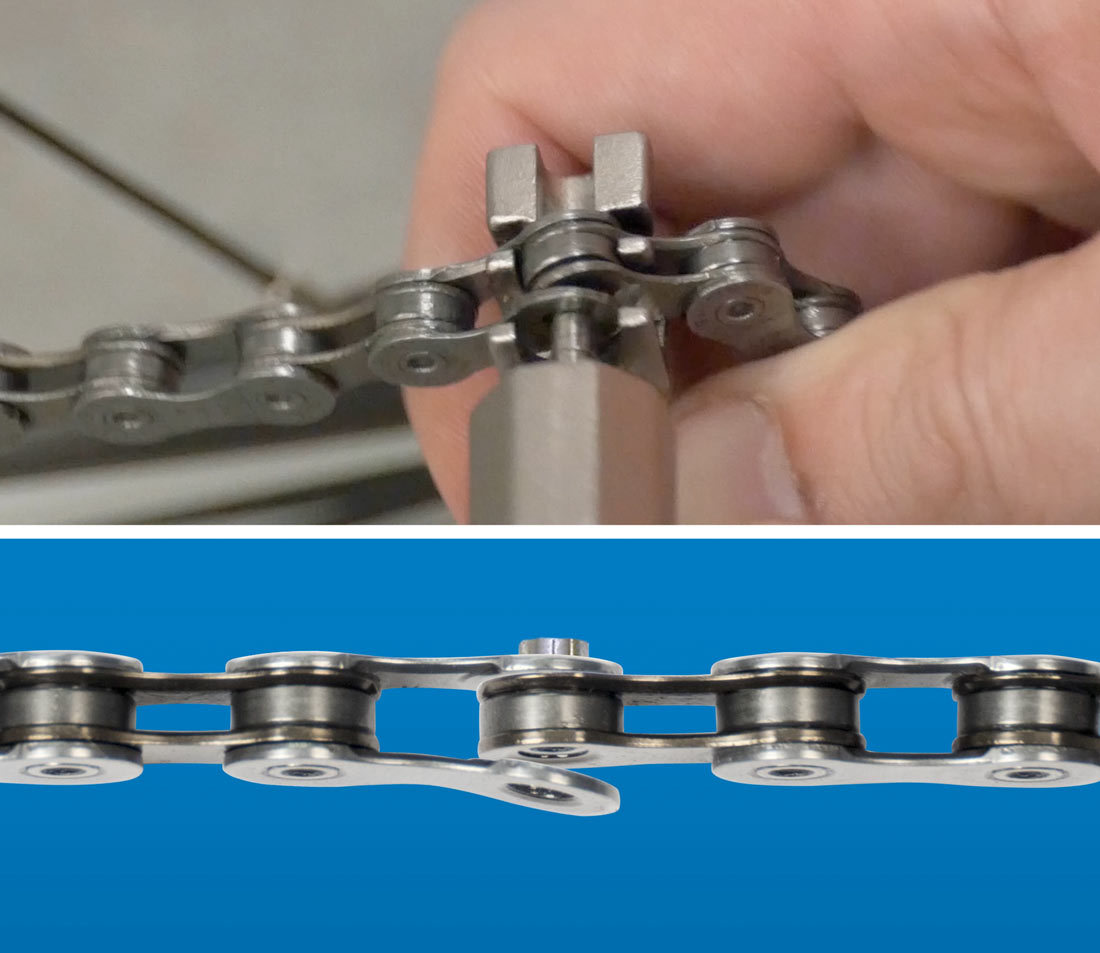
Break chain at damaged link
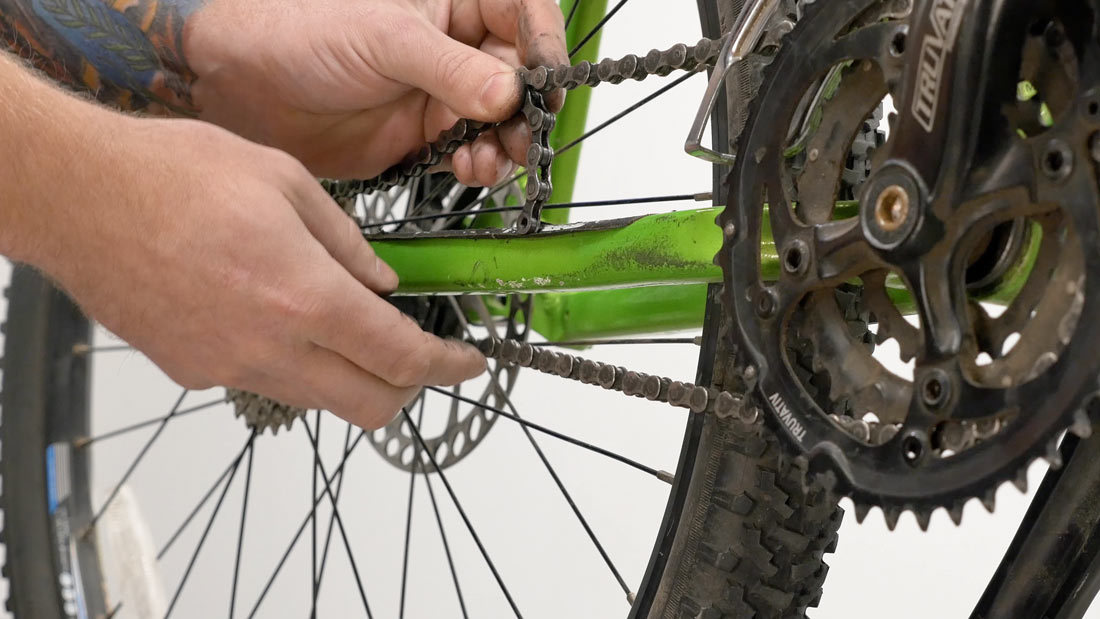
Remove damaged link with adjacent set of inner plates
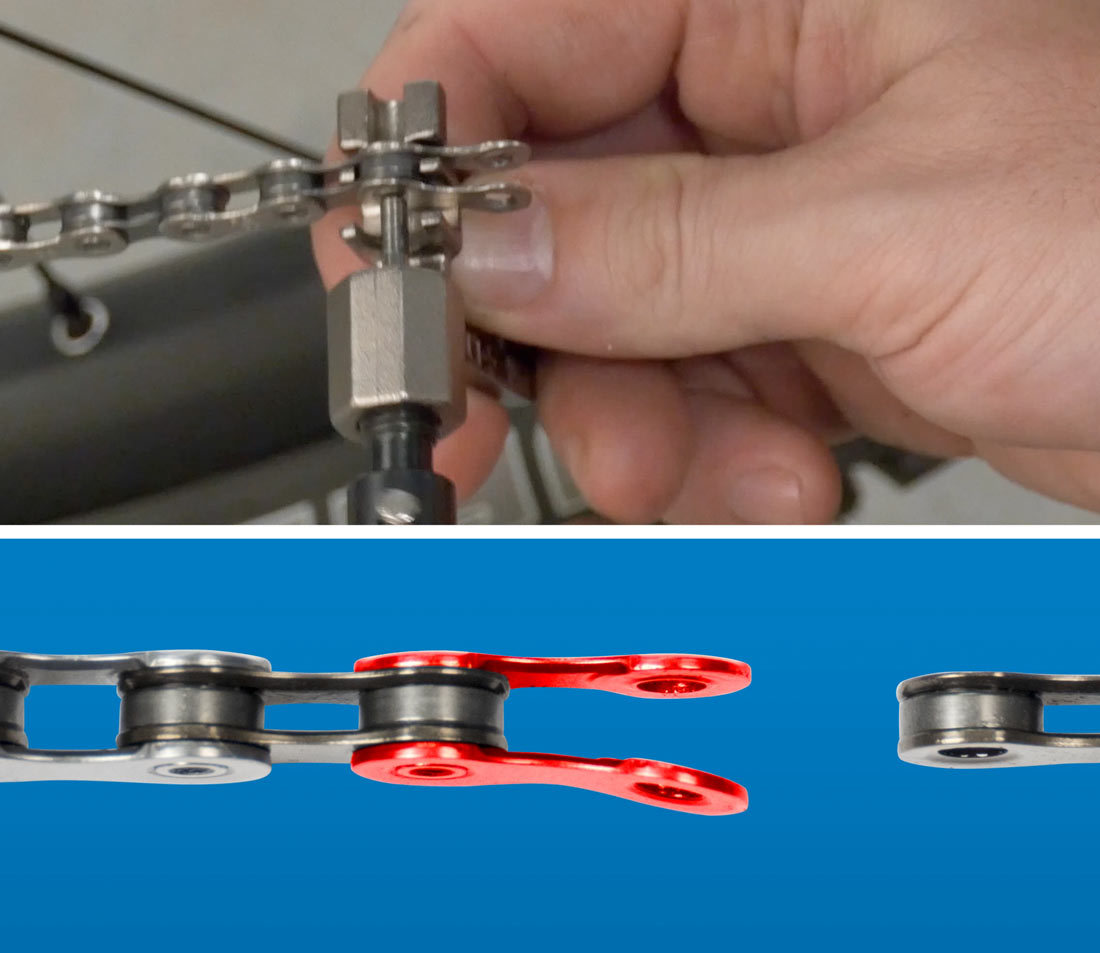
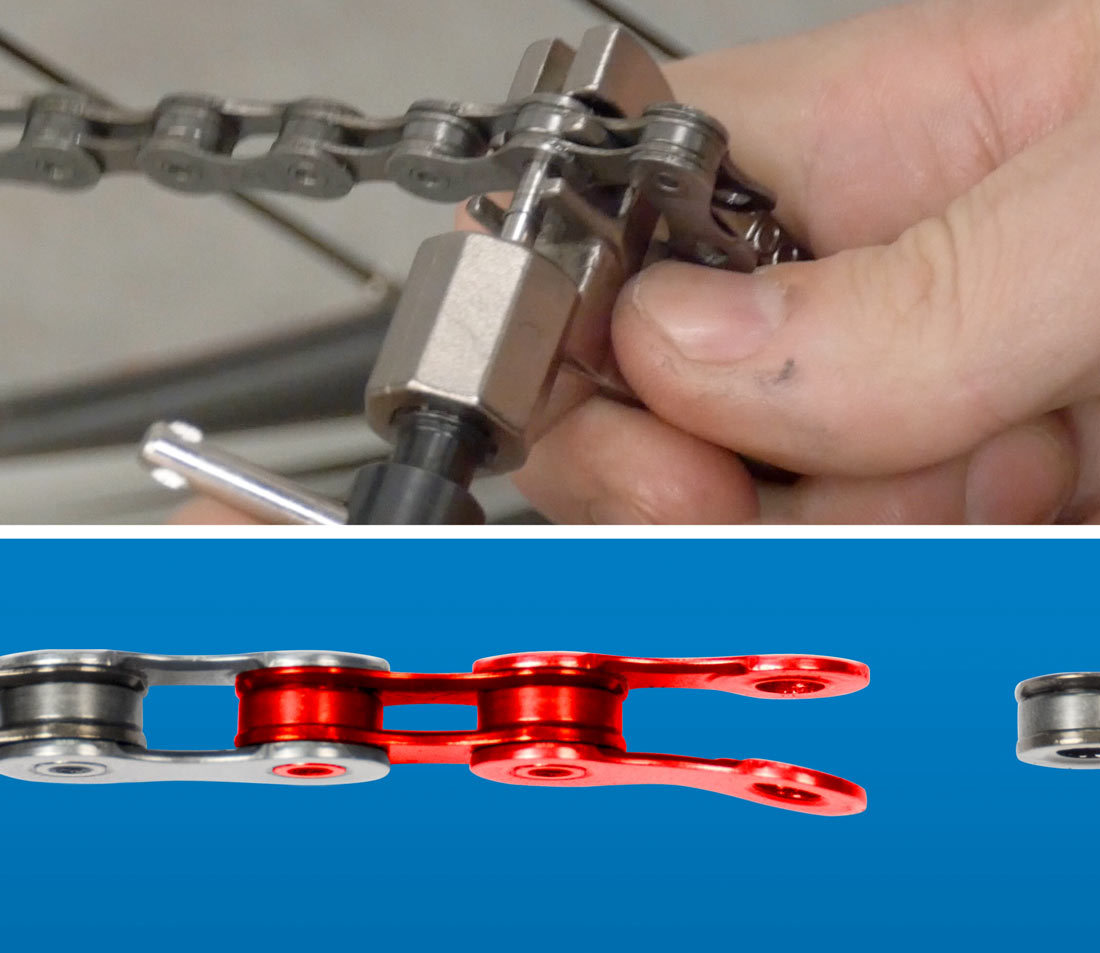
Install the connecting rivet and drive it into the chain using the chain tool until it matches the depth of the neighboring rivets. Break off the pilot tip of the connecting rivet.
Reusing a Rivet
If you don’t have a spare master link or connecting rivet, it is possible to reuse a rivet as a last resort. Break the chain at the damaged link, and push out a second rivet just enough to remove the damaged segment of chain.
Push out second rivet
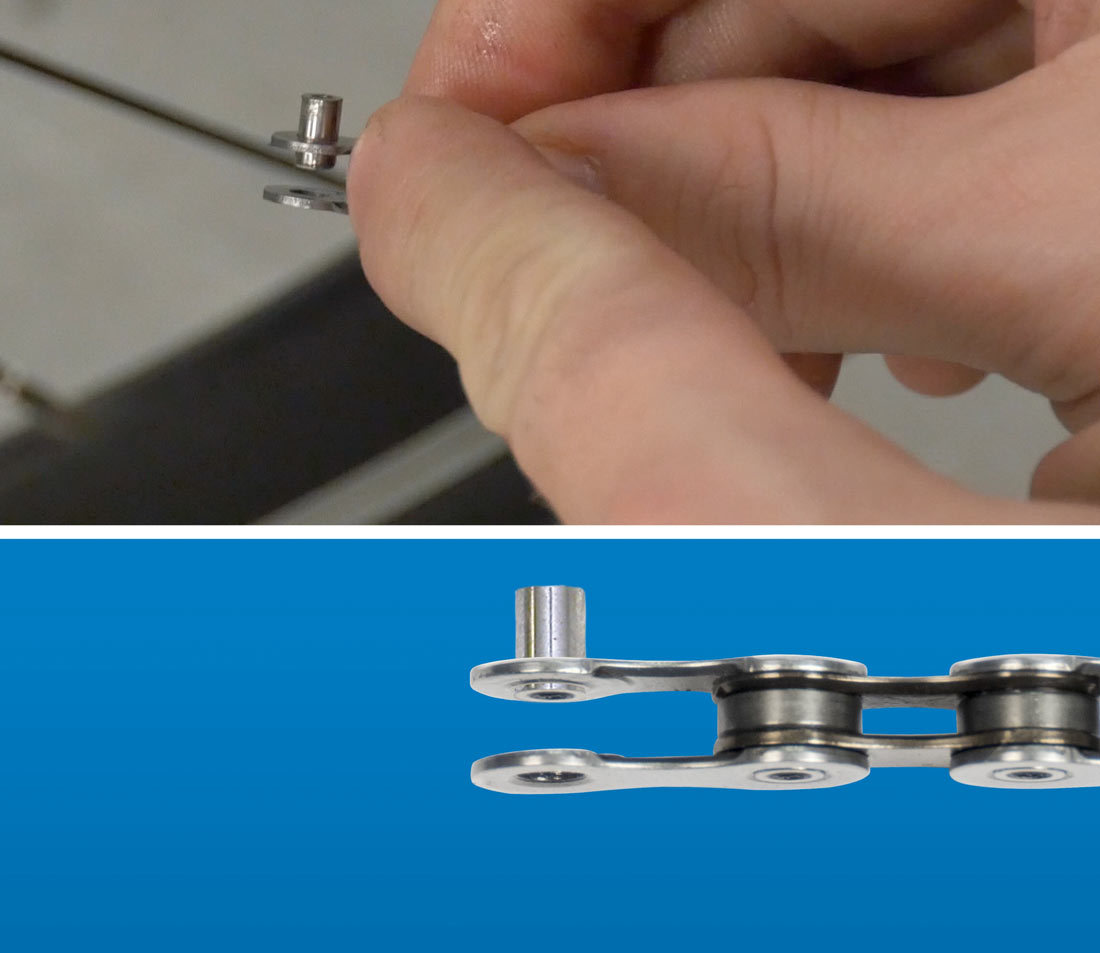
Leave rivet partially in place
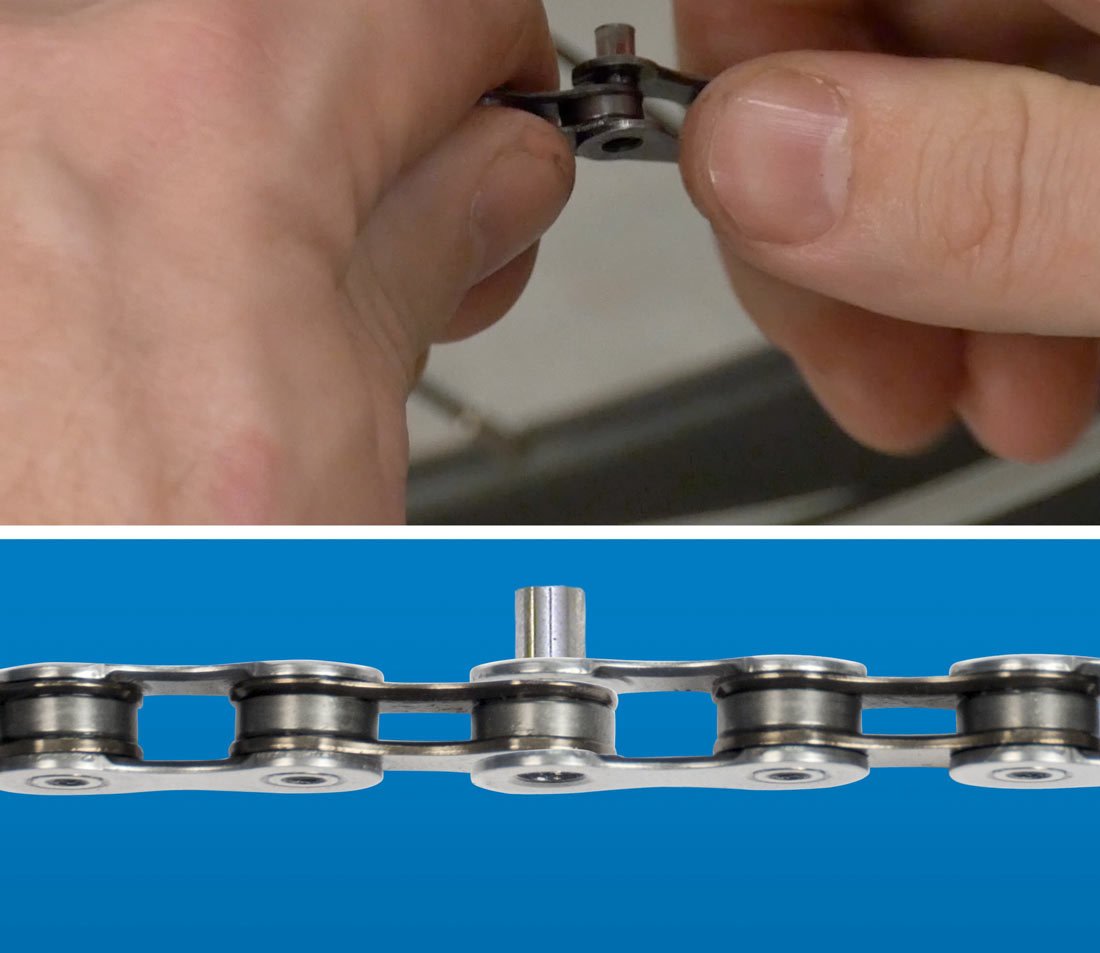
After you have removed any damaged links, reconnect the chain using the rivet that was partially pushed out. Push the rivet back in so that it matches the depth of the neighboring rivets. Again, this is a temporary fix, and the rivet’s strength has been significantly compromised.
Twisted Chain
Chains can become tangled in different parts of the drivetrain causing the chain to twist and bend. When a chain twists, it will no longer mesh with the teeth of the cogs, and when this happens you have to fix it or risk further damage to your drivetrain. First, identify any links that are bent or twisted. If the twist is isolated to a single link, remove it along with a set of adjacent side plates and reconnect your chain as shown previously. There are instances where the chain can have a compound twist or a twist that occurs in multiple links. If this happens you may have to remove a larger section of chain and potentially be required to make your bike into a single speed. We’ll cover that process next.
Sometimes when a chain breaks, it can wrap itself around other drivetrain components and cause a lot more havoc than you’d expect. In this case the chain has broken and wrapped itself around the rear derailleur so our only choice is to turn the bike into a single speed so we can get home.
When your bike sustains this much damage it’s a good idea to check all the other drivetrain parts before attempting a fix. Again, if you don’t have a spare connecting rivet or master link, be sure to push out a rivet only as much as you need to in order to separate the chain. Once the chain has been broken, separate it from any pieces of the derailleur with which it is tangled. Next, find the combination of gears that will give the best chainline and chain tension. Wrap the chain around the middle chainring and pick a rear cog somewhere in the middle with the best chainline. Next, make sure you can get acceptable tension by lining up the rivets and plates. Remember, an inner must connect to an outer plate. Your tension won’t be perfect, but the idea is to find a gear combination that will supply enough tension to get you home. This example will not work as the shortest possible chain length does not supply enough chain tension. In our next example we move one cog down and try again. This gear combination does supply adequate tension. Cut the chain at the appropriate rivet and join the chain by pushing the other pin back into the chain, or if you have a master link or connecting rivet, use those spare parts. The conversion is complete, but make sure to asses the full extent of the damage when you get home and make any necessary repairs.
These gears provide inadequate tension
These gears provide adequate tension
Related articles
Chain Length Sizing View Article
Chain Length Sizing: Campagnolo® View Article
Chain Replacement: Derailleur Bikes View Article