Chain Replacement: Single Speed Bikes
This article will discuss replacing a chain on a single speed or two-sprocket bike. Sizing, installing and correct tension will be reviewed.
Preliminary Info
People like the simplicity of two-cog drivetrains. Bikes like BMX, fixed-gears and internally geared drivetrains all use these simple, two-cog drivetrains. A fresh chain that has been properly installed and tensioned will keep your bike running smoothly and trouble-free.
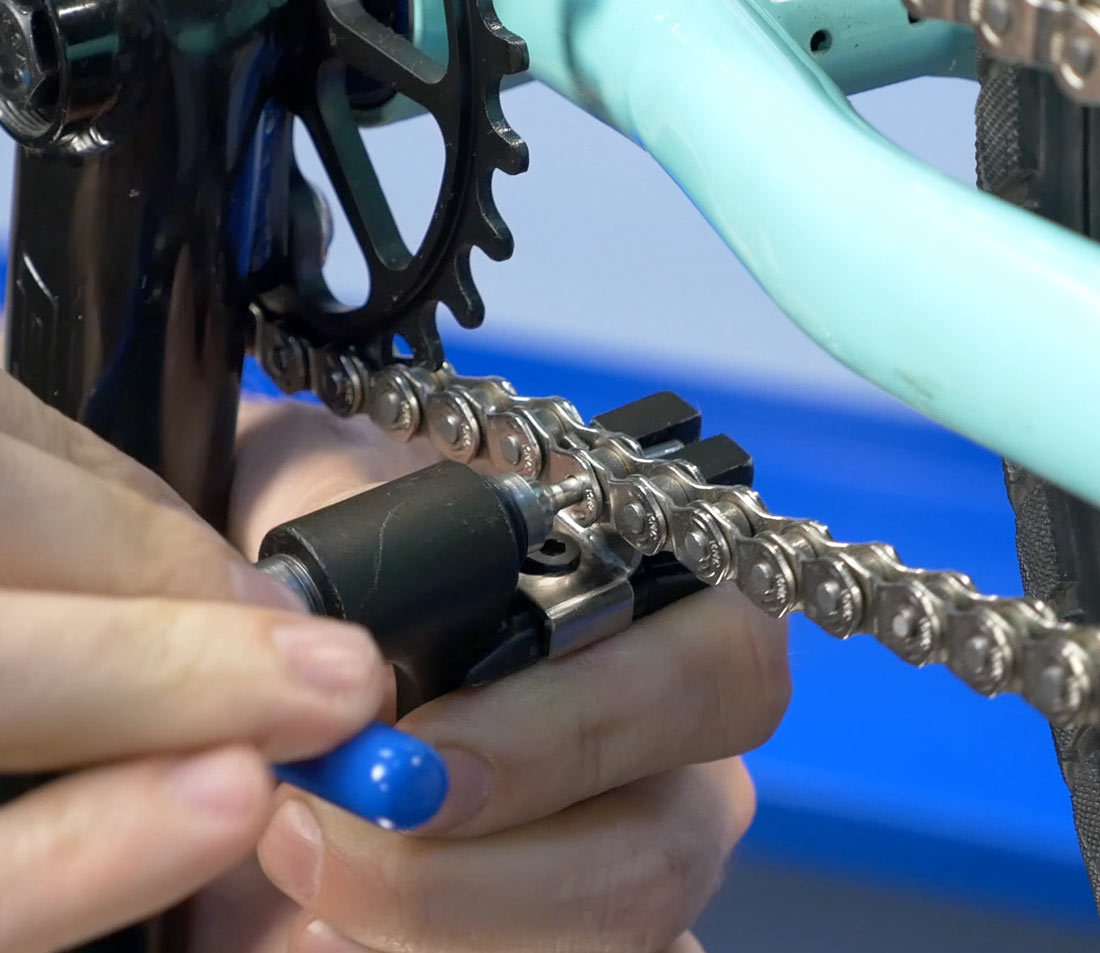
The Park Tool CT-3.2 is particularly useful because of its floating shelf which can accommodate a wide variety of chains. Some single speed chains can be very thick and the CT-3.2 is compatible with many of these over-sized chains.
Removal
Begin by loosening the axle-nuts to relieve tension on the chain.
Master Link Chain Removal
Use a needle-nose pliers to remove the C-clip and master link. Then, remove the chain from the bicycle.
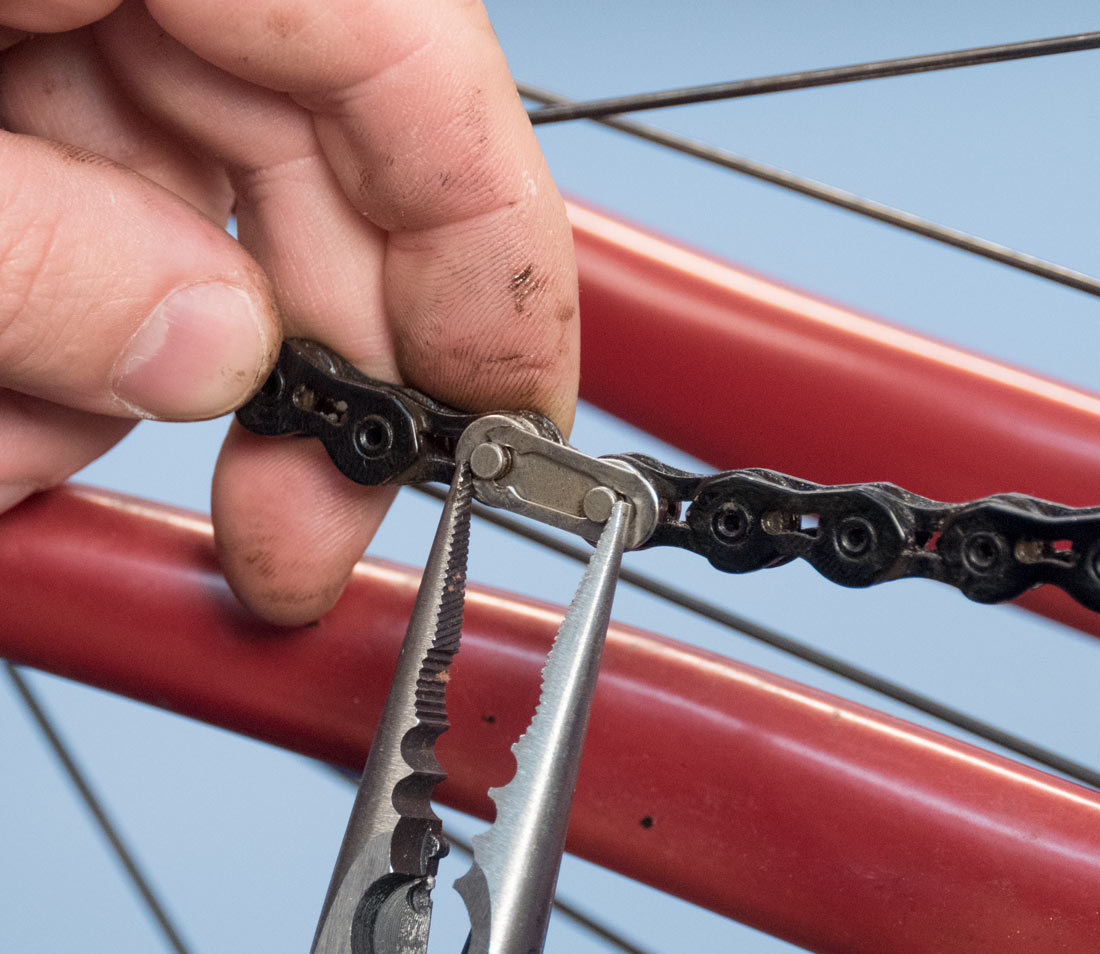
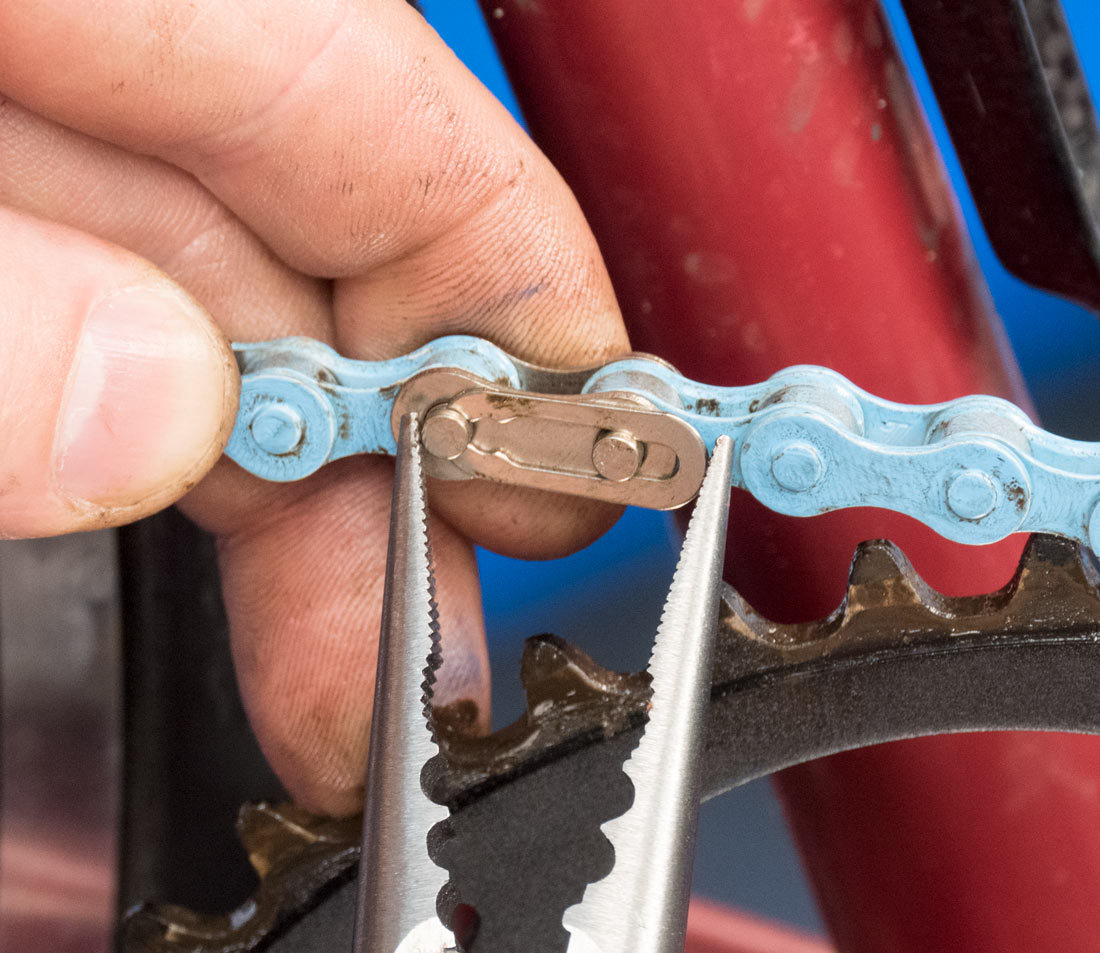
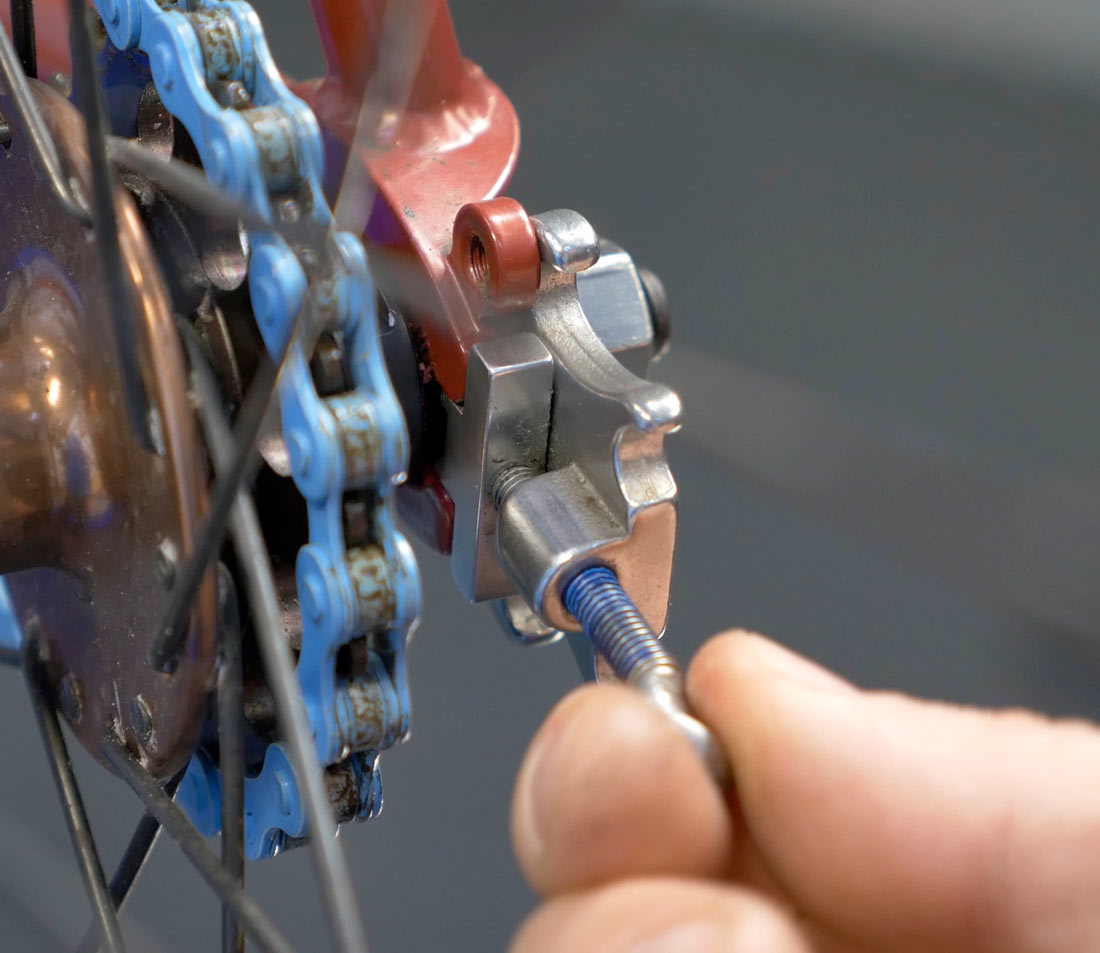
Some two-sprocket chains my use a different type of master link similar to those found on derailleur chains. Disengage this master link using master link pliers like the MLP-1.2.
Master link similar to those found on derailleur chain
Use Master Link Pliers to remove this type
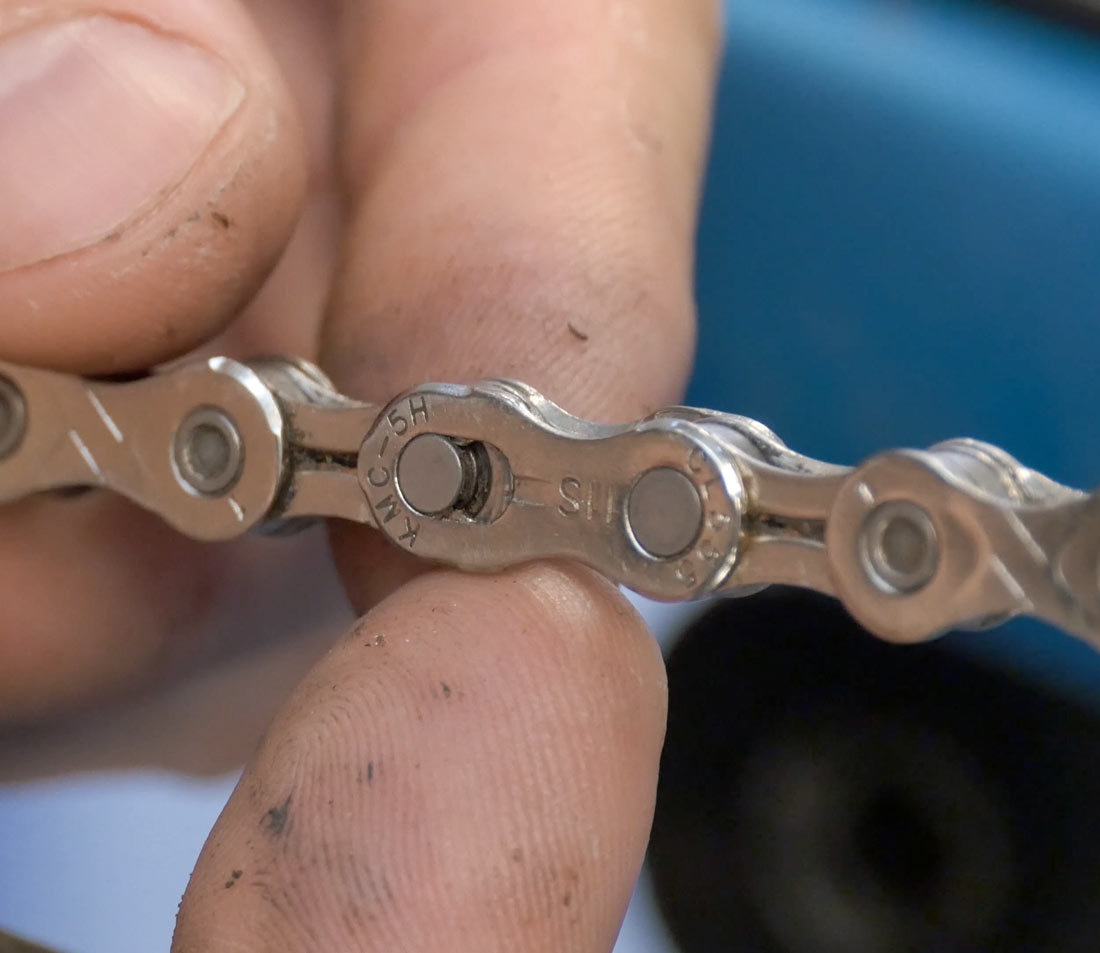
Connecting Rivet Chain Removal
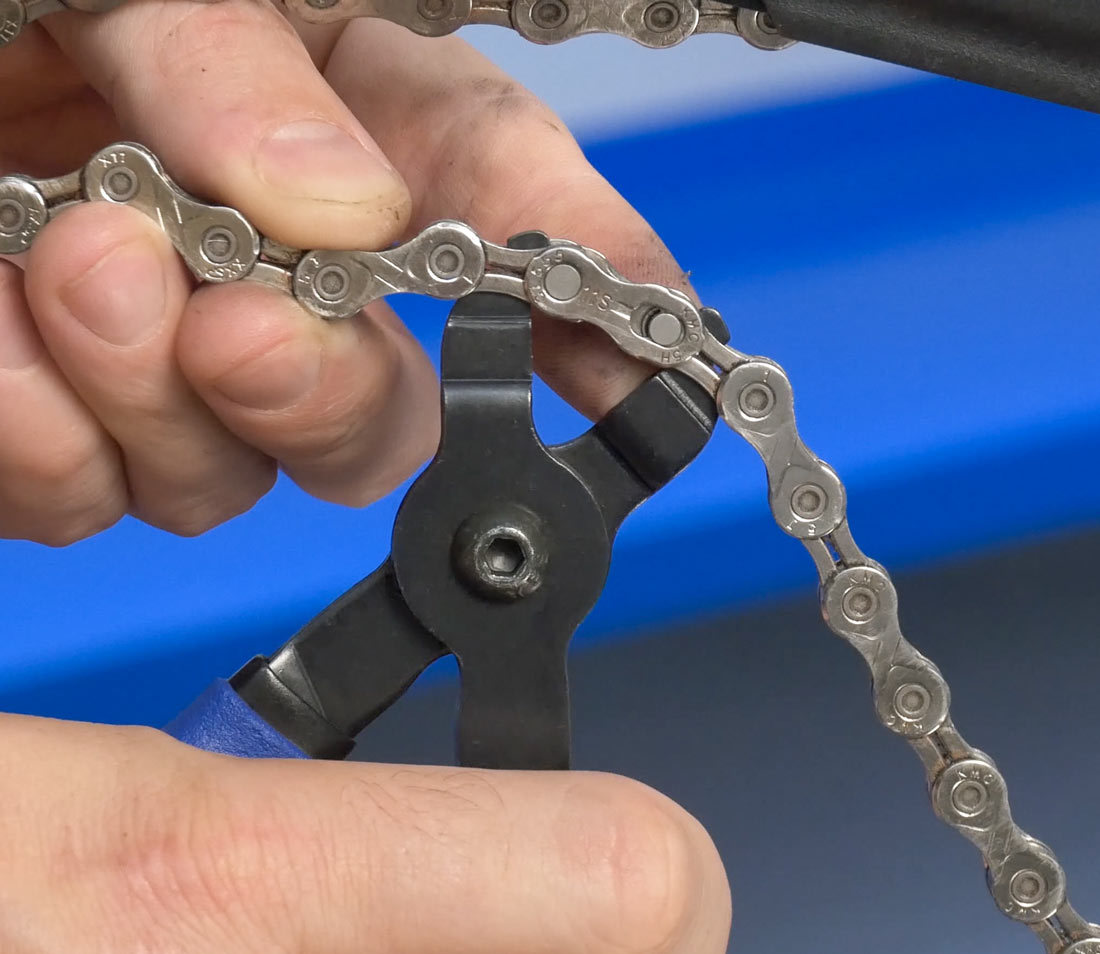
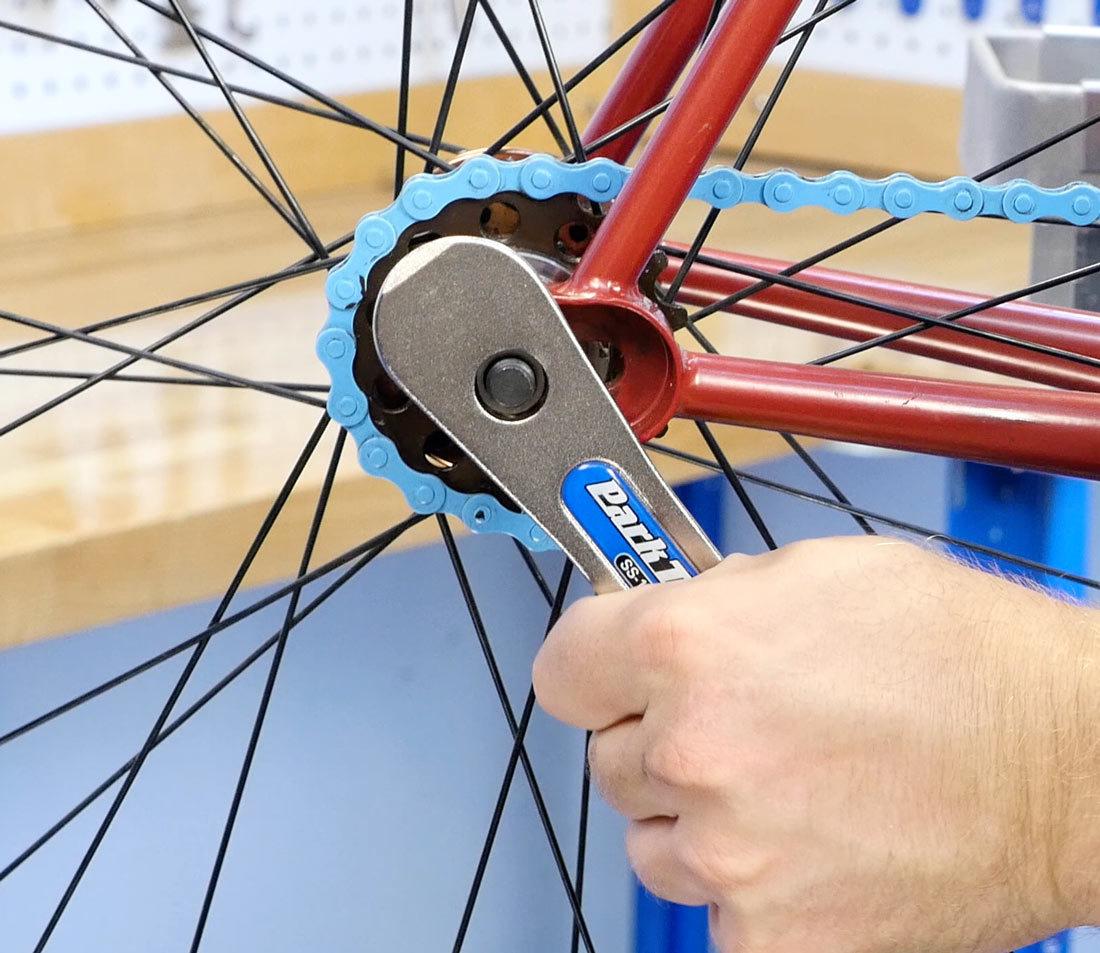
If you don’t see a master link, your chain uses a connecting rivet Connecting rivets will appear visually different to the other rivets in your chain. To disconnect a connecting rivet chain, choose a rivet that is several links away from your connecting rivet and drive it out of the chain using your chain tool. Remove the chain tool from the chain and then remove the chain from your bike.
Connecting rivets have different appearance
Drive out rivet suing a chain tool
Sizing & Installation
Sizing to Old Chain
If your old chain was properly sized, simply lay it next to the new chain on a work bench or table and match the rivets side by side to get the correct length. Install the chain tool and break the chain to the same length as the old chain.
Sizing New Chain
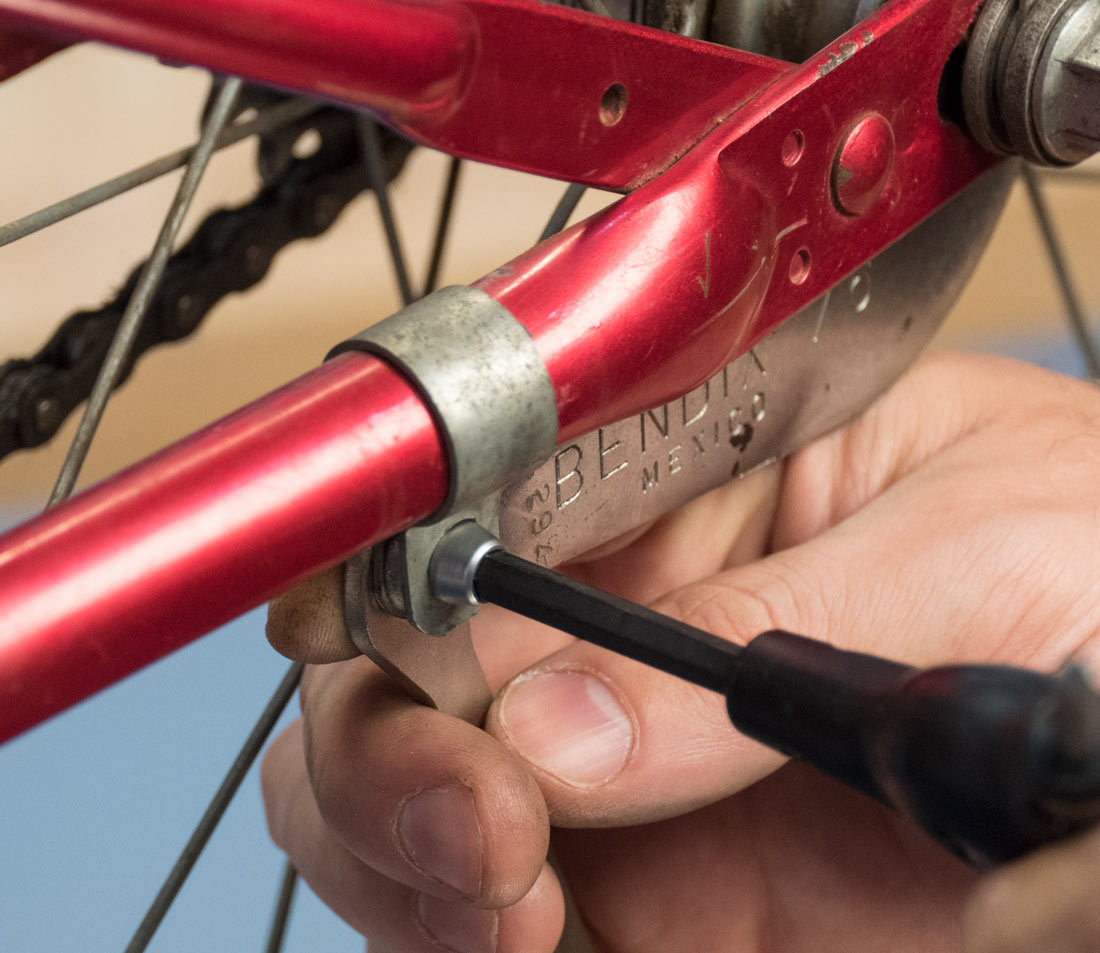
If you do not have the old chain and are sizing from scratch, move the wheel all the way forward in the dropouts. For forward facing dropouts, secure the axle-nuts so they are fully engaged, but the wheel is all the way forward in the dropout.
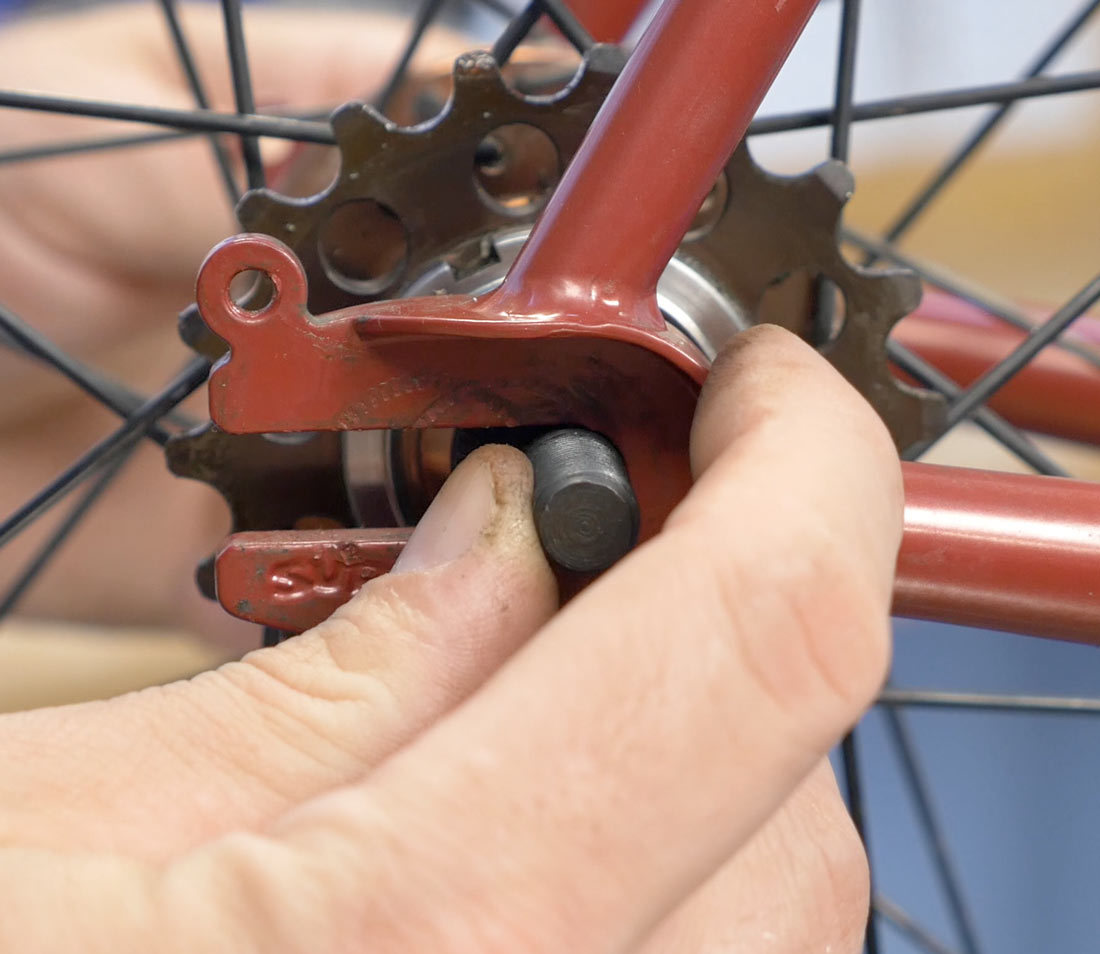
Move wheel forward in dropouts
Secure axle-nuts for forward facing dropouts
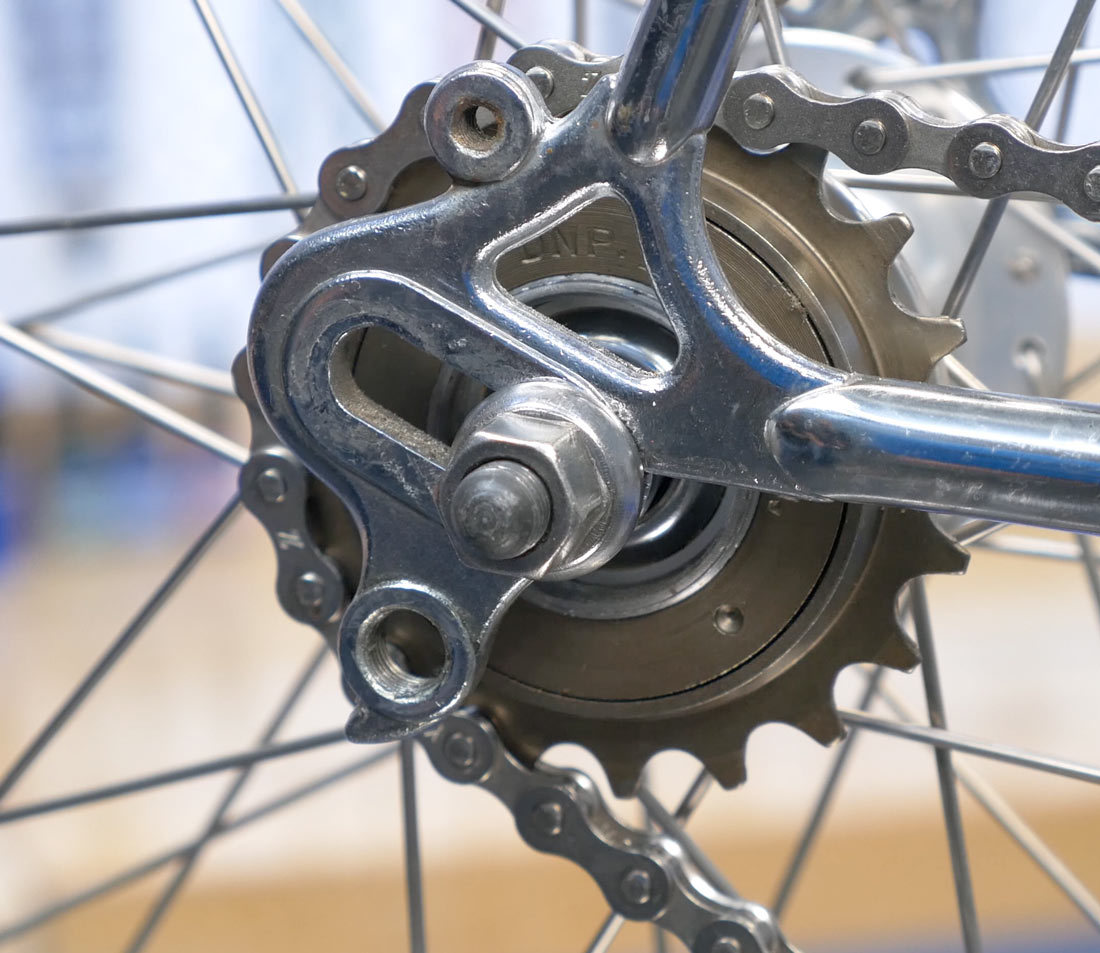
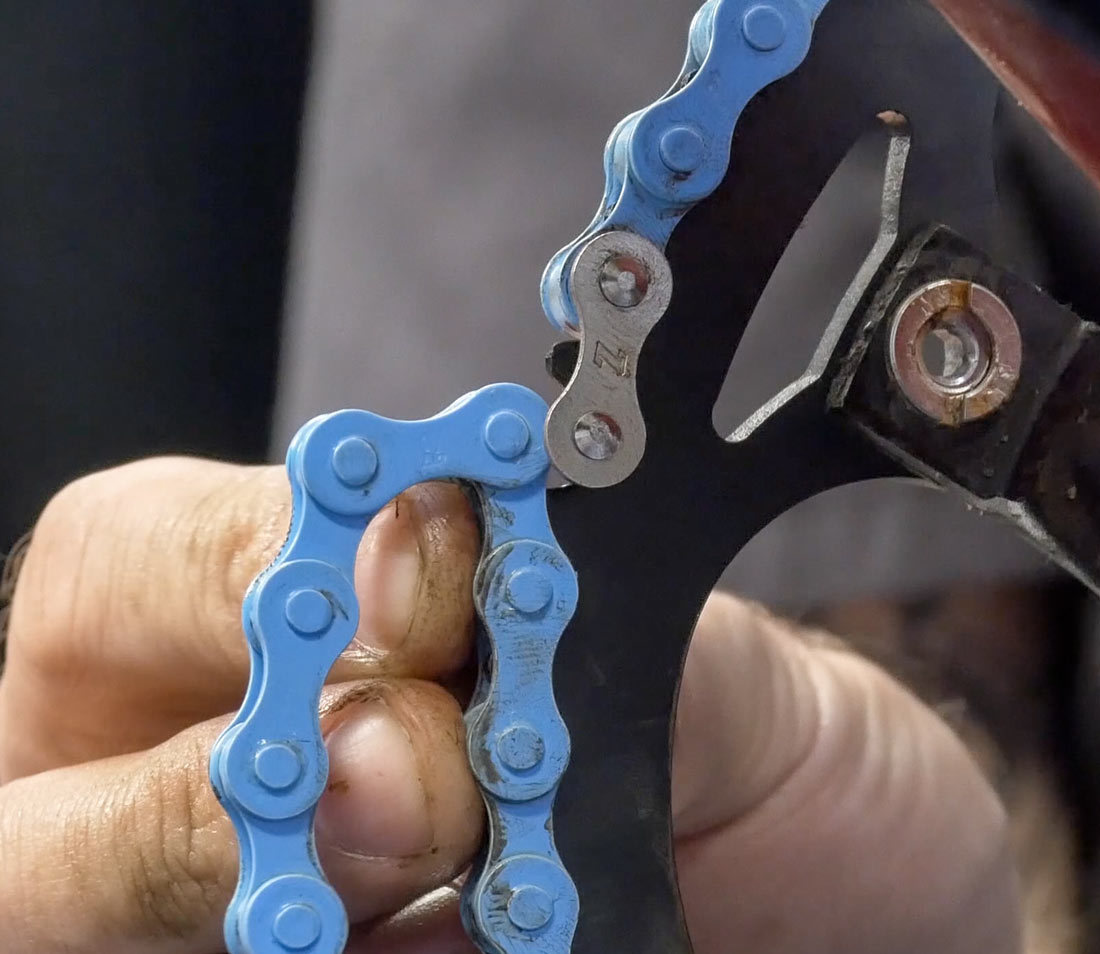
Wrap the chain around the front and rear sprockets. Place the chain end on the front chainring at about the two or three o’clock position. Engage any master link to account for all the link when determining chain length. Pull the lower run of chain as tight as you can, noting that an outer plate must attach to an inner plate. This may create some slack in the chain, but that is ok. Ideally the chain ends will meet at an inner and out plate as shown in the picture. We will call this rivet the reference rivet. It is possible that two outer plates will meet as shown in the photo below. If this is the case, add one pin so the appropriate chain ends meet. This will become the reference rivet.
Outer and inner plates meet
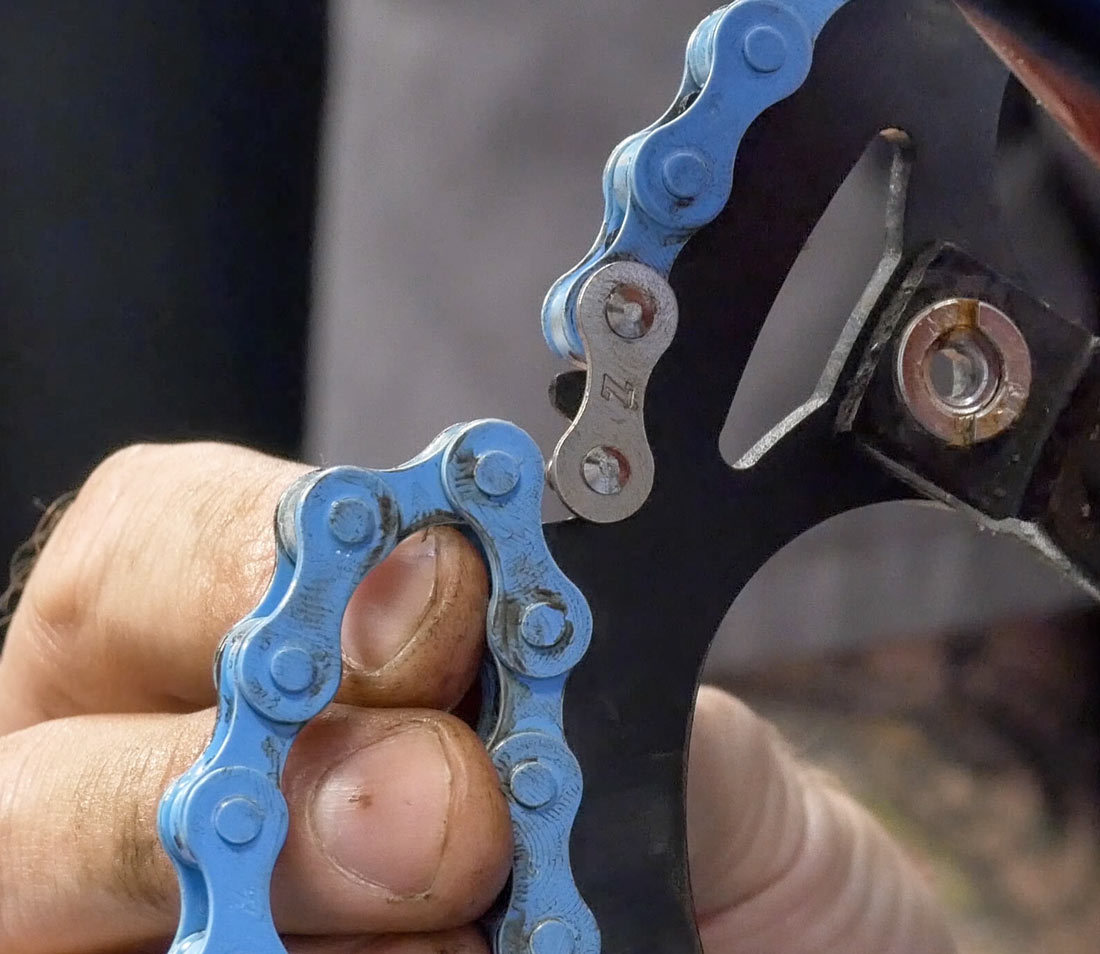
Two outer plates meet, requiring addition of one pin
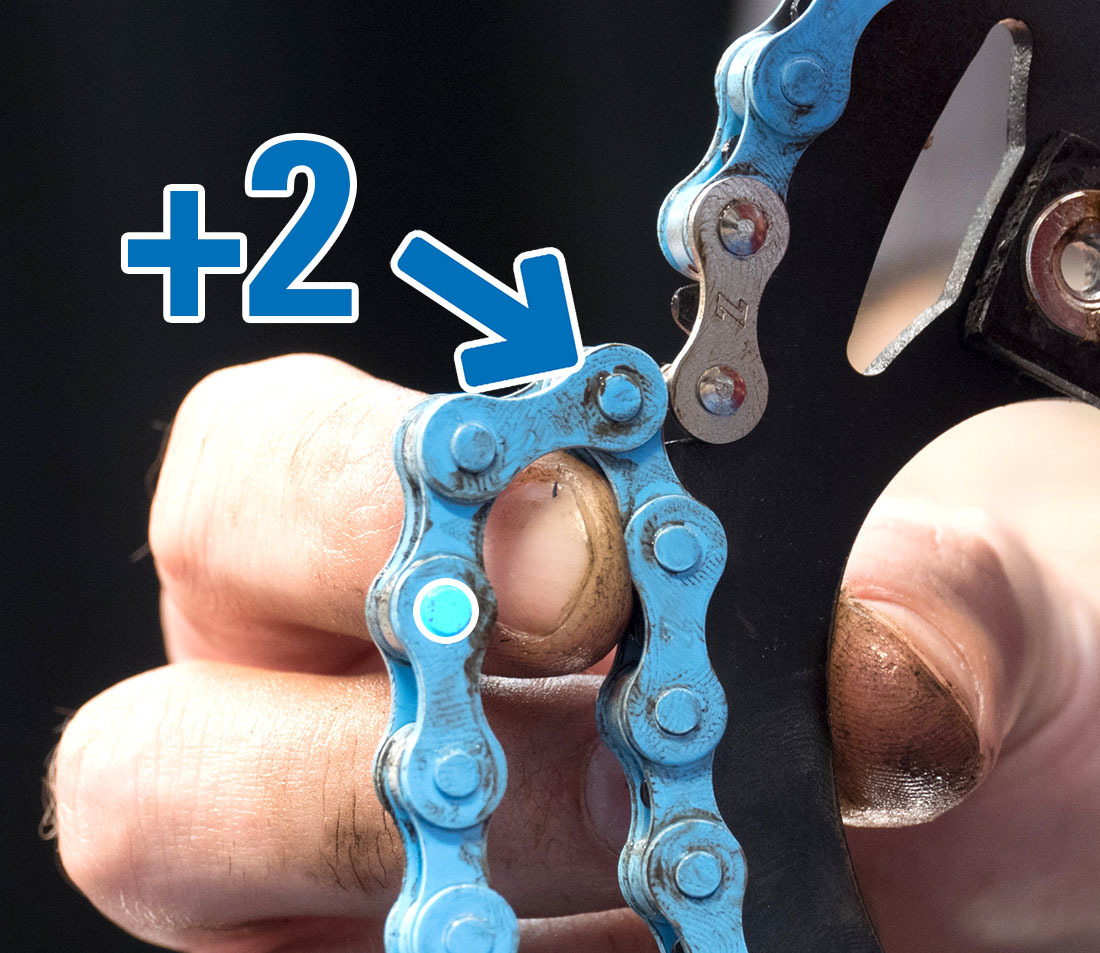
From the reference rivet add two more pins, or one inch, to the chain length. We do this because the extra inch of chain will provide enough slack to allow the chain to be lifted from the drivetrain for wheel removal. It also adds more flexibility for larger tires. Make note of the appropriate rivet to remove to shorten the chain and use a chain tool to remove the rivet and shorten your chain to the correct length.
Master Link Chain Installation
With the chain correctly routed through the frame, join the ends of the chain using your master link. Pull the wheel back in the dropouts and align the wheel in the center of the frame. Snug the axle-nuts but don’t fully tighten them as we need to check the chain tension first.
Connecting Rivet Chain Installation
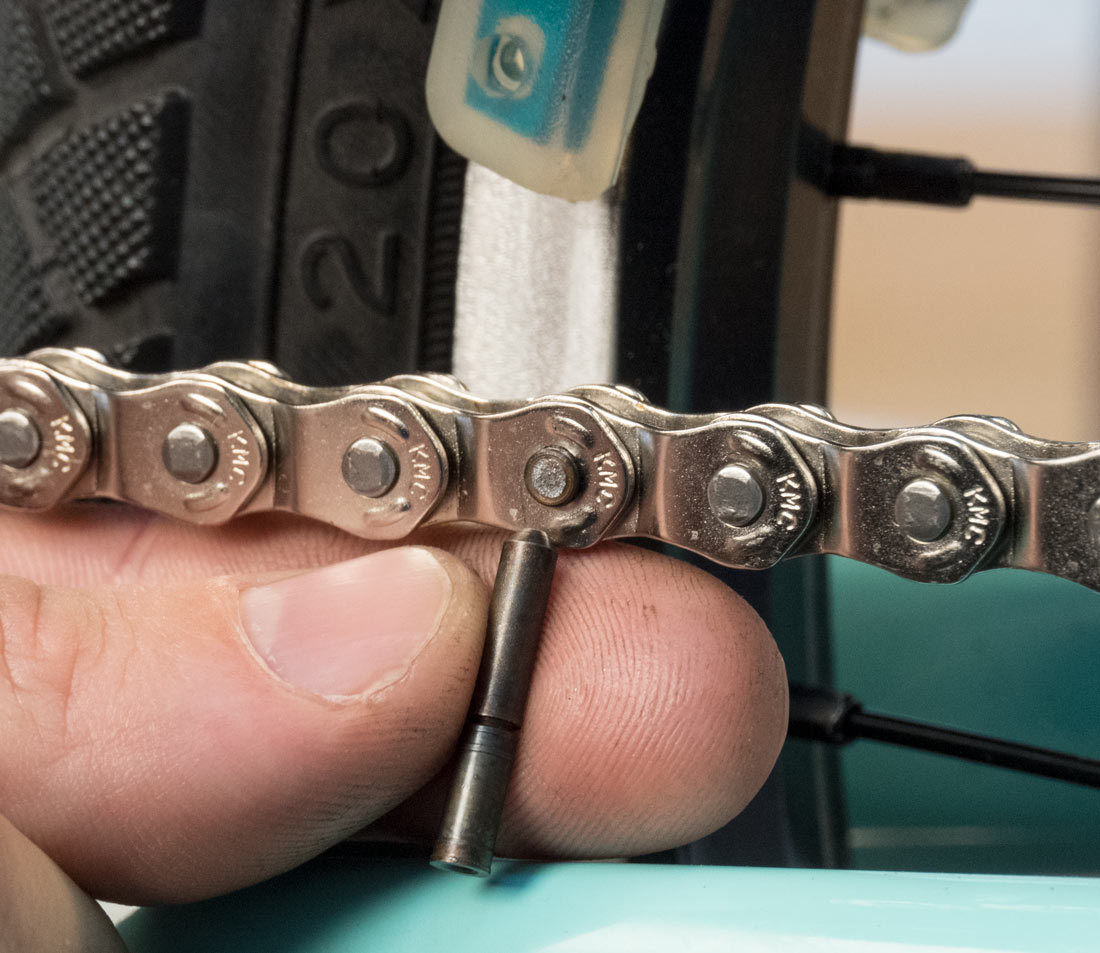
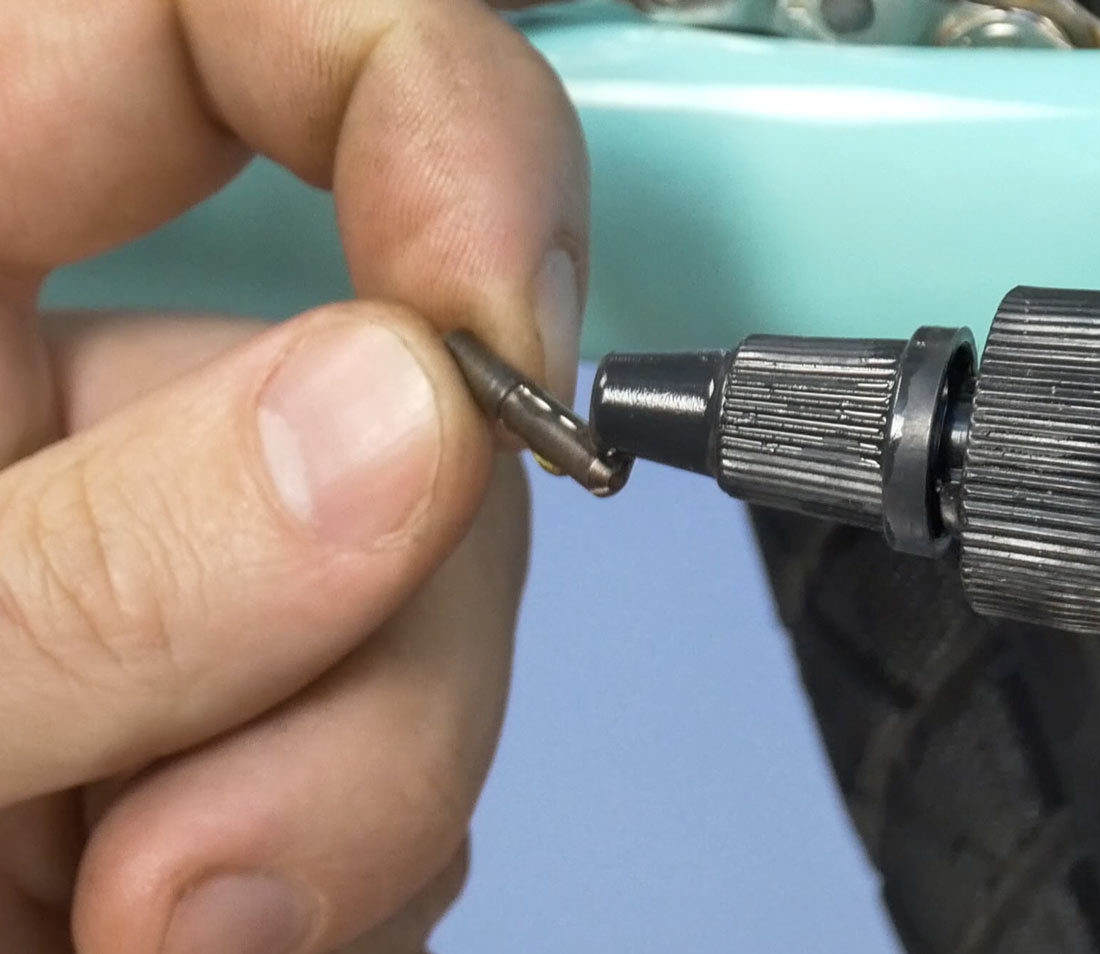
To connect your correctly sized and cut chain, lubricate the connecting rivet with a drop of chain lube. Install the rivet into the chain from the inside of the bike, toward the mechanic. Install the chain tool and drive the connecting rivet into the chain. Once the protrusion of the connecting rivet matches that of the nearby rivets, the connecting rivet is installed and the pilot can be broken off with pliers or a chain tool. Pedal the bike and inspect the chain for tight links. If you find a tight link, flex the chain laterally at the tight link.
Chain Tension
As a safety precaution only touch the outer perimeter of the chain. To check the tension on the chain, push the chain upward and downward in the middle. There should be approximately one half inch of movement in the chain up and down at a point half way between the front and rear sprockets. To change the tension loosen one of the axle-nuts and move the wheel forward or backward slightly and snug it up again. Then, loosen the opposite axle-nut, adjust and tighten, making sure the wheel remains centered in the frame. Re-check tension.

A chain tensioner can make the process easier. To install the chain tensioner, remove the drive-side axle-nut and place the chain tensioner against the rear dropout face. Reinstall the axle-nut and tighten the screw to move the wheel back in the dropout and add tension to the chain. Simply ensure that the wheel remains centered in the frame, add appropriate tension with the chain tensioner screw and re-secure the axle nuts.

Insert chain tensioner
Increase tension
If you see loose and tight spots in your chain as you check the tension, it means your sprockets are out of round. This is not uncommon, simply set the chain to have 1/4″ of movement at the tightest spot. A final test is to apply side load on the chain at a point half way between the front and rear sprockets. The chain will make a rattling sound but should not derail. If the chain comes off either the front or rear sprockets, increase tension and test again. Once this side load can applied without the chain coming off, fully secure the axle-nuts to manufacturer recommended torque, typically around 25 Nm. If using a standard wrench, use perceived effort; for 25 Nm apply about 40 pounds of pressure holding the wrench 5″ from the axle. Finally, if the bike uses a coaster brake, secure the arm to the bike frame and your installation is complete.
Use perceived effort to appropriately tighten axle-nuts
Secure coaster brake arm, if applicable
Related articles
Chain Replacement: Derailleur Bikes View Article
Coaster Hub Overhaul (Pedal Brake Hub) View Article
On the Ride Chain Repair View Article