Avid® Juicy Caliper Brake Bleed Service
This article will discuss bleeding of the Avid® Juicy disc caliper brakes. For caliper adjustment and housing length adjustments see Avid Hydraulic Caliper Brake Installation & Hose Length Changes.
Bleeding Procedure
- Avid® hydraulic bleed kit
- T-10 Star Shaped Drive, such as the PH-T10 or TWS-2
- 4mm hex wrench
- Toe strap or rubber band to hold brake lever
- Rubber gloves, such as MG-3 (recommended)
- Isopropyl alcohol
- Clean shop rags, or paper towels
Hydraulic brake systems should be bled anytime the system is opened, such as for shortening the hose. Additionally, the system should be occasionally bled to replace the old fluid with clean new fluid. The Avid® hydraulic disc brake calipers use a DOT 4 or DOT 5.1 fluids. Never use a mineral oil in this system. During any work with DOT fluids, immediately clean any spills on the bike, caliper, or lever with a rag and isopropyl alcohol. DOT hydraulic fluids can potentially damage paint finish. It is also recommended to wear protective gloves when working with DOT fluids.
The Avid® hydraulic brake is best bleed with the Avid® bleed kit, which includes two syringes with special threaded fittings, a bottle of DOT fluid, and a 8mm crow’s foot in 3/8″ drive. Leave syringe tubing clamps open during storage.
Before bleeding, set the volume of the brake system. Some model brake levers use adjusting knobs at the levers. For the right-hand lever, turn knob completely counterclockwise, then back clockwise one turn. For the left-hand lever, turn knob completely clockwise, then back counter-clockwise one turn. If there is no knob on levers, look for adjustment screw behind lever pivot . Rotate bike as necessary so any air in the hydraulic hose would rise upward from the caliper to the brake lever
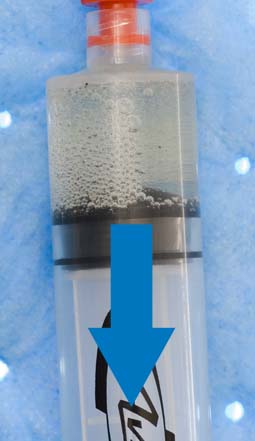
- Prepare one of the two syringes of the Avid® bleed system. Open tubing clamp on the syringe and fill at least half full with DOT 5.1 or DOT 4 fluid. (NOTE: Never use any other fluid such as a mineral oil in a system designed for DOT fluids.) Clamp tubing clip shut and remove gas. Hold syringe vertically and pull slightly on the plunger. This reduces pressure in the fluid, and will cause any significant amount air bubbles to appear (Figure 1). Allow the bubbles to rise, taping the syringe to help dislodge them. Unclamp tubing, and push bubbles out the top. Close clamp and repeat process until fluid appears mostly clear on bubbles. Some tiny bubbles will always be present and will not be a problem in the system.
- Place a rag under the caliper bleed port to catch any drips. Remove caliper bleed-port screw using a T-10 star-driver. Port screw is located in the center of the banjo bolt that attaches the hose to the caliper. Thread syringe fitting into caliper bleed port (Figure 2).
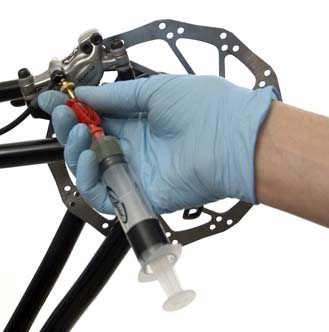
Figure 2. Install syringe at caliper

Figure 3. Align lever vertically, attach syringe, and strap lever closed to bar
- Rotate brake lever so it points straight to the ground. Remove lever bleed-port plug from lever using a T10 star-driver. Insert the empty syringe into the lever bleed port and secure (Figure 3). Open hose clamp. The lever syringe will accept the overflow from the rear syringe during the bleeding process. Use a toe strap or thick rubber band to close lever fully to bar or grip. (Note: if lever does not fully bottom against grip, check location of reach adjustment screw. Thread screw so it clears lever body if necessary.)
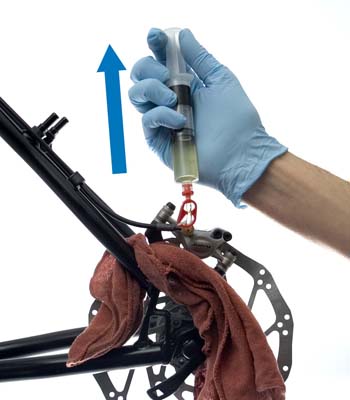
- At caliper, hold syringe vertical and open tubing clip. Remove any air in the caliper body by first pulling back on plunger gently (Figure 4). Excessive force will cause air to pass by top of plunger seal. Tapping on caliper body with plastic lever will help dislodge air. Let any bubbles rise to the top of the syringe, next to the plunger. Close syringe tubing clamp.
- Remove strap or rubber from the brake lever.
- Hold caliper syringe vertical to keep bubbles from entering caliper body. Open syringe tubing clamp and push down on the plunger until plunger end is close to but not touching syringe end (Figure 5). Do not push bubbles at end of syringe into caliper.
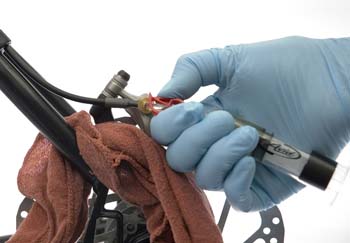
- At caliper, close syringe tubing clamp (Figure 6). Remove syringe from caliper and install bleed port screw. Clean up any fluid drips immediately.
- With the brake lever syringe tubing clamp open and syringe held vertically, draw back on the lever syringe to remove any air from lever body. Tap lever with a plastic lever to help dislodge any bubbles (Figure 7). Squeeze lever repeatedly until no bubbles are seen rising through the tubing. Leave syringe attached and tubing clip open.
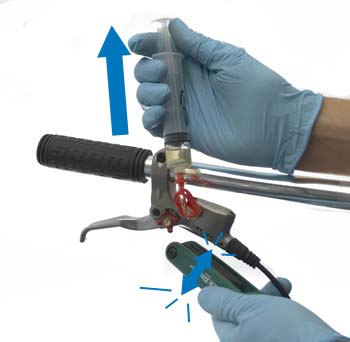
Figure 7. Pull back on plunger and tap body to free any air inside lever
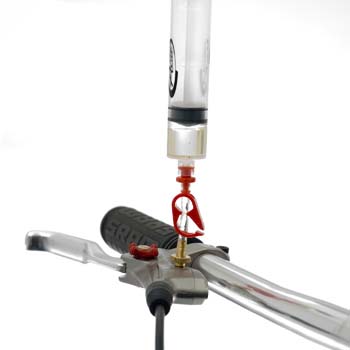
Figure 8. Rotate lever to horizontal and remove syringe
- Rotate the lever to a horizontal position (Figure 8). Unthread syringe from lever body
- Drip one or two drop of fluid into the lever bleed port screw hole (Figure 9).
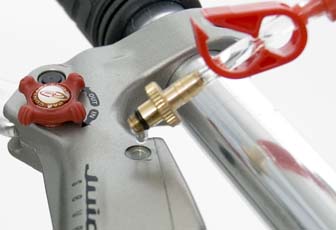
Figure 9. Drip brake fluid into bleed screw hole
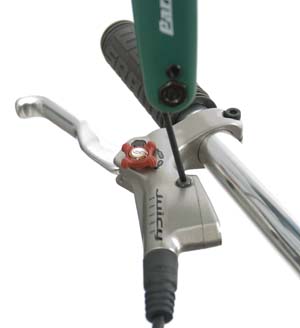
Figure 10. Install and secure bleed set screw in lever
- Install bleed port screw in lever and secure (Figure 10).
- Clean up any spilled or dripped fluid. Test brakes by pulling lever with force. Lever should feel firm and not yield at end of stroke. Check all hose fitting and bleed port screws for leaking. Repeat bleeding procedure if necessary. Discard of fluid a hazardous waste collection facility.
- Rotate lever back to normal working position and secure.
Related articles
How to Bleed Shimano® Flat Bar Hydraulic Brakes View Article