Written by Calvin on February 4, 2014/Calvin's Corner
The Slow-Time is the Right Time for Shop Inspection
In the bicycle retail business, the slower off-season is the perfect time to do things you’ve put off during the crazy, busy summer, including a detailed shop inspection. Use this downtime as an opportunity to go through your tools, materials, and equipment to determine what is worn out and needs to be replaced or replenished. When the warmer weather hits, the customers roll in, and the work starts stacking up, you will be ready to crank out the service. Now is also the time to look at new tools that will help you service bikes with new or updated technology.
Tools perform a job; they allow us to install components, fix things, and get stuff done. All tools will eventually wear out. When they do, it is time to replace them. They have done their part; they have performed their duty; they need to be replaced so you may carry on with your job.
WORK AREA AND WORK BENCH
Begin by standing back and taking inventory of the bench and the state of your tools. Does it look organized or is it chaotic? Before you even start cleaning up, you should look at the chaos for clues. Mechanics are likely to leave out the tools they use most, so be sure to organize such that these are still easily accessible. Don’t assume you can impose your sense of order on everyone. If the work area is shared among several staff members, then it needs to be tidy. However, it is not uncommon for some seasoned mechanics to have their own system and unique work style.
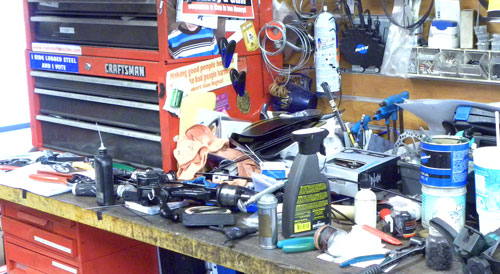
A work area in need of some attention

Pull and push the bench checking for any wiggle
Also, inspect the bench’s structural integrity. Grab the front of the bench and pull it front to back, then left to right. It should be solid. Tighten the legs and fittings so it feels stable, adding braces if necessary. If it’s rickety now, it will only continue to get worse.
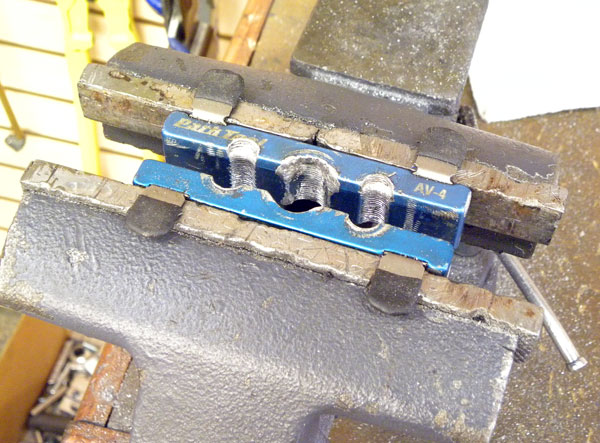
REPAIR STANDS
Repair stands are the foundation of the shop. They should feel solid. Begin your inspection at the base plates of the stand and work upwards. If the base plates wobble, insert shims so they don’t rock. Check all nuts and bolts for tightness. Jaw covers, like bike tires, do not last forever. They are made soft so they grip the bicycle frames, and after extensive use they should be replaced. Worn jaw covers will cause damage to your customer’s greatest asset, their bike.

A missing nut is easily remedied and makes the stand much more stable
Replacement jaw covers are available for all models of Park Tool Repair Stand Clamps
 The 100-3D clamp has replaceable saddle cover pads and clamp covers. When they start looking like these, replace them.
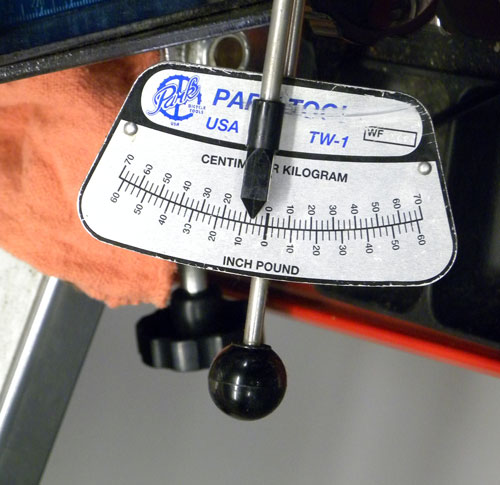
TORQUE WRENCH and BITS
Ratcheting “click-type” torque wrenches have moving parts. These wrenches have a spring that compresses against a pivot. With lots of use (and abuse) these wrenches can come out of calibration. Remember after using the click-type torque wrenches to back off the tension to relax the spring.
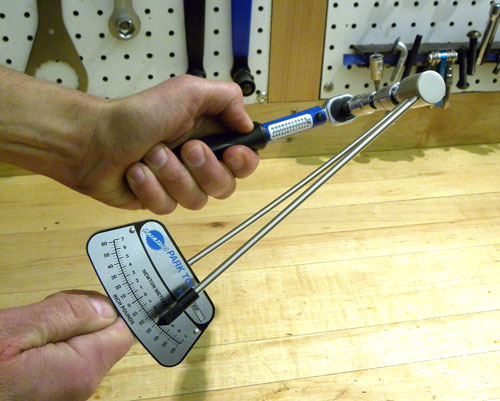
Using a beam torque wrench to check a click-type torque wrench
Over-torquing disc brake rotor bolts doesn’t do the bits any good
 Beam type wrenches are easily recalibrated
The click-type torque wrenches can be recalibrated. If in doubt, send the wrench in for calibration service. Park Tool will recalibrate the TW-5 and TW-6 wrenches for a nominal fee. A simple way to test the accuracy of a click-type wrench is to compare it against a beam style torque wrench. Install an 8mm hex bit on one wrench and an 8mm socket bit on the other. Dial the click-type wrench to a value seen in the middle of the beam scale. Pull the click-type wrench slowly and steadily while watching the beam pointer. The click-type head should swivel close to the reading you have set at the handle. Beam-type torque wrenches are easily recalibrated as well.
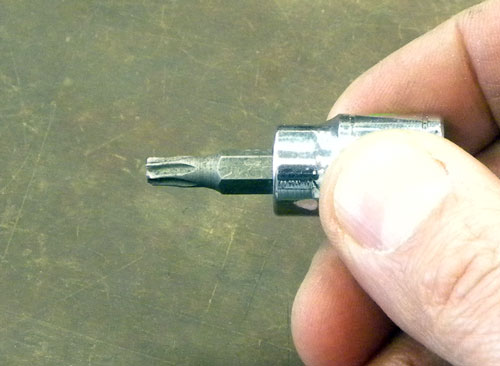
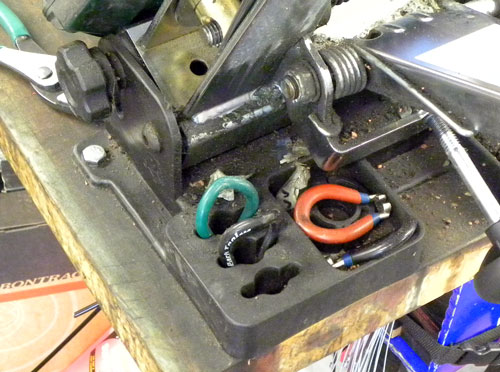
Also give a look at the bits and sockets. The smaller hexes and torx get a lot of use, and the larger sockets like the 14mm take a lot of load. Inspect the sockets for cracks and the hex/torx bits for damage or wear at the business end.
 Check the spoke wrenches at the truing stands
SPOKE WRENCHES
Just like any other wrench used multiple times daily, these can begin to wear out. Compare older spoke wrenches to new ones of the same size. Do the older ones go on easier or have more play when on the nipple? If so, they have been stretched or rounded and are in need of replacement.
 Check centering of the truing stand
TRUING STANDS
TS-2 and TS-2.2 Truing Stands produce a lot of good service work for their shops, and they deserve some attention. Use a rag and cleaner to get the chrome looking good again. While you are checking your Truing Stand, make sure it is centered properly as well.
HAND PLIERS / CUTTERS
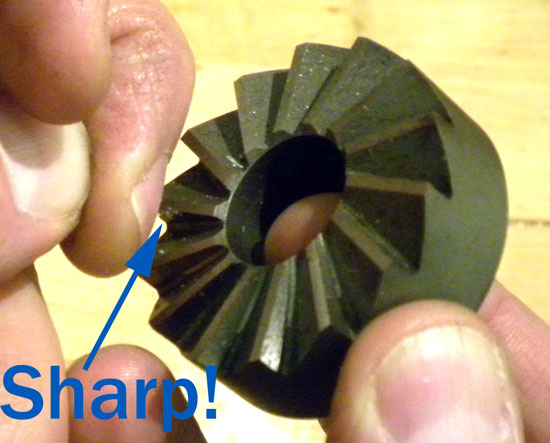
To check diagonal cutters, open up the jaws and look at each cutting blade. Run a thumbnail across each and see if you can feel a change in the sharpness across the edge. If so, replace them.
Diagonal side pliers cut by pinching, whereas cable cutters cut by shearing. If the cable cutters are not working well, check first for play in the pivot. Open up the handles and pull them up and down against the axis of the pivot bolt. If there is significant play, you can adjust the pivot. Test the cutter on shift or brake cable.
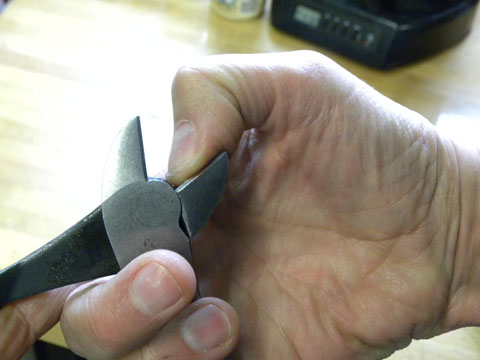
Dull cutting edge on a diagonal side cutter
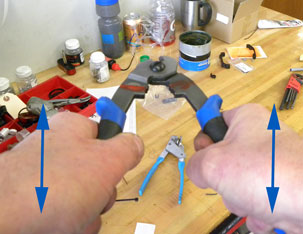
Checking play in a cable cutter
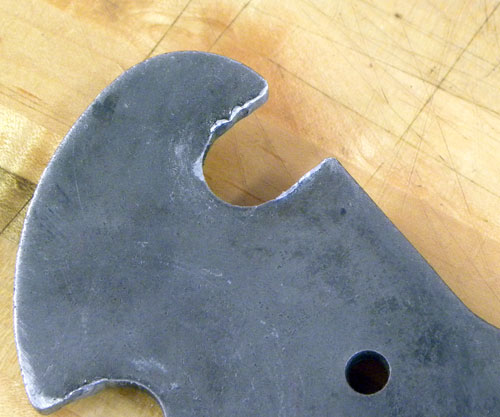
WRENCHES — CONE, PEDAL, COMBINATION, HEADSET
There are wrenches sized from 6mm all the way up 40mm for headsets. However, not all see the same amount of wear. A combination wrench will be relatively thick and rarely wear out. However, specialty wrenches for threaded headsets and hub cones must be made relatively thin. Cone wrenches must be made especially thin to fit the narrow wrench flats of hub cones. These cones are made of a very hard steel due to the extreme torque they must endure. This eventually results in wear on the cone wrench jaw. Inspect cone wrenches for wear in the jaws, especially in the most common sizes: 13mm, 15mm, and 17mm. You may see some people grind the tool, attempting to lengthen the service life, but this only weakens the tool. In this case, the wrenches should be replaced.
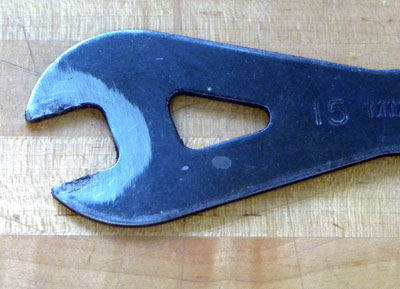
The hardened steel of cones will eventually wear out thin cone wrenches
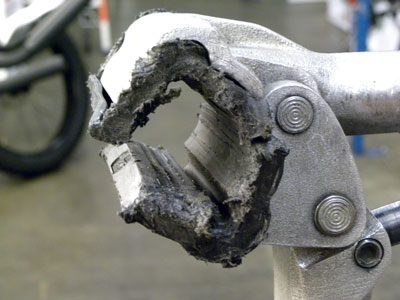
Pedal wrenches take a beating as well
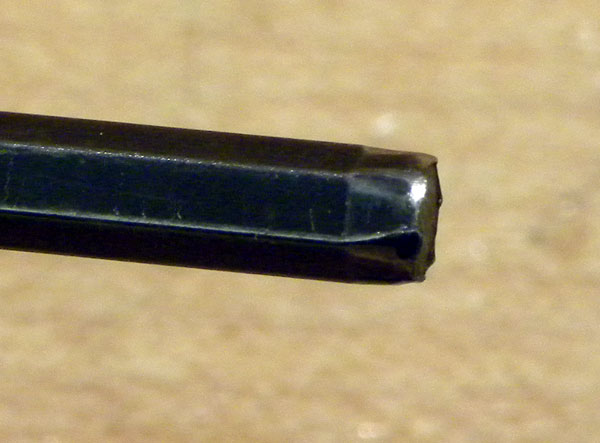 Worn out hex that needs replacement
HEX WRENCHES
The hex wrenches at every bench get a lot of wear, especially the 4mm and 5mm sizes. Most of the contact is at the six corners and only for the depth of the socket head into the bolt. Consequently, there is a lot of stress on a small area. When you begin to see obvious wear, it is time to replace them.
MACHINING CUTTERS
Facers, reamers, and taps are made of tool steel, but these will all eventually dull with use. The steel for cutting implements is very hard and, as a result, relatively brittle. Inspect the cutting edges for chips. These can be caused by misuse as well as by taps being stored together where they click and clack into one another. A tool grinder can sometimes minimize this damage, but sometimes it is best to replace a chipped cutting tool rather than risking damage to a customer’s bike.
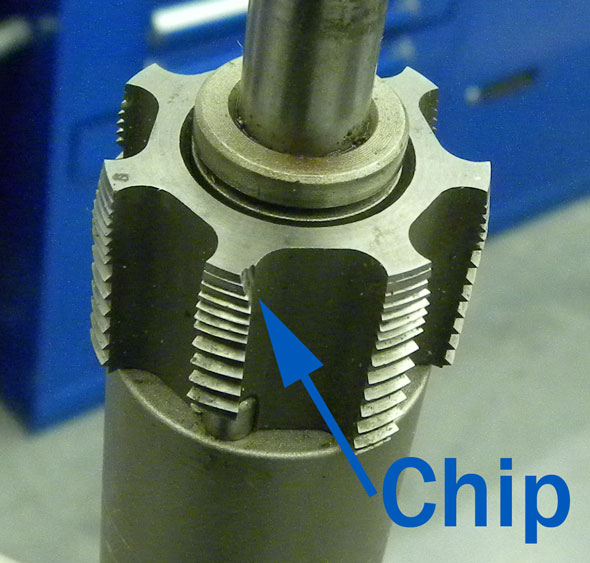
Chips on the very first edge of the tap
Test the facer against a finger nail. It should pull up material as it passes along the nail.
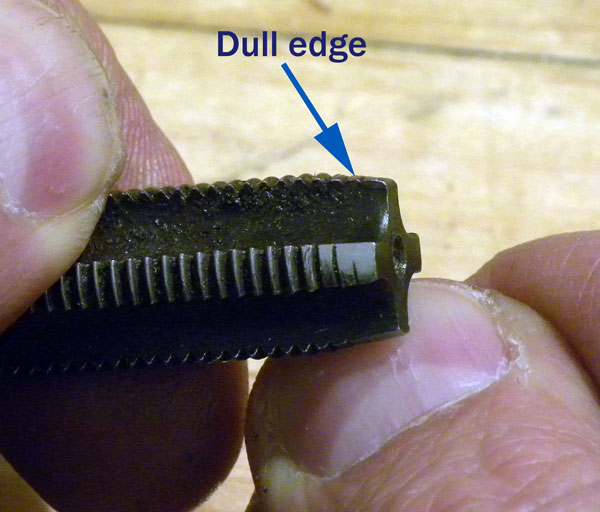 Dull cutting edges can be seen and felt
Cutting tools should have sharp edges, but the edge is not sharp like a knife or a razor. If they were that sharp, the leading edge would simply break under the pressure of cutting steel, aluminum, or titanium. Regardless, they should feel sharp if you run a finger down the edge. As a test, the cutting edge should be able to shave off some fingernail material. Take the cutting edge and run it down your thumbnail. If you can see it peel up some of the relatively hard nail material, it is still considered sharp. When it dulls, it will no longer do this. These precision tools should be maintained and resharpened when they become dull.
 Check the teeth along the cutting blade
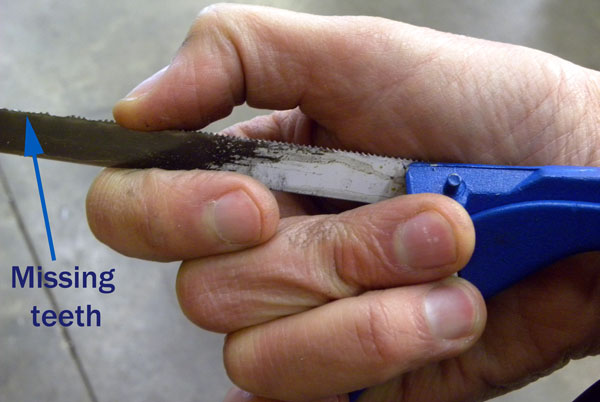
HACKSAW
In spite of having “hack” in its name, the hacksaw should be considered a precision cutting instrument. First check the condition of the teeth. Inspect the working section of the blade, where you tend to cut, and compare this to the ends. Dull and missing teeth mean it is time to treat yourself to a new saw blade. Also, check that the blade tension is properly tight. A loose blade will bow and wiggle when cutting through tough items such as steering columns, leading to an uneven edge.
 Rounded and dull blades of the RT-1 Race Remover
HAMMERS AND THINGS YOU HIT
Hammers are often a misunderstood tool. They should be used to impart a very directed force. There is significant energy in a hammer blow, and this will cause wear to the tool as well as the object of impact. Look first at the steel hammers, and inspect the face for any cracking. If any cracking is present, get rid of it immediately, as it may soon chip. If there is a plastic side, order up replacements if it is completely trashed.
Hammers often strike bike parts indirectly through punches or other tools. See that the ends of the punches are well dressed. Look at specialty punches like the RT-1 Head Race Remover. If the ends are getting rounded, it will soon begin slipping past the race rather than removing it.
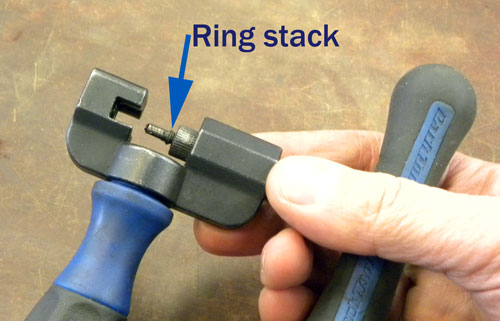
CHAIN TOOLS
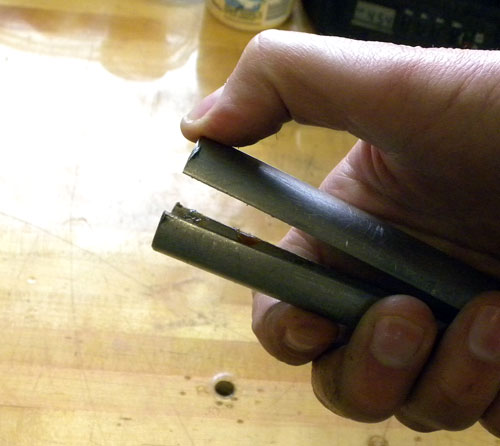
Chain tools are pushing out what is nearly the hardest piece of steel on the bike, the chain rivet. They take a lot of stress, and deserve a look over. Pins should be cleared of any built up rivet rings from repeated chain removal. If the pin shows any wear at the end, replace it.
These excess rings from old chains will eventually get in the way
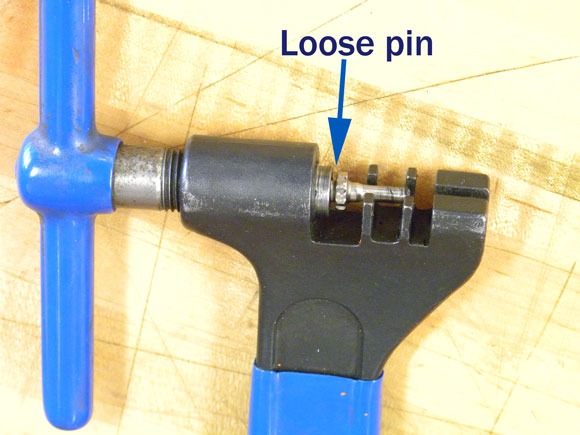
This pin looks in good shape but is loose in the handle—tighten it!
CASSETTE AND FREEWHEEL TOOLS
Grab each and every tool and inspect the business end. Unfortunately, cassette lockrings have a very shallow engagement, so only the end of these tools take the force. If there is obvious wear it is more likely to cause damage, so replace these. The same holds true for freewheel removal tools.
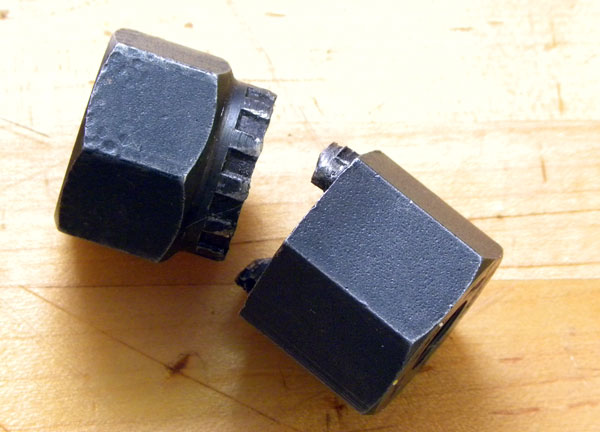
These worn removers may now cause more damage than do any good
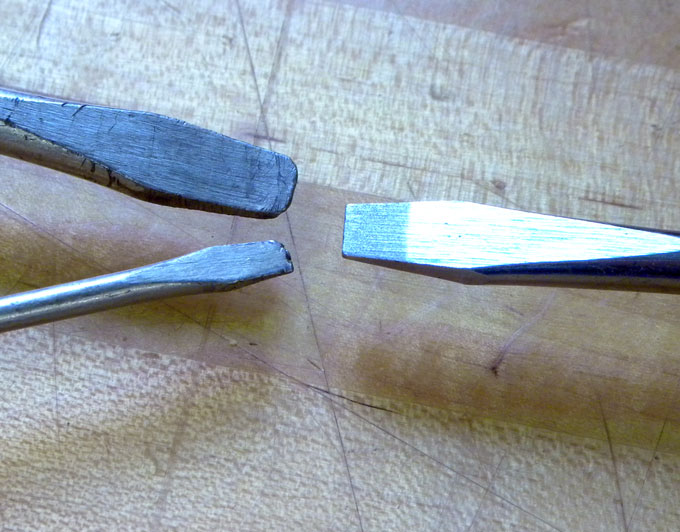
Worn straight blade tips compared to new
SCREWDRIVERS
The ends of screw drivers are cut and machined square when new. Those with rounded and dull ends are simply shot. They should be replaced.
 These soft jaws have done their duty and need to be replaced
VISE AND SOFT JAWS
The bench vise should be tightly secured to the bench. After a lot of use/abuse, the mounts may loosen, so double-check that any mounting bolts are fully secure. Also check the soft jaws for wear. These are supposed to give, as this is what saves the threads. Retire old soft jaws before they stop gripping at all.
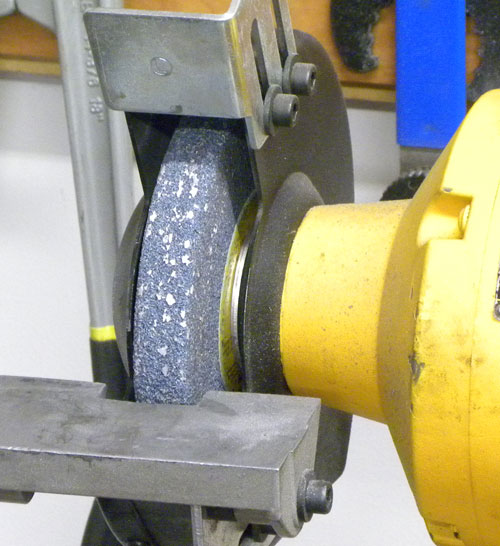 Aluminum will clog and eventually ruin a grinding wheel
BENCH GRINDER
Inspect the grinding wheels. They should look clean and square. If you own a grinder, you need a wheel dresser. Look at the wheel for patches of aluminum. If you find these, plan a talk with shop staff about not grinding aluminum on a wheel.