Troubleshooting a Noisy Drivetrain
How to diagnose and repair a creaky or noisy bicycle drivetrain.
Getting Started
Creaking and squeaking noises can be annoying, and can also be a sign of more serious problems. Damage or excess wear to components may result if they are left unattended. Creaking is usually caused by two things rubbing together, such as a crankarm rubbing on a spindle. Many of the solutions below rely on adequate torque on the parts — see also this article on Bicycle Torque Specifications. Thread preparation is also critical — see also Basic Fastener Concepts.
The best method of identifying a noisy component is by going on short test rides and paying close attention to when and where the noise occurs. If during a ride you hear a creak or squeak once per revolution, it is probably located in the crankset and pedal area. If the noise is once every 2–3 revolutions, it may be in the chain. If the noise is occurring when you are not pedaling at all, the problem is likely elsewhere. You may need to proceed through the drivetrain step by step, part by part, to identify potential culprits.
Here are some of the possible sources and remedies for drivetrain creaking.
Crank
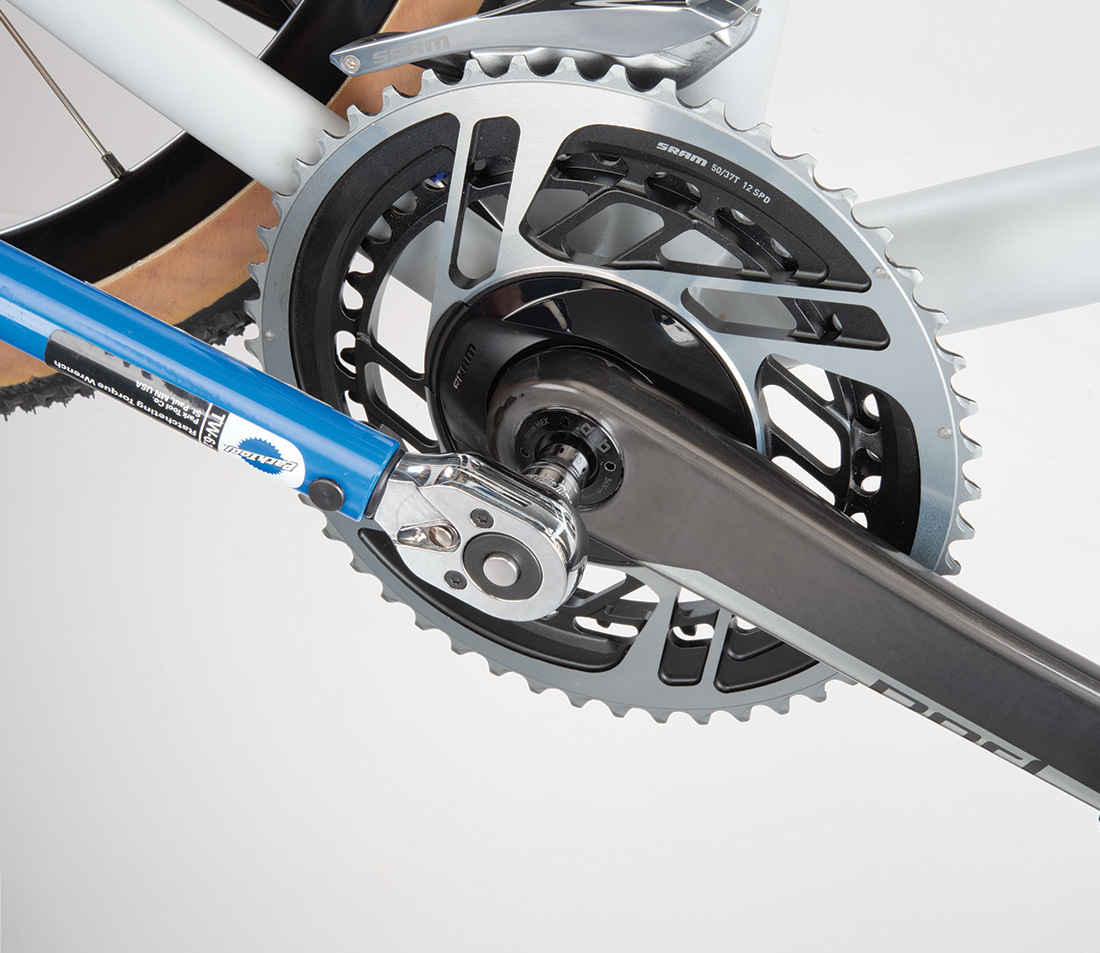
A common cause of creaking is the crank being loose on the spindle. Remove the crank bolts, lubricate the threads and under the bolt head, and reinstall. Tighten the bolts to the manufacturer recommended torque. Use a torque wrench if possible. A typical torque value for crank bolts is 40 Nm, or about 360 inch-pounds. If you are using a hand wrench, that is about 60 pounds of effort on a six-inch wrench.
For more on crank installation, see How to Remove and Install a Crank.
Bottom Bracket
The bottom bracket can be another source of creaking and noise. If it is a threaded bottom bracket, may not be properly tightened into the frame. Most bike frames use a threaded bottom bracket shell. If the bearing cups or retaining lockring are not tight, there may be movement between the internal and external threads.
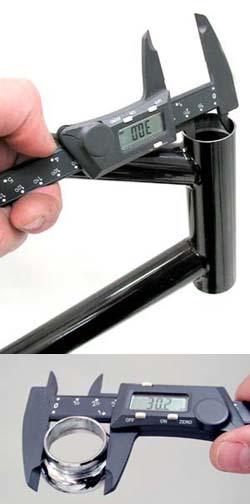
For threaded cartridge type or thru-spindle types, check cups or the lock ring for security. Tighten to at least 35 Nm. See Bottom Bracket Removal & Installation: Threaded for more details.
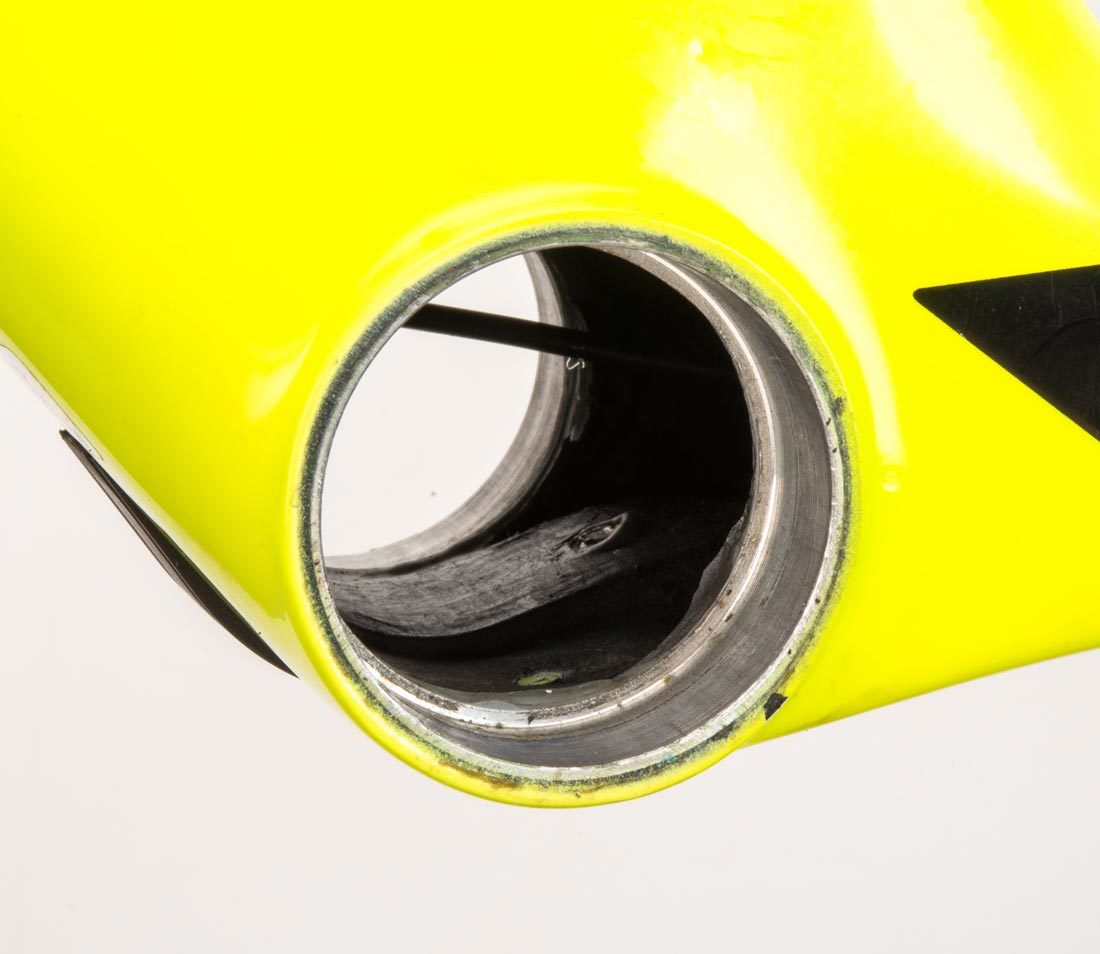
A press fit bottom bracket shell
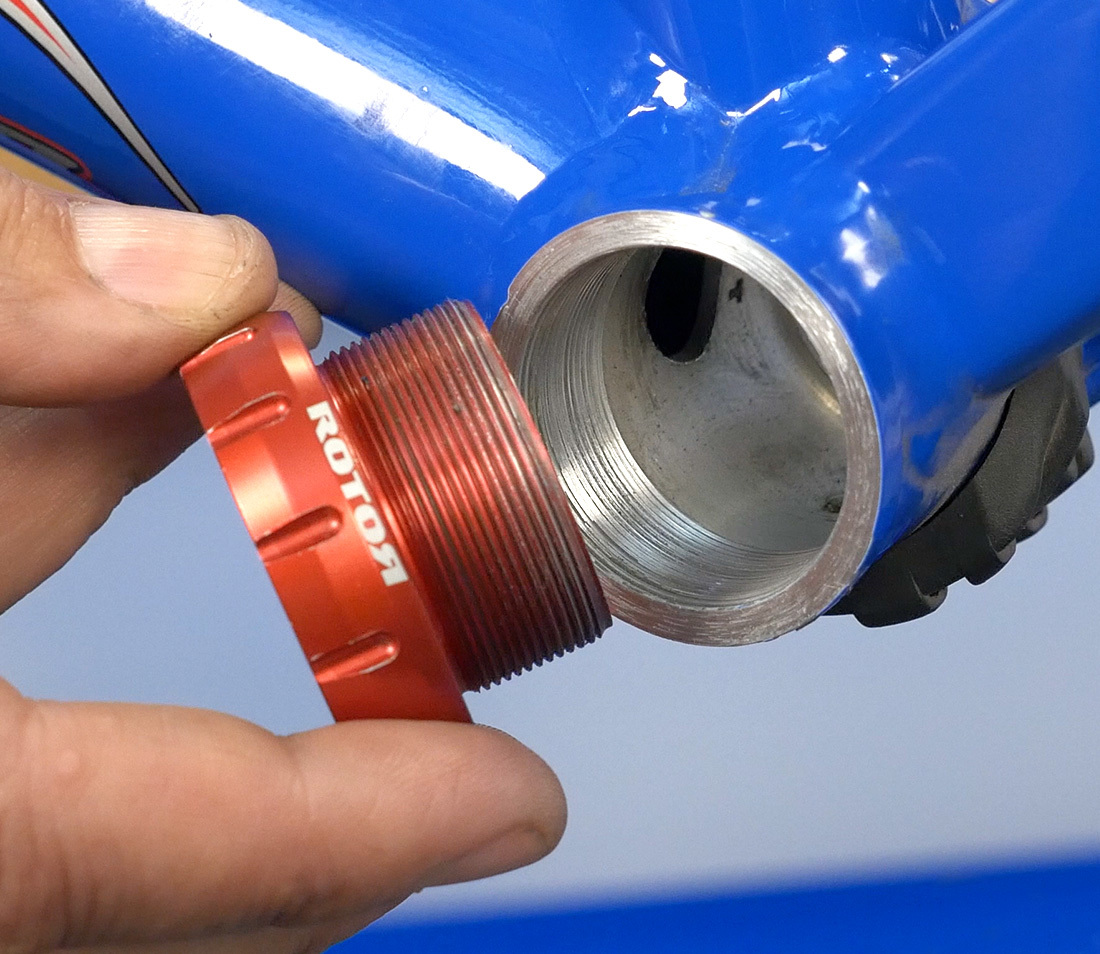
A threaded bottom bracket with bearing adapter
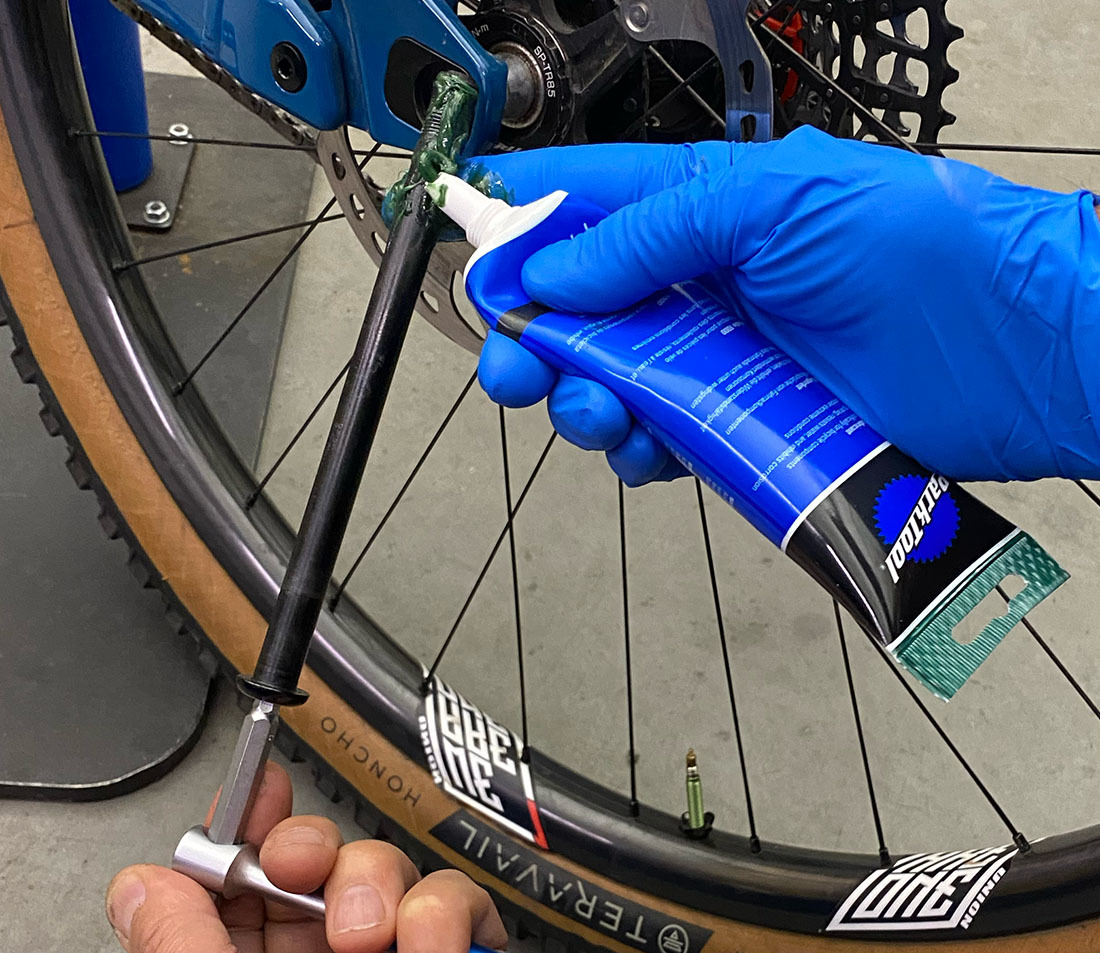
The bike may use a press fit bottom bracket system. These rely on the bearing or bearing adapter being pressed tightly in the un-threaded bore of the bottom bracket shell. If the sizing difference is not correct, the adapter can move under load and creak. Remove the adapter and re-install with a retaining compound which will dry, expand and harden to hold the adapter tight in the frame. See Press Fit Service for more details.
Chainring(s)
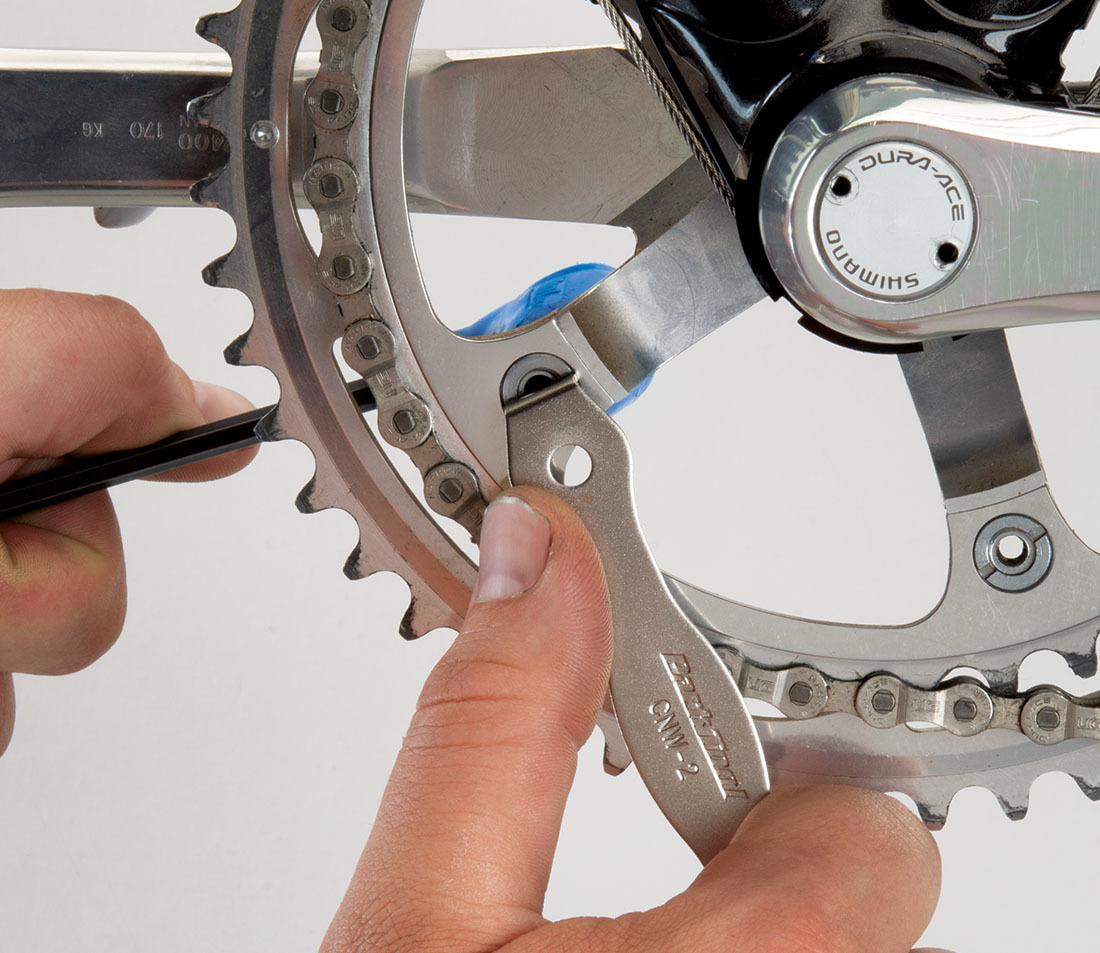
Chainrings are held to the cranks by chainring bolts. Use a hex key wrench and check each bolt. Hold the back chainring nut from spinning with a chainring nut wrench, such as the Park Tool CNW-2. Again, a mild threadlocker or grease on the threads is a good idea. Secure steel chainring bolts to about 8–12 Newton meters depending on manufacturer specifications.
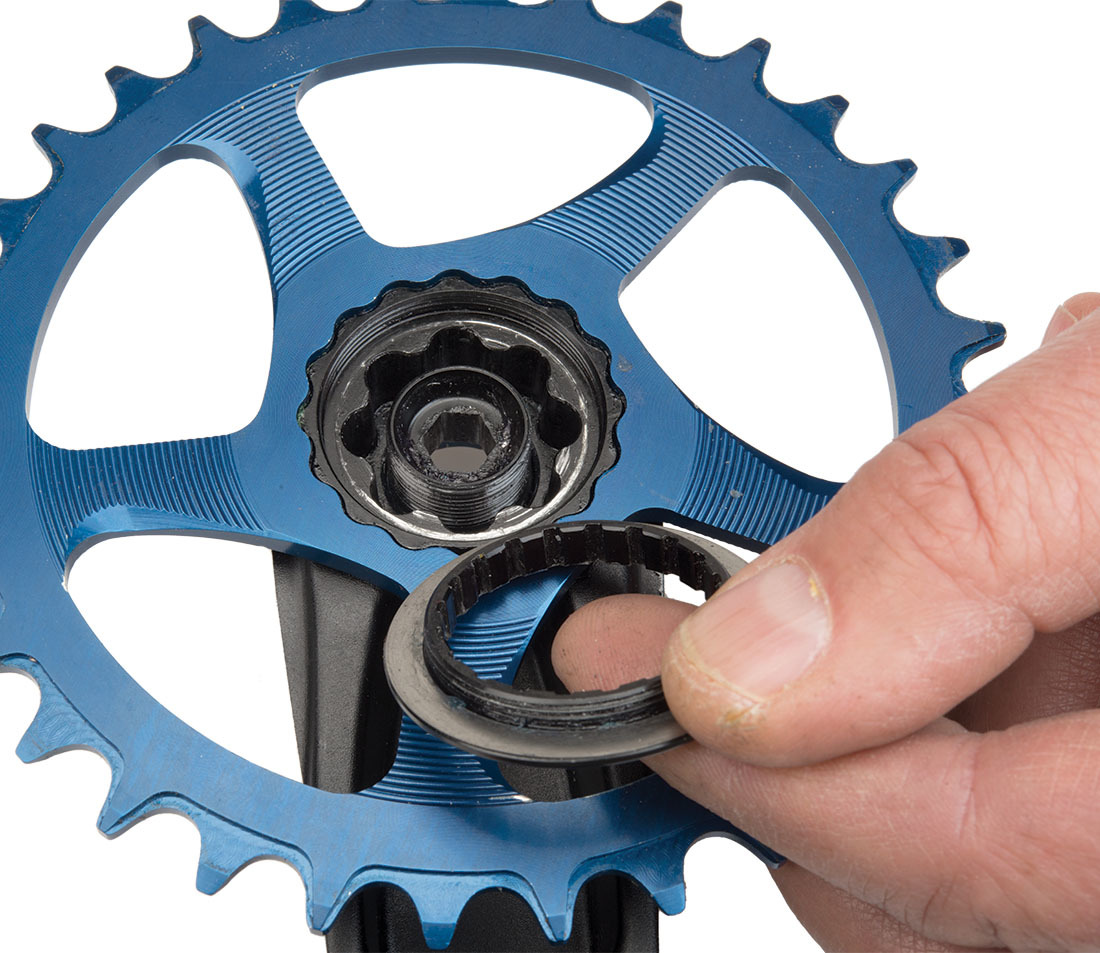
Some crank systems use a chainring mounted direct to the crank. If these are not fully secured to the arm, they can creak. There may a lockring or in some cases screws on the backside of the arm that may need tightening. Remove the crank from the bike. Remove the lock ring or screws. Apply some mild threadlocker onto the threads, then tighten. Tighten to ~40 Nm.
Axle/Dropouts
Wheels should be secure in the fork or rear frame. A loose quick release skewer can cause movement in the wheel under pedaling load. Check this and retighten as needed. A thru axle hub is held by an axle. If these are not tight, the hub can move in the frame and cause a creaking noise. Check the thru axles are secure. For more on properly installing a wheel into a frame, see Wheel Removal and Installation.
Shoes
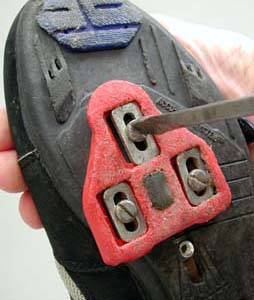
If you have riding shoes, the cleats under the shoe can loosen and also cause noise. Use a mild threadlocker or grease on the bolts, and tighten them fully. Even regular “street shoes” on a platform pedal can cause noise. A shoe lace can tap against a crankarm, and the rubber can move and squeak under the sole.
Pedals
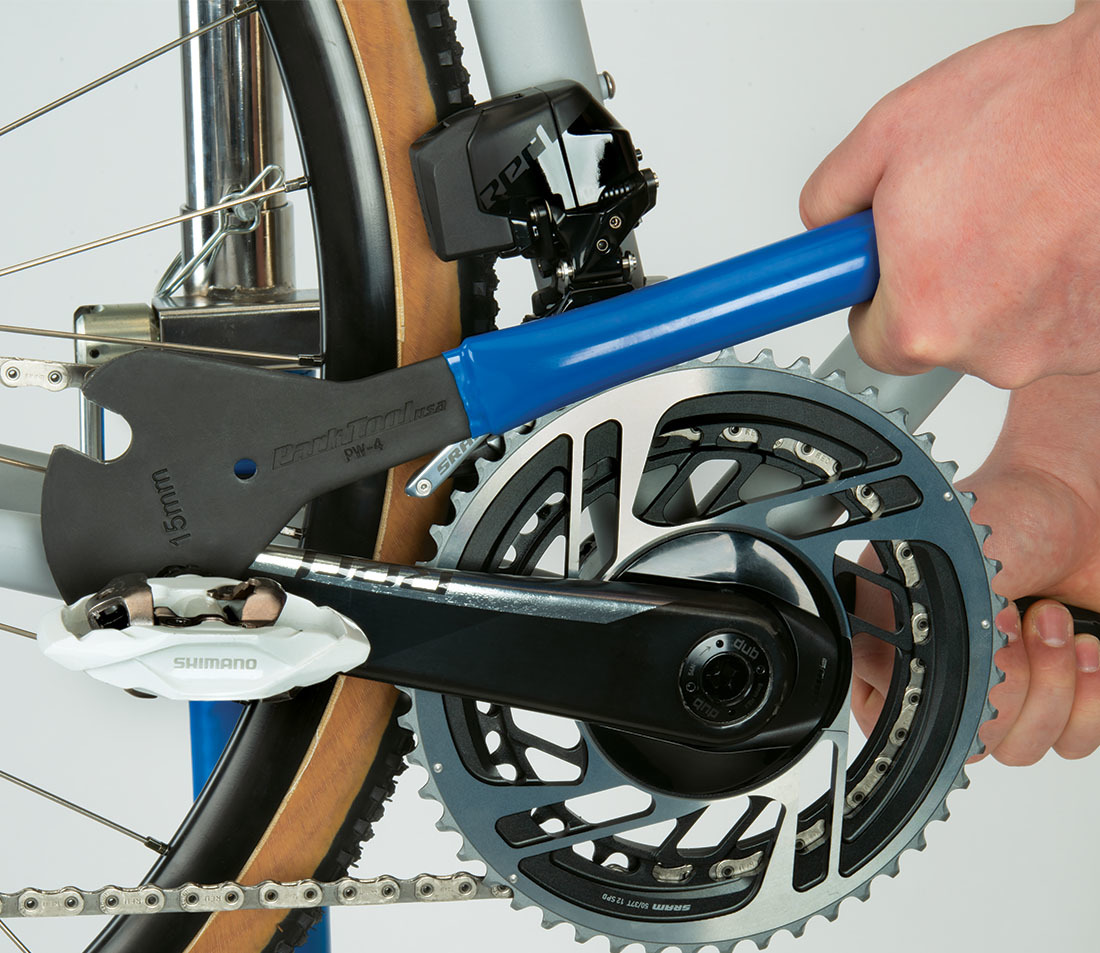
Ensure the pedals are sufficiently tightened into the crankarms. A typical torque recommendation is 40 Newton meters, or about 360 inch-pounds, which is 60 pounds of effort on a six-inch wrench. Pedal bearings can also creak. Spin the pedal and listen for noise. Different makes of pedals have different bearing service options. For more detail see Pedal Installation.
Chain

Listen for dry links by spinning the chain in a repair stand. Lubricate as necessary, with a drop of lubricant on each roller and rivet. Look at each and every rivet to check misalignment in the chain plates. Inspect for twists in side plate, or burrs, cuts or other damage to the side plates. Place the chain in a gear combination that relaxes the rear cage, and pedal backwards. If the chain hops as it passes of the pulley wheels, it may have a tight link.
Derailleur Pulley Wheels
The two pulley wheels of the rear derailleur spin as the chain turns. Use a light lubricant to quiet them.
Wheel and Spokes
Creaking wheels can be the result of loose spokes in the rim. As a wheel revolves under a cyclist, spokes tend to slack slightly at the bottom area, where the wheel is touching the ground. If spokes are too loose, there may be rubbing at the spoke interlace. Check and adjust spoke tension, using a spoke tension meter if possible. For more detail see Spoke Tension Measurement and Adjustment.
Housing End Caps
If there seems to be a creaking when the handlebars are turned, inspect the housing end caps where they enter the frame. These end caps are often metal, and may creak inside the frame fitting as the housing is moved side to side. Lubing is a temporary fix. It is sometimes possible to shim the cap for a tighter fit.
Frame
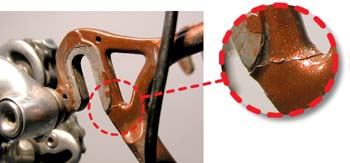
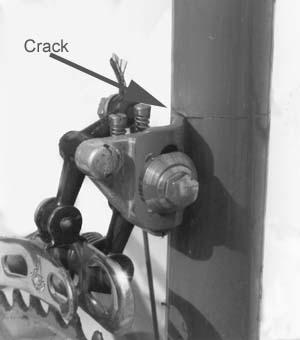
It is possible non-drivetrain creaks will masquerade as coming from the drivetrain. After checking other possibilities, check the frame itself for problems. A crack in a weld or a glued joint that is separating can also cause a creaking sound. If you suspect a crack, stop riding the bike and take it to a professional for further evaluation. The images below show a crack above the derailleur mount, a bonded bottom bracket shell separating, and a fork crown cracked. None of these bikes were crashed or wrecked. Once a crack has developed, repair is difficult and is often practically impossible.
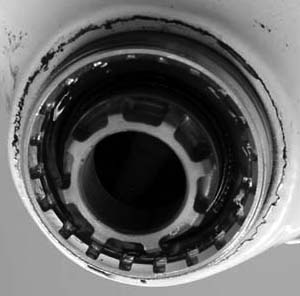
A carbon fiber frame with bottom bracket shell coming unbonded, resulting in creaking under load
Fork crown failure above brake mount hole
Saddle
The saddle may also be loose on the seat post, causing a creak as the saddle rails move and rock. Check security of the saddle rail binder bolts. The seat post can move slightly in the frame seat tube, especially in the fit inside the frame is marginal. Knurling the post, or even cutting off excess post may help.
The molded body of the saddle can also become loose from the saddle rail. If the rail has loosed from the molding there is no repair. Replace the saddle.
Headset
The headset connects the main frame to the fork and front wheel. Some headsets rely on a tight pressed fit on parts into the frame or fork. If the fit is not properly tight the parts may move and creak when stressed. In some cases the fit can be improved using a “retaining compound”. It may be best to consult a professional for this repair. For more on headsets see Threadless Headsets or Threaded Headsets
Rear Cogs
The rear cogs are not a likely source of a creak, but they should be checked in the interest of thoroughness. For cassette systems, check the security of the lockring. For more details, see Cog Removal and Installation. Inspect teeth for burrs and wear, which may cause a pop noise rather than a creak.
Stem and Handlebars
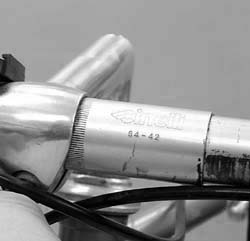
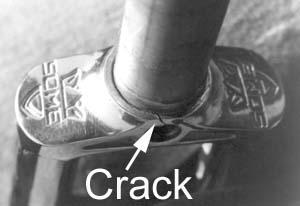
A loose stem or bar bolt may also cause a creaking sound. If the bolts threads are dry and without lubrication, they may not secure properly. Remove bolt, grease the threads and under the bolt head, and re-secure. Some handlebars use a center section that is press on, called a sleeve. This sleeve may become loose with use, and may begin to creak. Replacement is the best repair in this case. You may try a penetrating thread locking compounds if you have one, but it is likely to keep creaking. A center sleeve is seen in the left image below. In the right image below, the bar had no center sleeve. However, the bar developed a crack where it was held by the stem. A catastrophic failure was imminent.
