Shimano® SPD Pedal Service
A comprehensive guide to overhauling and adjustment of common Shimano® SPD-type pedals.
Getting Started
- Shimano® TL-PD40 bearing shaft removal tool
- Adjustment Wrench: HCW-4, HCW-15
- 10 mm thin open end wrench: CBW-1
- 7 mm box end wrench or small adjustable wrench
- Vise and insert: AV-5
- Compressed air and blow gun (optional)
- Grease such as Park Tool Polylube® 1000
- Solvent such as Bio ChainBrite®
- Rags
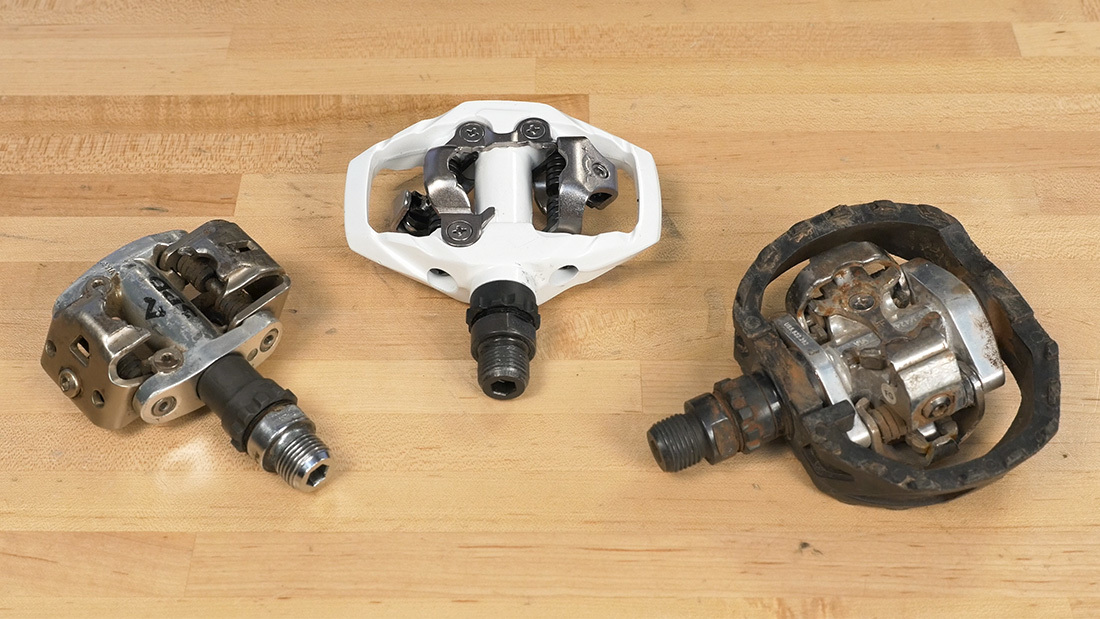
Pedal service should be considered routine maintenance. Not all models of bicycle pedals are actually serviceable, but Shimano® SPD pedals, and pedals that share a similar design, can be overhauled and adjusted, extending their useable life.
To determine whether a pedal needs servicing, the first thing to check is the tightness of the fasteners on the pedal body.
Next, check the bearings by giving them a spin. They should feel relatively smooth with no roughness or seizing.
Finally, check the play between the pedal body and axle. A little play is common, but excess play needs adjustment.

Bearing Unit Removal
It’s best to service one pedal at a time - the bearing units are different, the pedal bodies are different, but it’s very easy to confuse the two when they’re disassembled, and that will ruin your day.
Thread direction for the bearing unit is imprinted into the unit itself. Note that it is the opposite of the pedal thread direction.
Hold the pedal firmly but gently, such as in a repair stand clamp. Removal requires a proprietary tool: the Shimano TL-PD40. Install the tool and turn it with a wrench. The TL-PD40 has 36 mm wrench flats, which is the same as some bottom bracket and headset tools such as the HCW-4.
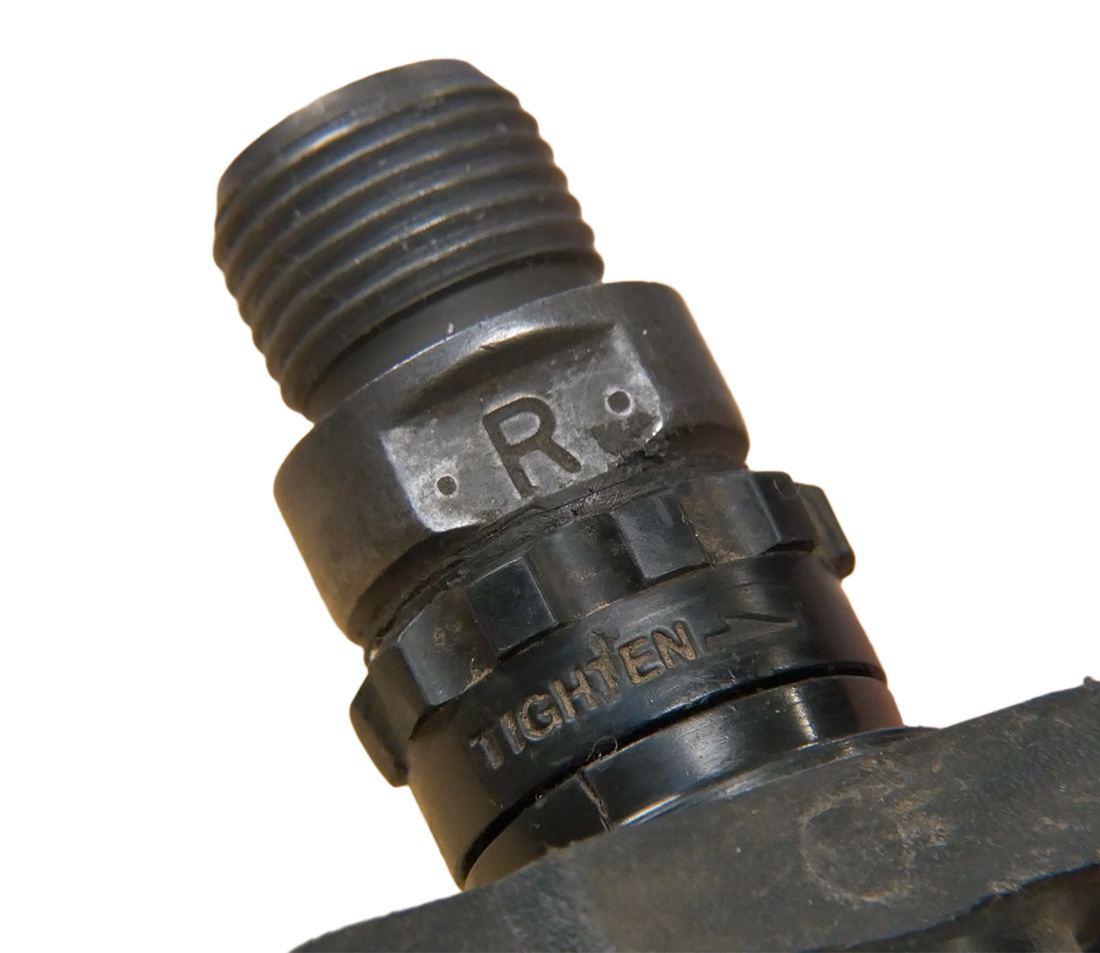
This bearing unit is a left hand thread while the pedal axle is a right hand thread.
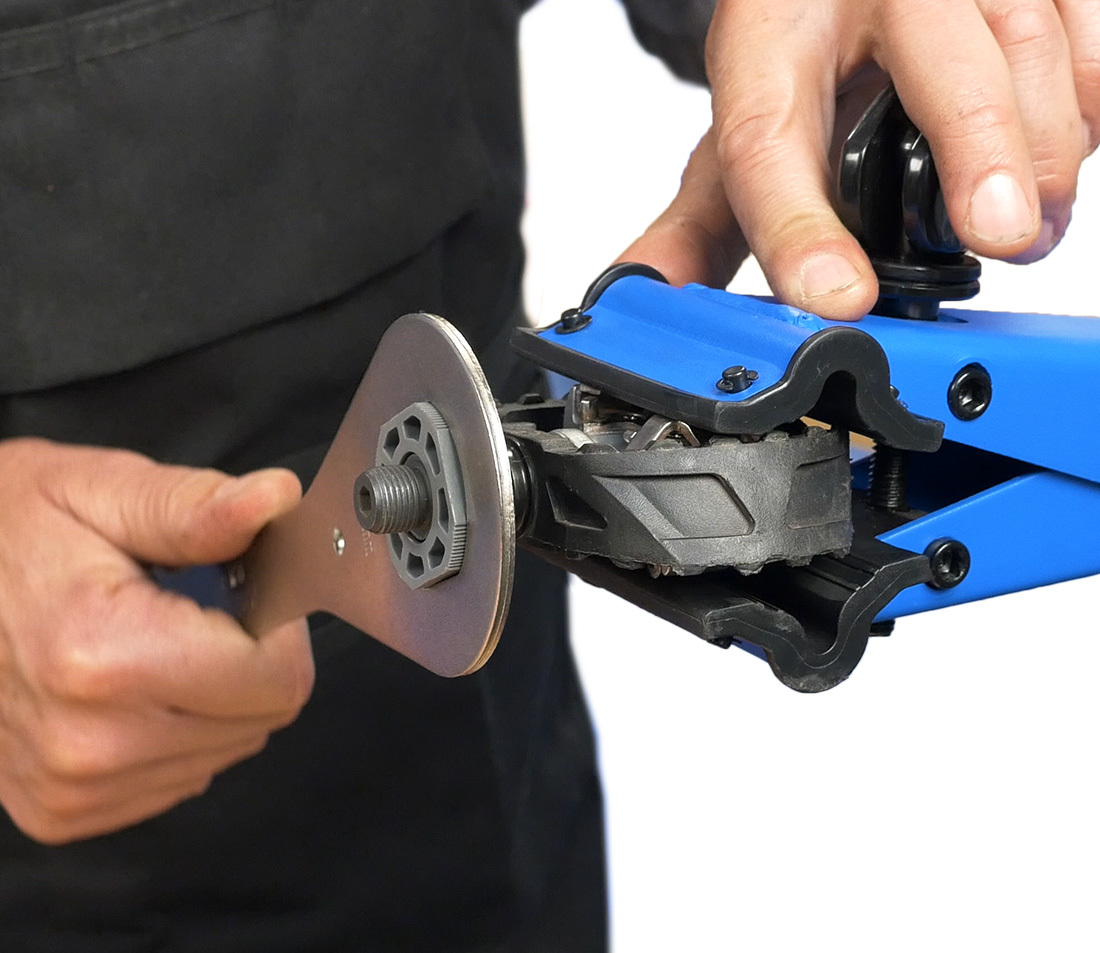
Pull the bearing unit from the pedal. As you remove the unit, you will encounter resistance as the bearing unpresses itself from the pedal body.
Cleaning
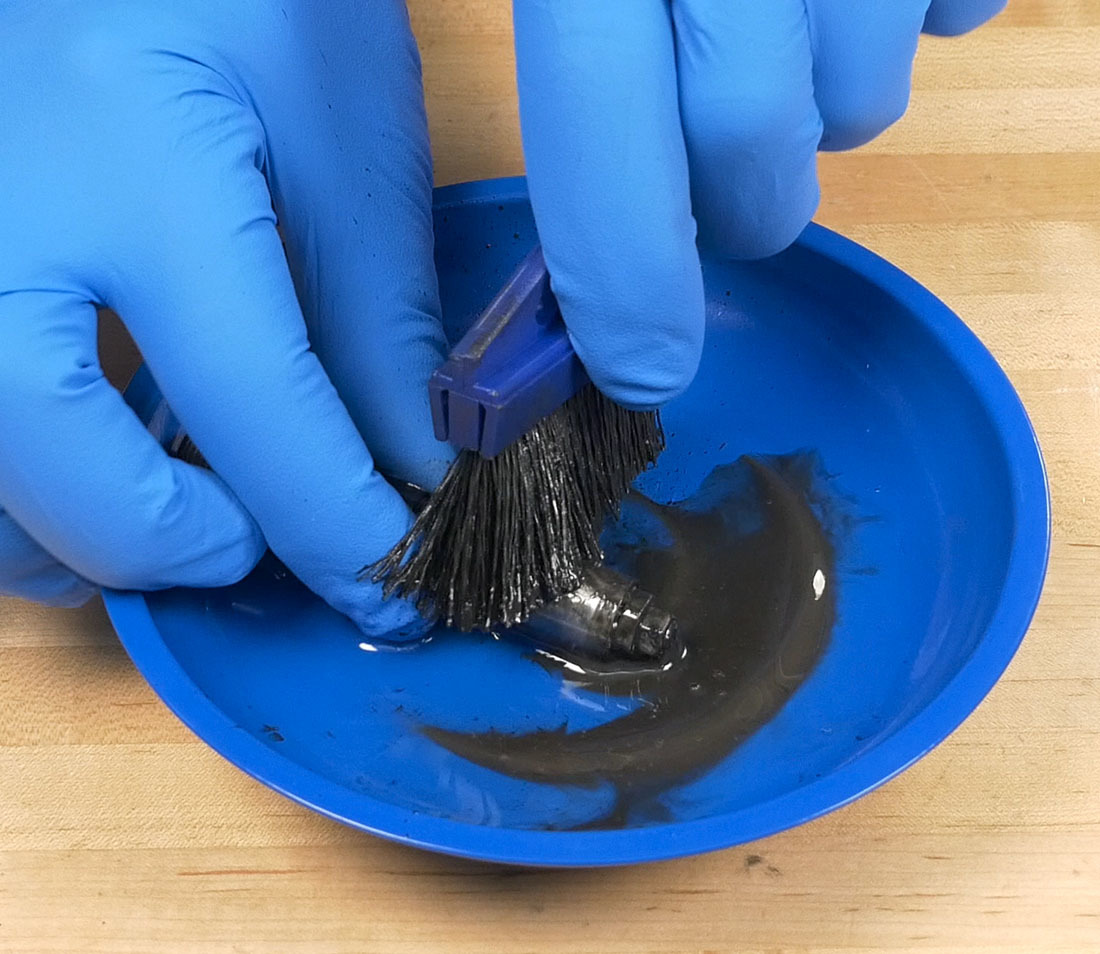
If the unit is dirty, It can be cleaned by scrubbing with solvent, and blowing dry using an air compressor.
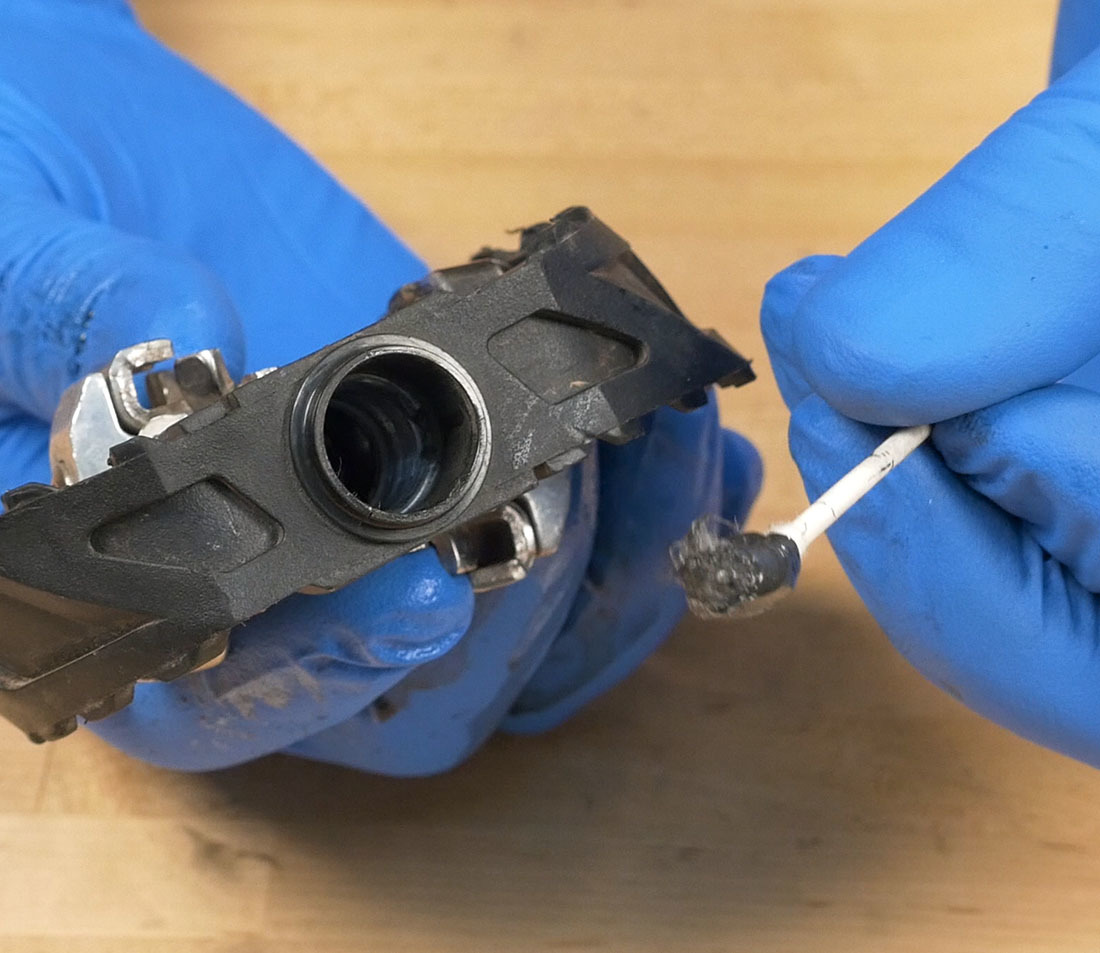
Wipe out the pedal body using a rag or cotton swab. Continue until it’s clean.
Bearing Adjustment
The play in the bearing unit can be adjusted using the locknut and cone. Securely fixture the bearing unit — our recommendation is a vise using dedicated jaw inserts such as the Park Tool AV-5.
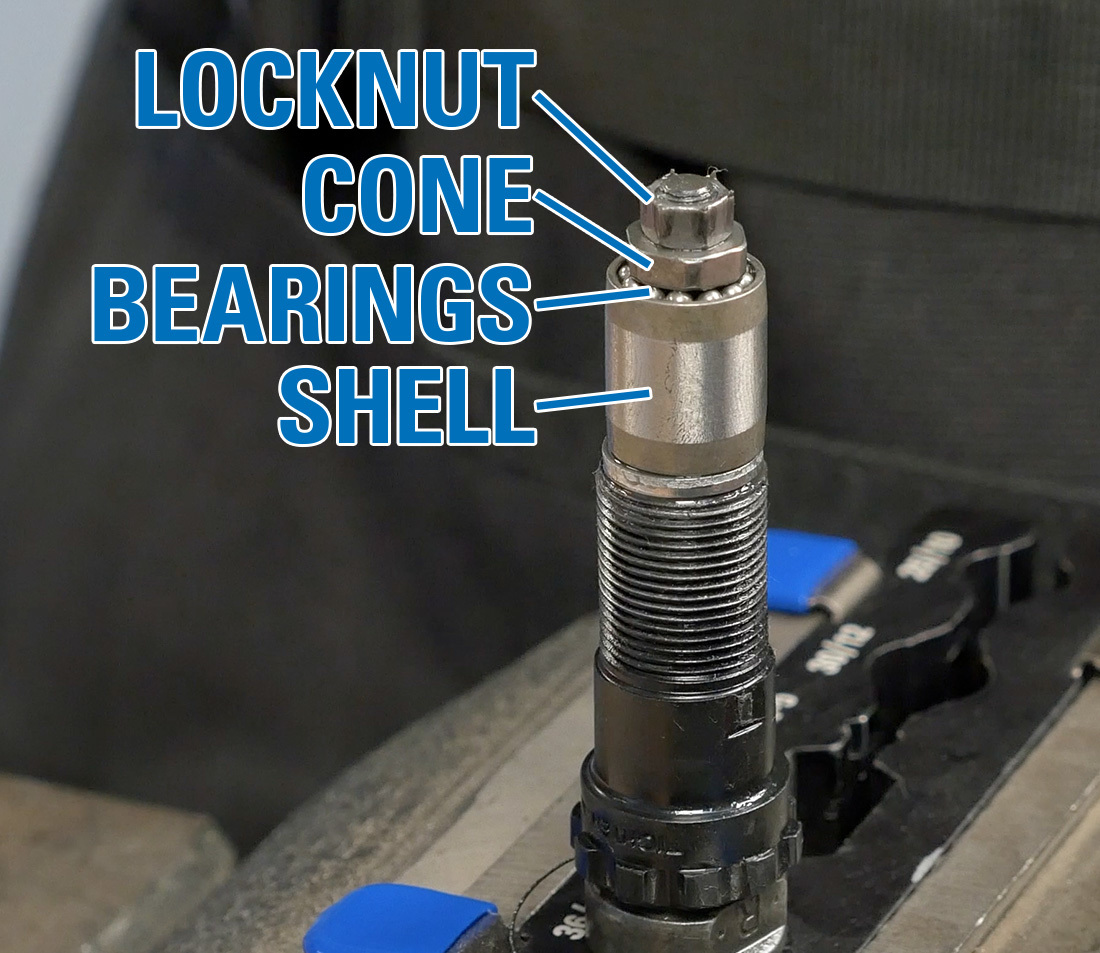
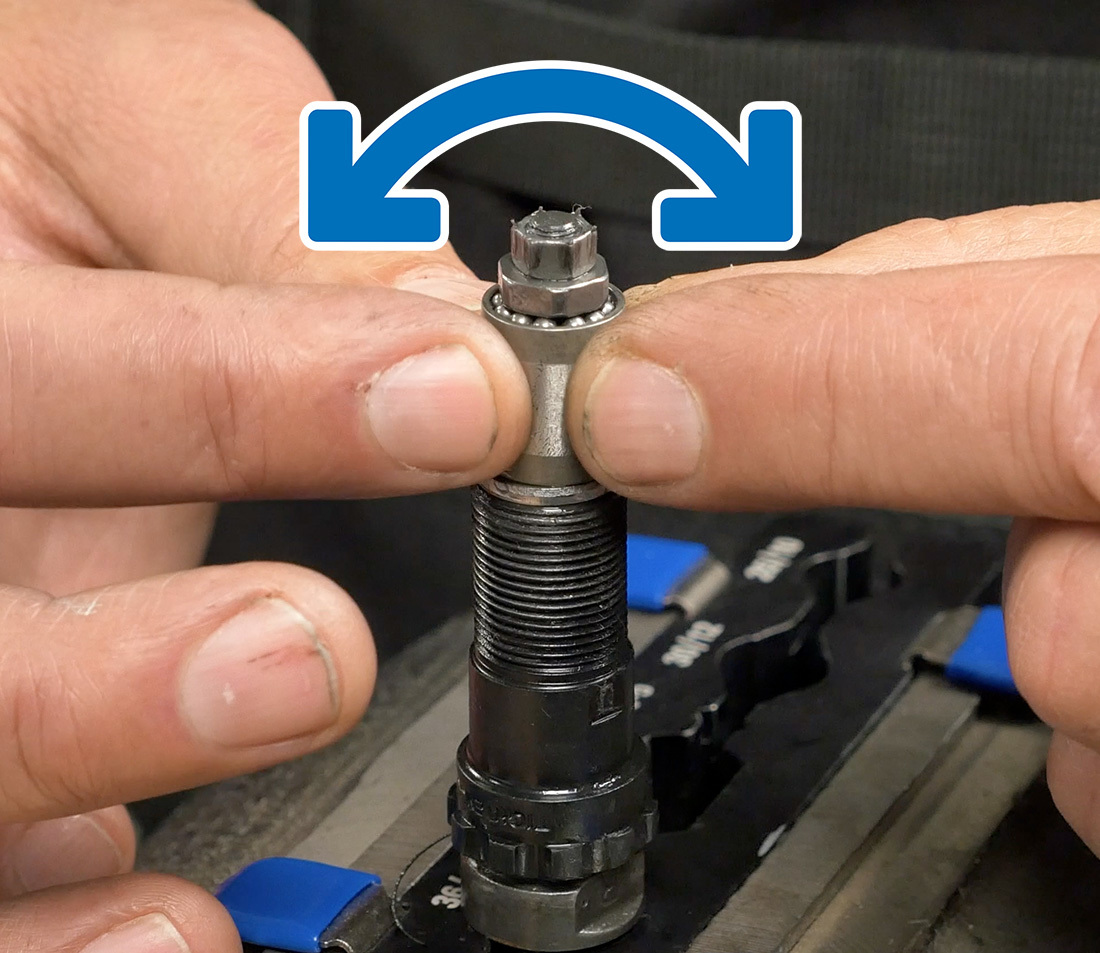
Check the bearing shell for play by rocking it back and forth with your fingers. Keep in mind that any play that is noticeable here will be magnified by the width of the pedal body, so even a nominal amount of play should be adjusted if possible.
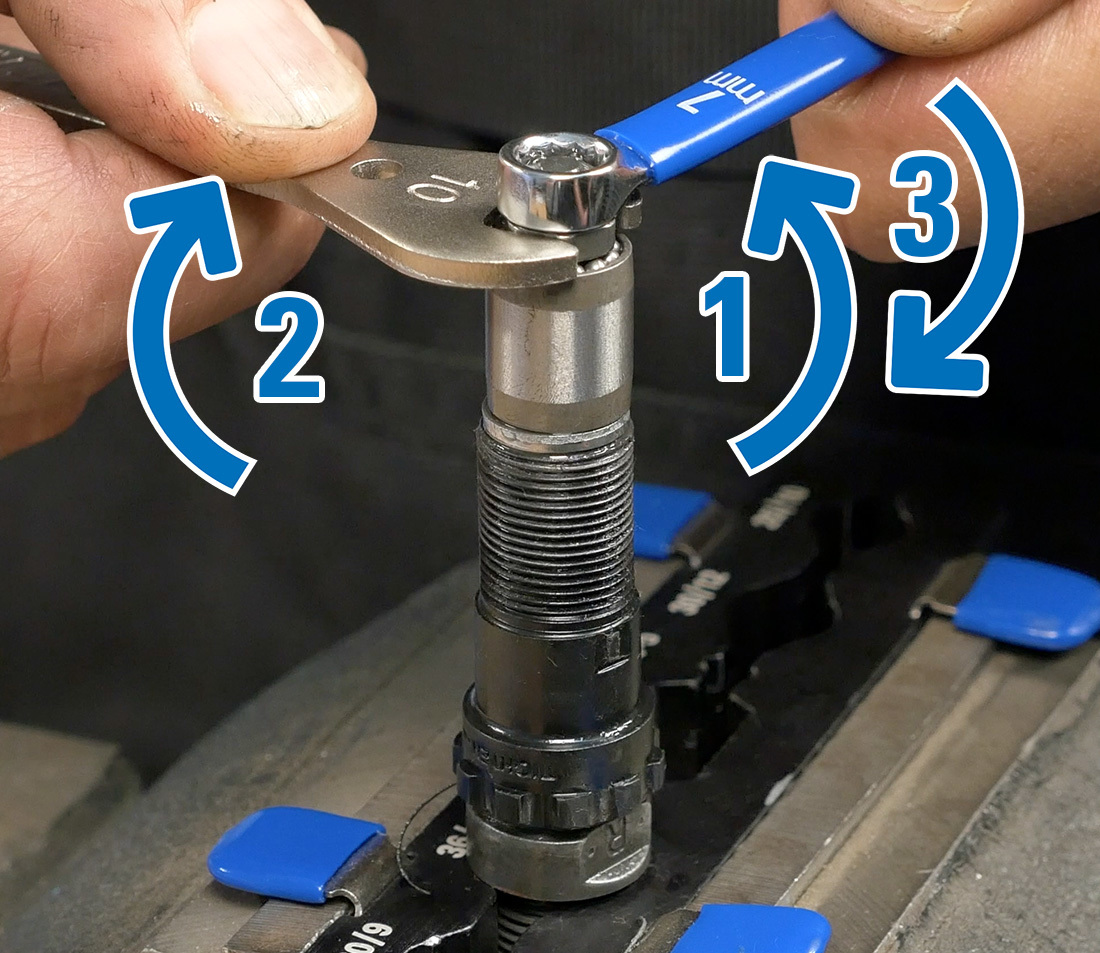
If excess play is felt, tighten the bearing adjustment using the following steps:
- While holding the cone in position using a 10 mm wrench, loosen the locknut counterclockwise using a 7 mm wrench
- Tighten the adjustment of the cone by turning it 15-20 degrees clockwise
- While holding the cone in position, re-tighten the locknut to set the adjustment
Re-check the bearing shell for play, and repeat the process as necessary. The goal is to achieve minimal play while still allowing smooth operation of the ball bearings. If it becomes necessary to back off the adjustment because it is too tight, simply turn counterclockwise in step 2.
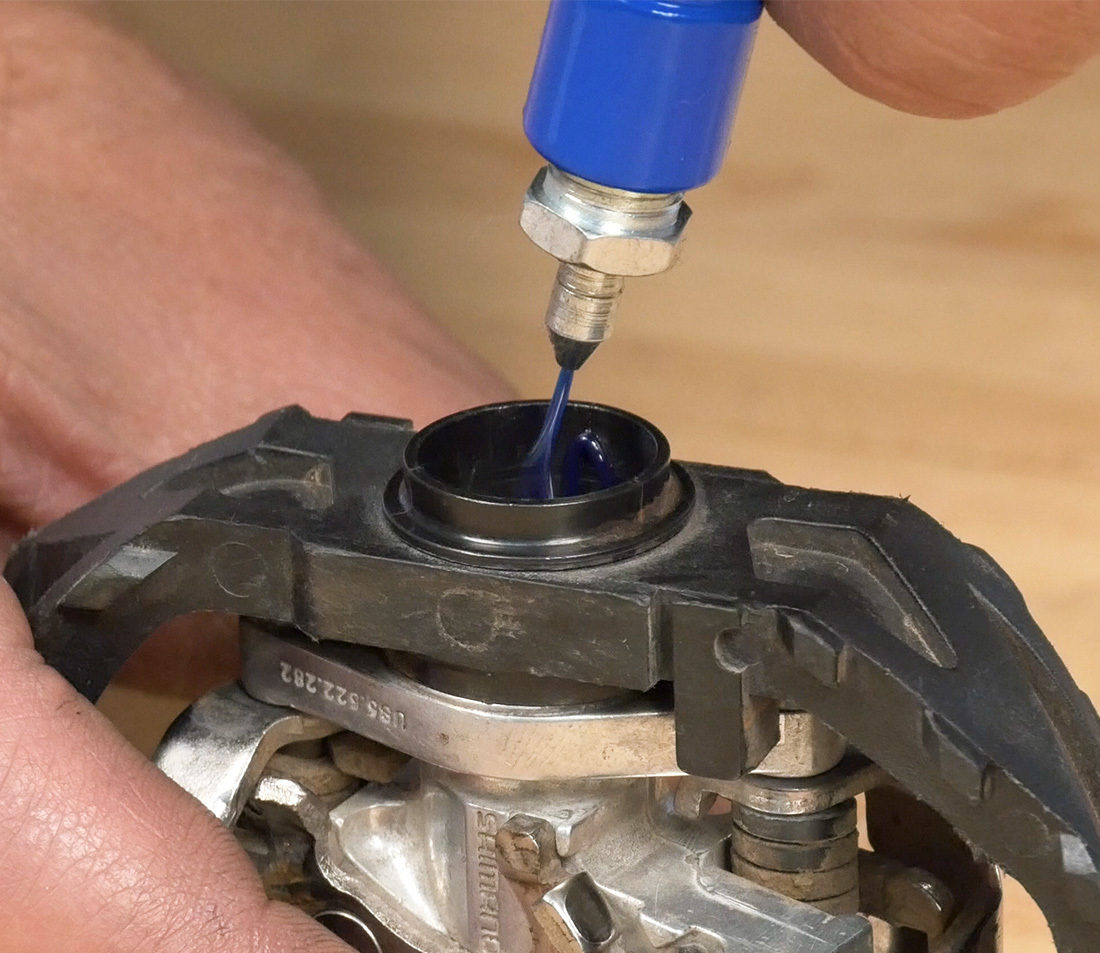
Greasing & Reinstallation
Installing the shaft into the pedal body will force the grease up the middle of the bearing unit, and into the bearings and races. Not much grease is required to re-grease the bearing unit. Squirt the equivalent of 1/2″ or 12 mm of bearing grease into the pedal body — use a pick or other thin object as a dipstick.
Installation is simply the reverse of the removal process. Thread the bearing unit into the pedal unit and tighten until snug. Wipe away any grease that was forced out of the pedal body.
Repeat the process on the other pedal.