Dropout Alignment
This article will discuss alignment of rear wheel dropouts and fork dropouts.
Getting Started

The front and rear wheels fit inside frame axle dropouts. These dropouts should be aligned so the inside faces are parallel to one another and square to the axis of the hub axle. If a dropout is badly misaligned, it may make the wheel difficult to get in and out. Additionally, it will stress the axle when the quick-release is closed. The face of the hub locknut will try to align with the dropout face. A bent dropout will cause the axle to flex and in some cases bend and break. Typically, misaligned dropouts will not effect how a wheel centers in a frame, unless the dropout is extremely misaligned.
Important Alignment Note: There are some bicycle dropout designs that do not allow correction by bending, or cold-setting. Extremely thick dropouts typically cannot be bent. Other examples include most suspension forks, most titanium frames, and oversized dropouts for the 14mm “freestyle/bmx” axles.
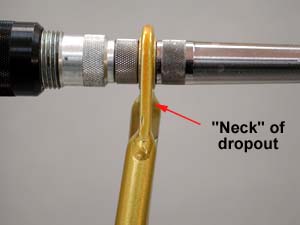
When a dropout is bent for correction, the frame tubing does not bend. Additionaly, the dropout face does not bend. What is being bent is the narrow section between frame and dropout. If there is not a narrow section between the frame and dropout, it may not be repairable. Without this “neck”, you are attempting to bend the frame tube.
Additionally, dropouts that are bonded into the frame, such as on carbon fiber frames, may not be repairable. Consult with the manufacturer if in doubt. However, even if the bicycle design will not allow correction, it is useful knowledge to inspect dropout alignment.
Once dropouts are aligned, they tend to not require constant rechecking. When the hub is clamped in place, the system is quite strong. Even extreme riding and smashing the wheel is unlikely to bend the dropouts.
Procedure for Dropout Alignment
- Rear dropouts with centering screws: First, install dished wheel in frame, and pull axle to screws. Check that wheel is centered, adjust screws as necessary.
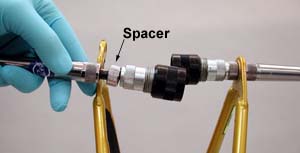
- For the rear, slide spacer to inside of dropouts. For front, slide wide spacer to outside of dropouts.
- Pull FFG-2 fully up into dropout. Hold threaded shaft and secure T-handle clockwise firmly against dropout. If tool begins to move, stop securing, tool is tight enough.
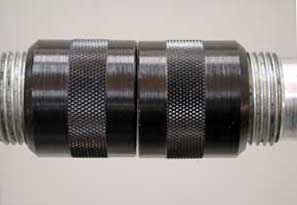
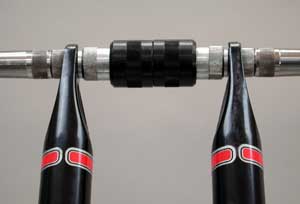
- Adjust bushings until there is a slight gap between them. Move threaded bushings side to side until gap is centered in dropouts.
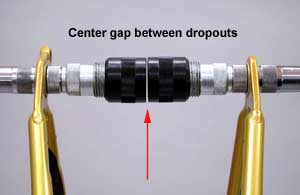
- View FFG-2 from all directions for any offset between bushings. Error may also be felt by running a finger across the gap.
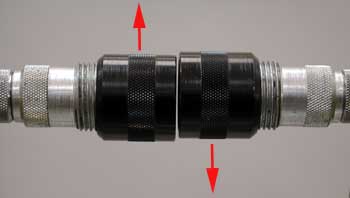
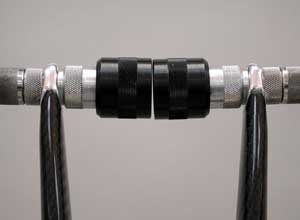
An example of parallel but offset dropouts. Move left side upward and right side downward
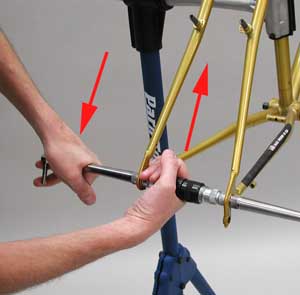
Begin by moving left dropout upward
- To correct by bending, grab bushing with one hand, and handle with other. Bend by moving hands opposite directions. If in doubt as to which side to bend, flex gently and note movement of bushing before proceeding to bend.
- Correct offset until bushing cylinders show no error greater than 0.5mm.
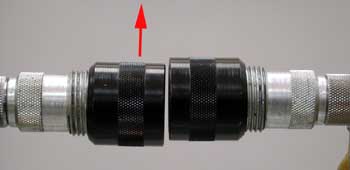
- View bushings for any gap opening that is not parallel to face of bushing. Correct by bending dropout. Again, if in doubt in choosing one side, flex handle and note movement of bushing. If largest gap is less the 0.5mm, drop outs are adequately aligned.