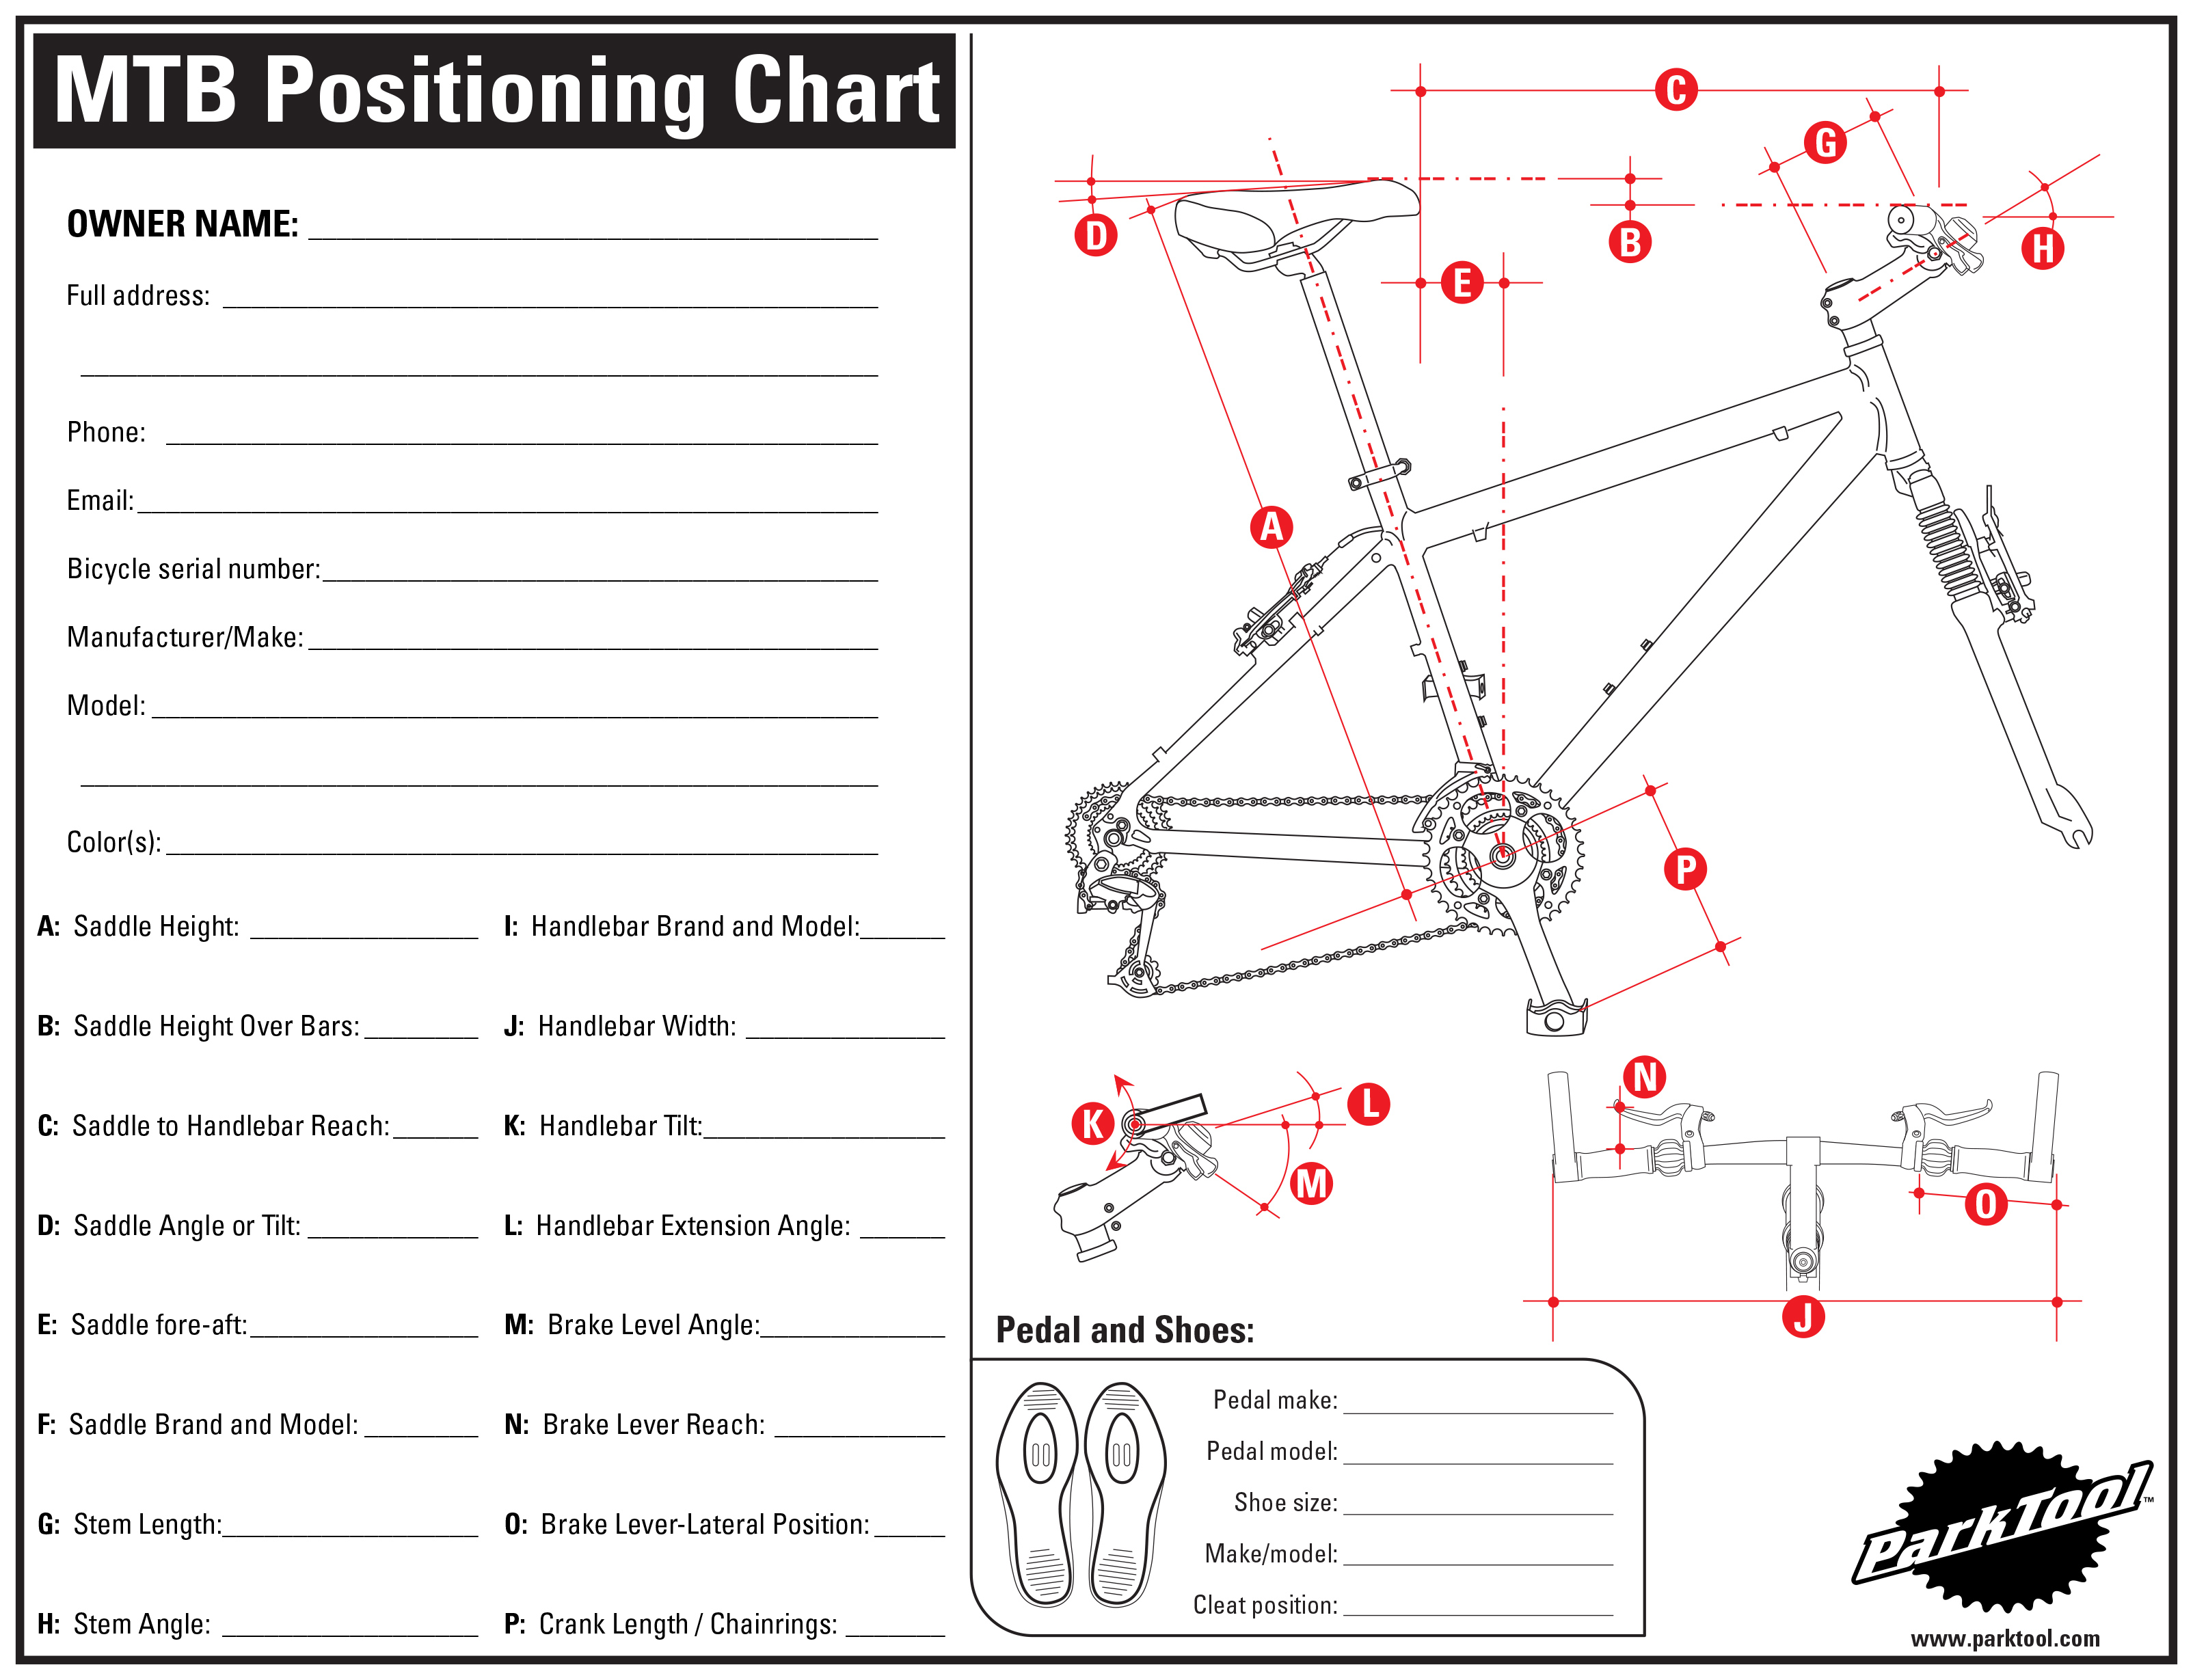
MTB Positioning Chart
This article will describe the use of the MTB Positioning Chart for competitive mountain bicycles. A similar article for road bikes is at Road Bike Positioning.
Charts
These charts are intended primarily for the mechanic to quantify and record the various aspects of a cyclist positioning adjustments. It can also be useful for a cyclist to track and record changes to his/her position. For example, if saddle height is raised, the new height and date of change can be noted. This will allow the cyclist to track changes in performance. Additionally, if the bicycle is lost or somehow destroyed, this chart will help in quickly setting up the new bike to closely match the original positioning.
The MTB Positioning Chart can be downloaded as a PDF file. The charts contain auto-fields and data may be typed directly to the chart once it is downloaded.
Procedure
Begin with the bicycle on level ground. If possible mount bike on trainer and level bike by checking that both wheel axles are the same distance from the ground.
There is often more than one method for measuring a component or position. It is important that the user be consistent and that the method of measuring is noted. Record all units of measurement. For example, record “50cm” for fifty centimeters, and “50mm” for fifty millimeters. Complete the chart and makes notes with the assumption that someone else will need to set up a bike from only this chart.
Begin by recording customer/rider information, such as name, address, etc. Also record bike make, model, year of production, and serial number. Also record bike’s color scheme and any unique or obvious physical characteristics that might distinguish this bike. Assume this will be used in a police report of a stolen bike. It is also recommended that the traveling rider carry a recent photo of the bicycle.
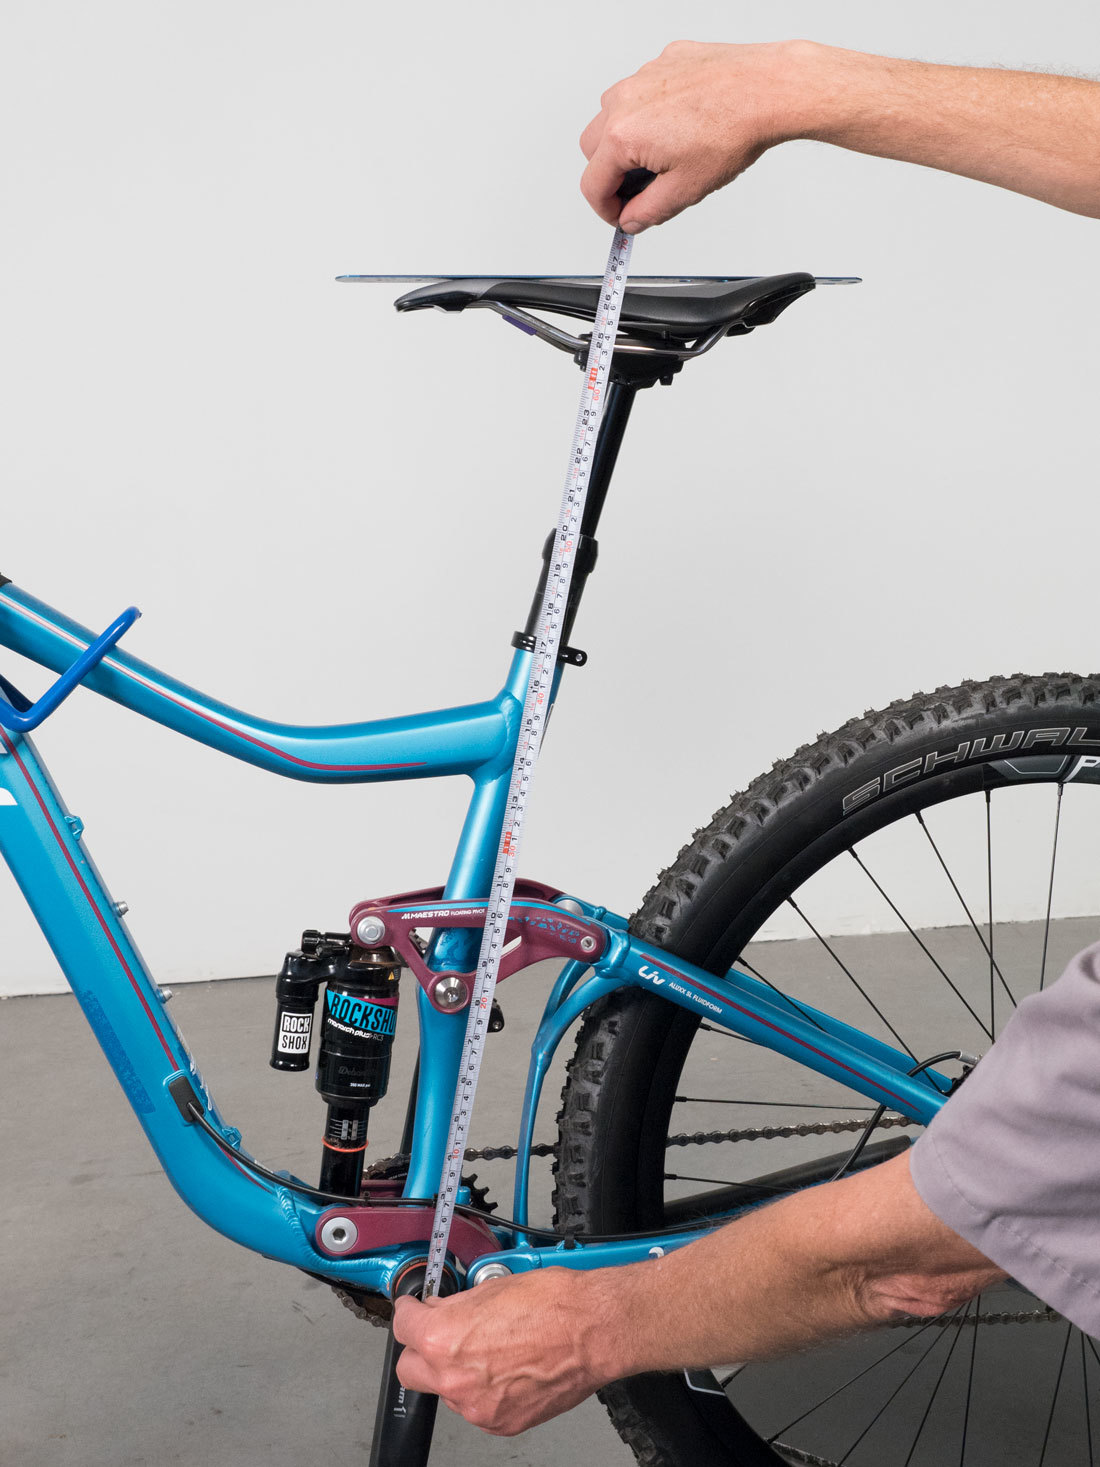
A: Saddle Height
Record saddle height and note method of measurement. A simple method is to place a straight edge on top of the saddle and record height from the bottom bracket center to the lower edge of straight edge. Measure along the seat tube.
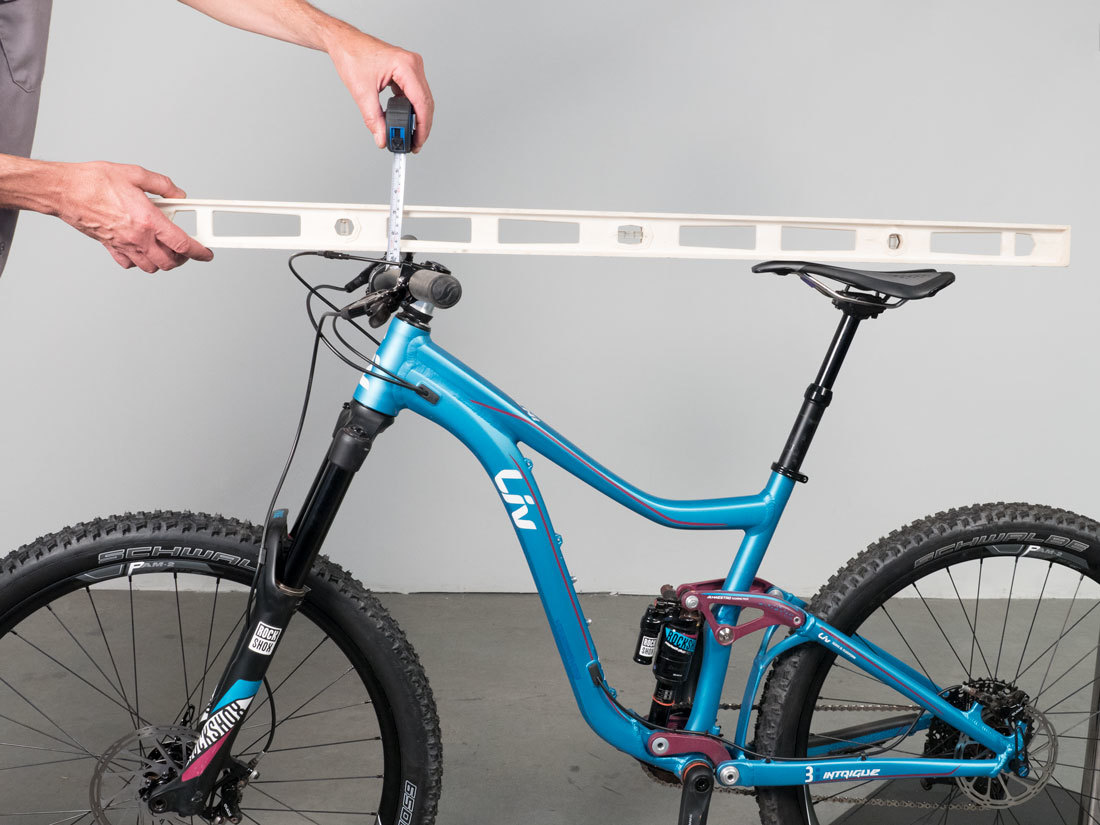
B: Saddle Height Over Bars
Record handlebar-over-saddle height difference. A simple method is to measure perpendicularly from saddle to ground, and then bar to ground, and take the difference between these two measurements. Use a straight edge on top of the bars, and measure to lower edge of the straight edge.
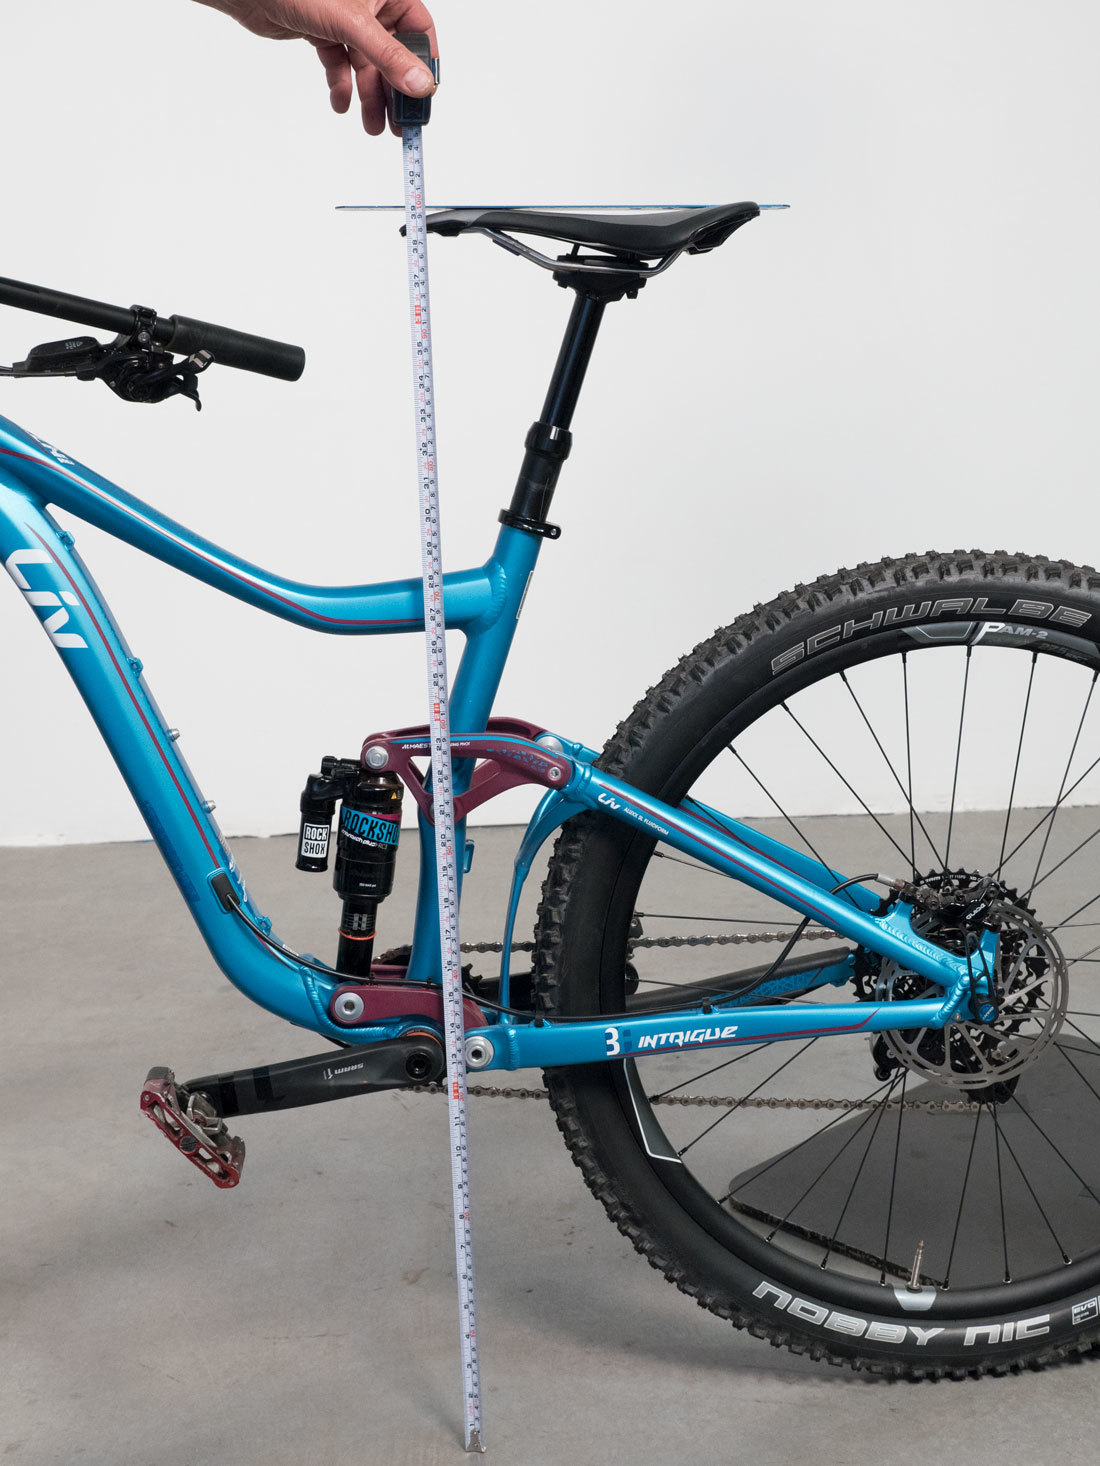
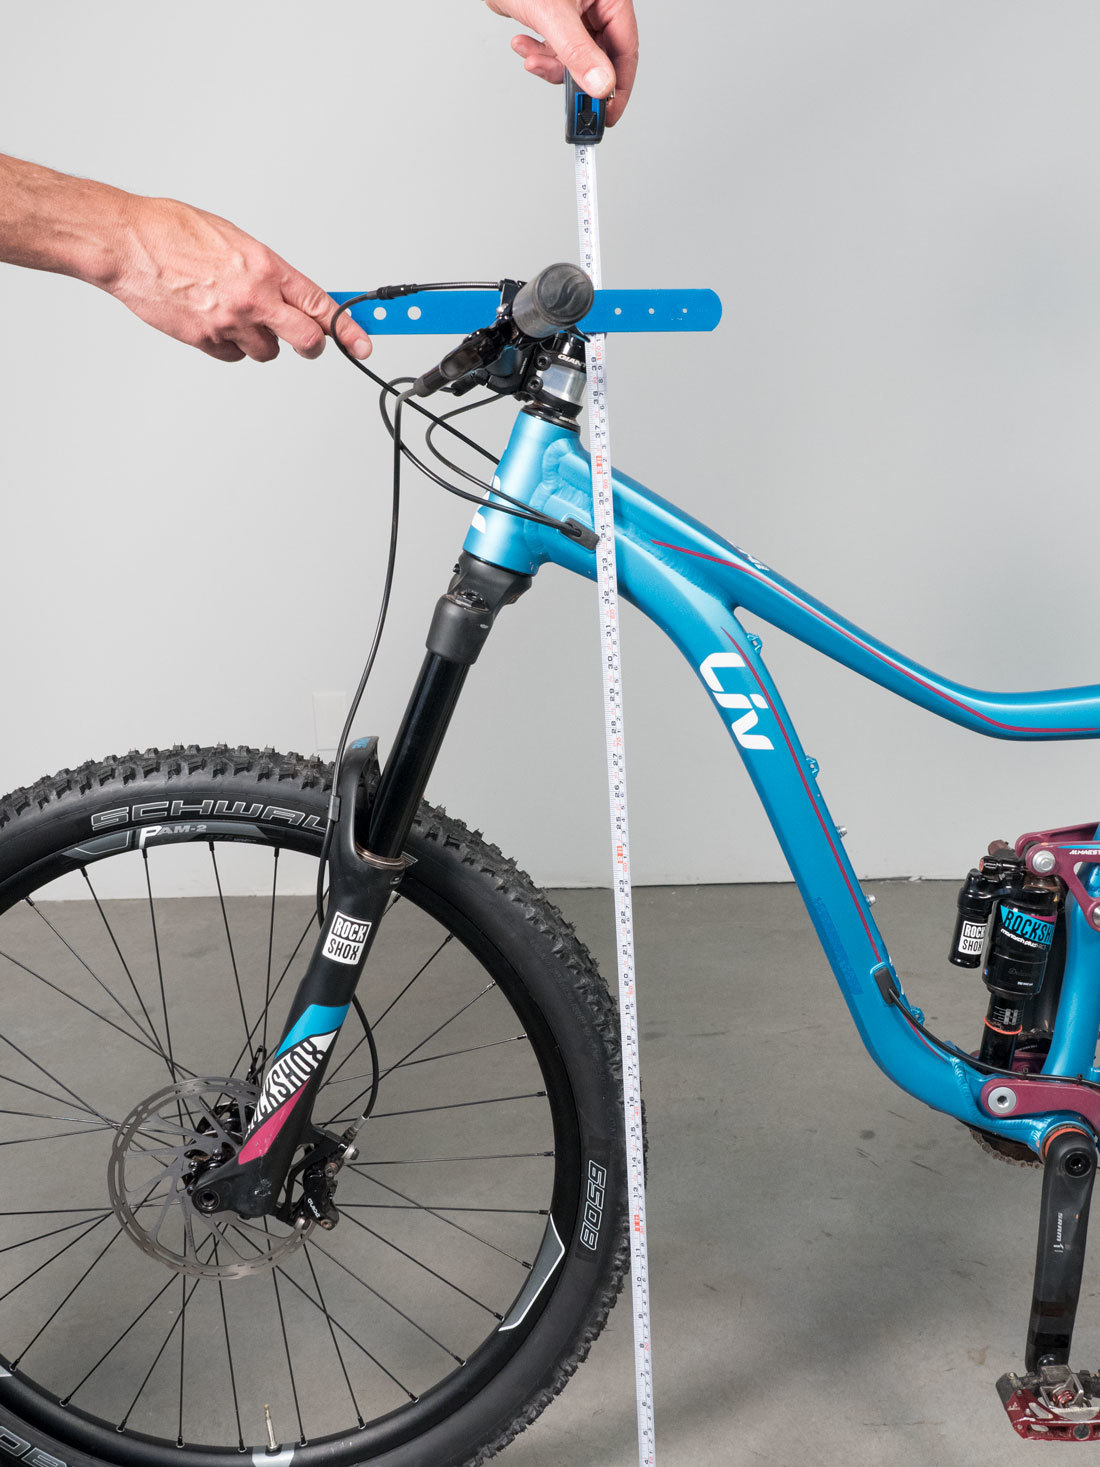
Another option is to use a long straight edge and the level finder. Use level finder to hold straight edge horizontal from saddle. Measure from lower edge of straight edge to top of handlebars.
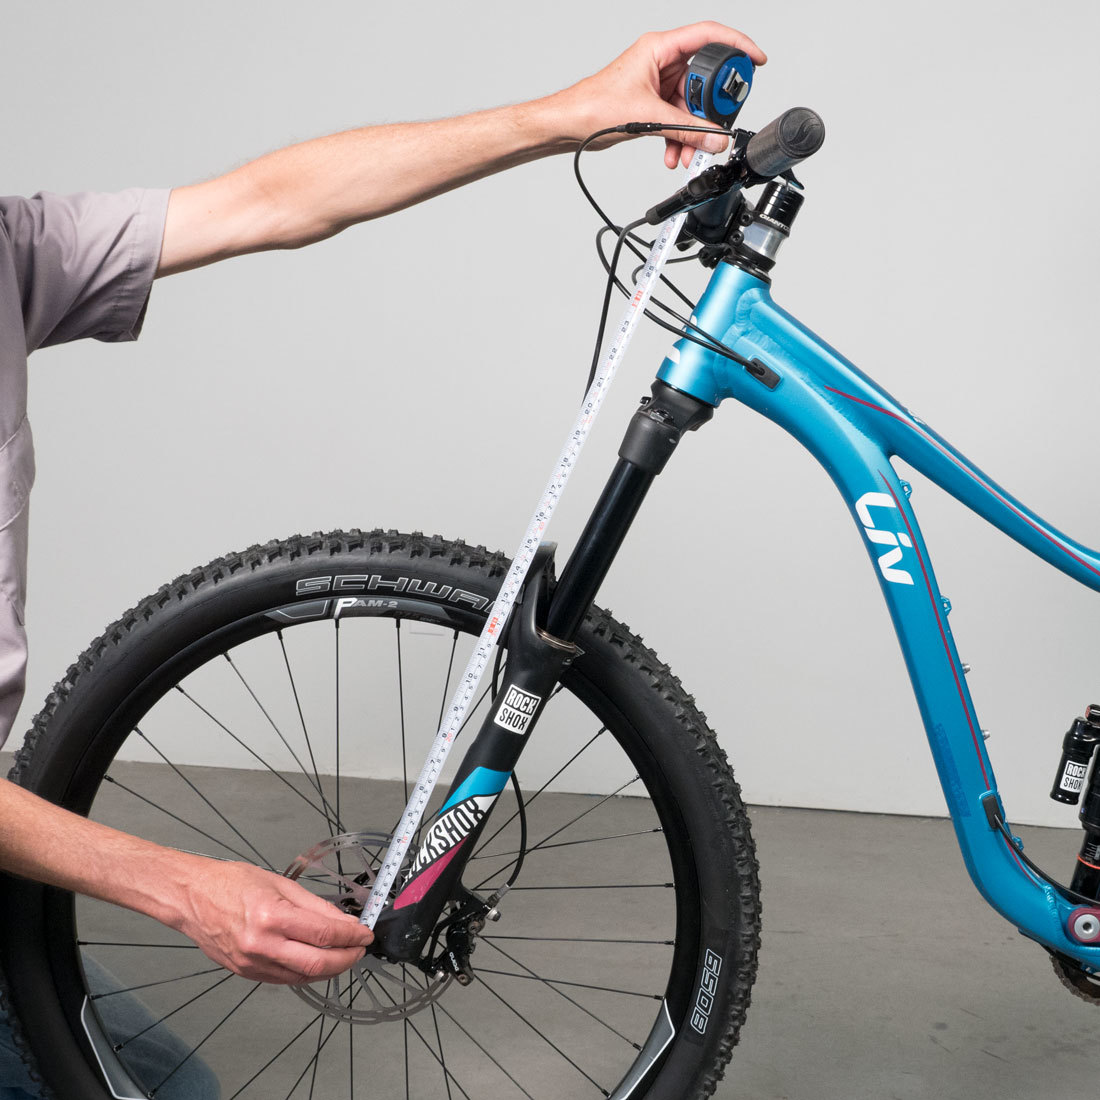
Another option is to measure from the front axle to the top of the bars. This is a useful measurement when tracking changes in position on the same bike. However, this number is also related to stem length, fork rake and wheel base, making it less useful when setting up a duplicate position on a different frame.
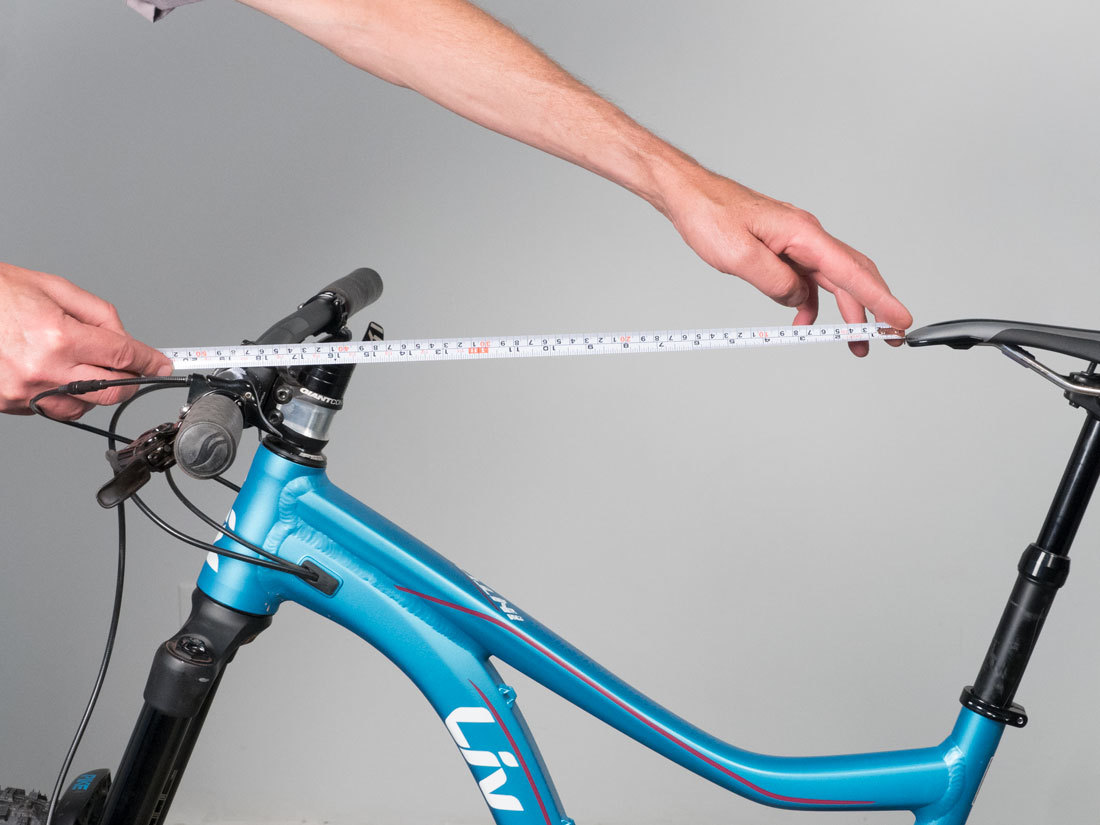
C: Saddle to Handlebar Reach
Measure from saddle tip to the center of the bars at the stem. This gives a reference for bar reach.
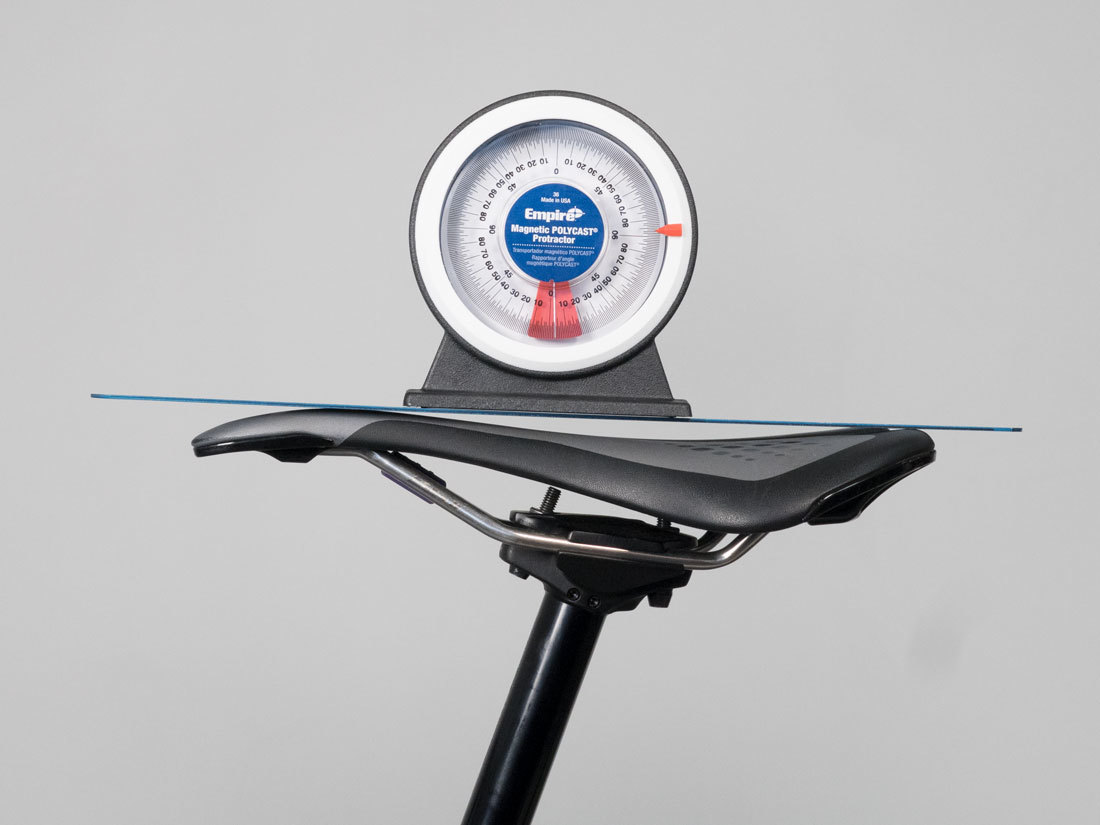
D: Saddle Angle or Tilt
Using a straight edge on top of saddle, measure saddle angle from horizontal. If the front end of the saddle is raised, record this upward sloping saddles as a positive number (+). Record downward sloping saddles with a negative number (-).
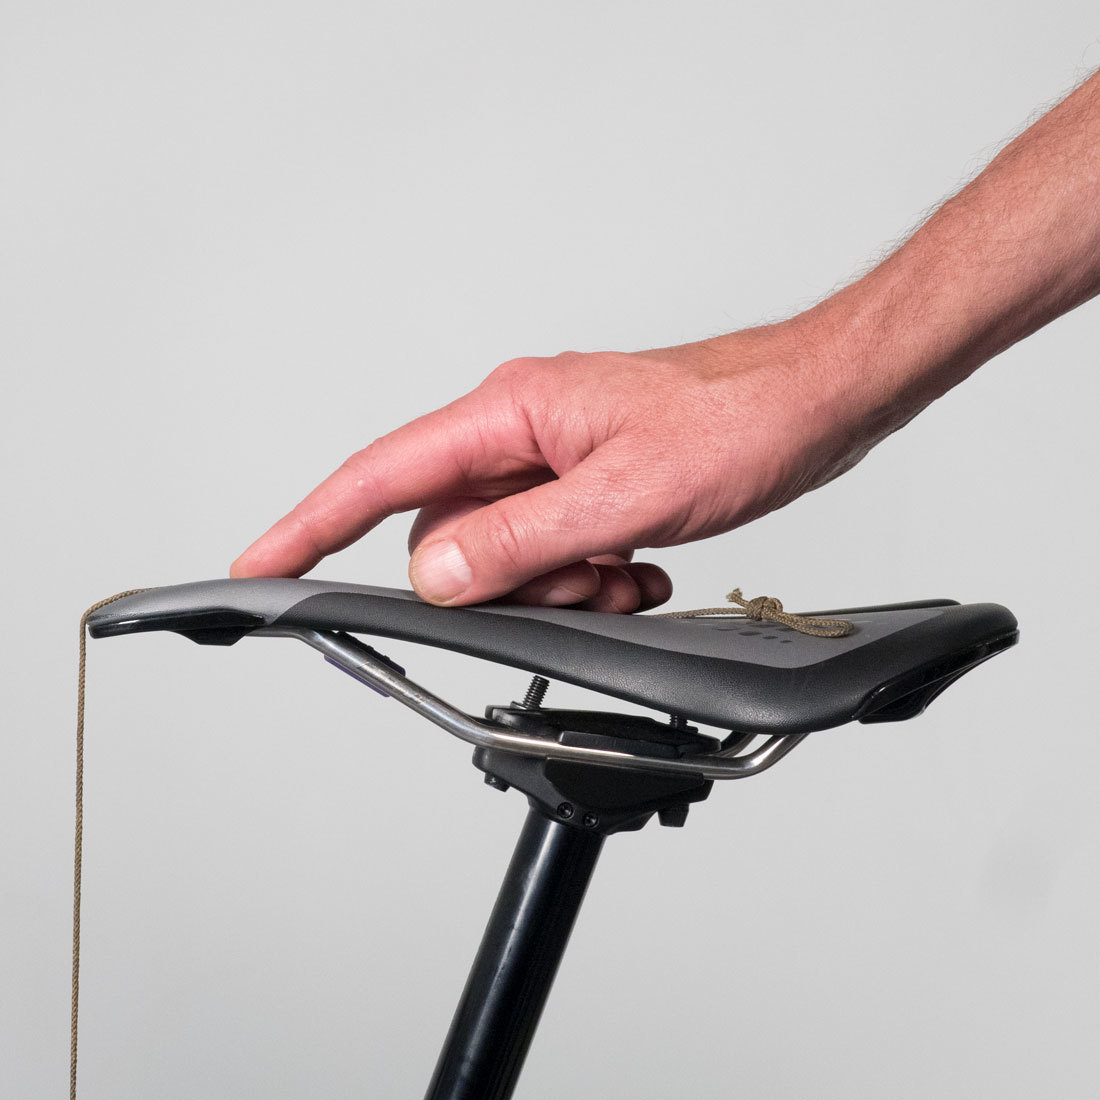
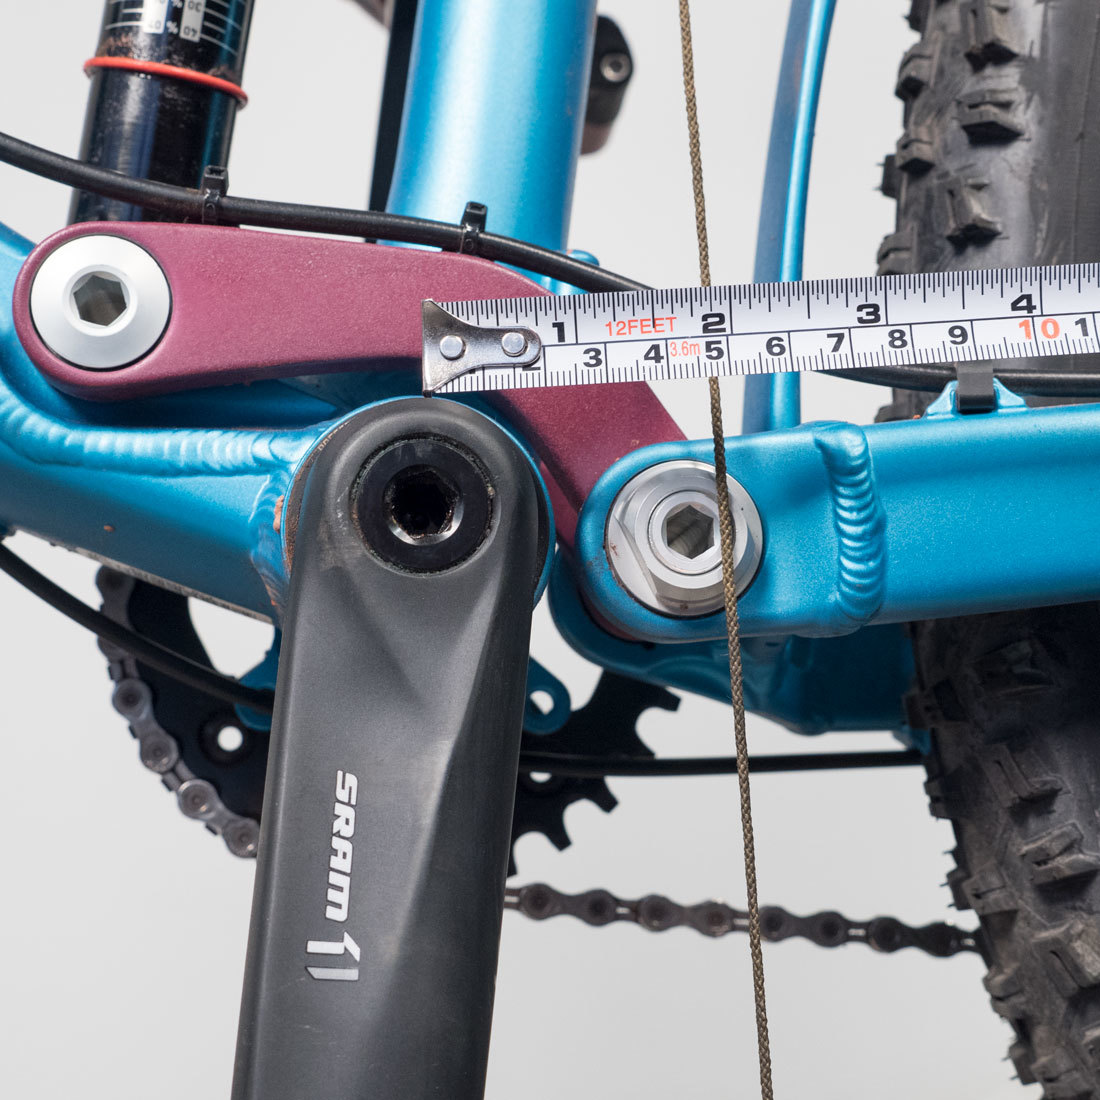
E: Saddle fore-aft
Drop a plum bob line from the saddle tip and measure distance from line to center of bottom bracket. It is easiest to tape line to saddle so it hangs from saddle end and extends freely toward the ground.
F: Saddle Brand and model
Record saddle brand and model.
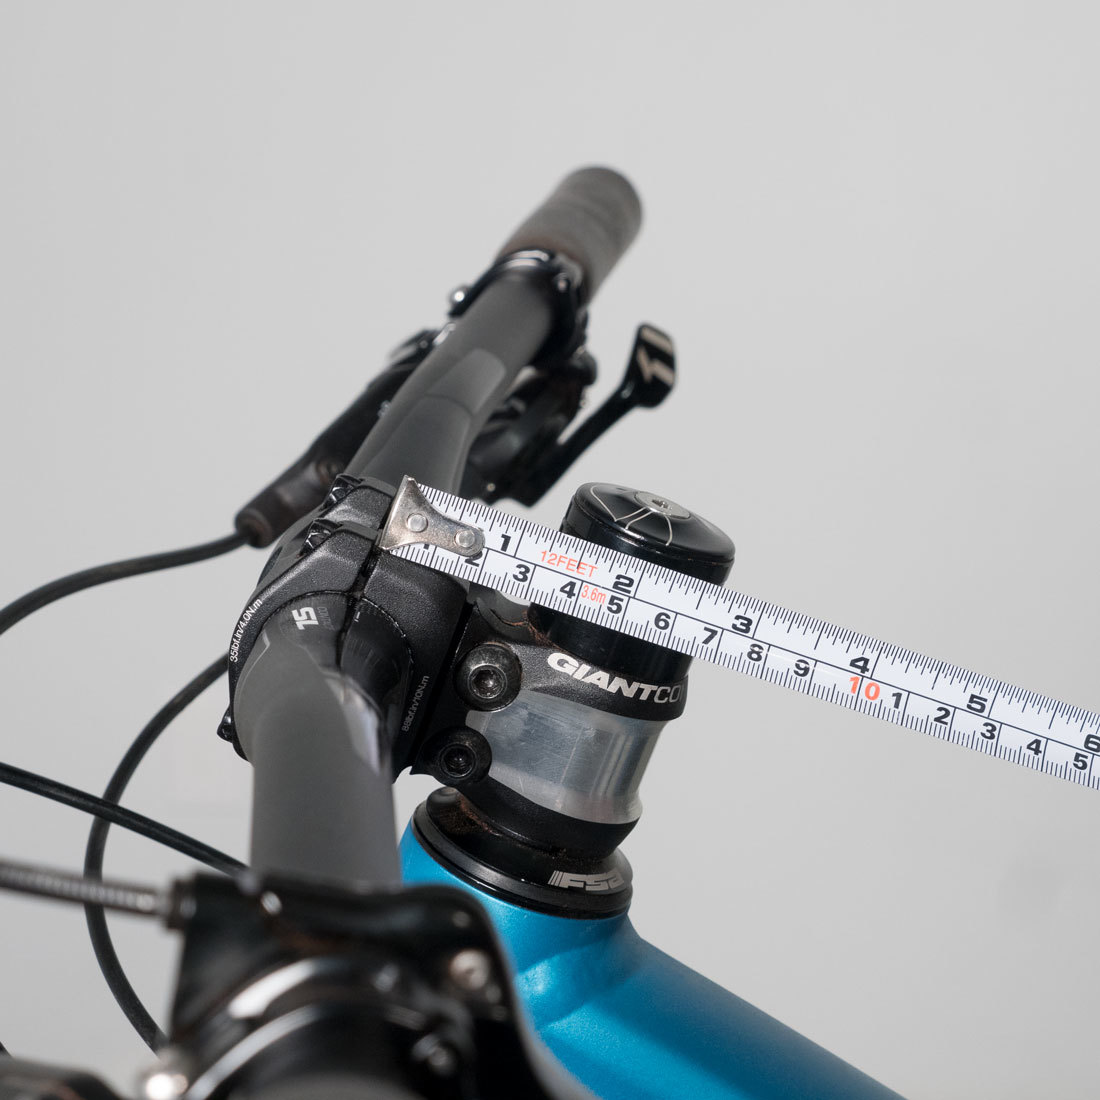
G: Stem Length
Measure center of the stem binder bolt to the center of the bars.
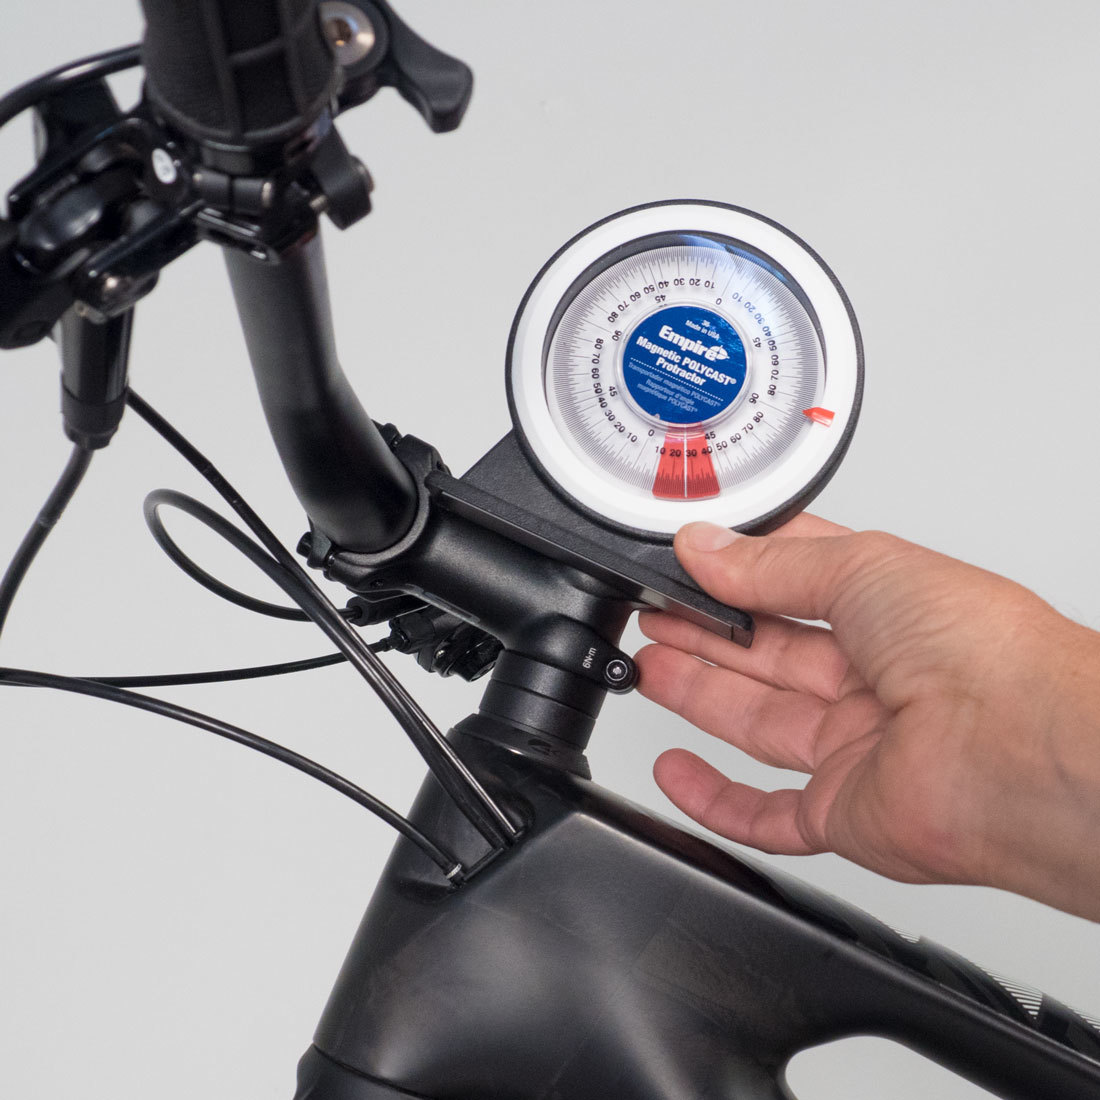
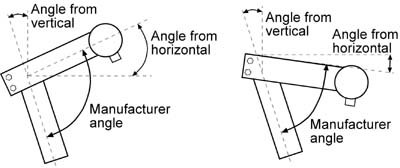
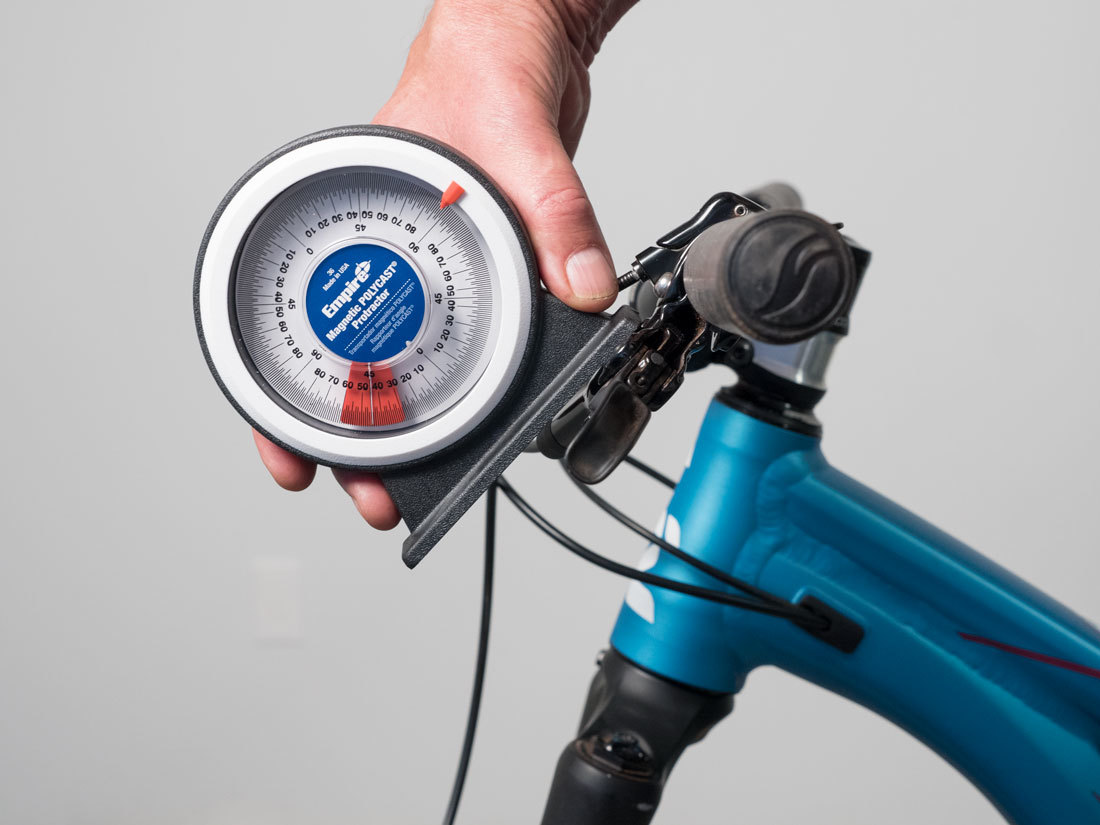
H: Stem Angle
Record the stem angle from horizontal. Especially on shorter stems, hold angle finder so it is parallel to stem angle. In the stem is downward sloping, record as a negative number ( - ). It stem is upward sloping, record as a positive number ( + ).
NOTE: Some stem manufacturers specify stem angle using the steering column as a reference. If this angle is known, record this as well. It is possible to measure the manufacturers angle by taking the stem angle and the quill (steering column) angle. Stem angles sloping upward are recorded as positive numbers, while stem angles sloping downward should be recorded as negative numbers. For example, a bike is measured and the angle from vertical is 18-degrees. (This means the headtube angle as the bike sits is 72-degrees.) The angle from horizontal is 25-degrees. The manufacturer’s angle is then 90 - 18 + 25 = 97 degrees. In the right image below, assume the stem sloped downward 6 degrees instead. The manufacturer’s angle is then 90 - 18 + (-6), or 66 degrees.
I: Handlebar brand and model
Handlebars vary in shape and design. Record the brand and model.
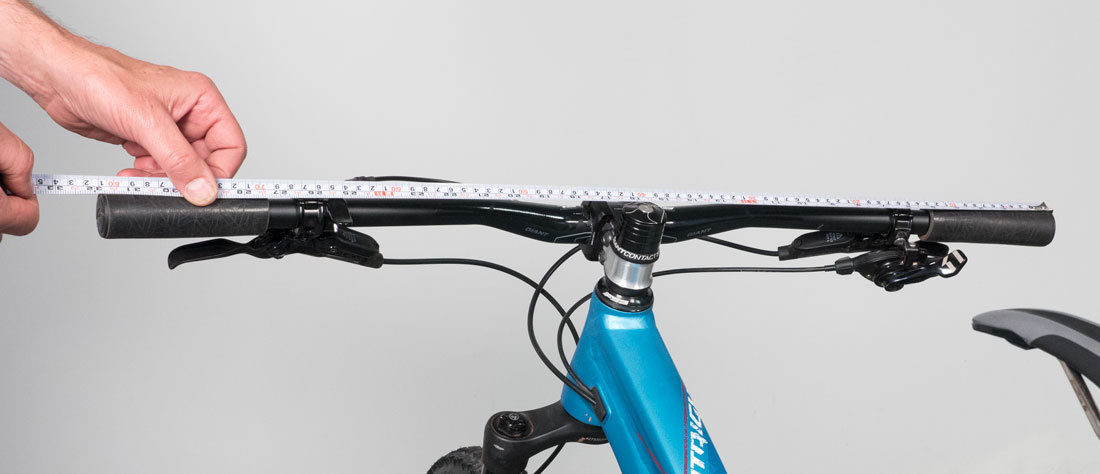
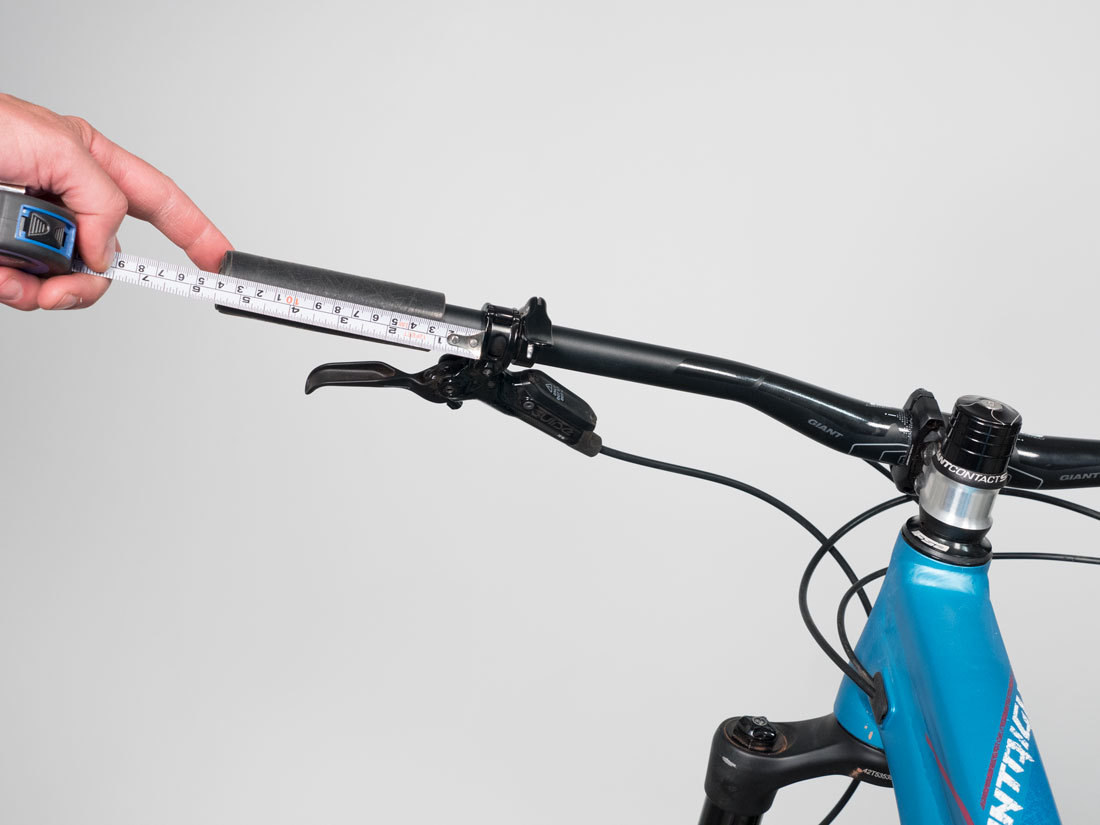
J: Handlebar Width
Measure flat bar width from end to end of bars.
K: Handlebar Tilt or angle
Measuring bar rotation with flat bars is difficult. The bars are made with a bend. It is possible to get an angle finder on the bend, but because of the grips, finding a flat reference point is tricky. At a minimum make note if bars are rotated with up, down, or flat.
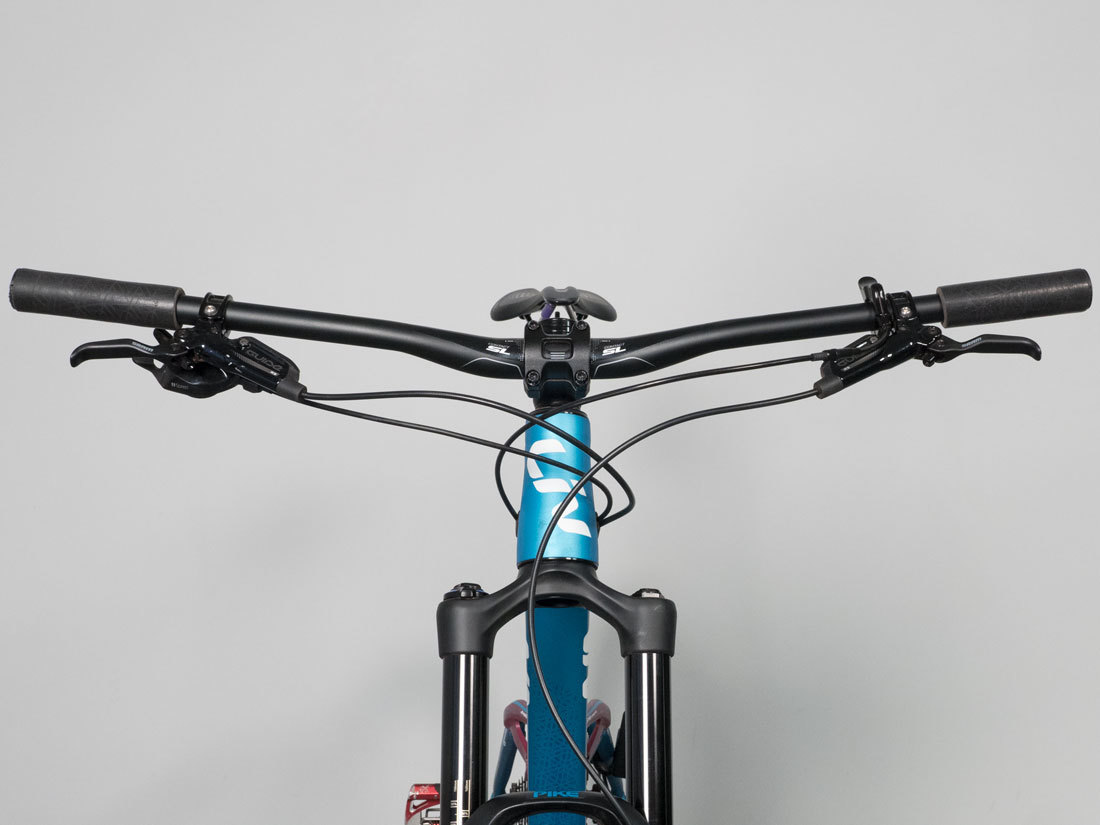
Handlebar rotated up
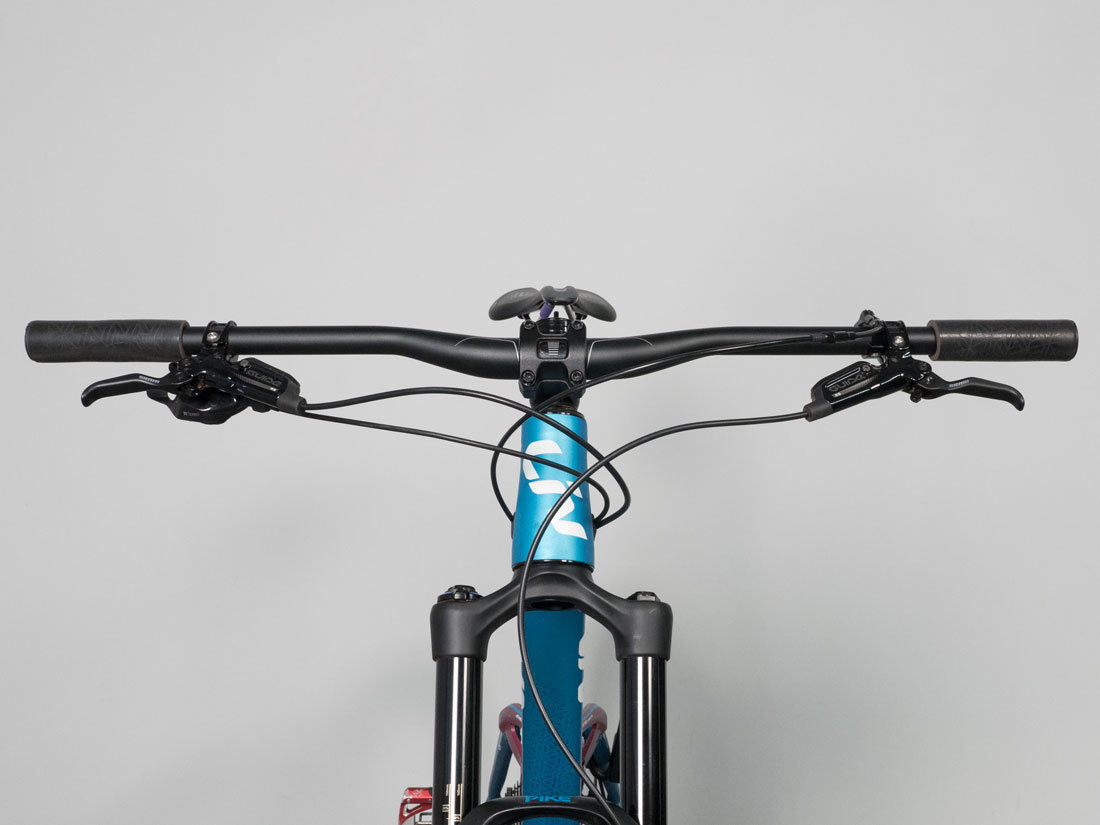
Handlebar rotated to flat or hoizontal
L: Handlebar Bar-ends
If bar ends are present, record the angle from horizontal.
M: Brake Level Position
Record the angle of the brake lever. There may not be a flat even surface to reference. Pull the lever and watch the plane of motion. This is the angle you are trying to record.
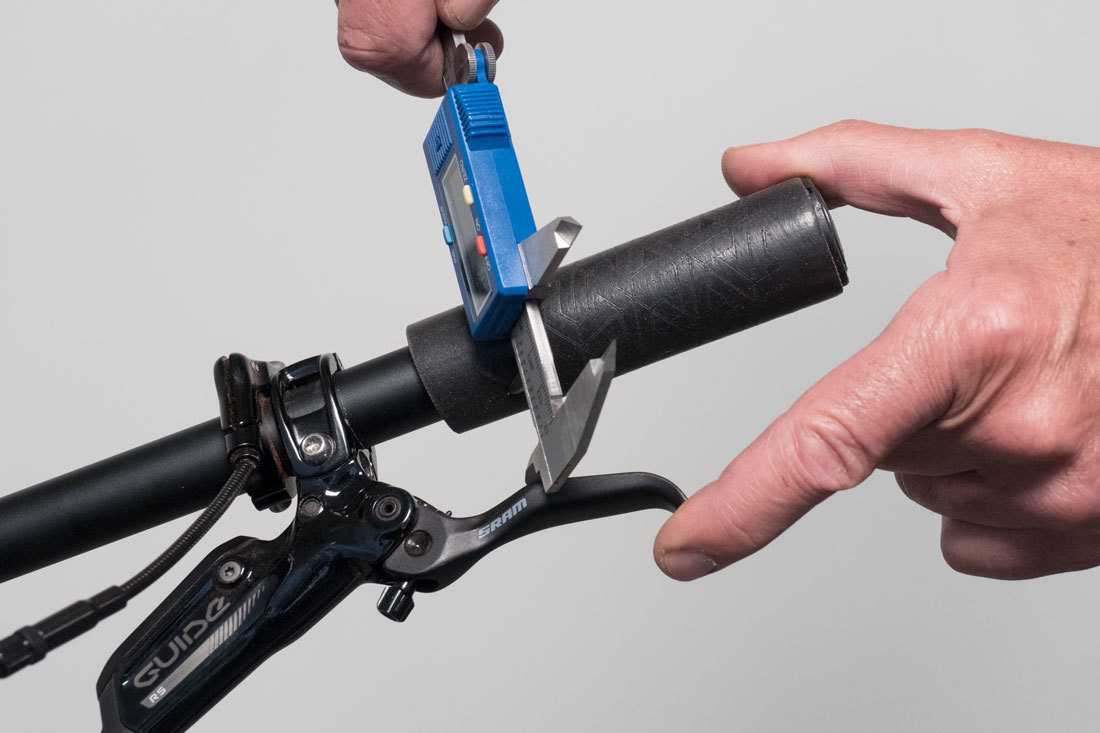
N: Brake Lever Reach
Record the distance from the bars to brake levers when the brakes are relaxed. This is adjustable on most bikes and is set to the riders preference.
O: Brake Level Position
Record the lateral position of the lever from the bar end.
P: Crank Length / Chainrings
Record the crank length and chainring(s).
Related articles
Road Positioning Chart View Article