How to Size and Install Shift Cable Housing
Properly sized and routed shift cable housing can make a huge difference in your bike's performance. This article will outline the process of sizing and cutting cable housing for derailleur systems.
Preliminary Information
In mechanical shifting systems, the cable pulls or releases a set amount of cable to cause the derailleur to move a set amount. If the cable or housing has become kinked, worn, frayed or corroded, you may experience slow shifting, inconsistent shifting, hard shifting or no shifting at all. Replacing your cables and or housing can improve shifting performance.
The process outlined in this article concerns housing replacement. The cable replacement process varies depending on your shift lever style — see the derailleur systems article category for all our articles on cable replacement.
There are 3 different routing methods: Full housing, segmented housing and internally-routed housing.
Full housing is when the housing runs all the way from the shifter to the derailleur uninterrupted.

Segmented housing is divided into segments that begin and end at the housing stops built into the frame. In between stops, the cable is exposed.
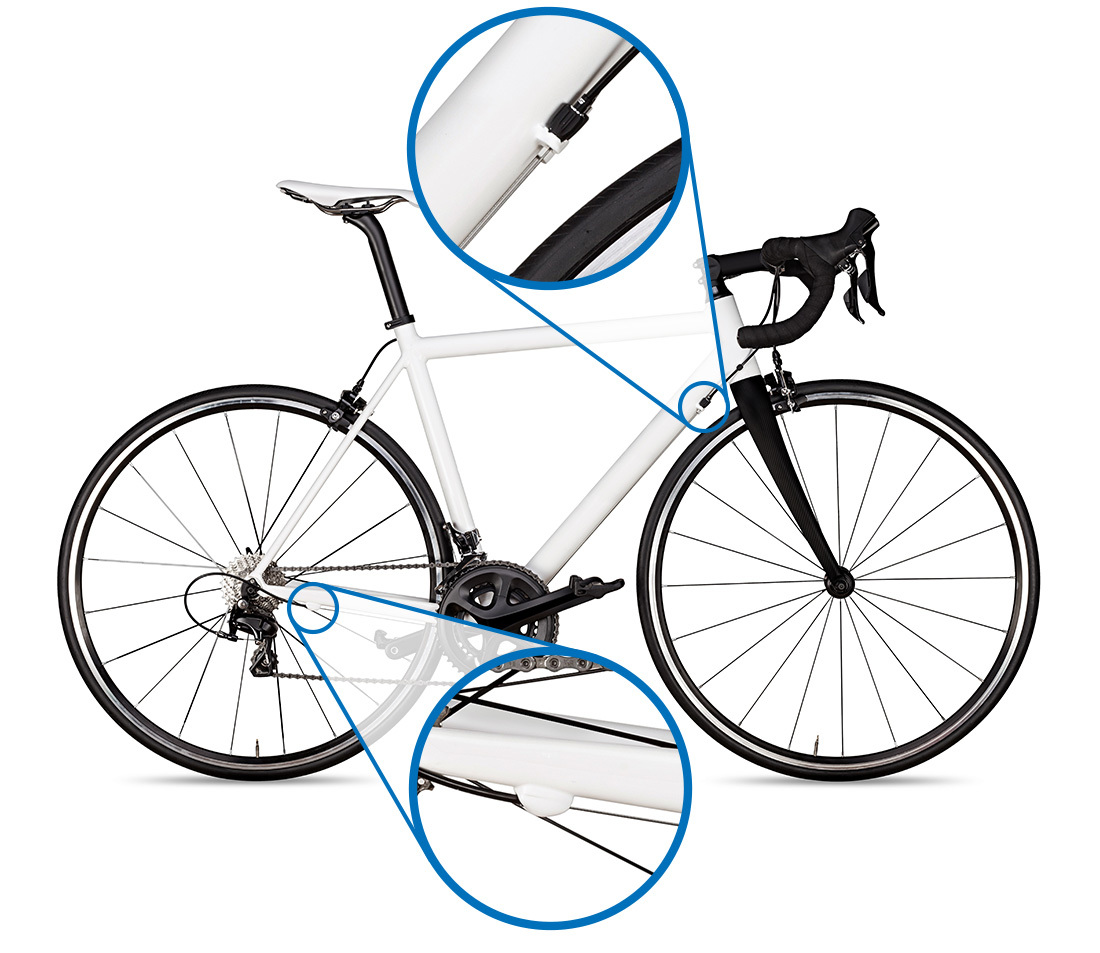
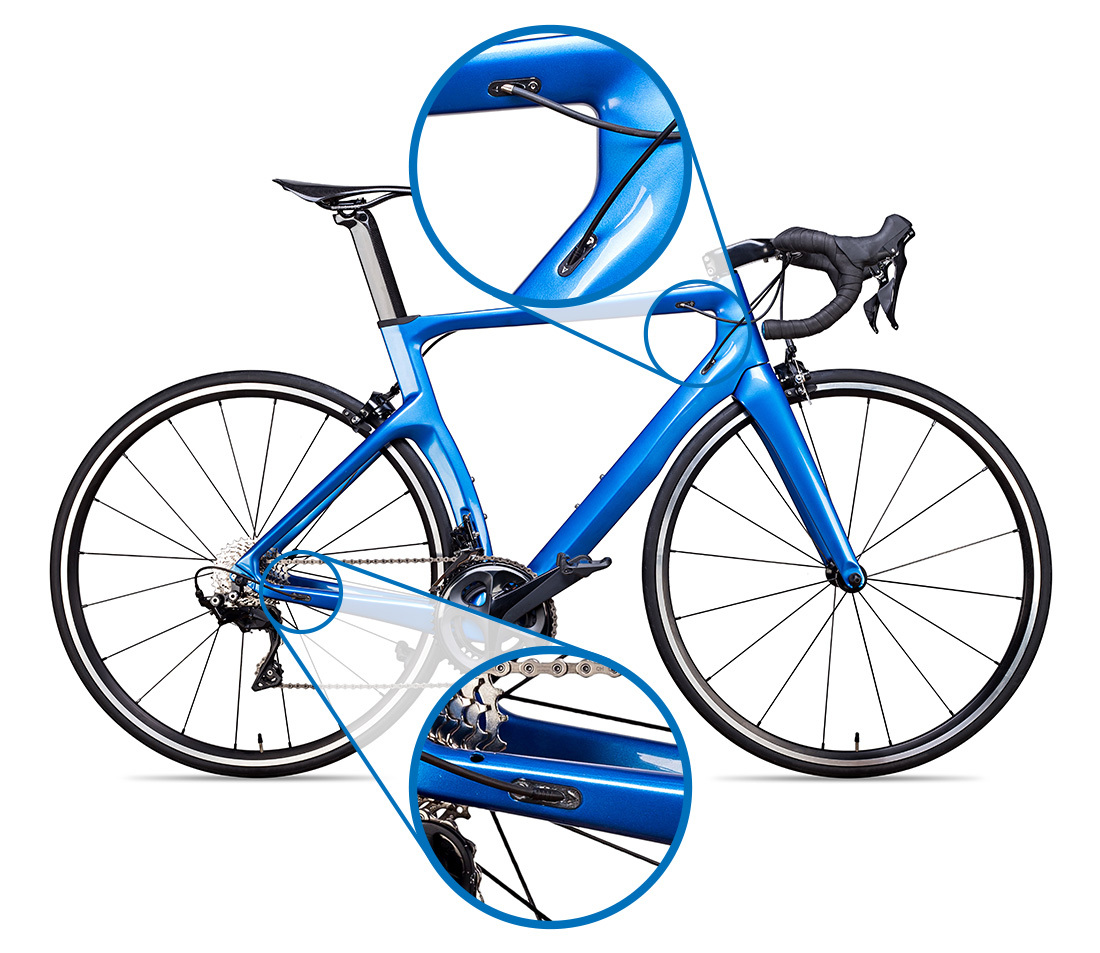
Internally-routed housing is when the housing runs through the frame and other components, and can be either segmented or full housing.
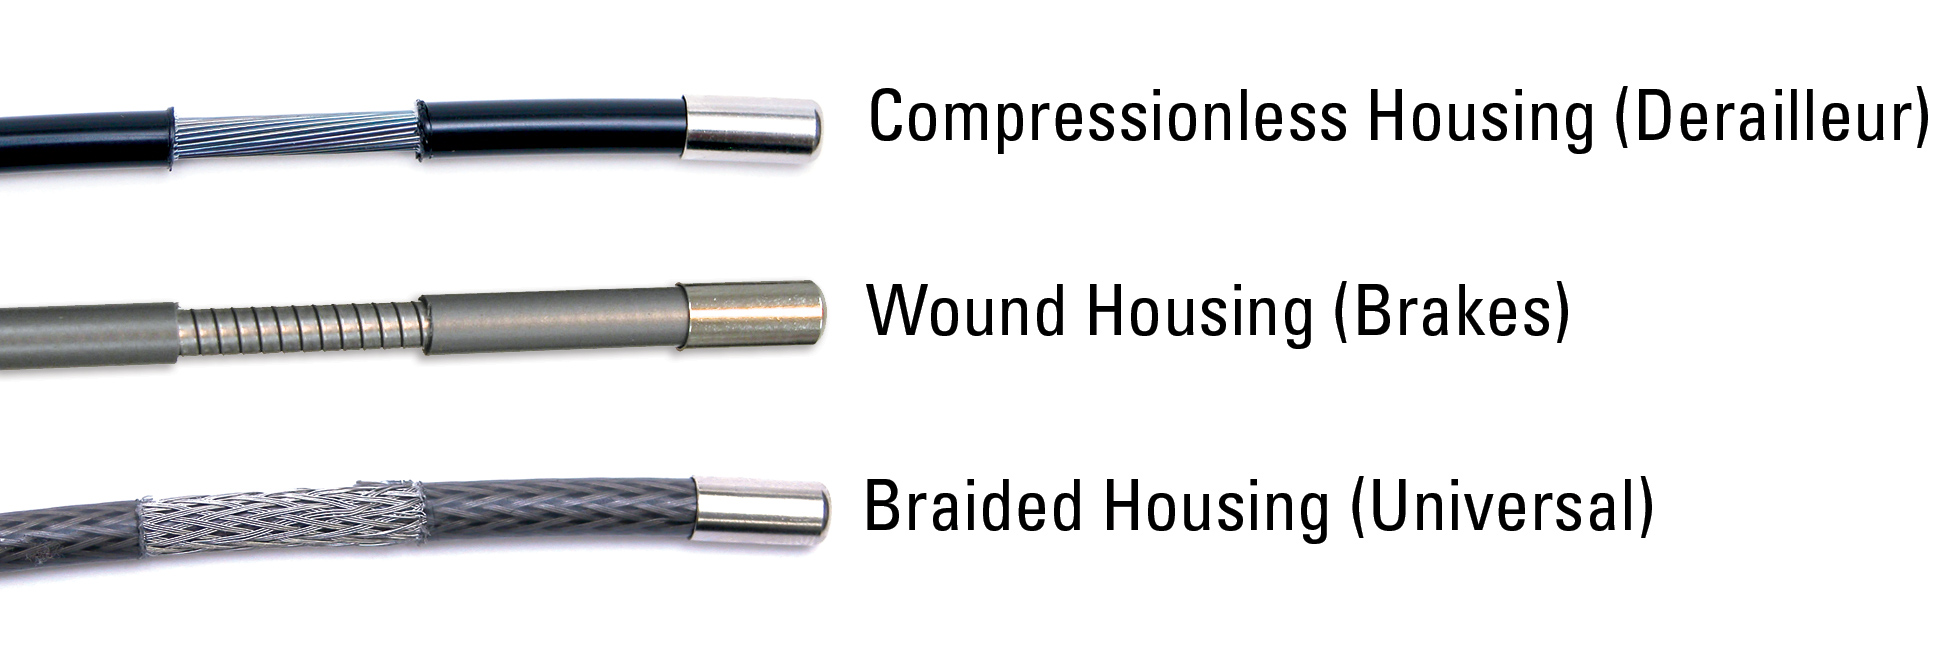
In addition to how it’s routed, there are different types of housing as well as different sizes:
Compressionless shift housing uses many inner support wires running longitudinally within the inner plastic liner. Compressionless shift housing is intended for shifting systems only — if used on brake systems, it will blow out under pressure.
Wound brake housing is wound like a spring, allowing the housing to compress slightly under pressure. For that reason, it should not be used for shift housing.
Woven or braided housing may be used for both brake housing and shift housing. It is recommended to lubricate inside the housing when the cable is installed.
There are also link style housings that are comprised of many small links or beads that will not compress or blow out and allow for tighter bends.
Housing comes in two common diameters: 5 mm or 4 mm. 5 mm was once very common, and is more rigid and resistant to bending. It will typically have a larger inner diameter giving the cable inside more wiggle room. Currently 4 mm is the most common housing size for shift housing.
On the ends of housing are ferrules, or end caps. Ferrules keep the housing contained and prevent it from deforming or digging into frame cable stops and other bike components. Ferrules are usually made of metal or plastic.
If a ferrule fits in the component it improves the shifting. If it doesn’t fit, the component is already sized for the housing as it is. In this case do not use a ferrule.
No matter the material or size of the ferrule, they need to be properly installed — fully seated over the cable ends, and then properly seated into cable stops or other components.
A housing component you may encounter is an inline barrel adjuster. There are used to allow the derailleurs indexing to be more easily adjusted.
The final piece of our cable housing system is the cable end cap. End caps keep the strands of the cable in one nice tight bundle and are crimped on.
![Components of the cable and housing system: housing (A), ferrule (B), barrel adjuster [usually built-into lever or derailleur] (C), cable (D), pinch bolt (E), and end cap (F)](https://www.parktool.com/assets/img/repairhelp/Shift-Housing-Labels.jpg)
Determining Length
When determining housing length, you want the housing to be as short as practical while feeding straight into the housing stops.
If your bike has previously-routed housing already installed, you can inspect its length to determine if you can use it as a template and if so, you can simply cut new housing to that size and install it. However, if you see damage to the housing, end caps or frame of the bike, these may be signs of improper routing or length and a worn out cable system. These types of problems can be remedied by adjusting or changing the housing length and sometimes the routing path.
Kinked housing indicating too short a length
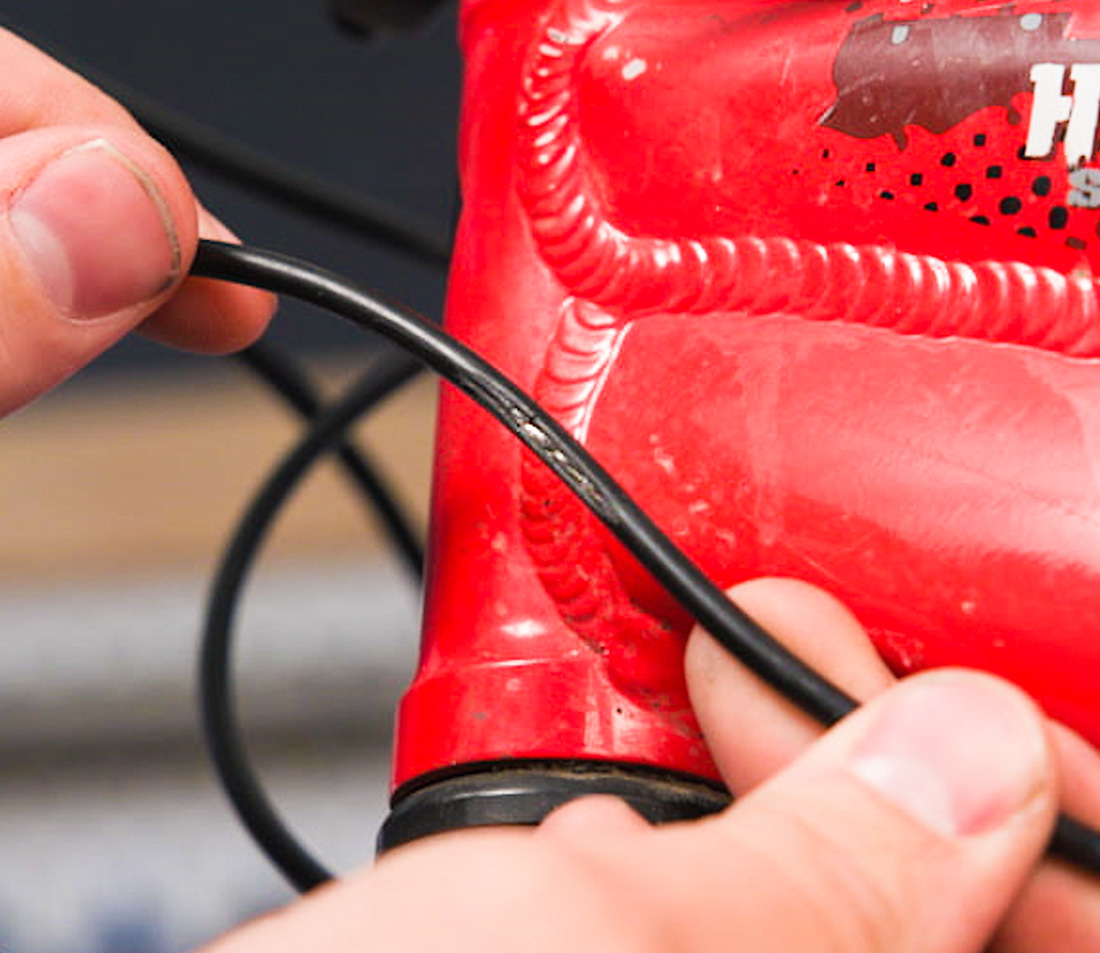
Worn housing indicating improper routing
Shift housing allows the cable wire to be routed around bends and connects the levers to the frame stops. The less drag on the cables, the better the shifting performance. Housing that is too short will kink and bind, creating even more friction.
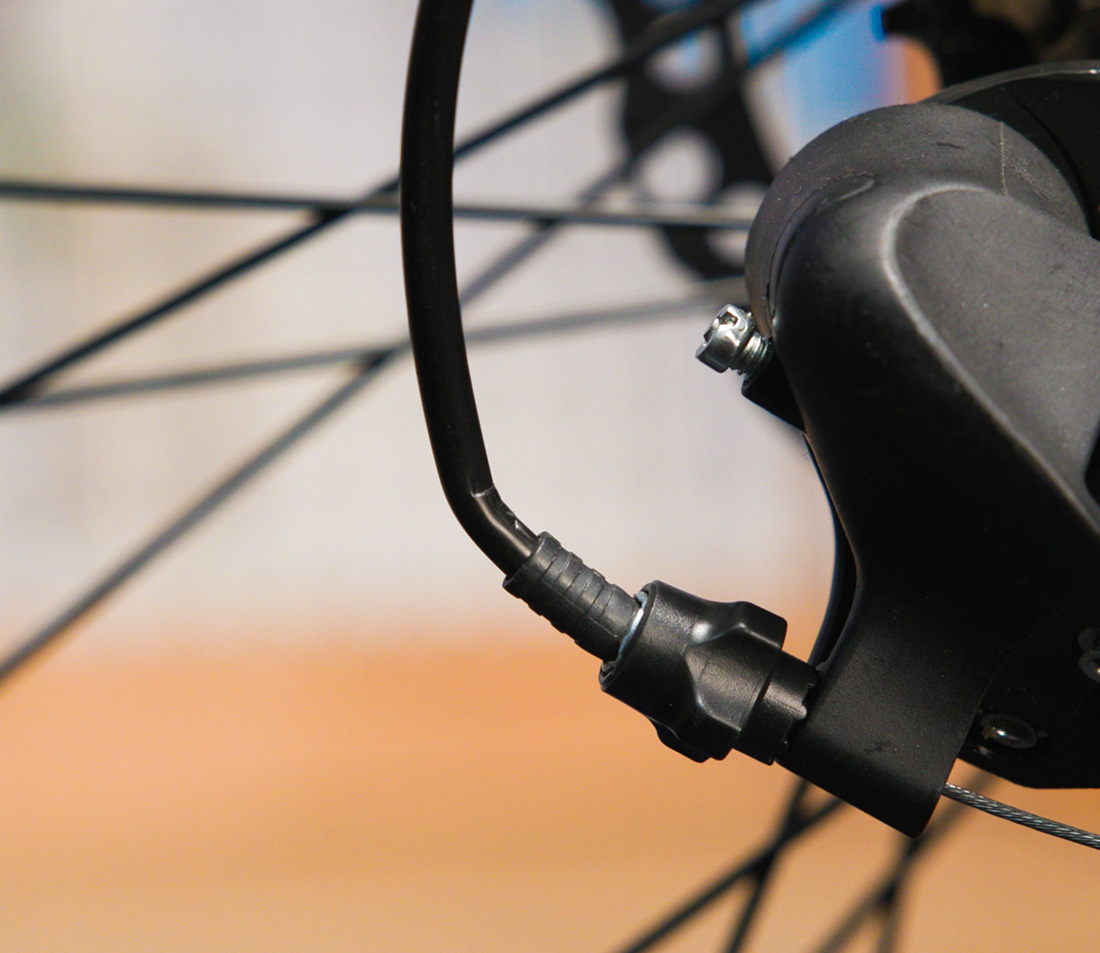
For rear derailleur housing, note especially how the housing enters the barrel adjuster.

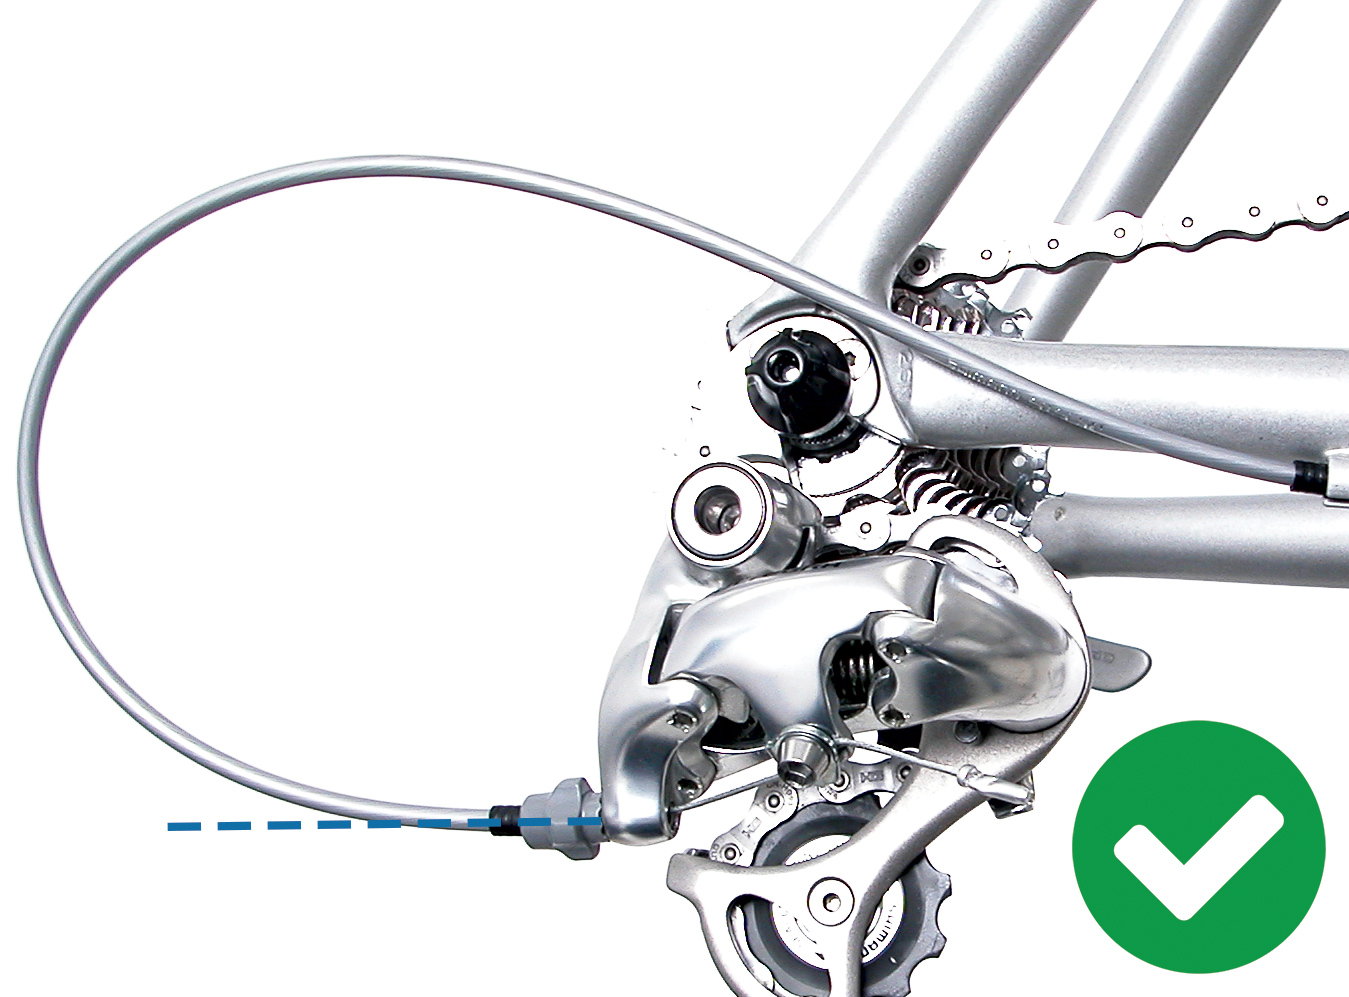
In the left image above, the housing bends immediately upon leaving the barrel adjuster. This can actually bend the housing end cap. The image to the right shows how longer housing in this case allows the housing to enter straight.
Once you reach the head tube of the bike you are often faced with the option of going around to the left or right. Routing around the side opposite the shifter will typically give the most gradual bend. In some cases, that is simply not possible, and routing to the same side as the shifter is necessary.
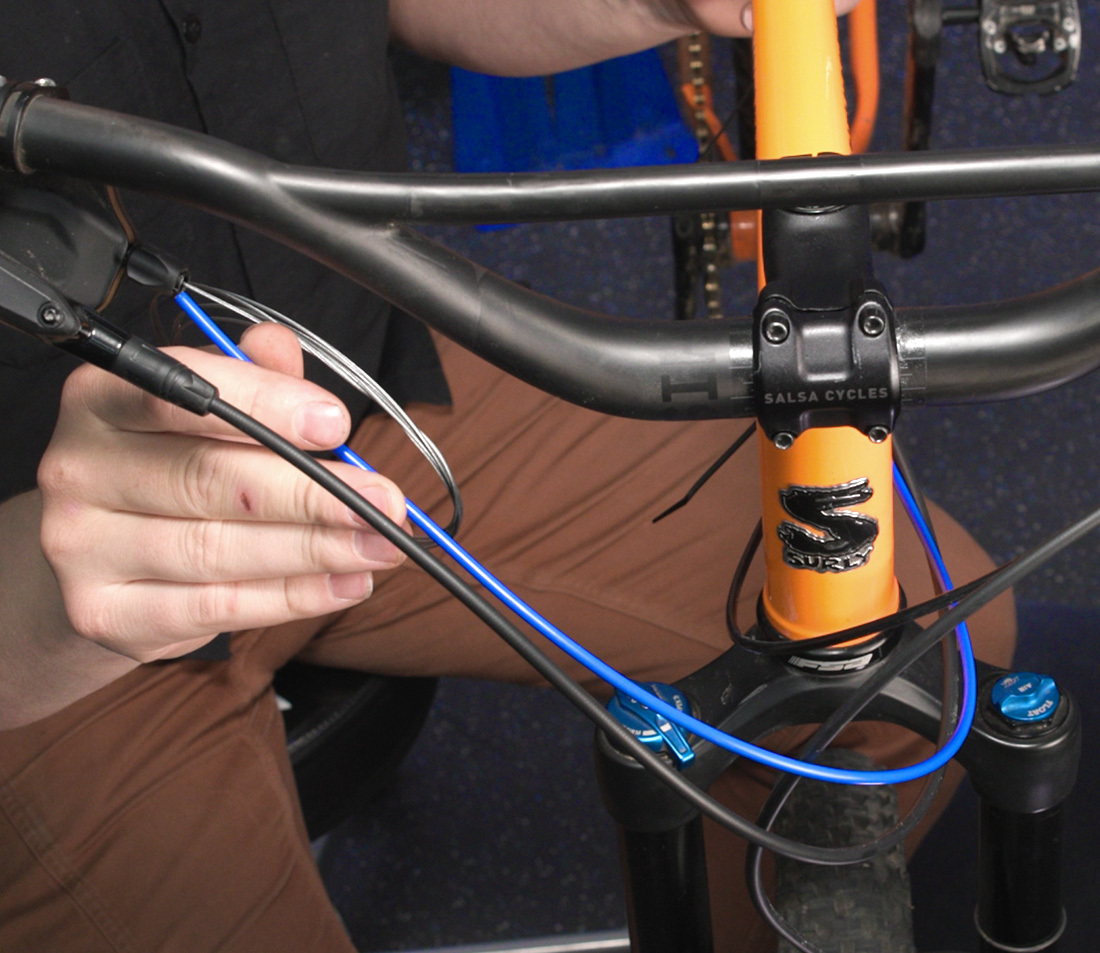
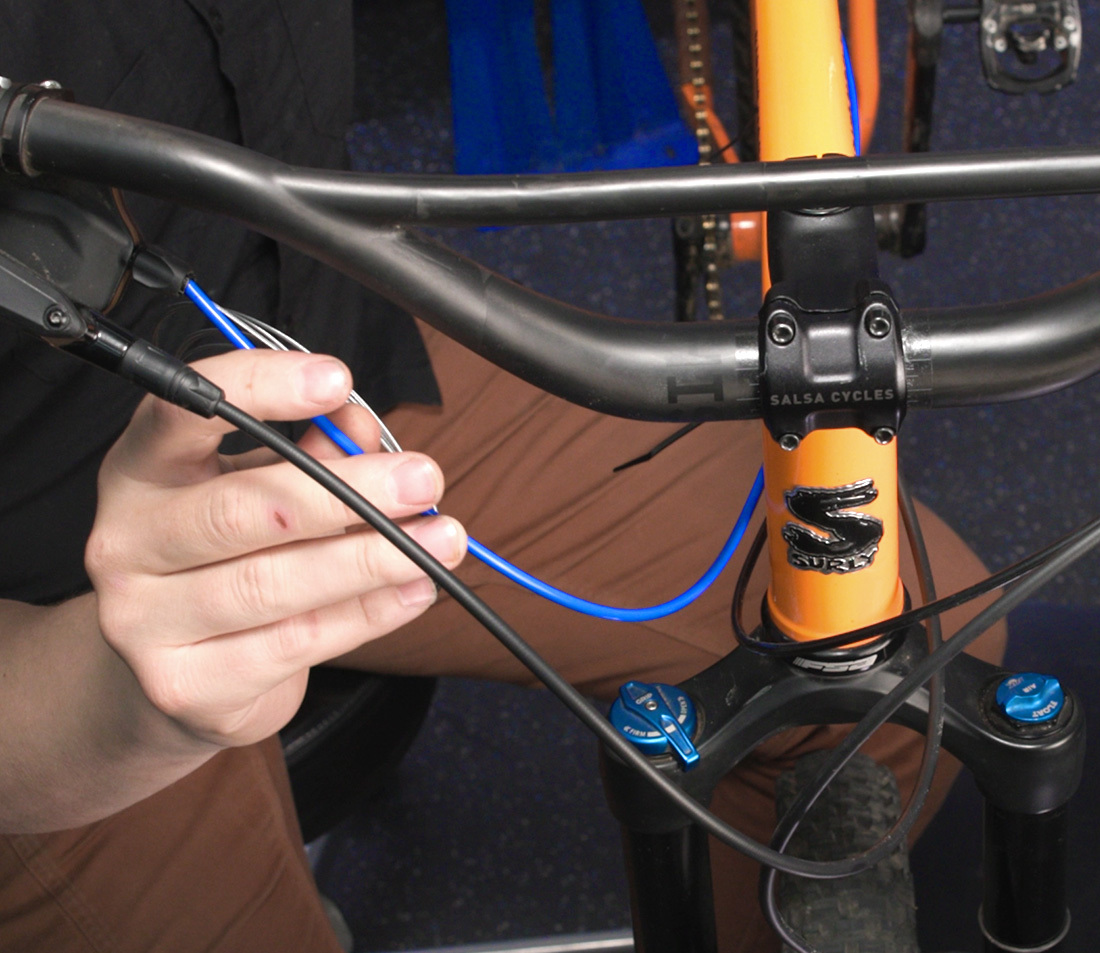
When determining housing length at the front of the bike, make sure there is enough housing to allow for sufficient rotational travel of the handlebars — about 90 degrees for road bars, and for MTB bars, as far as they will go if interrupted or 180 degrees if uninterrupted. You’ll also want to consider future changes to the bike like handlebar height, stem length or handlebar width. Be sure to leave some extra housing length if you anticipate the possibility of changing these components in the future.
Full Housing
Begin by installing zip ties at each mounting location before routing. This will help keep things in place, especially if you are routing more than one item on the same mounting tab. Starting from the back, feed a long piece of housing up through each zip tie. Do not tighten the zip ties as you go so that the housing can freely flow through.
Be mindful of kinking or pulling if installing on a full suspension bike — while the bike is going through its travel the cable could be kinked or pulled.
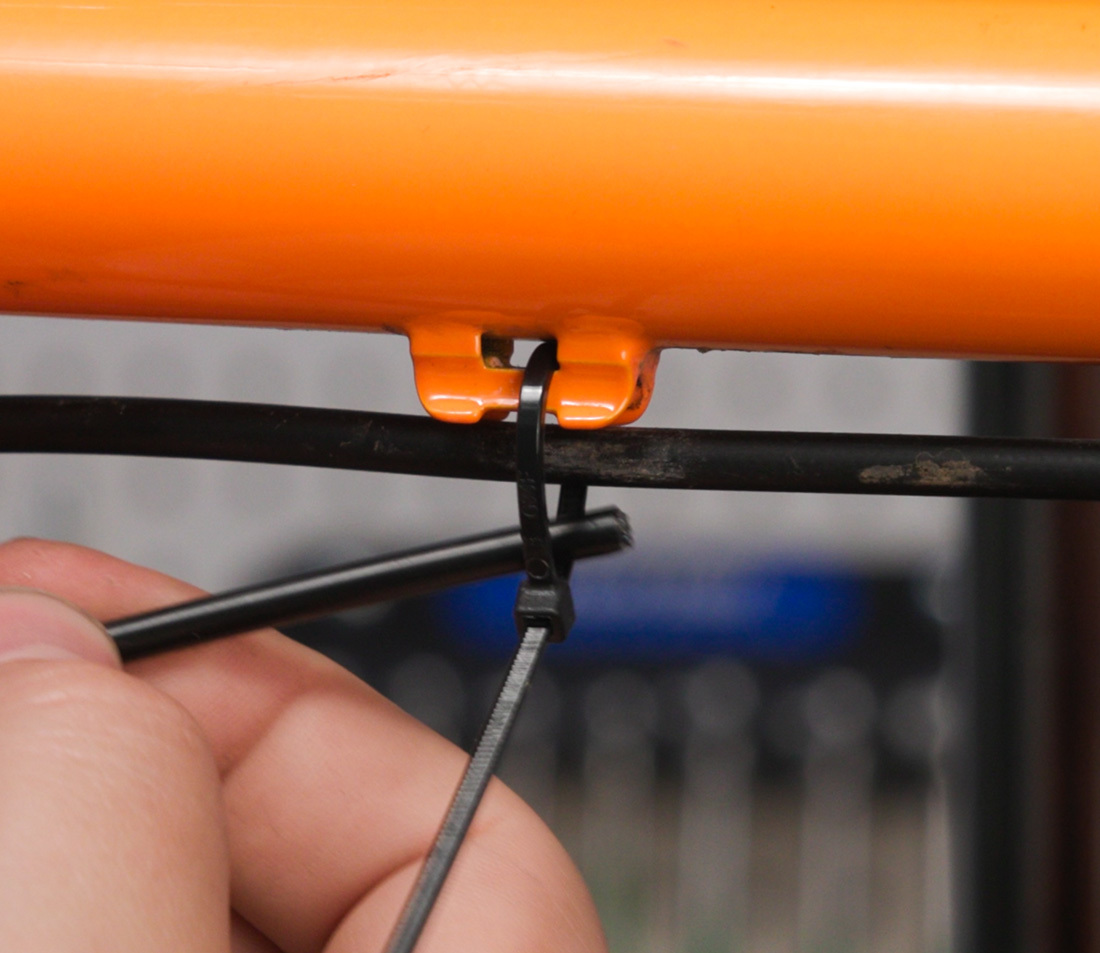
Feed the housing through the loop of each partially-tightened zip tie
Verify that the housing won't kink or pull at any point in the suspension travel
Once you reach the head tube of the bike you are often faced with the option of going around to the left or right. Routing around the side opposite the shifter will typically give the most gradual bend. In some cases, that is simply not possible, and routing to the same side as the shifter is necessary.
Option A: routing around the side opposite the shifter
Option B: routing around the same side as the shifter
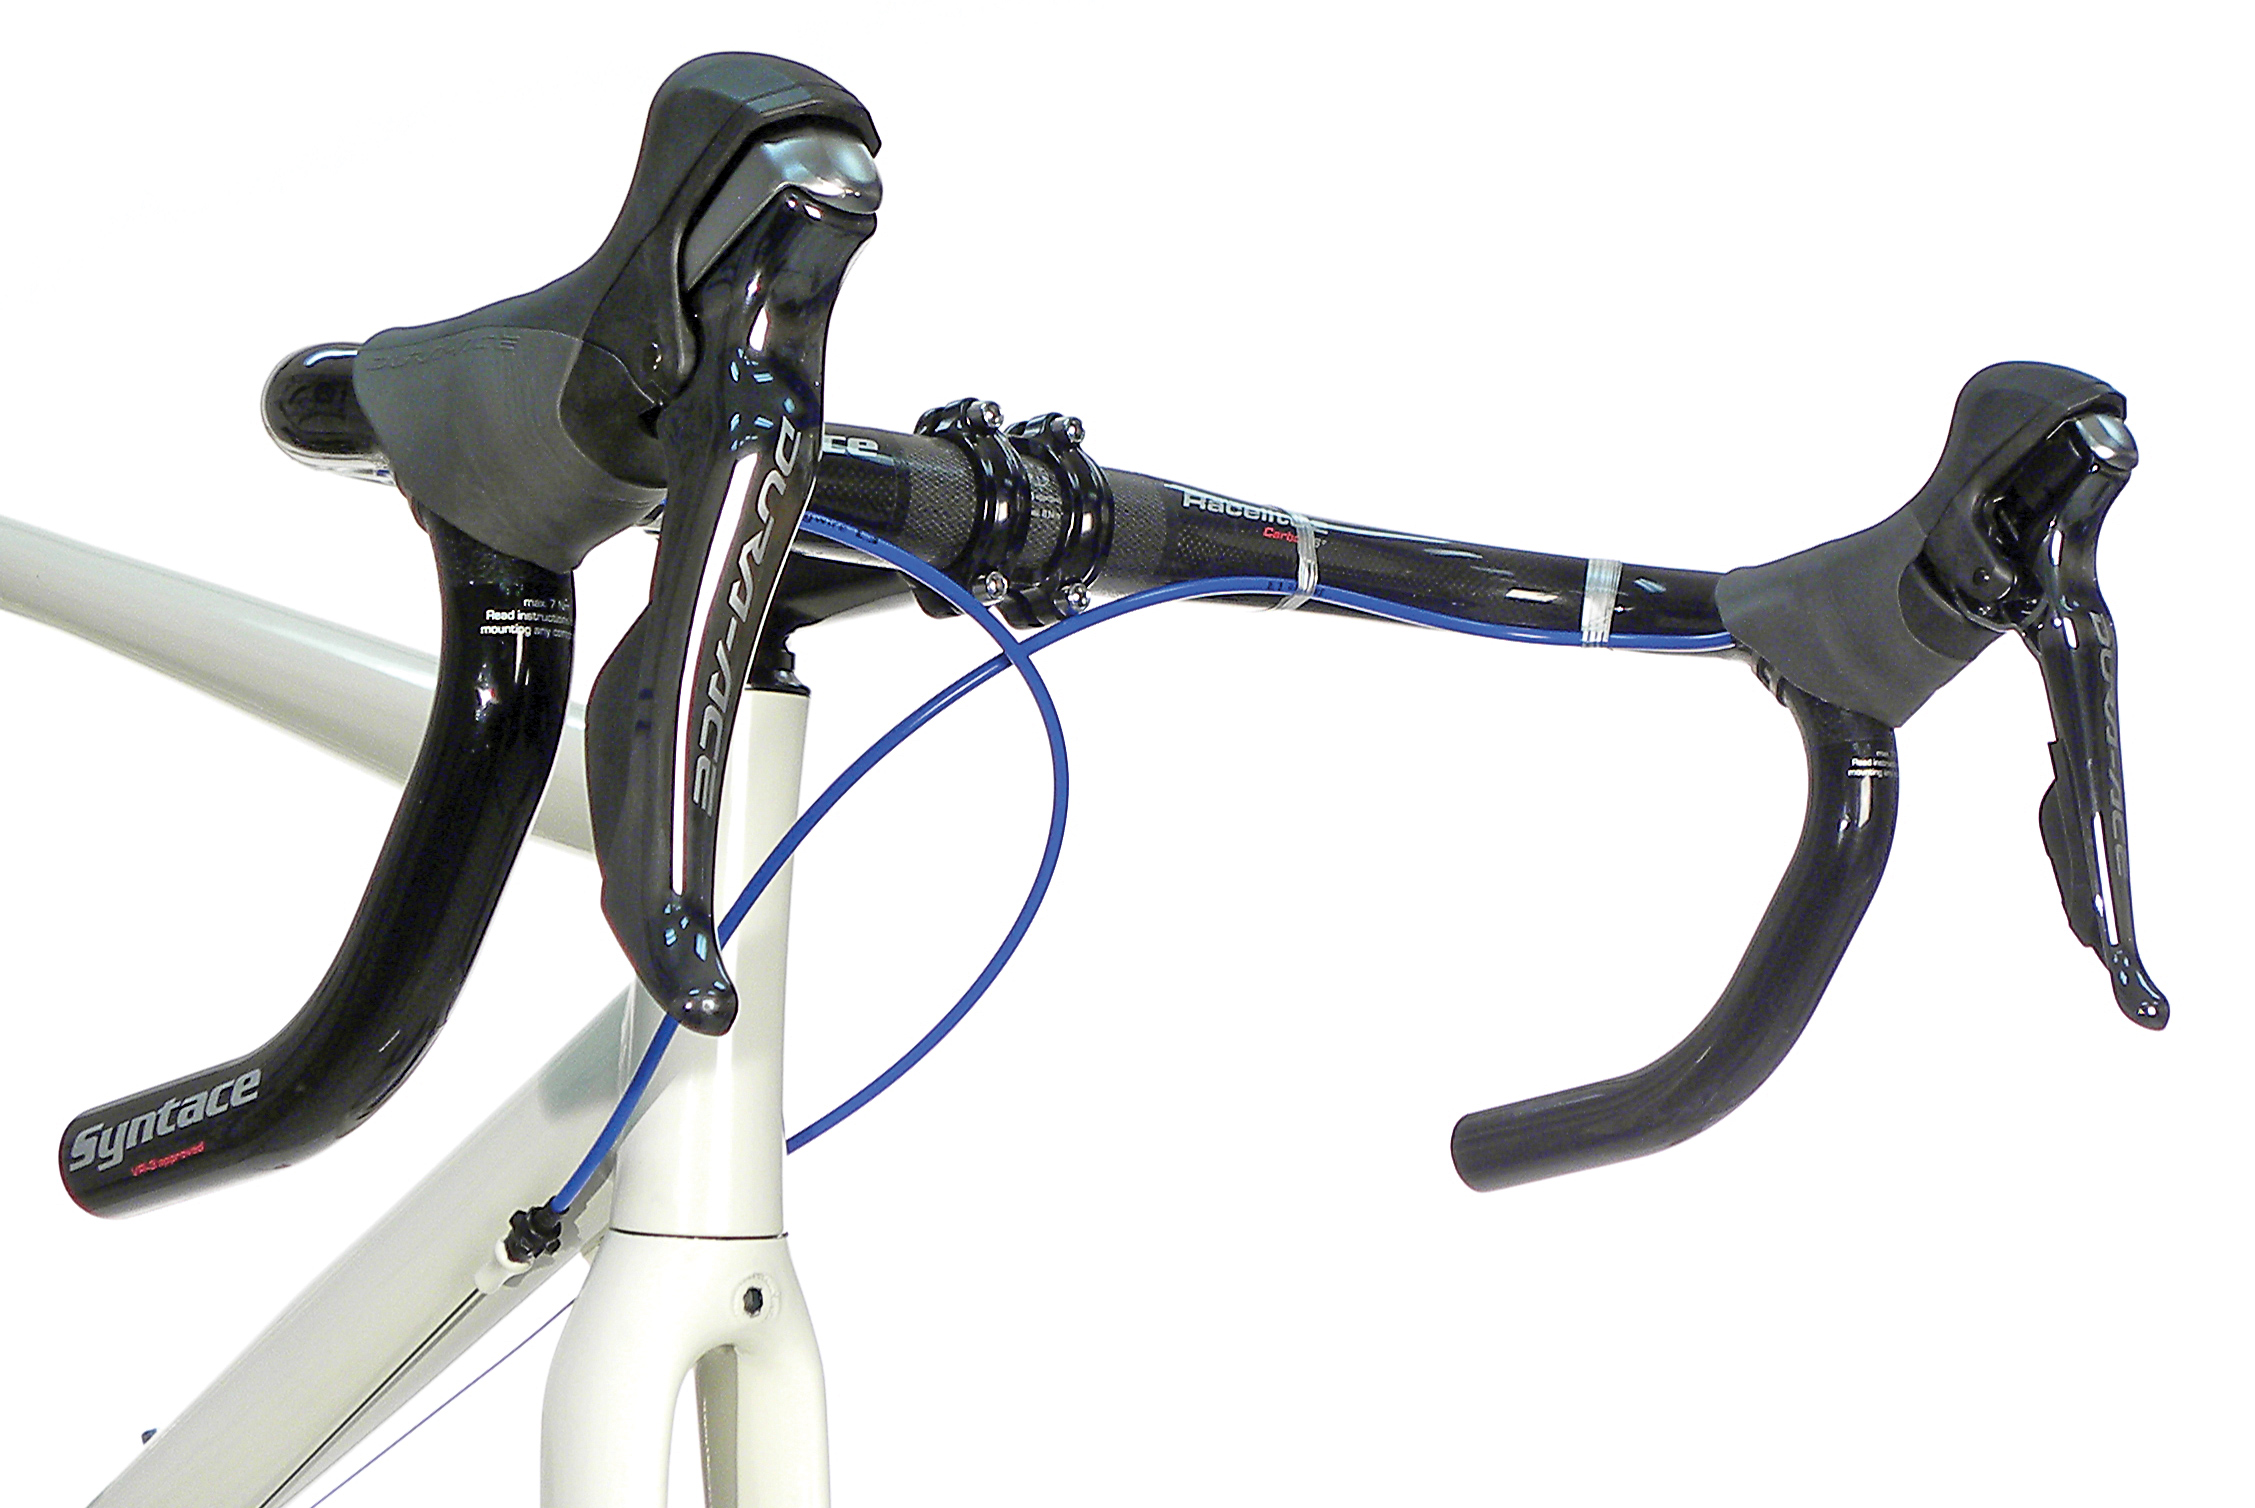
Install the housing into the housing stop at the lever. Again, make sure that the sweep of the housing is gradual and enters the stop in a straight line. Road shifters sometimes have multiple options for running the housing in front, behind or out the side of the lever body. These options can affect how your hand sits on the bar and how directly the housing can be routed.
If the housing will be routed underneath bar tape, tape it down at this point. With the routing and size of your housing established at the front, tighten the zip ties down.
Now to size the housing at the back of the bike. Derailleurs have two main housing exit points — out the back or out the top in the front. For housing exiting the back, make a sweeping curve and pull it tight. Make the housing feed into the derailleur as straight as possible. If the curve is too tight the cable can kink, and if it is too large, it can kink on the opposite side.
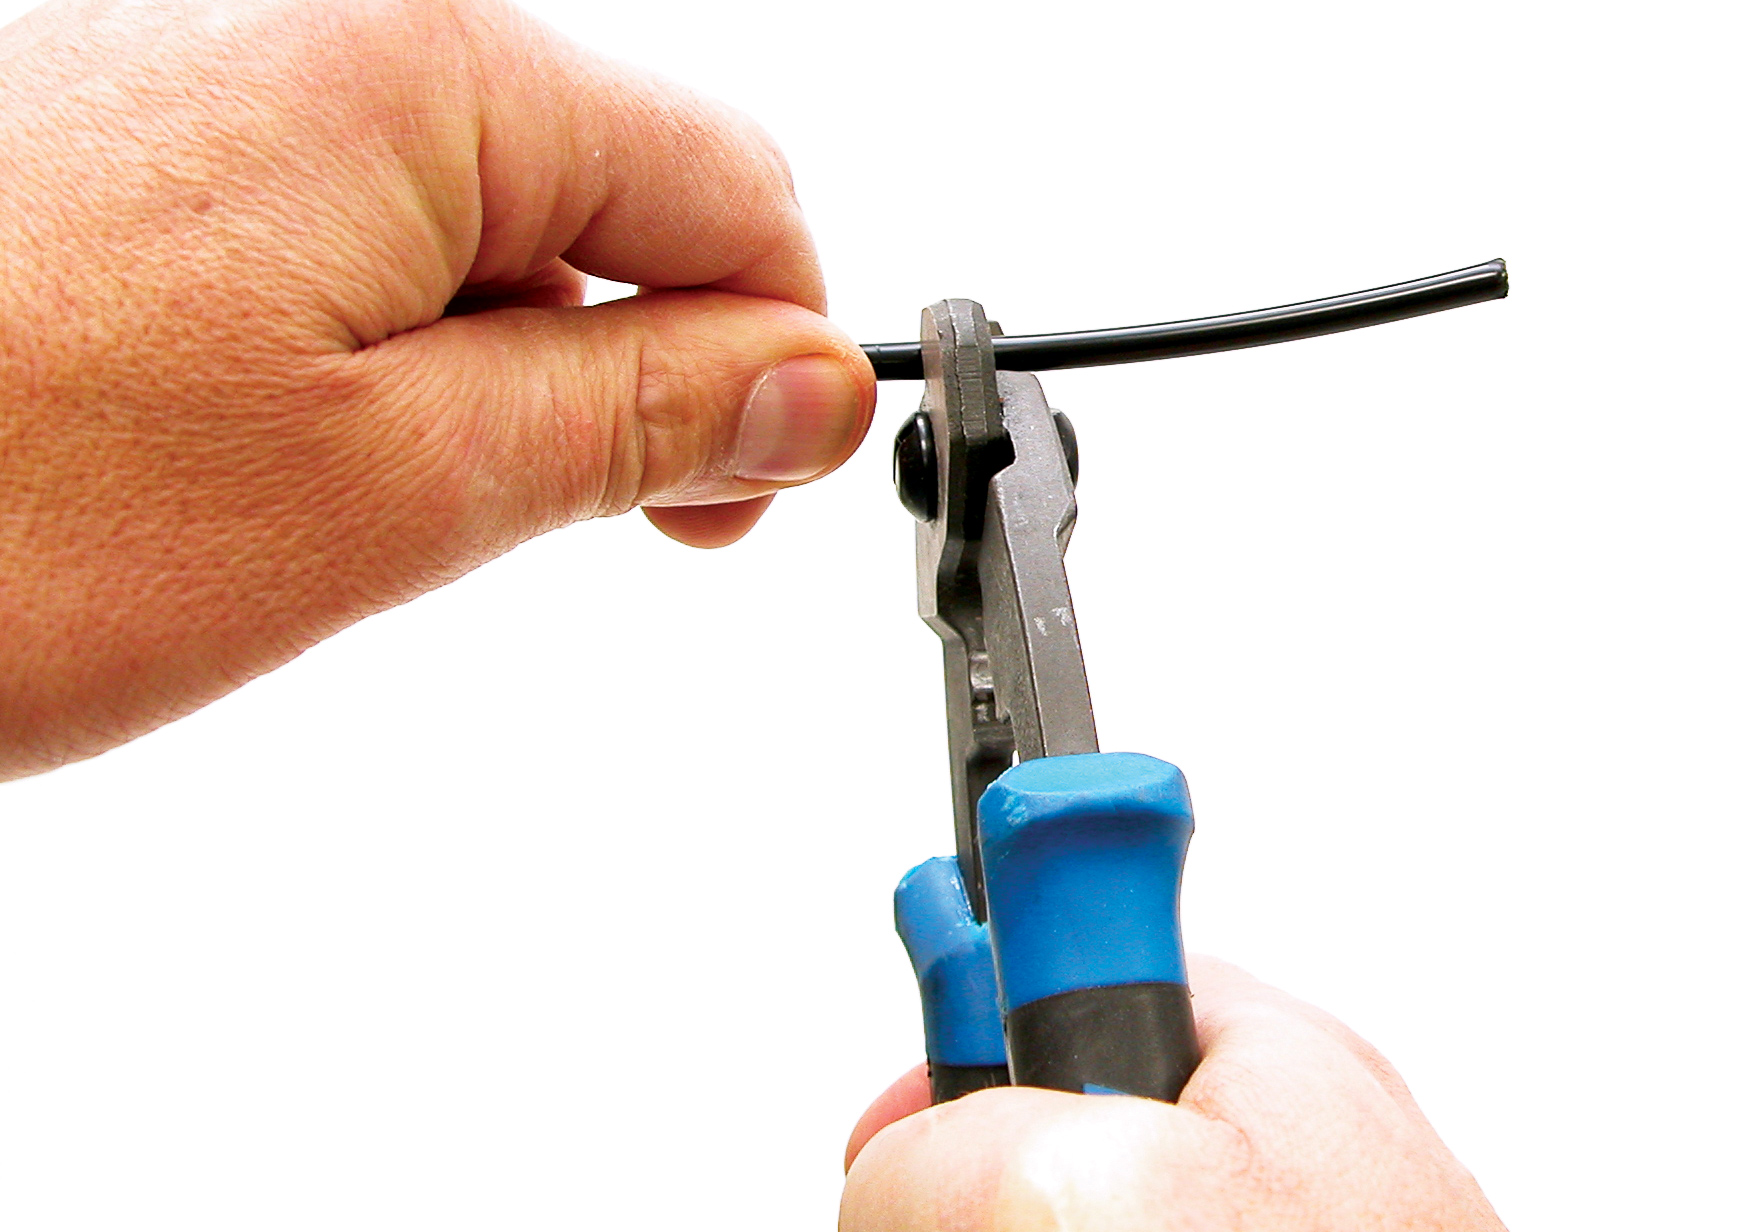
Once you have established the ideal length, use a dedicated cable cutter like the CN-10 to cut the housing. Hold the housing perpendicular to the jaws and squeeze levers quickly for a clean cut. Often the housing will deform from being cut — use a pick or awl to open the liner up.
Now install a ferrule on both ends and begin routing the cable. Note that some components do not require ferrules.
Segmented Housing
For segmented housing, start from the rear of the bike and install one end of a long section of housing into the rear derailleur. Hold the housing up at the next housing stop on the frame.
Make the housing feed into the derailleur as straight as possible. If the curve is too tight the cable can kink, and if it is too large, it can kink on the opposite side.
Once you have established the ideal length, use a dedicated cable cutter like the CN-10 to cut the housing. Hold the housing perpendicular to the jaws and squeeze levers quickly for a clean cut. Often the housing will deform from being cut — use a pick or awl to open the liner up.
Install a ferrule on both ends and install your cut segment of cable into the housing stop/rear derailleur.
Locate the next set of housing stops, usually from the seat stay to the top tube. Repeat the process: install one end of the housing into the housing stop, then pull and push the housing at the stops to find a length that provides a good curve for the cable. Cut the housing, install the ferrules, and Install the segment of cable into the housing stops.
Once you reach the head tube of the bike you are often faced with the option of going around to the left or right. Routing around the side opposite the shifter will typically give the most gradual bend. In some cases, that is simply not possible, and routing to the same side as the shifter is necessary.
You may end up with the cables crossing each other under the down tube or top tube. Exposed cables lightly touching one another is fine — cables hitting the frame is not and should be avoided.
Install the housing in the appropriate housing stop and route it around the corresponding side of the head tube.
Road shifters sometimes have options for running the housing in front, behind or out the side of the lever body. These options can affect how your hand sits on the bar and how directly the housing can be routed.
Hold the housing up to the housing stop at the lever and determine the ideal length. Again, make sure that the sweep of the housing is gradual and enters the stop in a straight line.
Cut, add ferrules, and install housing. If the housing will be routed underneath bar tape, tape it down at this point.
Internal Routing
Internal routing is often used in conjunction with full housing, but can also be segmented. There are also frames with preinstalled sleeve systems that allow you to simply feed housing into one end and have it come out the other end.
For systems that are not sleeved, the process of internal routing requires patience, and we recommend the IR-1.2 Internal Cable Routing Kit for the best experience. See this video for more detailed information:
Cable Routing
The process of installing the shift cable into the shifter varies greatly by shifter.
Once that’s done, begin routing the cable through the housing — but first, apply some light lubricant such as chain lube to the first several leading inches of the cable. This will displace water and prevent corrosion. As you feed the cable, be sure not to force it and to stop pushing it you feel resistance. If resistance is felt when coming out of a junction, it can help to unseat that section from the frame stops and straighten it out to allow the cable to come through, then re install the housing. If resistance is felt at a bend, it can help to roll or rotate the cable as you push.
If the housing is segmented you will need to thread the cable through the different segments. In the areas with exposed housing, it may be desirable to install cable doughnuts Cable doughnuts can help reducing any rattling that the cable may cause against the frame.
Once the cable is fully routed and connected to the derailleur, hold onto the rear derailleur with your left hand and actuate the shifter with your right hand. This will help seat the housing into the ferrules as well as do a bit of pre stress on the system. It’s likely that this will introduce slack into the system, and you will need to loosen the pinch bolt and retighten while pulling out the slack.
Finally, revisit your derailleur adjustments, particularly your indexing.
Next article in this series
Shift Cable Replacement: Drop Bars View Article
Front Derailleur Adjustment View Article
Rear Derailleur Adjustment View Article
Related articles
Shift Levers / Shifters View Article