Chain Replacement: Derailleur Bikes
Replacing your chain as it wears out is good preventative maintenance, much like changing the oil in your car. It prolongs the service life of other, more expensive parts on your bike, so replacing your chain before it becomes too worn is a good idea.
Preliminary Info
- Chain Tool
- MLP-1.2 Master Link Pliers for chains with master links
- Chain lubricant such as CL-1.2
In order to replace your chain you will need either Master Link Pliers like our MLP-1.2 for chains with quick links, or a chain tool like our CT-3.3 for chains with connecting rivets, as well as chain lube for lubricating connecting rivets.
Check & Remove Chain
Before removing your chain, confirm it is the correct length by shifting to the largest front and rear sprockets. The chain should be able to make this shift with two slight bends in the chain as it wraps around each derailleur pulley. Next, shift to the smallest cogs. There should be no slack in the chain and the derailleur should not pull so far back that the chain contacts itself. If your old chain is sized correctly, you can use it to size your new chain.
Slight bend at each derailleur pulley
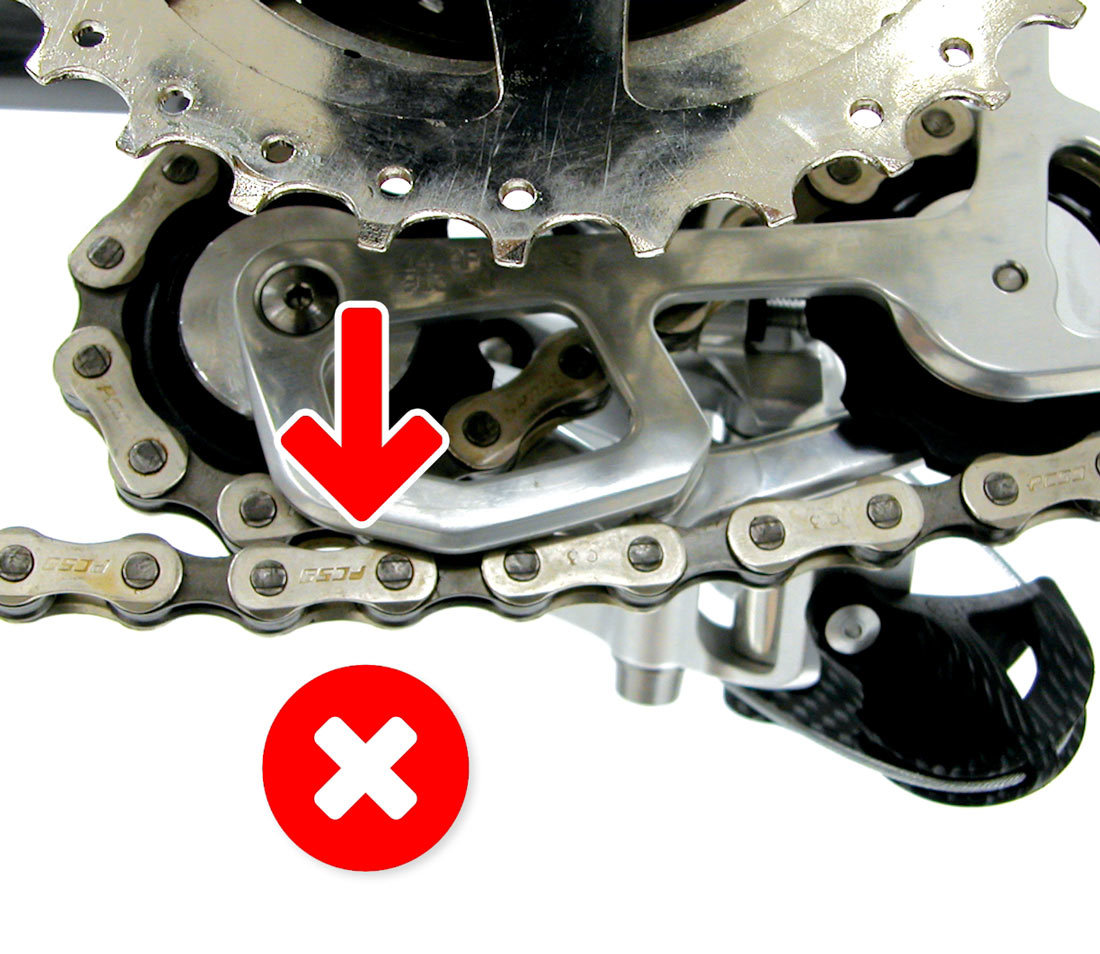
Chain should not contact itself
Now, remove the old chain. An option is to first remove the rear wheel from your bike. This will take tension off of the chain and make things a little easier.
Master Link Chains
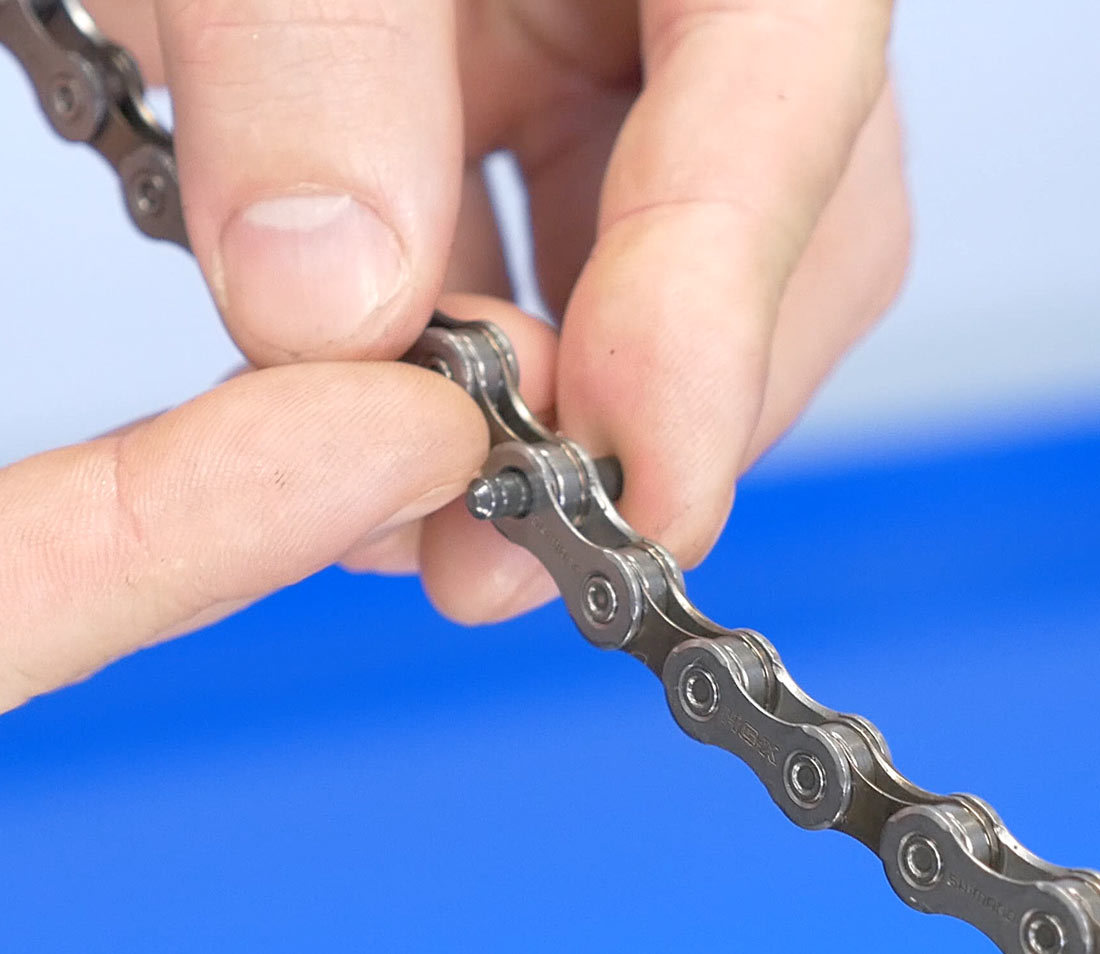
Inspect the chain for a master link. Master links have a pair of unique side plates that are sometimes a different color. If a master link is present, position it in the lower section of chain and use a master link pliers such as the MLP-1.2 to disengage the link. If you have a chain tool and your chain is worn out, you can simply ignore the master link and break the chain using the chain tool some links away from the master link.
Connecting Rivet Chains
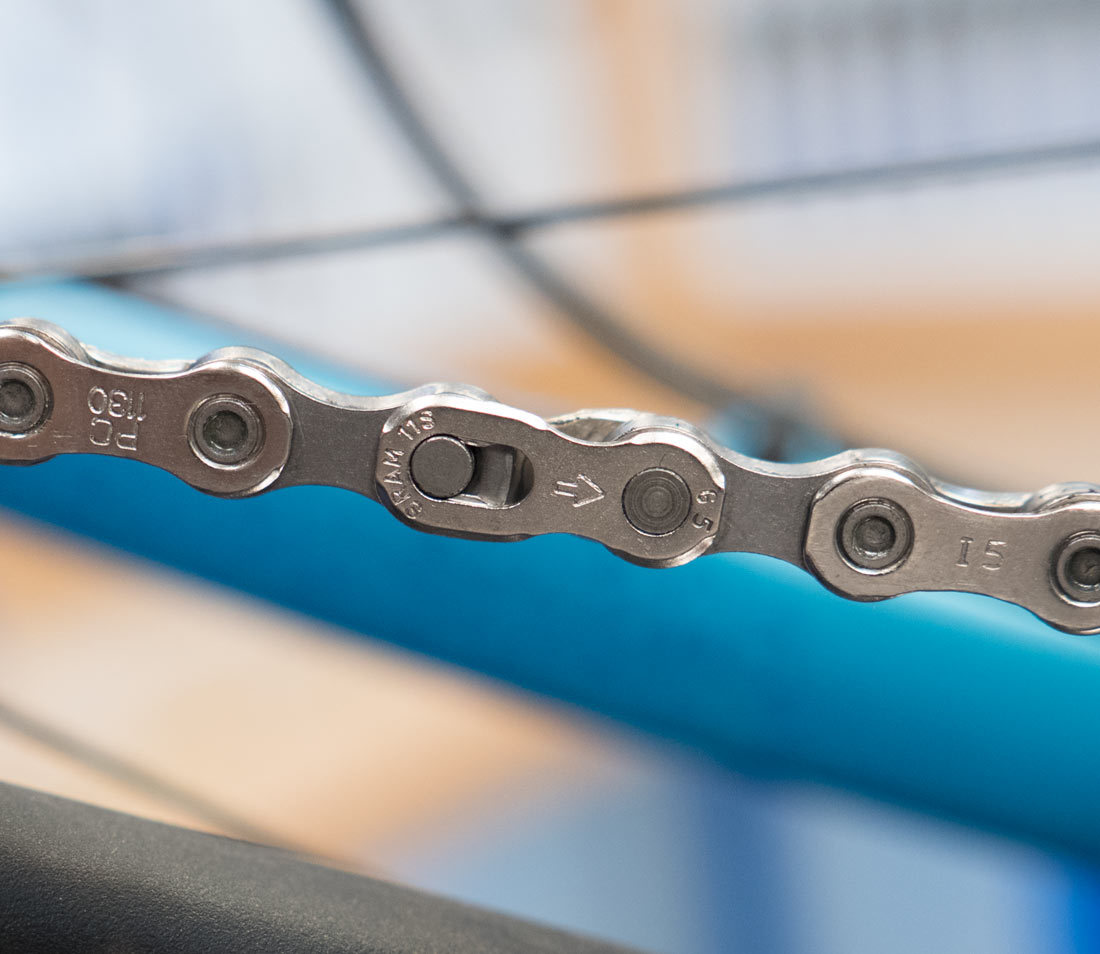
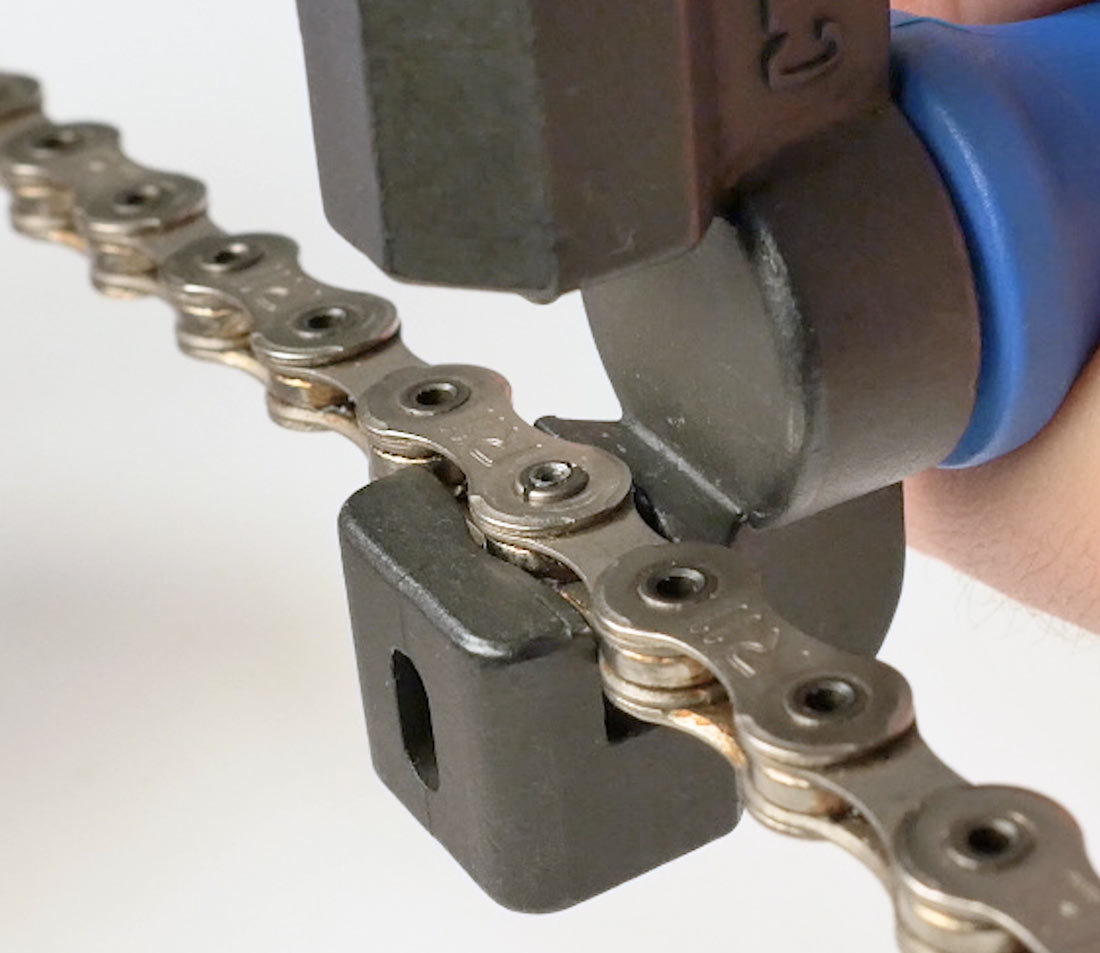
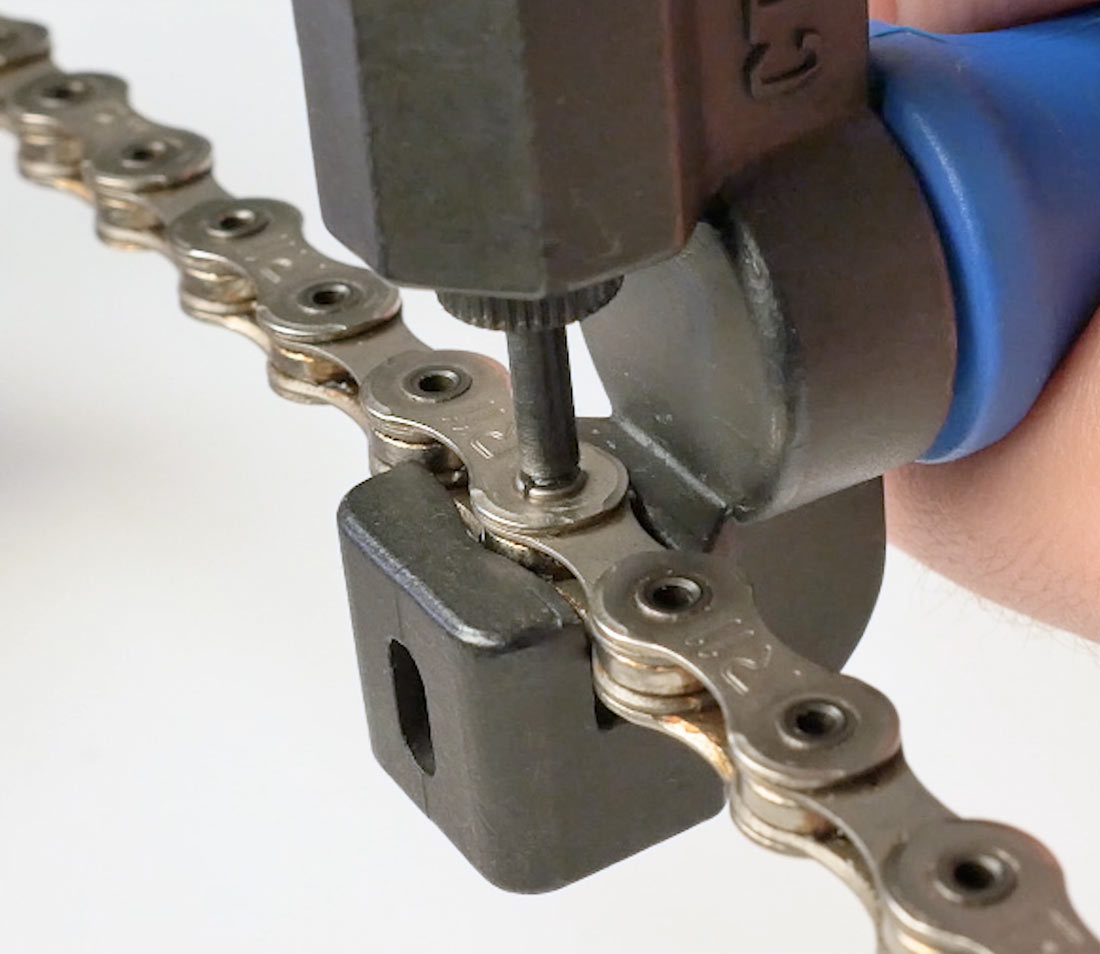
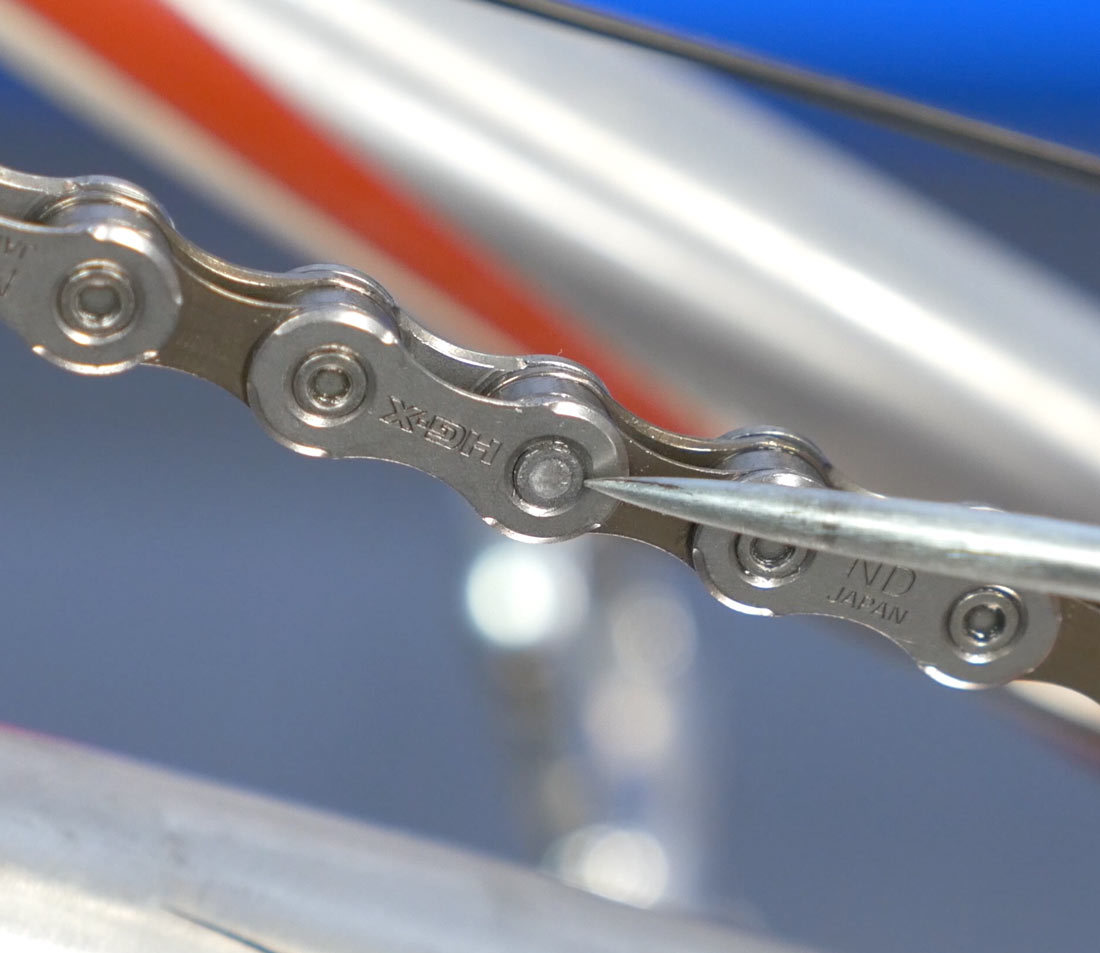
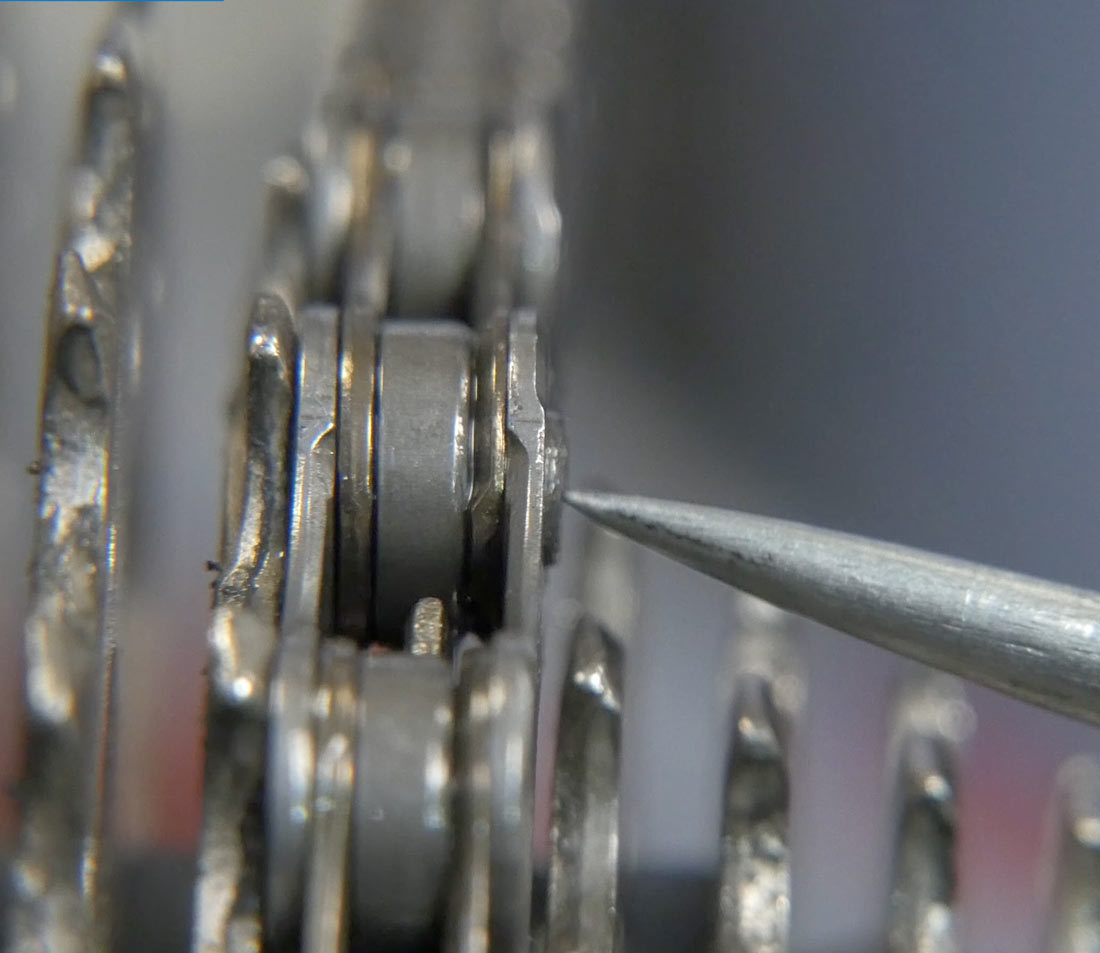
For connecting rivet chains, locate the special connecting rivet in your chain. Connecting rivets will appear visually different from the other rivets in the chain. When selecting a rivet to break, make sure that it is several rivets away from any connecting rivets already installed in the chain. Bring the driving pin of the chain tool into contact with the rivet and ensure the chain tool pin is driving in a straight line into the rivet. Turn the handle with force and drive out the rivet, then remove your chain.
Connecting rivet
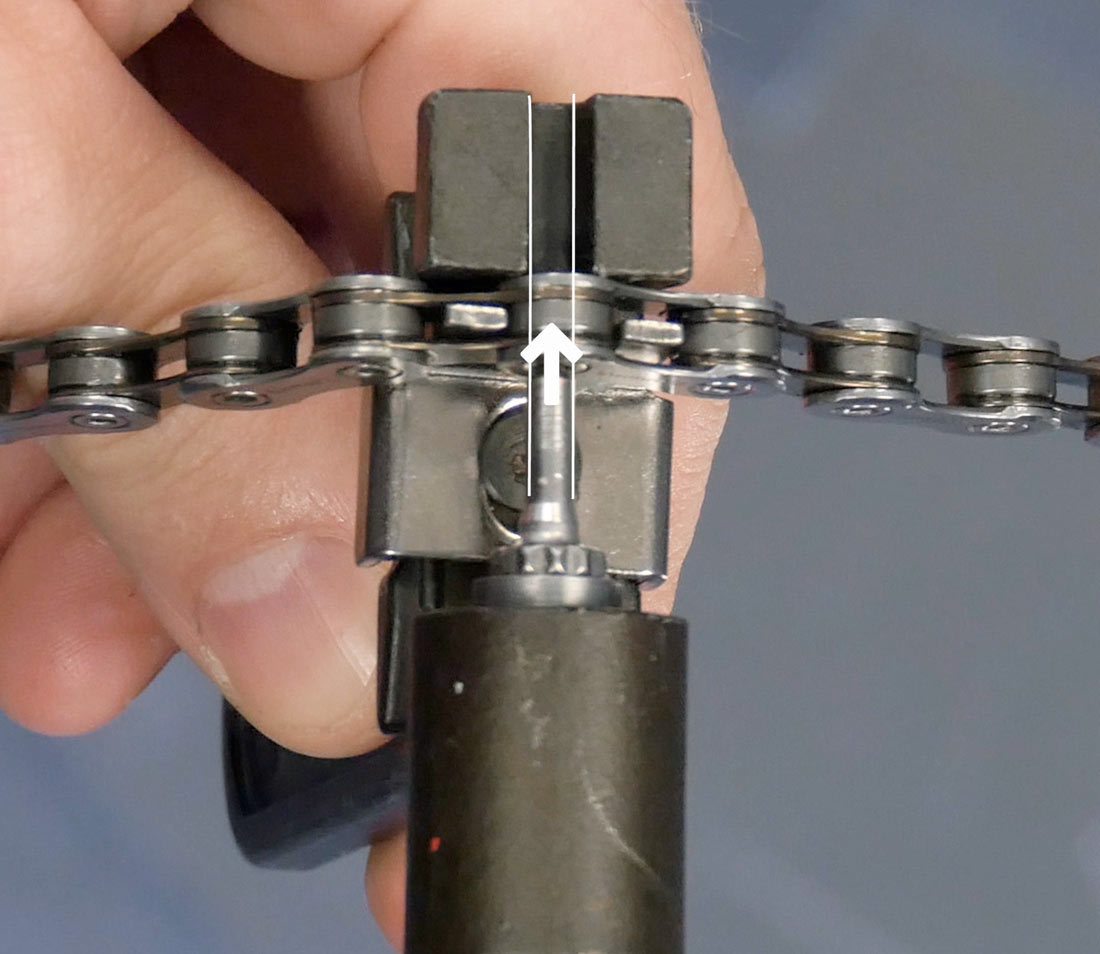
Drive out pin in a straight line
Chain Sizing
If your original chain was an acceptable length, we’ll use it to size our new chain. If your old chain was either too long or too short, see the one of the following articles:
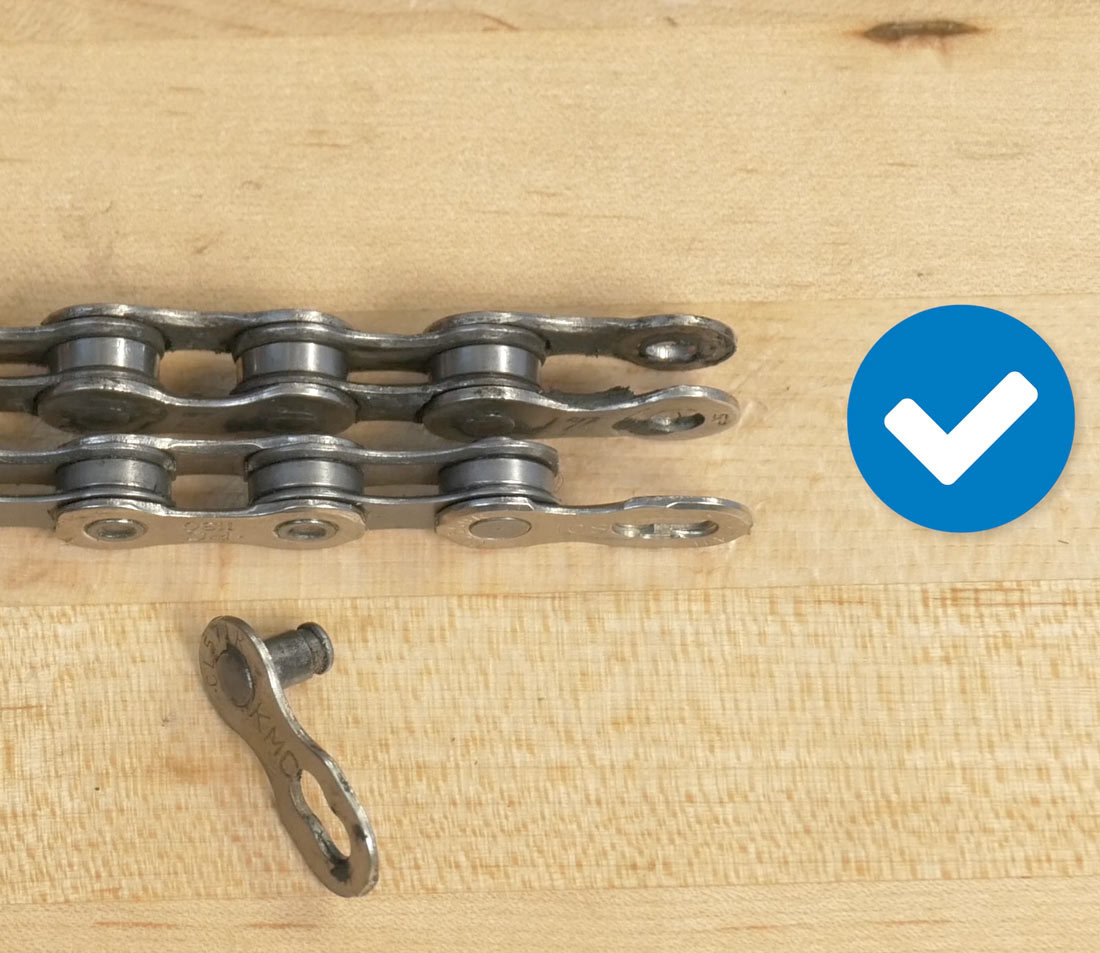
When sizing to the original chain, always line up ends with outer plates. Insert the master link to get a true side-by-side comparison. It is also acceptable to line up ends with inner plates. The important thing is to always match inner to inner or outer to outer for an accurate length comparison. Next, line up the chains, taking care to match them rivet by rivet, noting that old chains will lengthen as they wear. Once you have them side by side, simply cut the new chain to match the length of the old chain.
Chain Routing
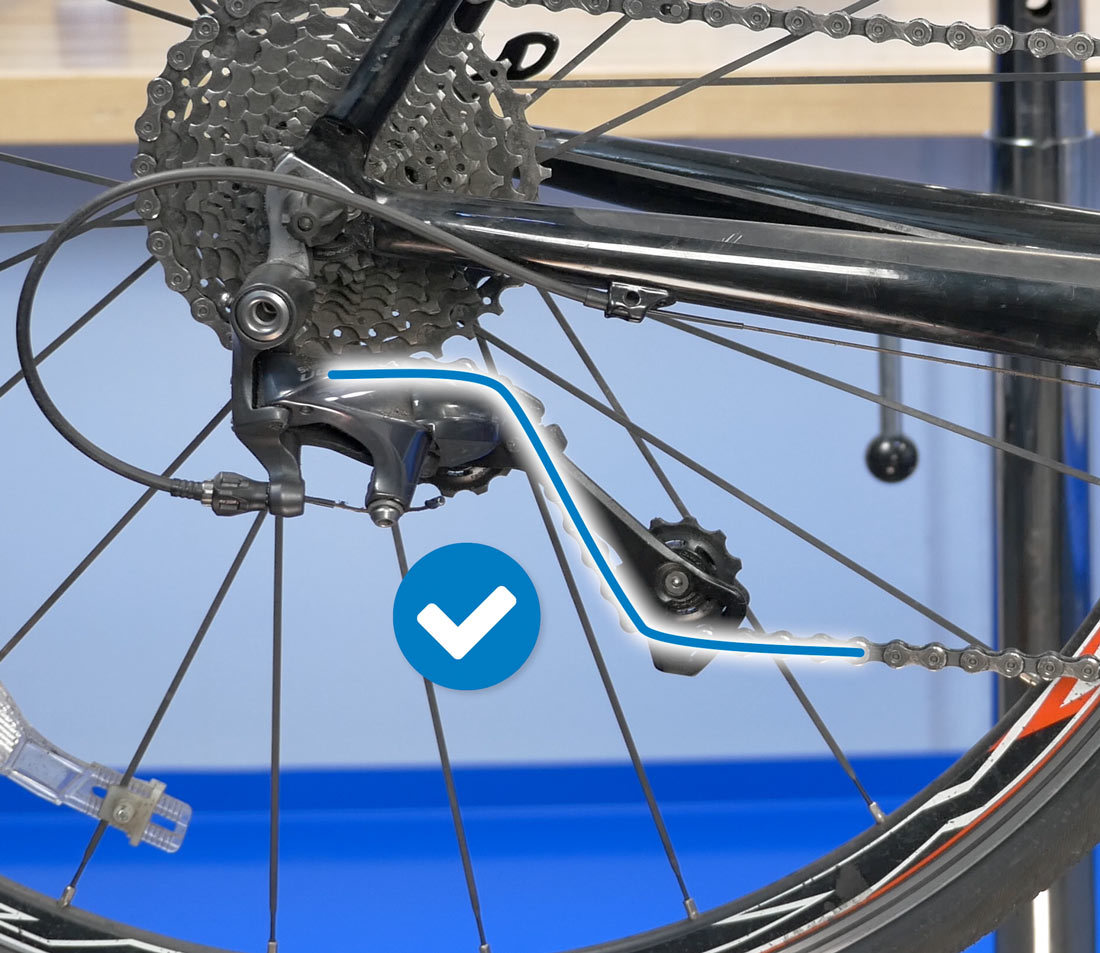
Before routing the chain, inspect the chain side plates. Some chains are directional and any logos or printed letters should face out towards the mechanic on the drive side. The process for routing the chain is the same for either master link or connecting rivet chains, just make sure to lead with outer plates if using a connecting rivet chain. Master link chains have inner plates on both ends so you can lead with either end for chains that use a master link. Feed the chain through the rear derailleur as shown. Be aware of any tabs on the derailleur cage and route the chain on the correct side of the tab. Bring the chain inside the frame, through the front derailleur, and bring both ends of the chain together.
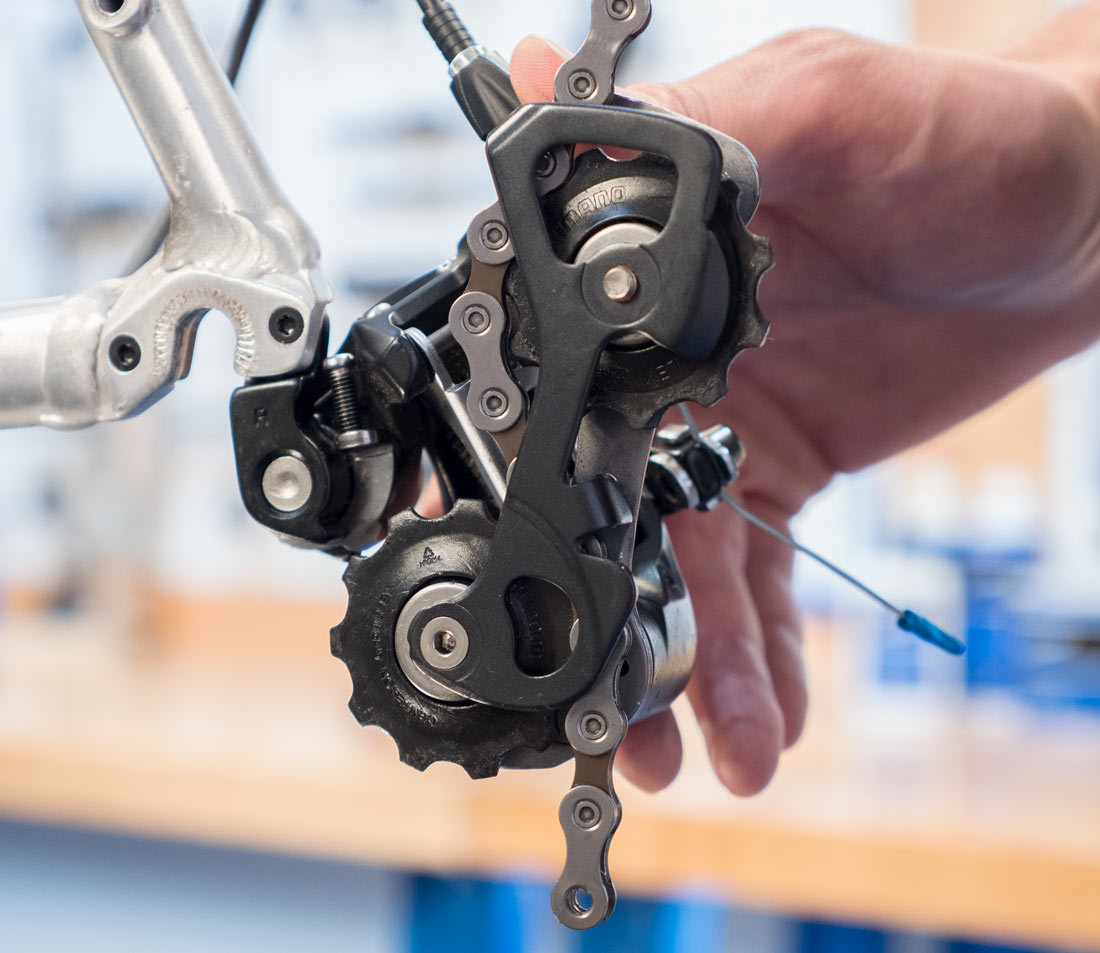
Correct chain route
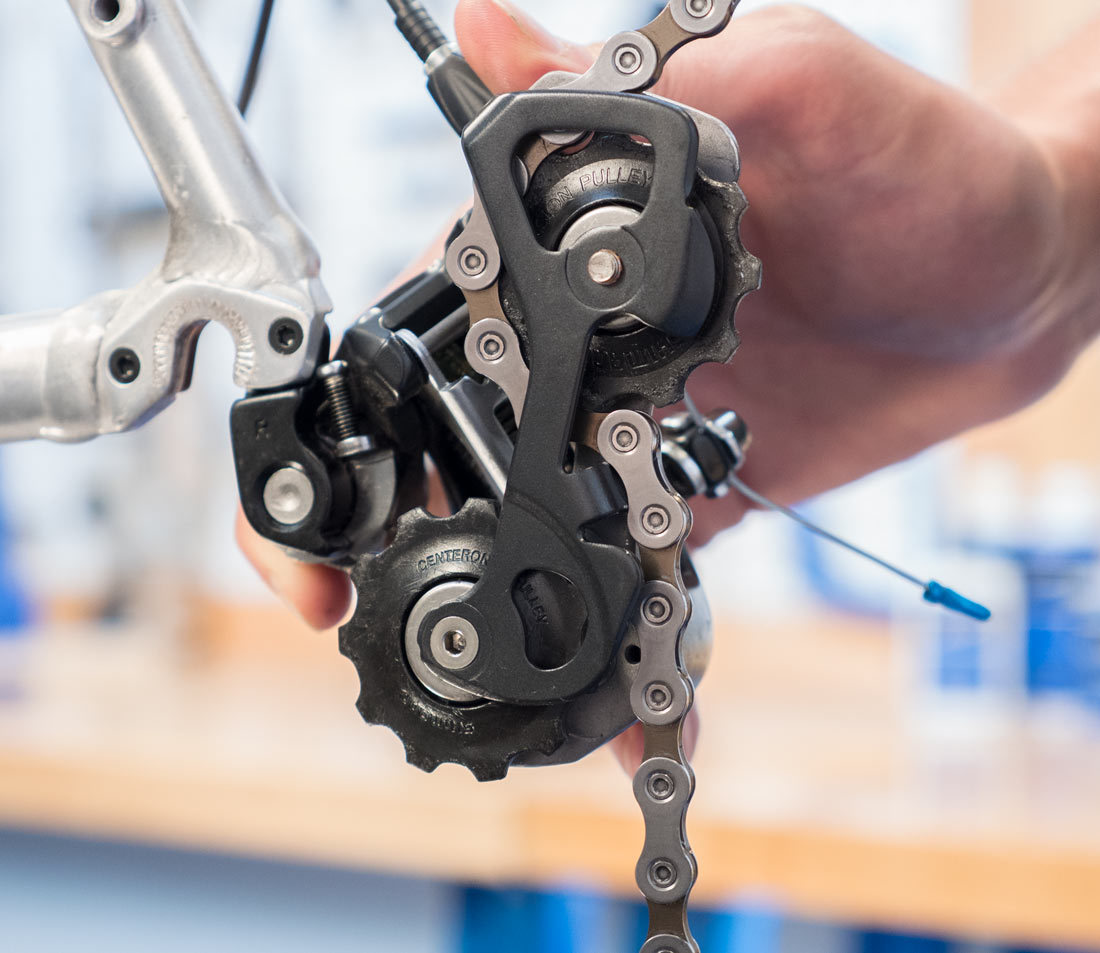
Pay attention to any tabs
Connecting the Chain
Master Link Chains
If connecting a chain using a master link, inspect your master link for any arrows indicating the direction of travel. Connect the master link and engage it using master link pliers such as the MLP-1.2. Engage the pliers and pull outward to seat the link. An alternate method for connecting the master link is to position the master link on the upper run of chain, apply the rear brake, and apply force to the pedals. Inspect to make sure the master link is fully engaged.
Connecting Rivet Chains
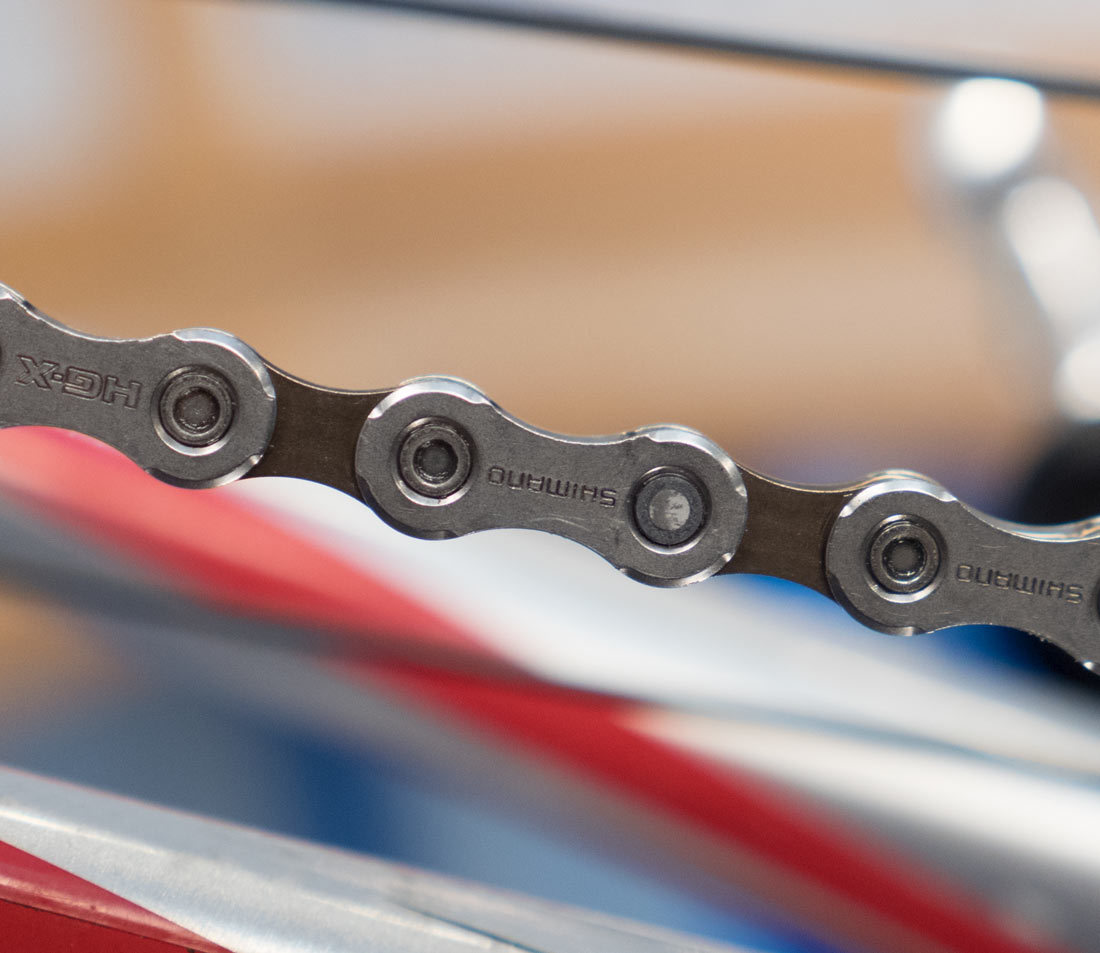
Now we will connect a chain that uses a special connecting rivet. The connecting rivet has special flaring that is guided in by a long, tapered pilot after the rivet is fully installed. Each rivet is specific to the make and model of chain, so be sure to use the proper connecting rivet for your chain.
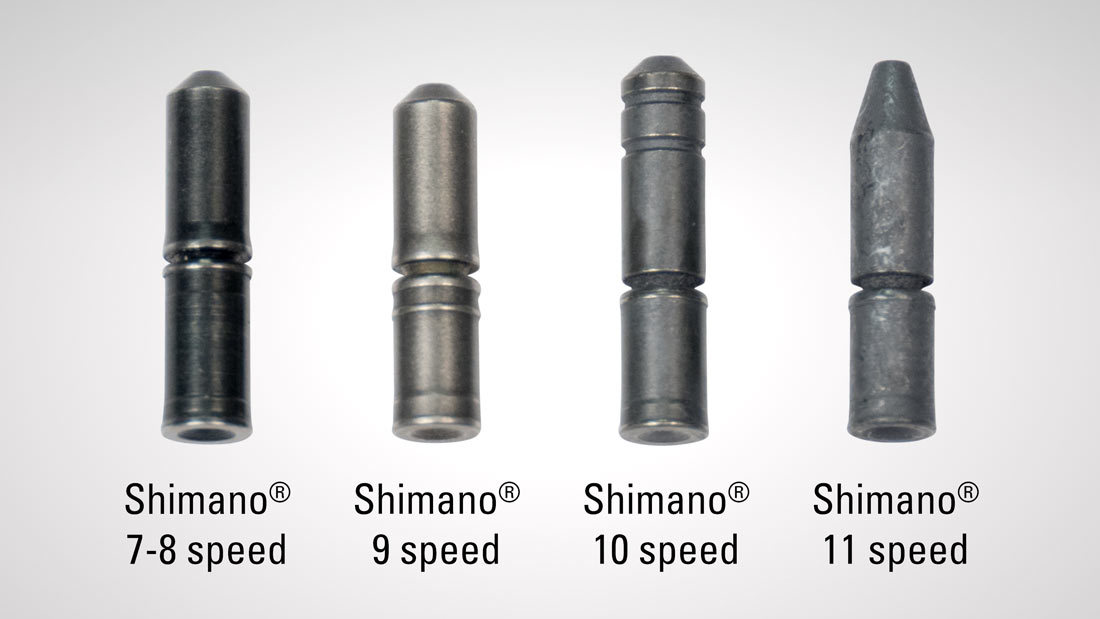
Shimano® connecting rivets
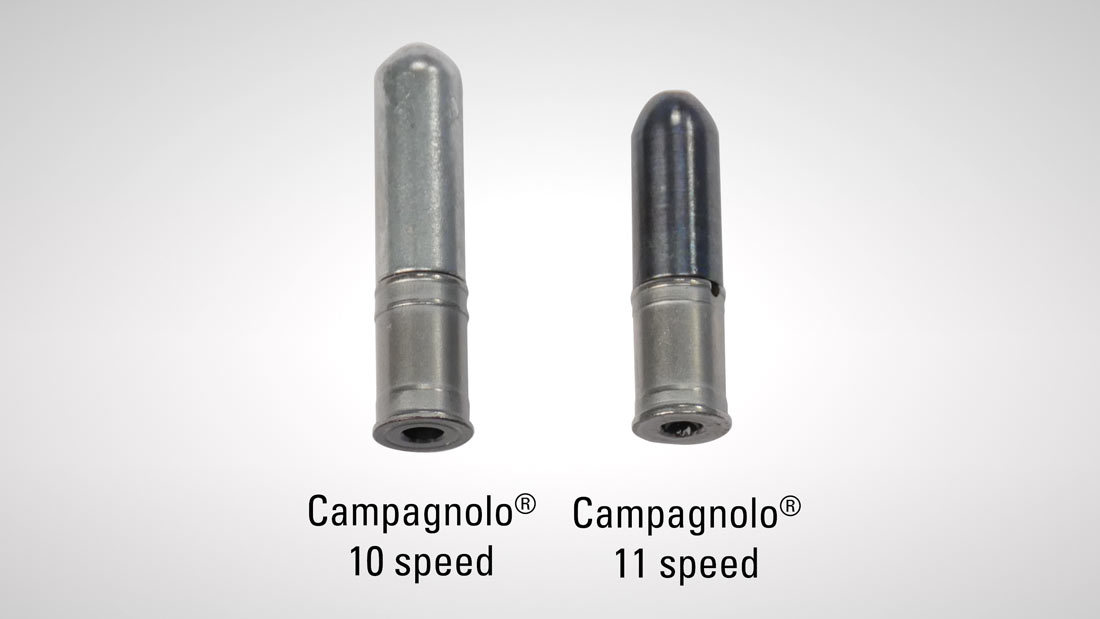
Campagnolo® connecting rivets
Lubricate the connecting rivet, and install the connecting rivet from the inside of the bike towards the mechanic.
Engage the chain tool and drive the connecting rivet into the chain. There will be two points of resistance as the rivet goes into the chain. The first will be as rivet begins to go in through the first cage plate. The resistance will let up as the rivet continues into the chain and will then ramp up again as the rivets begins to go through the second outer cage plate. Match the depth of the neighboring rivets. Once it has reached similar depth, stop and check that your pin isn’t protruding too far or needs to be driven in further. If this depth looks good, you can go ahead and break off the pilot tip of the connecting rivet.
For Campagnolo® 11 and 12-speed chains, once the pilot is broken off, the pin will need to be pressed further to complete installation. Using a chain tool with a peening anvil like the CT-6.3 or the CT-6.3, set the peening anvil and chain place.

Set peening anvil
Set chain in place
Run the driving pin of the chain tool up to contact so the rivet sits between the anvil and the pin. Press an additional quarter of a turn on the chain tool and you are done.
Now the the pilot tip has been broken off, you can see a good case for driving the pin from the inside out. The burr left after breaking off the pilot is now facing out from the cassette or cogs and cannot come into contact with any part of the drivetrain and make additional noise or cause any shifting problems.
Burr oriented away from bike
The burr does not contact any drivetrain components
Reinstall the wheel and backpedal to inspect for any tight links. Repair as necessary by flexing the chain laterally at the tight link. Your new chain is now installed. Once your chain is installed, if you encounter any problems such as skipping, it could be a symptom of a worn cassette or freewheel cogs so you might need to replace those if you have used a worn chain for too long without replacing.
Related articles
Chain Replacement: Single Speed Bikes View Article
On the Ride Chain Repair View Article
How to Clean and Lubricate a Chain View Article